Table of Contents
Advertisement
Quick Links
Advertisement
Table of Contents

Related Manuals for MP-Man PH502

Summary of Contents for MP-Man PH502
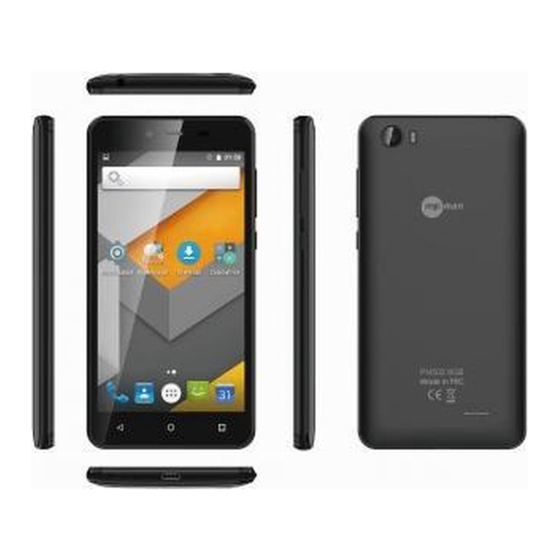
- Page 1 USER MANUAL Model-No.: PH502 8GB...
-
Page 2: Table Of Contents
T A B L E O F C O N T E N T S 1.UNDERSTANDING YOUR DEVICE ................ 1 GENERAL INFO ......................1 2.GETTING STARTED ....................2 INSTALLING CARDS........................3 POWERING ON/OFF THE DEVICE................. 3 3.TEXT ENTRY......................5 INPUT METHOD ......................5 4.HOME SCREEN ...................... -
Page 3: 1 . U N D E R S T A N D I N G Y O U R D E V I C E
1 . U N D E R S T A N D I N G Y O U R D E V I C E GENERAL INFO PH402 is a dual SIM phone that encloses features, such as Android version 6.0, Wi-Fi, 2.0MP Auto focus back Camera &... -
Page 4: 2 . G E T T I N G S T A R T E D
2 . G E T T I N G S T A R T E D Installing SIM Card Remove the back cover of the device. Hold the device with the front facing downwards. Insert the SIM card in the device. Installing Memory Card Switch off your device. -
Page 5: Installing Cards
Charging the Battery Please follow the instructions mentioned below to charge your device: Plug the connector of the charger into the jack of the device. Plug the charger into a standard AC wall outlet. Charging …… . Fully Charged …… . You must fully charge the battery before using the device for the first time. - Page 6 Turning Off the Device Press and hold the Power Key for 3 seconds. A pop-up window appears, select Power off. Select OK to confirm.
-
Page 7: Text Entry
3 T E X T E N T R Y Input Method To entry text, please follow the methods mentioned below: Click the input field, then the bottom of the screen will appear the virtual keyboard. Click the letters on the virtual keyboard, text will be output on the screen. to transform the letter case. - Page 8 to open the voice input interface, then speak to input. Select...
-
Page 9: Home Screen
4 . H O M E S C R E E N From Home screen, you can quickly access common features, view notifications of missed calls, received messages and check connection status. Status Bar Home Screen Application Network intensity of SIM card Battery level of the device New short message Missed call notification... -
Page 10: Application Tab
USB connected Headset is plugged in Bluetooth is activated APPLICATION TAB Tap Application Drawer to access applications and settings of the device. The Application tab enables you to access the Main Menu and choose among the various utilities/ features available in the device. Application CUSTOMIZING SCREEN The device features a touch screen with idle displays and access to utilities at just... - Page 11 Shortcuts Long press on the desired application to add on the screen. Widgets Save time with live updates right on Home screen and get all of your personalized updates at one place. Setting the wallpaper You can customize the wallpaper of your Home screen with default wallpaper or with pictures taken from your device.
-
Page 12: Menu Functions
5 M E N U F U N C T I O N S Calling If the icon appears on the screen, then you can make or receive calls. To make a call, please follow the steps mentioned below: Enter the Main Menu, select Phone. Enter the phone number using the on-screen keyboard. -
Page 13: Messaging
Answer/Reject an Incoming Call When you receive an incoming call, a notification message appears on the screen. In order to accept the call, drag towards right. If you wish to reject the call, drag towards left. MESSAGING Creating a Message to compose a new message. - Page 14 Receiving and Managing Messages To reply to a text message Enter the Main Menu, select Messaging. Select a message thread to open it. Select Type text message to enter your message. Click to Send. To forward a text message ...
-
Page 15: Contacts
Enter the Main Menu, select Messaging. Select Tap Menu > Add subject. In the Type name or number field, enter the recipient’s phone number or email address and enter the Subject. To insert a picture or video file, tap Attach. - Page 16 Tap Done to save the contact. To import contacts Enter the Main Menu select People. Tap Menu > Import/Export. Select to import contacts from Phone contact/ Phone storage/ SIM Card/ SD Card. Select a particular source to import the contacts from. ...
-
Page 17: Email
EMAIL Setting up an Email Account Enter the Main Menu, tap Email. Enter your Email address and Password. Tap Next. The device will automatically retrieve email settings. Enter Name and Account display name. Tap Next. -
Page 18: Camera
mode anoth access perf settings change... -
Page 19: Videos
VIDEOS You can view/play your videos stored on your SD Card through the Video Player. select Application tab > Videos to play videos on the memory card. -
Page 20: Gallery
GALLERY In the Gallery you can view the captured images, recorded video clips, and downloaded images, etc. The picture folder and video folder will be displayed. Select to view the camera pictures or camera videos. The images or videos will be displayed in thumbnails. -
Page 21: Browser
BROWSER Browser is a tool which enables you to access the Internet. To open a web page From the Main Menu, select Browser. Tap the address bar. Type the URL and select “Go”. Tap Menu to access more functions, such as bookmarks, history and other browser related settings. -
Page 22: Settings
6 S E T T I N G S Select Settings to view and adjust the settings of your device. The Settings menu is categorized into: Wireless & networks, Device, Personal, Account and System. WI-FI Connect to a wireless network to browse Internet. Enter Main Menu and tap Settings. - Page 23 device and accept/transfer data. The received data is automatically stored in the directory. Access Settings by entering the main menu. Click Bluetooth to turn on Bluetooth. To make your device discoverable, select Bluetooth settings and check discoverable. Enable or Disable SIM card PIN When PIN code is enabled, you are required to enter the PIN code before making a call.
Need help?
Do you have a question about the PH502 and is the answer not in the manual?
Questions and answers