Table of Contents
Advertisement
Quick Links
AGA Marvel
Toll free phone: 800-223-3900
1260 E. VanDeinse St.
Fax: 616-754-9690
Greenville MI 48838
www.agamarvel.com
THANK YOU for purchasing this high-quality product. If you should experience a problem not covered
in TROUBLESHOOTING, please visit our website at www.agamarvel.com for additional information. If
you still need assistance, call us at 1-800-223-3900.
You will need your model and serial number, located on the inside wall of the refrigerator compart-
ment.
Mercury Model MMCFDR23
Refrigerator User Instructions
Advertisement
Table of Contents

Related Manuals for AGA marvel Mercury MMCFDR23


Summary of Contents for AGA marvel Mercury MMCFDR23
- Page 1 AGA Marvel Toll free phone: 800-223-3900 1260 E. VanDeinse St. Fax: 616-754-9690 Greenville MI 48838 www.agamarvel.com THANK YOU for purchasing this high-quality product. If you should experience a problem not covered in TROUBLESHOOTING, please visit our website at www.agamarvel.com for additional information. If you still need assistance, call us at 1-800-223-3900.
-
Page 2: Table Of Contents
FINDING INFORMATION AND SAFETY Important Safety Instructions Table of Contents Warnings and safety instructions appearing in this guide Table of contents ..............2 are not meant to cover all possible conditions and situa- Safety .................2 tions that may occur. Common sense, caution, and care Unpacking your appliance ..........3 must be exercised when installing, maintaining, or operat- Electrical information ............4... -
Page 3: Unpacking Your Appliance
UNPACKING YOUR APPLIANCE Warranty Registration WARNING It is important you send in your warranty registration card immediately after taking delivery of your appliance or you EXCESSIVE WEIGHT HAZARD can register online at www.agamarvel.com. Use two or more people to move product. Failure to do so can result in personal injury. -
Page 4: Electrical Information
ELECTRICAL INFORMATION Electrical information Do not remove WARNING ground prong You must follow these guidelines to ensure that your refrigerator’s safety mechanisms are operating correctly. • The refrigerator must be plugged into its own dedicat- ed 115 Volt, 60 Hz, AC-only non-GFCI electric outlet. Figure 2 The power cord of the appliance is equipped with a three-prong grounding plug for your protection against... -
Page 5: Feature Overview
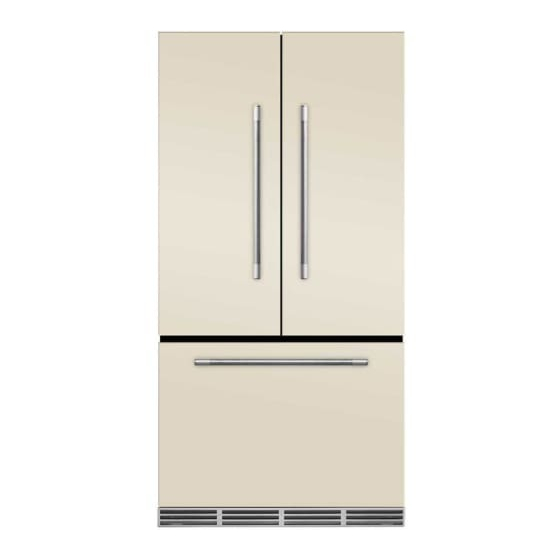
FEATURE OVERVIEW Understanding features and terms Your refrigerator is designed for optimal convenience and storage flexibility. The illustration below is provided to assist you with familiarizing yourself with product features and terminology. Covered LED lights door bin Flipper Guide Flipper mullion Air filter Shelves... -
Page 6: Product Dimensions
PRODUCT DIMENSIONS MMCFDR23 26 7/8” Body Width (68.3 cm) 35 5/8” Hinge (90.5 cm) 23 5/8” (60.0 cm) Dimensions 70” (177.8 cm) 68 3/16” (173.2 cm) 3/8” front leg adjusters front Figure 6 44 1/2” stabilizers (113.0 cm) with freezer drawer open Rough In Measurements Water... -
Page 7: Installation
INSTALLATION Required tools You will need the following tools: Components Tools necessary: provided: Top hinge cover front screw Top hinge cover (or) rear screw (or) (or) (or) Lower Phillips™ Head hinge or #2 square screw hinge 1/4" Nut drive head screw 3/8"... - Page 8 INSTALLATION Leveling Freezer Drawer (if necessary) Figure 13: Remove screws and then gently pull forward. 1. Check gasket seal around top, bottom, and sides of freezer drawer. 2. If gasket is not sealed, open drawer and slightly loosen four drawer screws (two on each side) to allow drawer to rotate (see illustration).
- Page 9 INSTALLATION To adjust the door stop: 5. Re-tighten screw. Door stop is adjustable between 85 to 145 degrees. NOTE View shown is looking up at the bottom of the refrigerator Rotate door. door stop Re-tighten screw Lower Door hinge stop Re-tighten screw Figure 16 6.
- Page 10 INSTALLATION To adjust the flipper mullion: 1. Loosen the screw located on the flipper mullion hinge. Flipper mullion Screw Flipper mullion hinge Figure 17 Adjusting flipper mullion screw 2. Adjust flipper mullion height. For proper connection with the flipper mullion guide, there should be a separation about the thickness of a coin (0.060 inches, or 1.5 mm) between the guide and flipper mullion.
-
Page 11: Removing The Doors
REMOVING THE DOORS 2. Disconnect the harness by grasping both sides of the Getting through narrow spaces connector firmly, depress the latch, and pull apart. Re- If your refrigerator will not fit through an entrance area, move the two screws from the top hinge. Lift the door you can remove the doors. - Page 12 REMOVING THE DOORS Removing Freezer Drawer 2. Reinstall four drawer screws (two per side), tighten down, and close drawer (C). 1. Open freezer drawer. 2. Remove drawer screws on right and left sides (two screws on each side). Remove hex Remove hex head drawer head drawer...
-
Page 13: Connecting The Water Supply
CONNECTING THE WATER SUPPLY To Connect Water Supply Line To Ice Maker Inlet Valve WARNING Disconnect refrigerator from electric power source. Place end of water supply line into sink or bucket. Turn ON water supply and flush supply line until water is clear. Turn To avoid electric shock, which can cause death or severe OFF water supply at shutoff valve. -
Page 14: Controls
ELECTRONIC CONTROL A red indicator light will be illuminated above most active features. Touch the icon to activate the options below. fast freeze Activates a faster rate for freezing food. fast ice Increases the production of ice energy saver Keep this switch set on energy saver (light on) for lowest energy us age. - Page 15 ELECTRONIC CONTROL Sabbath mode Sabbath Mode and the Select Temp The Sabbath Mode is a feature that disables portions Drawer of the refrigerator and its controls for, in accordance with The Select Temp Drawer should be turned off for the observance of the weekly Sabbath and religious holidays Sabbath/Holidays.
-
Page 16: Ice Maker
AUTOMATIC ICE MAKER Ice maker operation & care • The following sounds are normal when the ice maker is operating: After the refrigerator is installed properly, the ice maker can - Motor running produce ice within 24 hours. It can completely fill an ice bin - Ice dropping into ice bin in about three days. -
Page 17: Storage Features
STORAGE FEATURES Shelf features Drawers Your refrigerator includes a variety of storage drawers. These drawers are located in fixed positions at the bottom of the fresh food compartment. CAUTION Crispers To avoid injury from breakage, handle tempered glass Crisper drawers are designed for storing fruits, vegetables, shelves carefully. - Page 18 STORAGE FEATURES To remove Special Special items the crisper items rack rack drawer for The innova- cleaning: tive design of 1. Pull the the special drawer out items rack until it stops. allows you to 2. Lift the store 4 bot- front slightly tles of wine and remove...
- Page 19 STORAGE FEATURES To change the position of an adjustable door bin: NOTE 1. Before adjusting a bin, remove all food. 2. Grip the bin firmly with both hands and lift it upward. 3. Remove the bin. DO NOT clean the display area of the Select Temp 4.
- Page 20 STORAGE FEATURES Freezer Features Lift up on the rear of the lower divider and pull out. Tilt Wire Shelf Stabilizer bar The freezer tilt wire shelf (located on the inside of the freez- er drawer) is not designed to be removed. Dividers Removal Lift up on the front of the upper divider and pull out.
-
Page 21: Storing Food And Saving Energy
STORING FOOD AND SAVING ENERGY Ideas for storing foods Ideas for saving energy Installation Fresh food storage • Locate the refrigerator in the coolest part of the room, • Keep the fresh food compartment between 34°F and out of direct sunlight, and away from heating ducts or 40°F with an optimum temperature of 37°F. -
Page 22: Normal Operating Sounds
NORMAL OPERATING SOUNDS Understanding the sounds you may hear N Select Temp drawer fan Turns off when door opens or Select Temp drawer is turned off. Your new, high-efficiency refrigerator may introduce unfa- miliar sounds. These sounds normally indicate your re- frigerator is operating correctly. -
Page 23: Changing Water And Air Filters
CHANGING THE WATER AND AIR FILTERS It is not necessary to turn the water supply off to change Your refrigerator is equipped with separate water and air the filter. Be ready to wipe up any small amounts of water filtering systems. The water filter system filters all the water released during the filter replacement. - Page 24 CHANGING THE WATER AND AIR FILTERS Air filter 4. Push firmly until the cartridge snaps into place (you should hear two clicks). When fully engaged, The air filter is located under the utility bin. the front of the filter cartridge should be flush with the filter release button.
-
Page 25: Care And Cleaning
CARE AND CLEANING Protecting your investment NOTE Keeping your refrigerator clean maintains its appearance and prevents odor build-up. Wipe up any spills immediately and clean the freezer and fresh food compartments at least If you store or move your refrigerator in freezing tem- twice a year. - Page 26 CARE AND CLEANING Care and cleaning tips Part Cleaning agents Tips and Precautions Interior and ●Soap and water ● Use two tablespoons of baking soda in one quart of warm water. door liners ●Baking soda ● Be sure to wring excess water out of sponge or cloth before cleaning around and water controls, light bulb or any electrical part.
-
Page 27: Replacing Led Lights
CARE AND CLEANING Replacing LED Lights NOTE Both the freezer and fresh food compartments of your refrigerator include LED lights. LED lights are in series so if one is bad or unplugged, sev- To replace LED Lights: eral lights may not light up. 1. -
Page 28: Solutions To Common Problems
SOLUTIONS TO COMMON PROBLEMS Before you call If you experience a concern with your refrigerator or notice a product behavior or condition that you do not understand, you can usually avoid a call to your service representative by referring to this section for an answer. Beginning with the following table, this information includes concerns, potential causes, and common solutions. - Page 29 SOLUTIONS TO COMMON PROBLEMS Opening/Closing of Doors/Drawers Concern Potential cause Common solution Door(s) will not close. ●Refrigerator is not level. It rocks on ● Ensure floor is level and solid, and can adequately support the refrigerator. the floor when moved slightly. Contact a carpenter to correct a sagging or sloping floor.
- Page 30 SOLUTIONS TO COMMON PROBLEMS Temperatures are to Warm Concern Potential Cause Common Solution Freezer/Refrigerator ●Doors are opened too frequently or ●Warm air enters the refrigerator whenever the door is temperature is too warm. too long. opened. Open the door less often. ●Door is slightly open.
-
Page 31: Warranty
Such parts will be repaired or replaced QUENTIAL OR INCIDENTAL DAMAGES OF EXPENSES at the option of AGA Marvel without charge, subject to the RESULTING FROM BREACH OF THESE OR ANY OTHER terms and conditions as set out below. - Page 32 www.agamarvel.com 41014733-EN rev A All specifications and product designs subject to change without notice. Such revisions do not entitle the buyer to corresponding changes, improvements, additions, replacements or compensation for 11/3/16 previously purchased products.
Need help?
Do you have a question about the Mercury MMCFDR23 and is the answer not in the manual?
Questions and answers