Table of Contents
Advertisement
Quick Links
MONITOR
1. Power:
2. TV/AV:
3. Quad:
4. Volume:
5. IR Sensor:
6. Manual Record:
7. Motion Record:
8. Manual Channel:
9. Auto Channel:
10. Delete/Scan:
11. Menu/Exit:
12. Joystick:
13. Antenna:
14. Power Input:
15. A/V Out:
16. SD Card Insert:
17. Talk:
Pressing this button turns the monitor on and off
If your monitor is connected to another video source, pressing this button will
transfer the image from the 7" LCD monitor to the attached monitor.
Opens up a quad screen view. For more information on camera viewing, please
see "Camera Viewing" on Pg. 16
This adjusts the volume of the audio that plays through your monitor
The IR sensor is how the remote and monitor communicate
Prompts the monitor to begin constant recording. To stop recording, press this
button again
Prompts the monitor to record only when motion is detected. To stop motion
recording, press this button again
Manually changes which camera is being viewed on screen
Turns auto channel on and off. When this function is on, the camera channels will
sequence through automatically
This button will turn on the screen saver. The screen saver will display until
motion is detected, once detected, the screen saver will close and the monitor
will display the camera that detected motion. During playback this button allows
you to delete single clips of recorded footage. For more information on deleting
recorded footage, please see "DELETE" on Pg. 27
Enters and exits the main menu
This tab has many functions when accessing the menu as well as playing back
footage. For information about how to use this joystick, please see "Joystick" on
Pg. 14 of the manual
This antenna allows for a stronger signal between the camera and monitor
Plug the small end of the included power adapter marked "monitor" into this area
Plug the single end of the included A/V cable into this area
Your SD card can be inserted into this area to record and save footage
This button allows for two-way communication. The monitor and camera are
both equipped with a microphone and a speaker, pressing this button allows you
to speak through the camera from the monitor
Advertisement
Table of Contents

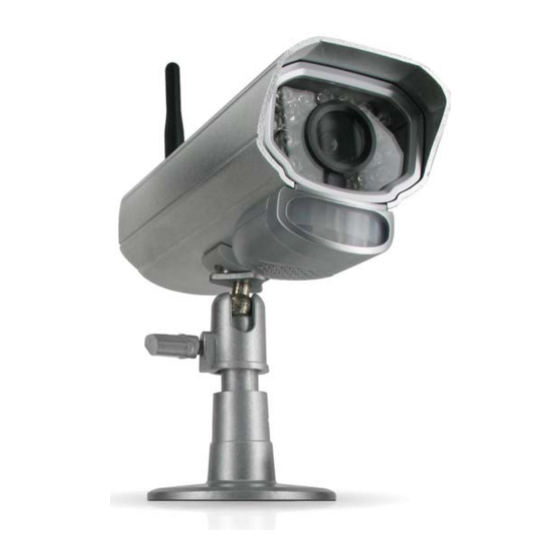
Summary of Contents for RDI Technology CA640
- Page 1 MONITOR 1. Power: Pressing this button turns the monitor on and off 2. TV/AV: If your monitor is connected to another video source, pressing this button will transfer the image from the 7" LCD monitor to the attached monitor. 3. Quad: Opens up a quad screen view.
- Page 2 REMOTE The included remote control has the same functions as the monitor with the exception of two commands that are NOT included on the remote control, they are: • Talk: Cannot access talk function with remote • Power: Cannot power on or off the monitor from the remote control CAMERA 1.
-
Page 3: Things To Consider Before Installation
THINGS TO CONSIDER BEFORE INSTALLATION • The camera should be installed between 8 to 13ft above the area to be monitored • Ensure that the camera is installed NO MORE than 100 ft away from the monitor’s position to maintain a strong signal between the camera and monitor •... -
Page 4: Mounting The Camera
MOUNTING THE CAMERA Adjust camera to desired viewing angle 1. Decide if the camera will be wall-mounted or sitting on a desk/tabletop. The camera can be adjusted for many mounting scenarios by rotating it to the required position. • Keep in mind that the camera is microphone equipped. - Page 5 PLUGGING IN MONITOR Once the monitor is connected to a power source , turn it on using the power button and it will automatically pair with the camera. If the camera and monitor do not automatically pair please see “PAIRING” Pg 14. To plug monitor in: Plug adapter into 9VDC 1.
-
Page 6: Specifications
My Unit has Scrolling • Ensure that the device is set to NTSC. For more information horizontal lines please see “AV OUT on Pg. 22 Schedule record is not working • Ensure that both manual and motion record modes are turned OFF for schedule record to take place SPECIFICATIONS CAMERA... - Page 7 MONITOR Wireless Frequency ....................2400~2483.5Mhz Channel Frequencies ....................Hopping Frequency Number of Cameras Supported .................4 Output Terminal ......................1/8th inch to RCA A/V output Resolution .........................640x480 or 320x240 Speaker ........................Internal Buzzer Maximum SD Card Size ....................32 GB Compression ......................MPEG-4 File Type ........................AVI Operation Mode ......................Simplex Scheduled Recording ....................24 Hour clock Automatic Overwrite when Full ................Optional Motion Activated Alert ....................Compatible...
-
Page 8: Additional Accessories
If you accidentally damage or lose any parts they can be replaced with ease. The following are parts that came with your system and their reference model numbers so you can continue to effectively monitor your premises. PRODUCT MODEL# DESCRIPTION Power Adapters Audio/Video Cable Your product software and manual are available for download at:... - Page 9 FCC NOTE: This device complies with Part 15 of the FCC Rules. Operation is subject to the following two conditions:(1)this device may not cause harmful interference, and (2) this device must accept any interference received, including interference that may cause undesired operation. The manufacturer is not responsible for any radio or TV interference caused by unauthorized modifications to this equipment.

Need help?
Do you have a question about the CA640 and is the answer not in the manual?
Questions and answers