
Related Manuals for Gembird CAM44U

Summary of Contents for Gembird CAM44U
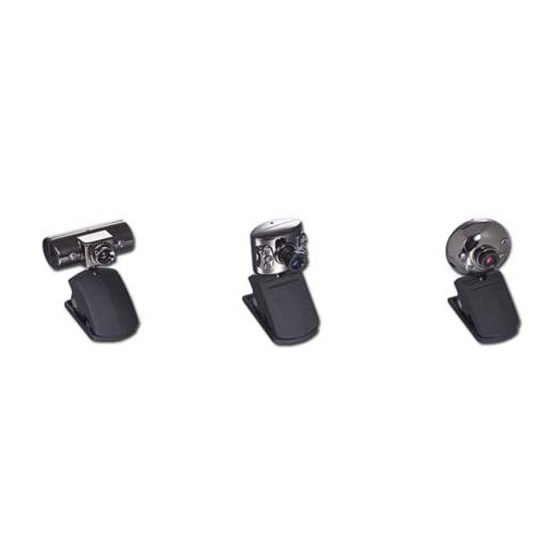
- Page 1 Web camera CAM44U/CAM55U/CAM66U PC Camera...
- Page 2 • No part of this manual may be reproduced, transmitted or translated in any language in any form, by any means, without the prior written permission of Gembird Electronics Ltd. • Gembird Electronics makes no warranties for damages resulting from corrupted or lost data due to a mistaken operation or malfunction of the product, the software, personal computers or peripheral devices.
-
Page 3: Software/Hardware Requirements
CAM44U/CAM55U/CAM66U Thank you for choosing our new generation of Web camera! This device is a Plug and Play product for real-time video transmission to PC via the USB Port. IBM-compatible PC or laptop with USB port Pentium 200 or higher CPU... - Page 4 High resolution Fast transmission rate Light and easy to carry Stylish design Night vision For CAM44U: 350,000 pixels resolution VM 305 chipset High resolution CMOS color sensor Large window capture size: 640×480 Video mode: 24 bit true color Interface: USB 1.1...
- Page 5 Large window capture size: 640×480 Video mode: 24 bit true color Interface: USB 1.1 For CAM66U 1,300,000 pixels resolution Interface: USB 2.0 Transmission rate: 320×240 30fps or 1280*960 15fps Includes microphone and software Noise-signal ration: greater than 48db by 30fps 220LUX Dynamic range: greater than 72db Image focus: 5cm to infinity Built-in image compression...
-
Page 6: Software Installation
Web camera Software installation Insert CD with Driver/Applications into your CD Rom drive. The installation software should be launched automatically. If by any reason it does not start, please, open the CD-drive in your Windows Explorer and then execute Driver setup/Setup.exe manually. You will see the following window: 1. - Page 7 Web camera 2. The window below will be then shown during the installation. 3. Click “Finish” when you see the window below and restart your computer.
- Page 8 Web camera 4. Plug the web camera into the USB port now and turn your computer on. The camera will be automatically recognized by Windows: 5. Choose “Start/Programs/VIMICRO USB PC camera” group and launch the program “AMCAP” to start the video capture.
- Page 9 Web camera 6. This is how the video capture window looks like: 7. From the “Options” menu choose “Video Capture Filter”. You will see the following dialog box, which will help you to adjust the video picture if necessary:...
-
Page 10: Operation Precautions
8. From the “Options” menu choose “Video Capture Pin”. You will see the following dialog box, which will help you to adjust the video format & size: • Do not touch the lens with your hand or any sharp items. Use only clean and soft tissues to clean it.
Need help?
Do you have a question about the CAM44U and is the answer not in the manual?
Questions and answers