Table of Contents
Advertisement
Quick Links
Advertisement
Table of Contents

Related Manuals for Milwaukee MW190


Summary of Contents for Milwaukee MW190
- Page 1 INSTRUCTION MANUAL MW190 DO / Temperature Bench Meter SATISFACTION GUARANTEED...
- Page 2 This instruction manual will provide you the necessary information for correct use of the meters. All rights are reserved. Reproduction in whole or in part is prohibited without the written consent of the copyright owner, Milwaukee Instruments Inc., Rocky Mount, NC 27804 USA.
-
Page 3: Table Of Contents
TABLE OF CONTENTS 1. FUNCTIONAL DESCRIPTION ............................4 2. GENERAL DESCRIPTION .............................6 3. SPECIFICATIONS ................................7 4. PROBE FUNCTIONAL DESCRIPTION ........................8 5. PROBE CONNECTION & PREPARATION ......................9 6. OPERATIONAL GUIDE ..............................10 7. SALINITY AND ALTITUDE COMPENSATION ......................11 8. D.O. MEASUREMENTS ..............................12 9. TEMPERATURE MEASUREMENTS ........................12 10. -
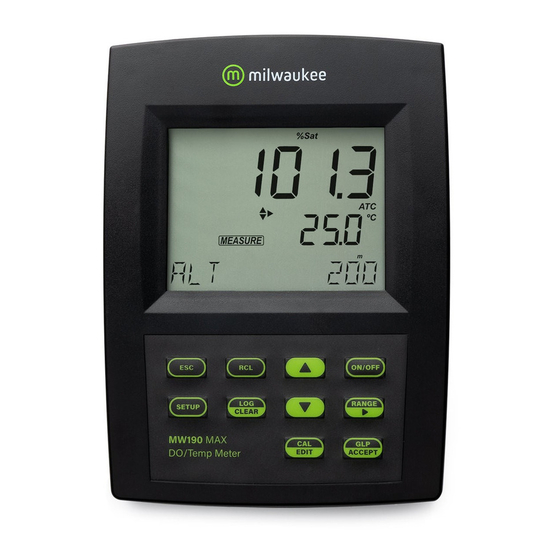
Page 4: Functional Description
4 MW190 Bench Meter 1. FUNCTIONAL DESCRIPTION DISPLAY A. Primary display B. Measuring unit for primary display C. Calibration messages D. Setup, log mode E. Require user confirmation F. Calibration mode G. Secondary display H. Temperature unit I. Calibration wrong message... - Page 5 FUNCTIONAL DESCRIPTION 5 FRONT PANEL 1. Liquid Crystal Display (LCD) 2. CAL key, to enter/exit calibration mode 3. MR key, to enter/exit recall mode 4. ACCEPT key, to confirm value 5. LOG key, to store reading in memory 6. SETUP key, to enter/exit setup mode or to toggle between delete one and all logged data key, to select SETUP item or to...
-
Page 6: General Description
6 MW190 Bench Meter 2. GENERAL DESCRIPTION Thank you for choosing Milwaukee Instruments. This instruction manual will provide you the necessary information for correct use of the meter. MW190 is is a logging microprocessor-based DO and Temperature bench meter. Dissolved Oxygen is indicated in ppm (parts per million) or in %. -
Page 7: Specifications 7
SPECIFICATIONS 7 3. SPECIFICATIONS 0.00 to 45.00 ppm O Range 0.0 to 300.0 % O Temp -5.0 to 55.0 °C (23.0 to 131.0 °F) 0.01 ppm Resolution 0.1 % Temp 0.1 °C (0.1 °F) ±1.5 % of full scale Accuracy (@ 20 °C / 68 °F) Temp ±0.4 °C (±0.8 °F) single or double point at 0% (MI 9070) and 100% (in air) -
Page 8: Probe Functional Description
8 MW190 Bench Meter 4. PROBE FUNCTIONAL DESCRIPTION 1. D.O. Probe 2. Protective Cap 3. Watertight Shielded Cable 4. Polypropylene Probe Body 5. Temperature Sensor 6. O-Ring Seal 7. Silver Chloride Anode 8. Platinum Cathode (sensor) 9. Oxygen Permeable Teflon® Membrane... -
Page 9: Probe Connection & Preparation 9
Probes shipped from Milwaukee Instruments are dry. To hydrate the probe and prepare it for use, connect it to the meter and proceed as follows: Shipping 1. -
Page 10: Operational Guide
10 MW190 Bench Meter 6. OPERATIONAL GUIDE Plug the 12 VDC adapter into the power supply socket. Connect the DO probe to the 7-pin connector. Make sure the probe sleeve is properly inserted and tighten the threaded ring. Turn the instrument on by pressing ON/OFF. All LCD tags are displayed and a beep is heard while the instrument performs a self test. -
Page 11: Salinity And Altitude Compensation 11
SALINITY AND ALTITUDE COMPENSATION 11 Whenever measurements are taken with a non-polarized probe, the oxygen level revealed is both that of the tested solution, as well as that present in the electrolyte solution. This reading is incorrect. The calibration of this instrument is very simple. Before proceeding with the calibration, make sure the probe is ready for measurements (see PROBE CONNECTION &... -
Page 12: Measurements
12 MW190 Bench Meter 8. D.O. MEASUREMENTS Make sure that the instrument has been calibrated and the protective cap has been removed. y Immerse the tip of the probe in the sample to be tested. Allow approximately one minute for the reading to stabilize. -
Page 13: Calibration
The instrument can be calibrated in maximum 2 points: 0.0% (zero calibration) and 100.0% (slope calibration). The zero calibration of the MW190 is very stable, therefore this procedure needs to be performed only whenever the probe or the membrane is replaced. - Page 14 14 MW190 Bench Meter y When the reading is stable, “READY” & “ACCEPT” tags start blinking. Press ACCEPT to confirm the “0.0%” D.O. calibration. y If the reading is within the limits (±15% f.s.), the meter stores the value (and adjusts the zero point).
- Page 15 If the reading is not close to the selected value, “WRONG“ & “BUFFER” tags will blink. MW190 has automatic buffer recognition function. If the ARROW keys are pressed to select the desired calibration value, the automatic buffer recognition function is...
-
Page 16: Logging
16 MW190 Bench Meter 11. LOGGING Up to 50 LOG samples can be stored into memory LOGGING THE CURRENT DATA To store the current reading into memory press the LOG key while in measurement mode. The instrument will display the current date (MM.DD) on the primary LCD and the record number on the secondary LCD, along with “LOG”... - Page 17 LOGGING 17 When the LOG key is pressed while in measurement mode, a complete set of information is stored. VIEW LOGGED DATA Press the MR key to retrieve the information stored while in measurement mode. If no data were logged, the instrument displays “no rEC” message for the selected range. Otherwise, the instrument will display the DO value on the primary LCD and the temperature on the secondary LCD, along with last stored record number and “LOG”...
- Page 18 18 MW190 Bench Meter Press the RANGE key and the instrument will display the next logged parameter: y The date: month and day on the primary LCD and the year on the secondary LCD, along with “DATE” tag. y The time: hour and minutes on the primary LCD and the seconds on the secondary LCD, along with “TIME”...
- Page 19 LOGGING 19 y The “dEL” message on the primary LCD and the record number on the secondary LCD along with “ACCEPT” tag blinking. Notes: If one of the arrow keys is pressed while “dEL” message is displayed, the next/previous record number will be selected. If the SETUP key is pressed, the secondary LCD will toggle between the record number and “ALL”...
-
Page 20: Setup
20 MW190 Bench Meter 12. SETUP Setup mode allows viewing and modifying the following parameters: y Salinity Compensation y Altitude Compensation y Current Time (hh:mm) y Current Date (MM.DD. Y YYY) y Beep Status y Baud Rate (serial communication) y Instrument ID... - Page 21 SETUP 21 Press the arrow keys to select the next/previous parameter. Press the SETUP key to exit SETUP menu at any time. The following table lists the SETUP parameters, their valid values range and the factory settings (default): Item Description Valid values Default SALt...
- Page 22 22 MW190 Bench Meter The salinity affects the D.O. concentration, decreasing its value. The table below shows the maximum oxygen solubility at various temperatures and salinity levels. Salinity (g/l) at Sea Level ºC ºF 0 g/l 10 g/l 20 g/l...
- Page 23 SETUP 23 Altitude, Meters above Sea Level ºC ºF 1200 1500 1800 2100 2400 2700 3000 3300 3600 3900 4000 0 14.6 14.1 13.6 13.1 12.6 12.1 11.7 11.2 10.8 10.4 10.0 32.0 13.8 13.3 12.8 12.4 11.9 11.5 11.0 10.6 10.2 35.6 13.1 12.6 12.2 11.7...
-
Page 24: Temperature Calibration (For Technical Personnel Only)
If the temperature measurements are inaccurate, temperature recalibration should be performed. For an accurate recalibration, contact your dealer or the nearest Milwaukee Customer Service Center, or follow the instructions bellow. y Prepare a vessel containing ice and water and another one containing hot water (at a temperature of around 50 °C). -
Page 25: Pc Interface
Data can be exported to the most popular spreadsheet programs for further analysis. To connect the instrument to a PC through the RS232 port, use the Milwaukee MA9350 cable connector. To connect the instrument to a PC through the USB port, use a standard USB cable. - Page 26 26 MW190 Bench Meter UNIT CHANGE COMMAND CHU xx Change the instrument unit according with the parameter value (xx): The instrument will answer for this command with: <STX> <answer> <ETX> where: <STX> is 02 ASCII code character (start of text) <ETX>...
-
Page 27: Probe Maintenance 27
PROBE MAINTENANCE 27 15. PROBE MAINTENANCE The oxygen probe body is made of reinforced plastic for maximum durability. A thermistor temperature sensor provides temperature measurements of the sample. Use the protective probe cap when not in use. To replace the membrane or refill with electrolyte, proceed as follows: y Remove the protective cap by gently twisting and pulling it off the body of the probe (see fig. -
Page 28: Troubleshooting
28 MW190 Bench Meter 16. TROUBLESHOOTING SYMPTOMS PROBLEM SOLUTION Reading fluctuates up and DO probe not properly Insert the probe. down (noise). connected. Recalibrate the meter; Display shows DO reading Reading out of range. Check the sample is blinking. within measurable range;... -
Page 29: Accessories
ACCESSORIES 29 17. ACCESSORIES MA9070 Zero Oxygen Solution, 230 ml MA9071 Refilling Electrolyte Solution, 30 ml MA9311 115VAC to 12VDC converter MA9310 230VAC to 12VDC converter MA840/2 Spare probe with 2 meters (6.7’) cable MA840/10 Spare probe with 10 meters (33’) cable MA840/20 Spare probe with 20 meters (67’) cable MA841... -
Page 30: Certification
Damage due to accidents, misuse, tampering or lack of prescribed maintenance is not covered by warranty. If service is required, contact your local Milwaukee Instruments Technical Service. If the repair is not covered by the warranty, you will be notified of the charges incurred. - Page 31 Milwaukee Instruments reserves the right to make improvements in design, construction and appearance of its products without advance notice.
- Page 32 THANK YOU FOR CHOOSING Sales and Technical Service Contacts: Milwaukee Electronics Kft. Alsó-kikötő sor 11C H-6726 Szeged - HUNGARY tel: +36 62 428 050 fax: +36 62 428 051 www.milwaukeeinst.com e-mail: sales@milwaukeeinst.com Milwaukee Instruments, Inc. 2950 Business Park Drive Rocky Mount, NC 27804 USA...
Need help?
Do you have a question about the MW190 and is the answer not in the manual?
Questions and answers