Table of Contents
Advertisement
Quick Links
Advertisement
Table of Contents

Related Manuals for Marathon MER241SS

Summary of Contents for Marathon MER241SS
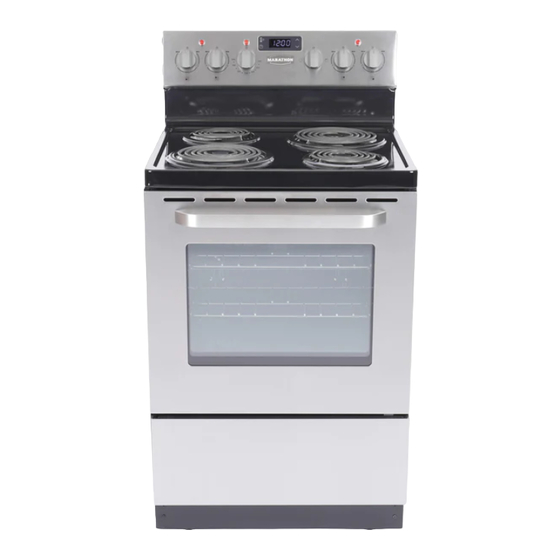
- Page 1 MER241SS...
-
Page 2: Before First Use
Important Safety Information W AR SUFFOCATION HAZARD AND RISK OF CHILD ENTRAPMENT To avoid the possibility of child entrapment, please take the following precautions before discarding your old electric range Remove the oven door completely from the electric range. Never allow children to operate, play with, or crawl inside the electric range. BEFORE FIRST USE It is very important that you review this Owner’s Manual very carefully before you plug in or use your new appliance. -
Page 4: Installation Instructions
Installation Instructions NOTICE: Before you use this range for the first time: The heating elements have a protective coating, which must be burned off before use. To do this, open the oven door and set the temperature control knob to 450°F. Turn the function selector to the Bake element and the Broil element separately to approximately 15 minutes. - Page 5 Installation Instructions • Use Proper Pan Size - This appliance is equipped with one or more surface units of different size. Select utensils having flat bottoms large enough to cover the surface unit heating element. The use of undersized utensils will expose a portion of the heating element to direct contact and may result in ignition of clothing.
- Page 6 Dimensions 23 5/8’’ (600 mm)
- Page 7 Installation Dimensions Guide...
-
Page 8: Electrical Connection
Installation Instructions ELECTRICAL CONNECTION • It is the installer’s complete responsibility to comply with installation clearances specified in the manual. The Minimum Cabinet opening dimensions/clearances shown must be used. The minimum spacings must be maintained between the appliance cooking surface and the horizontal surface above the cooking top. -
Page 9: Leveling The Range
To reduce the risk of tipping the appliance, the appliance must be secured by properly installing the Anti-tip bracket included with your Marathon range. WARNING TIP OVER HAZARD •... -
Page 11: Operating The Range
Operating the Range Marathon LED Clock & Timer Your Marathon smooth top range features a white LED clock and minute timer for your added convenience. Clock Set up Press the clock symbol, you will then hear a “beep” and the LED display will start flashing, use the up and down arrows to set the time of day. -
Page 12: Using The Oven
Operating the Range Using the Oven OVEN RACKS The oven racks (2) are adjustable and are designed with stop-locks so that when placed correctly on the rack supporters, they will stop before coming completely out from the oven and will not tilt when removing food from or placing food on them. -
Page 13: Cooking Mode
Always remember that when the oven is hot, outside surfaces of the range get hot. “BROIL” Your Marathon deluxe 24” range has the unique feature of variable “BROIL” heat providing increased flexibility when broiling. When broiling, only the upper element is switched “ON”. Use with the oven door closed and the note that the thermostat can be set from 200 to 500°F even on “BROIL”... -
Page 14: Cookware Tips
Operating the Range Using the Cooktop Surface Elements Your Marathon electric range is engineered with two large high wattage elements (8”) and two small lower wattage elements (6”). To operate the cooktop surface elements, select the surface element you would like to use and simply push in and turn the knob to the desired heat setting between “MIN”... -
Page 15: General Information
When we engineered your Marathon range, we incorporated a few key features that will help make clean ups easier: Durable, one piece, upswept porcelain enamel cooktop – no seams for food or dirt to accumulate. -
Page 16: Lift-Up Cooktop
Care and Maintenance LIFT-UP COOKTOP Your Marathon deluxe range has one piece upswept lift up cooktop for easy clean ups underneath the cooktop for spills etc. As always, ensure the range is unplugged from the power outlet before cleaning •... -
Page 17: Cleaning The Oven
Care and Maintenance CLEANING THE OVEN The oven interior of your Marathon range is a durable porcelain enamel finish that will last for many years if properly maintained and cleaned regularly. To make cleaning the oven easier, it is possible to easily remove the oven door as follows:... -
Page 18: Removable Storage Drawer
Care and Maintenance REMOVABLE STORAGE DRAWER For cleaning, you can remove the drawer by pulling it out until the stop point and lifting it up. Never store any flammable material in the drawer. REPLACING THE OVEN LIGHT Before any maintenance is started involving electrical parts of the appliance, it must be disconnected from the power supply. -
Page 19: Troubleshooting
Faulty surface element or Check element first, if still not working contact Stirling Marathon control. Improper cookware being used. If using Bake or Broil, wait until oven has fully pre-heated and the indicator light has turned off before inserting food into the oven Foods cook slowly in oven You have blown a household fuse or tripped a circuit breaker. -
Page 20: How To Obtain Service
Service Center is further than 100 km (60 miles), you will be required to deliver the appliance to the closest Service Center at your expense. Stirling Marathon is not responsible or liable for any spoilage or damage to food or other contents of this appliance, whether due to any defect of the appliance, or its use, whether proper or improper.
Need help?
Do you have a question about the MER241SS and is the answer not in the manual?
Questions and answers