
Related Manuals for Lambda Labs CX-1A


Summary of Contents for Lambda Labs CX-1A
- Page 1 CX-1A / CX-1B Manual Version 1.2 CX-1A/CX-1B Manual Version 1.2 05/2020 © 2020 Lambda Labs; All rights reserved This manual is optimized to save paper and to print 2 pages per DIN A4 sheet.
-
Page 2: Table Of Contents
Lambda Labs - Professional Acoustics CX-1A/B Manual Contents 1. Safety 1.1.General safety information 1.2.Declaration of Symbols and Illustrations of this Manual 1.3.IMPORTANT GENERAL SAFETY REGULATIONS 1.4.EC declaration and conformity 2. The CX-1A 2.1.Technical data overview 2.2.General Components & CX-1B use 2.2.1.Amplifier Module &... - Page 3 Lambda Labs - Professional Acoustics CX-1A/B Manual NOTES: www.lambda-labs.com...
-
Page 4: Safety
• Always use the latest manual edition! Check our website regularly for updates! While all information in this manual has been prepared to the best knowledge and with the utmost care, Lambda Labs can not guarantee the accuracy of the documentation in all cases. Lambda Labs disclaims any liability for any errors or omissions that may be inferred from this manual or the products described therein. -
Page 5: Important General Safety Regulations
Never climb on stacked or flown loudspeakers! Speaker rigging! As Lambda Labs loudspeakers can be flown in various ways, always refer strictly to the given rigging operations and its related safety regulations of the provided rigging DANGER! - Page 6 Always keep watching all rigging components and connection joints during the uplifting procedure! Stop the uplifting procedure if any uncertainty occurs! Lambda Labs recommends to always use a second and independent safety link to upper located suspension points after the setup is ready.
- Page 7 Manual! Keep this manual within easy reach for operating the product/s all the time! As a Lambda Labs products rental partner, always attach the appropriate user manuals to DANGER! the devices. Should you need further manuals, please order them from Lambda Labs or...
-
Page 8: Ec Declaration And Conformity
Electrical and electronic devices must be disposed of separately from household or municipal waste at the end of its operational lifetime. Please dispose of this product according to the respective national regulations or contractual agreements. If there are any further questions regarding the disposal of this product, please contact Lambda Labs. www.lambda-labs.com... -
Page 9: The Cx-1A
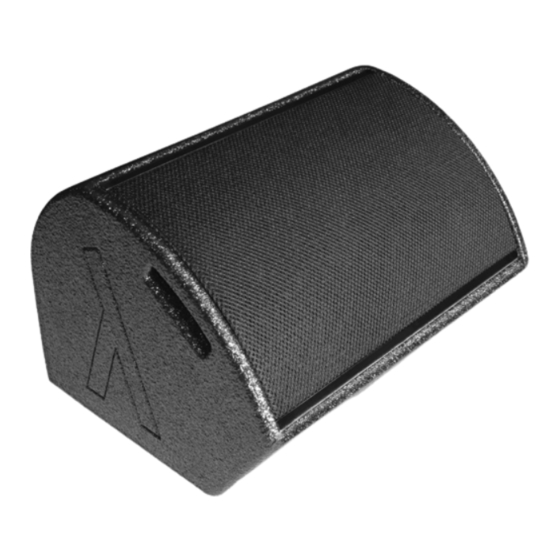
Lambda Labs - Professional Acoustics CX-1A/B Manual 2. The CX-1A 2.1. Technical data overview System High power 2-way coaxial monitor Configuration True Point Source 1 x 8" high excursion 2“ VC driver 1 x HF-compression driver with 1.7" VC polyamide diaphragm... -
Page 10: General Components & Cx-1B Use
„EPS“ (Express Pin System) Rigging Points Chapter 2.2.4 The CX-1A is equipped with 1 EPS Rigging Point to fly the loudspeaker with various rigging equipment. Therefore, the loudspeaker can be flown vertically, horizontally and upside down. Refer to Chapter 2.2.4 as well. - Page 11 Therefore, the speakon connector has to be wired with 4 poles. Caution: Never connect more than two CX-1B on one CX-1A, because a critical low impedance will be reached for the active module. Furthermore 2 different CX-1A should not be connected with their speakon outputs in any case.
-
Page 12: Amplifier Module & Dsp
Lambda Labs - Professional Acoustics CX-1A/B Manual 2.2.1. Amplifier Module & DSP 2.2.1 Figure 1: Front View Amplifier Module PART DESCRIPTION of 2.2.1 Figure 1 REFERENCE DSP Control Panel Chapter 2.2.1.1 The DSP Control Panel contains the XLR input and output to apply Chapter 2.2.1.3... -
Page 13: 1.Amplifier Modul & Dsp: Xlr Connectors
Lambda Labs - Professional Acoustics CX-1A/B Manual Danger: The amplifier module can develop excessive heat! Do NOT touch the surface of the amplifier module during and right after its operation! Allow the unit to cool down before packing the loudspeaker. -
Page 14: 3.Amplifier Module & Dsp: Gain Control
Lambda Labs - Professional Acoustics CX-1A/B Manual Danger: RISK OF ELECTRIC SHOCK! Use grounded mains only! Use undamaged cables and connectors only! Do NOT insert anything other into the Powercon connectors than Powercon plugs! Keep the connectors away from water and excessive humidity! -
Page 15: 5.Amplifier Module & Dsp: Selecting Presets
Lambda Labs - Professional Acoustics CX-1A/B Manual If the red LED flashes, one of the integrated limiters for the lowmid driver (distortion limiter, continuous output limiter, continuous current limiter, peak current limiter) is triggered. Together they serve to ensure sound quality and safe operation. -
Page 16: 6.Amplifier Module & Dsp: Preset Assignment
PRESET 2: Crossover Mode 140Hz Setup for the CX-1A to be used in combination with the MF-15A subwoofer is Preset 2. To match to the CX-1A, the MF-15A should be driven with Preset 3. If needed, a cardioid mode can be realized by using an additional MF-15A with the Preset 4. For further detailed information, please read the MF-15A manual. -
Page 17: 7.Amplifier Module & Dsp: Module Cover „S" Mounting
Lambda Labs - Professional Acoustics CX-1A/B Manual 2.2.1.7. Amplifier Module & DSP: Module Cover „S“ Mounting To protect the Control Panel from unauthorized access, a module cover can be installed. To do this, follow the instructions below: 1. Remove the 4 x M4 DIN 912 screws with a ratchet or an electric screwdriver. -
Page 18: Adjustable Speaker Flange
Lambda Labs - Professional Acoustics CX-1A/B Manual 1,5 Nm Caution: Fix the screws with a torque of ! Follow an X order to unmount/mount the screws and do not start with a corner screw! Use the screw parts in the right order to prevent any damage to... -
Page 19: Second Independent Safety Link
If the loudspeaker is to be flown, the loudspeaker must be secured with a Second Independent Safety Link. This link is to be attached to the top of the CX-1A/CX-1B. To prepare the loudspeaker accordingly, follow the steps as explained below: 1. -
Page 20: Eps & Rigging Options Overview
2.2.4. EPS & Rigging options overview The CX-1A is equipped with 3 EPS mounting points to fly the loudspeaker with various rigging equipment. Therefore, the loudspeaker can be flown vertically, horizontally and upside down. For further instructions and detailed rigging explanations, please check the provided specific rigging manuals. - Page 21 Lambda Labs - Professional Acoustics CX-1A/B Manual T-Bracket / Vari-Clamp T-Bracket: Mobile Version (M) Mobile Version (M) Installation Version (I) Installation Version (I) www.lambda-labs.com ! 2 0...
-
Page 22: 2.Eps & Rigging Options: Half-Bracket Rigging System Cx-Series
Lambda Labs - Professional Acoustics CX-1A/B Manual 2.2.4.2. EPS & Rigging options: Half-Bracket Rigging System CX-Series The rigging component Half-Bracket CX-Series can be used with all loudspeakers from the CX-Series. It provides vertical rigging options with the additional opportunity to mount the loudspeaker upside down. To make the Half-Bracket fit to every loudspeaker of the CX-Series, its length can be adjusted. -
Page 23: 3.Eps & Rigging Options: I-Bracket Rigging System
I-Bracket S I-Bracket L Note: The maximum possible tilt angle for the CX-1A/ C X - 1 B l o u d s p e a ke r i n combination with the I- Bracket S is 60° for a ceiling installation. -
Page 24: Maintenance
I-Bracket S: Wall mount (I-Bracket L not shown) Note: The maximum possible tilt angle for the CX-1A/ C X - 1 B l o u d s p e a ke r i n combination with the I- Bracket S or L depends on... -
Page 25: Dimensions
Lambda Labs - Professional Acoustics CX-1A/B Manual 2.4.Dimensions Dimensions (mm) Weight CX-1A 8,4 kg 18,5 lbs CX-1B 7,2 kg 15,9 lbs www.lambda-labs.com ! 2 4...
Need help?
Do you have a question about the CX-1A and is the answer not in the manual?
Questions and answers