
Related Manuals for Philips MLink 27PT41B199


Summary of Contents for Philips MLink 27PT41B199
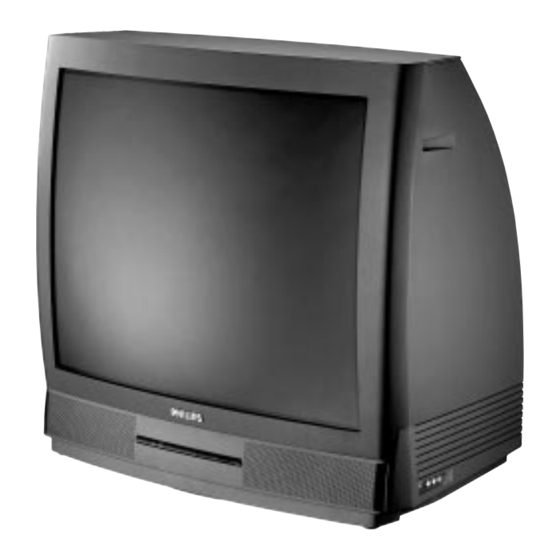
- Page 1 Color Television 27PT41B1 Instructions for use This television contains; 3135 015 17511...
-
Page 2: Welcome/Registration Of Your Tv
And we’ll do everything in our power to keep you happy with your purchase for many years to come. As a member of the PHILIPS “family,” you’re entitled to protection by one of the most comprehensive warranties and outstanding service networks in the industry. -
Page 3: Safety/Precautions
SAFETY INSTRUCTIONS - Read before operating equipment This product was designed and manufactured to meet strict quality and 11. Power-Cord Protection - Power supply cords should be routed so that they are not likely to be walked on or pinched by items placed safety standards. -
Page 4: Table Of Contents
Input Jacks .......36–38 ImageMax are trademarks of Philips Consumer Electronics Company. -
Page 5: Features
Infrared Remote (IR) Blaster works with the M-Link feature to enable Commands your TV to ÒlearnÓ the remote-control commands of new Philips devices • Inputing Commands from the Remote or multibrand devices that you have connected to your TV. After the com-... -
Page 6: Picture
DJUSTING THE ICTURE o adjust your TV picture controls, select a channel and follow these steps. BEGIN Press the MENU button on the remote control to show the onscreen menu. PICTURE will be highlighted. Press the CURSOR RIGHT button and the menu will shift to the left. BRIGHTNESS will be highlighted and an PICTURE BRIGHTNESS... -
Page 7: Turning On The Dynamic Noise Reduction
URNING YNAMIC OISE EDUCTION ONTROL ue to many reasons, such as poor cable reception, the picture can sometimes appear slightly ÒspeckledÓ PICTURE BRIGHTNESS (an indication of signal noise in the SOUND COLOR picture). The DNR (Dynamic Noise FEATURES PICTURE PICTURE SHARPNESS INSTALL Reduction) control can help eliminate... -
Page 8: Using The Closed Captioning Control
SING THE LOSED APTIONING ONTROL losed Captioning (CC) allows you to read the voice content of NOTE: Not all TV programs and product commercials are broadcast with Closed television programs on the TV Captioning (CC). Nor are all Closed Captioning MODEs (CAPTION 1Ð4 or TEXT screen. -
Page 9: Features
ELECTING THE CREEN ORMAT ou can change the screen for- mat size to match the type of program youÕre watching. Select the normal 4:3 aspect ratio or expand the 4:3 aspect ratio to com- pletely fill the screen. There also is a compressed 16:9 aspect ratio, PICTURE TIMER... -
Page 10: Activating The Blue Mute Control
CTIVATING THE UTE CONTROL he Blue Mute feature will elimi- nate annoying snow from the screen when no video signal is pres- ent by displaying a pleasent blue screen. This occurs in cases such as when a VCR tape is removed or an antenna signal is broken. -
Page 11: Using The Sleep Timer Control
SING THE LEEP IMER ave you ever fallen asleep in front of the TV, only to have it wake you up at two in the morning with a test pattern sound screeching in your ears? Well, your TV can enable you to avoid that discomfort by automatically turning itself off. -
Page 12: The Timer - Setting The Clock
– S IMER ETTING THE LOCK our television comes with an on- screen clock. During normal oper- ation, the clock appears on the screen when the STATUS/EXIT button is pressed or if the TIMER DISPLAY control is turned ON. BEGIN Press the MENU button on the PICTURE TIMER... -
Page 13: The Timer - Setting The Start Time
– S IMER ETTING THE TART ust as you would an alarm clock, you can set the TV to turn itself ON once or at the same time every day. Follow these steps to set the Start Time. BEGIN Press the MENU button on the remote control to show the PICTURE TIMER... -
Page 14: The Timer - Setting The Stop Time
– S IMER ETTING THE se the START TIME control to set the TV to turn itself ON once or at the same time every day (see page 13 for details). The fol- lowing steps will guide you in set- ting the TV to turn itself OFF once or at the same time every day. -
Page 15: The Timer - Selecting The Channel
– S IMER ELECTING THE HANNEL ou can select a specific channel that the television will tune to when the timer turns the set ON. Follow these steps to select the channel. BEGIN Press the MENU button on the remote control to show the onscreen menu. -
Page 16: The Timer - Setting Activate To On Or Off
– S IMER ETTING CTIVATE TO fter you have set the Time, Start Time, Stop Time, and Start Channel, the timer must be set to come on ONCE or DAILY, or turned OFF through the ACTIVATE control. BEGIN Press the MENU button on the PICTURE TIMER remote control to show the... -
Page 17: The Timer - Turning On The Timer Display
– T IMER URNING IMER ISPLAY fter the TVÕs clock has been set, you can use your TV as a clock. The TIMER DISPLAY control allows you to permanently display the time in the upper right corner of the screen. BEGIN Press the MENU button on the remote to show the onscreen... -
Page 18: Understanding Autolock
™ NDERSTANDING he AutoLock™ feature receives and processes data sent by broadcasters or other program providers that contain program con- AutoLock AutoLock tent advisories. When programmed MOVIE RATING TV RATING by the viewer, a TV with AutoLock™ can respond to the content advisories TV-Y and block program content that may TV-Y7... -
Page 19: Autolock™ - Setting Up The Access Code
™ – S ETTING P THE CCESS utoLock allows parents to block out or ÒcensorÓ any channels they think children should not watch. A channel blocked by PICTURE TIMER SOUND AutoLock the AutoLock control cannot be FEATURES FEATURES INSTALL CLOSED CAP viewed until a correct access code TIMER TIME... -
Page 20: Autolock™ - Blocking Channels
™ – B LOCKING HANNELS fter your personal access code has been set (see the previous page), you are ready to select the channels or inputs you want to PICTURE TIMER SOUND AutoLock block out or censor. FEATURES FEATURES INSTALL CLOSED CAP TIMER TIME... -
Page 21: Autolock™ - Blocking By Movie Rating
™ – B LOCKING BY OVIE ATING fter your personal access code has been set (see page 19), you can select specific movie ratings that you want to censor. PICTURE TIMER SOUND AutoLock BEGIN FEATURES FEATURES INSTALL CLOSED CAP TIMER TIME Press the MENU button on FORMAT... -
Page 22: Autolock™ - Blocking By Tv Rating
™ – B TV R LOCKING BY ATING ou also can select specific TV ratings that you want to censor by following these steps. BEGIN PICTURE TIMER SOUND AutoLock Press the MENU button on the FEATURES FEATURES INSTALL CLOSED CAP remote control to show the TIMER TIME... -
Page 23: Autolock™ - Turning Block On Or Off
™ – T URNING LOCK he BLOCKING control is what can be thought of as the Òmas- ter switchÓ for AutoLockª. This control affects the settings you have PICTURE TIMER chosen for blocking programs SOUND AutoLock FEATURES according to movie ratings or TV FEATURES INSTALL CLOSED CAP... -
Page 24: Autolock™ - Blocking Unrated
™ – B LOCKING NRATED ROADCASTS n addition to blocking specific ratings or channels, you may choose to block all programming that is unrated. PICTURE TIMER SOUND AutoLock BEGIN FEATURES FEATURES INSTALL CLOSED CAP Press the MENU button on the TIMER TIME FORMAT... -
Page 25: Autolock™ - Blocking Broadcasts That Have No Rating
™ – B LOCKING ROADCASTS ATING ome programming is not encod- ed with content advisory data by the MPAA (Motion Picture Association of America) or the tele- vision broadcasters (see the expla- PICTURE TIMER nation on page 18). To block such SOUND AutoLock FEATURES... -
Page 26: Autolock™ - Reviewing Your Settings
™ – R EVIEWING ETTINGS o remind you which ratings you have blocked and which Block Options you have selected, a review MOVIE RATING TV RATING screen is available to review your AutoLock settings. To access this screen follow the steps below. NC17 BEGIN Press the STATUS/EXIT but-... -
Page 27: Programming
™ – V IEWING LOCKED ROGRAMMING arious onscreen messages will appear when someone tries to view blocked programming. The message is determined by how the PICTURE TIMER current programming is blocked. SOUND AutoLock You may view the blocked program- FEATURES FEATURES ming and turn OFF the AutoLock™... -
Page 28: Sound
– A OUND DJUSTING THE REBLE ALANCE esides the normal volume level control, your TV also has indi- vidual sound-adjustment controls. The TREBLE (high frequency), BASS (low frequency), and Speaker BALANCE may all be used to adjust the sound playback of TV programs. -
Page 29: Sound - Setting The Volume
– A OUND DJUSTING THE OLUME se the Volume Bar control to see the TVÕs volume level settings on the TV screen. The Volume Bar will be seen each time the VOLUME buttons (on the TV or remote con- trol) are pressed. BEGIN Press the VOLUME (+) or (Ð) button on the remote control to... -
Page 30: Leveler)
– U AVL (A OUND SING THE UDIO OLUME EVELER n most cases, the volume levels coming from broadcast program- ming or commercials are never the same. With the AVL (Audio Volume Leveler) control turned ON, you can have the TV level out sound that is being heard. -
Page 31: Sound - Using Incredible Surround
– U OUND SING NCREDIBLE URROUND he Incredible Surround feature adds greater depth and dimen- sion to both monaural (MONO) and stereo TV sound. With the control set to INCR. SURROUND (Incredible Surround), the TVÕs speakers can add even wider sound separation to normal broad- casts. -
Page 32: Sound - Setting The Tv For Stereo And Sap (Second Audio Program)
– S OUND ETTING THE TEREO AND ou can receive broadcast stereo TV programs. The TV has both an amplifier and twin speakers through which the stereo sound can be heard. PICTURE TREBLE BEGIN BASS SOUND FEATURES BALANCE Press the MENU button on SOUND INSTALL TREBLE... -
Page 33: Sound - Setting The Audio Out Control
– S OUND ETTING THE UDIO ONTROL f you have connected the TVÕs AUDIO OUTPUT jacks to the AUDIO INPUT jacks on a stereo receiver, set AUDIO OUT to either VARIABLE or FIXED to determine whether you adjust the volume at the stereo or at the TV. -
Page 34: Sound - Using The Tv Speaker Control And Audio Output Jacks
– U TV S OUND SING THE PEAKER ONTROL AND UDIO UTPUT ACKS ould you like to hear TV pro- grams through your audio hi- fi system? The TVÕs Audio Output jacks and TV Speaker ON/OFF control work together to offer you this TV sound option. -
Page 35: Sound - Using The Surround Sound
– U OUND SING THE URROUND OUND XTERNAL PEAKER ONNECTIONS y adding optional external speakers to the TVÕs sound sys- tem, you can create the feeling of reflected sound that surrounds you at a movie theater or concert hall. BEGIN BACK OF TV Connect both external speak- ers to the speaker wire terminals... -
Page 36: Sound - Using The Audio/Video Input Jacks
– U OUND SING THE UDIO IDEO NPUT ACKS UDIO IDEO NPUTS NOTE: Repeatedly pressing the SOURCE button on the remote control will toggle the picture source from he TVÕs audio/video input the current channel, the last viewed channel, then AV1 jacks are for direct picture (or CVI) connection, then the AV2 connection, and then and sound connections between... - Page 37 – U ’ OUND SING THE UDIO IDEO NPUT ACKS CONT IDEO NPUT NOTE: Repeatedly pressing the he S(uper)-Video connection SOURCE button on the remote will on the rear of the TV can pro- toggle the picture source from the BACK OF TV current channel, the last viewed vide you with better picture detail...
- Page 38 – U ’ OUND SING THE UDIO IDEO NPUT ACKS CONT OMPONENT IDEO NPUTS NOTE: Repeatedly pressing the SOURCE omponent Video inputs pro- button on the remote will toggle the picture vide for the highest possible source from the current channel, the last viewed BACK OF TV color and picture resolution in the channel, then the CVI (or AV1) connection, the...
-
Page 39: Remote Control - Using Autopicture
– U ™ EMOTE ONTROL SING ICTURE hether you’re watching a movie or a video game, your TV has automatic video control set- tings that will match with your cur- rent program source or content. AutoPicture™ quickly resets your TV’s video controls for a number of different types of programs and viewing conditions that you may have in your home. -
Page 40: Remote Control - Using Autosound
– U ™ EMOTE ONTROL SING OUND utoSound™ allows you to select from three factory-set controls and a personal control that you set according to your own pref- erences through the onscreen Sound menu. The three factory-set controls (Voice, Music, and Theatre) enable you to tailor the TV sound so as to enhance the particular program you are watching. -
Page 41: Remote Control - Using Channel Surf
– U EMOTE ONTROL SING HANNEL list or series of previously viewed channels can be select- ed with the SURF button on your remote control. With this feature, you can easily switch between dif- SURF ferent TV channels that currently ADD? interest you. -
Page 42: Pip - Basic Connections
PIP – B ASIC ONNECTIONS icture-In-Picture (PIP) is the showing of two pictures on the MAIN SCREEN PICTURE PIP PICTURE TV screen at the same time (one main screen and and one, small, pic- ture, or PIP). Please note that a VCR or other accessory device is required to sup- ply the PIP signal. -
Page 43: Pip - Selecting The Signal Source
PIP – S ELECTING THE IGNAL OURCE he picture for the PIP window can come through either the ANT/CABLE or any of the exter- nal audio/video connections on MAIN SCREEN PICTURE PIP PICTURE the back of the TV. PIP SOURCE simply tells the TV which one of these sources it is to show in the AV 1... -
Page 44: Pip - Remote Control Buttons
PIP – R EMOTE ONTROL UTTONS y using the PIP buttons on the remote control, you can change the size of the PIP win- dow and move and swap the PIP picture with the main screen. The PIP picture also can be frozen within the PIP window. -
Page 45: Pip - Adjusting The Tint
PIP – A DJUSTING THE OLOR AND he Picture-in-Picture (PIP) COLOR and TINT controls are used to make fine-tune adjustments to the picture settings for PIP (when shown on the TV screen). BEGIN Press the MENU button on the remote control to show the onscreen menu. -
Page 46: Pip - More Connections
PIP – M ONNECTIONS Cable Box and VCR Connections his page shows how to hook PIP up with a cable box and a VCR. BEGIN REAR OF TV First, use an optional signal splitter and connect the original cable TV signal to both the CABLE IN on the cable converter and the M-Link ANTENNA plug on the rear of the... -
Page 47: Dvd (Or Similar Device) Hookup
PIP – M ’ ONNECTIONS CONT VCR and DVD Connections he steps for hooking up a VCR (video cassette recorder), DVD (digital video disc player), or simi- lar device to work with PIP are shown here. BACK OF TV BEGIN First, connect the original cable TV signal or antenna signal M-Link... -
Page 48: Troubleshooting
ROUBLESHOOTING lease make these simple checks CAUTION: A video source (such as a video game, compact disc interactive [CDI], or before calling for service. TV information channel) that shows a constant nonmoving pattern on the TV screen can Because charges for TV installa- cause picture tube damage. -
Page 49: Glossary Of Television Terms
LOSSARY OF ELEVISION ERMS Alternate Channel ¥ The feature that allows you to toggle Multichannel Television Sound (MTS) ¥ The broadcast stan- between the last two channels viewed by pressing the A/CH but- dard that allows for stereo sound to be transmitted with the TV ton on the remote control. -
Page 50: Index
NDEX Accessories/Optional Parts ....42, 46, *Q/U-1 ImageMax™ ........7 Alternate Channel Button (A/CH) . -
Page 51: Limited Warranty
RENEWED 90 DAY LIMITED WARRANTY...
Need help?
Do you have a question about the MLink 27PT41B199 and is the answer not in the manual?
Questions and answers