
Subscribe to Our Youtube Channel
Related Manuals for Philips FWT9200MU


Summary of Contents for Philips FWT9200MU
- Page 1 Always there to help you Register your product and get support at www.philips.com/welcome FWT9200 Question? Contact Philips User manual...
-
Page 3: Table Of Contents
Contents 1 Important 9 Adjust volume level and sound effect Safety Notice Adjust volume level Mute sound Boost loudness 2 Your Mini Hi-Fi System Select a preset sound effect Introduction Enhance bass What's in the box Virtual surround Overview of the main unit Overview of the remote control 10 USB record Record to a USB device... -
Page 4: Important
1 Important h Do not install near any heat sources such as radiators, heat registers, stoves, or other apparatus (including amplifiers) that produce heat. i Protect the power cord from being walked on or pinched, particularly at Safety plugs, convenience receptacles, and the point where they exit from the apparatus. -
Page 5: Notice
Notice Any changes or modifications made to this device that are not expressly approved by Philips Consumer Lifestyle may void the user’s authority to operate the equipment. The making of unauthorized copies of copy- protected material, including computer... -
Page 6: Your Mini Hi-Fi System
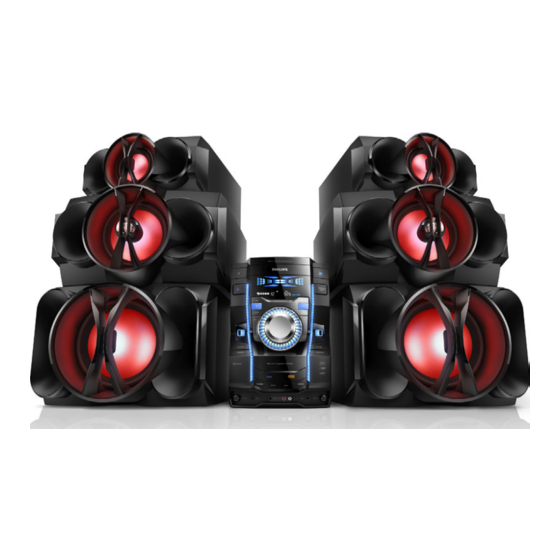
• Main unit x 1 Congratulations on your purchase, and • Front speaker x 2 welcome to Philips! To fully benefit from the • Rear speaker x 2 support that Philips offers, register your product • Subwoofer x 2 at www.Philips.com/welcome. -
Page 7: Overview Of The Main Unit
Overview of the main unit M P 3 - C D P L AY B A C K DYNAMIC LIGHT M i n i H i - F i S y s t e m F w t 9 2 0 0 T E C H N O S A M B A R O C K... -
Page 8: Overview Of The Remote Control
g Volume dial Overview of the remote • Rotate clockwise to increase volume; control rotate counterclockwise to decrease volume. USB 1 PLAY/USB 2 PLAY/REC • Jack for a USB mass storage device. • Record to USB. i ALBUM/PRESET+/- • Skip to the previous/next album. •... - Page 9 • In Disc/USB/Bluetooth mode, skip to • Adjust radio frequency. the previous/next track. • When playing from disc/USB, search • When setting clock, select hour format within a track. and adjust hour and minute. s USB DELETE • When setting alarm, adjust alarm clock •...
-
Page 10: Connect
3 Connect Connect the AM loop antenna to the AM jack on the back of the main unit. Adjust the position of the antenna for optimal reception. Connect FM antenna Connect the supplied FM antenna to the FM jack on the back of the main unit. Connect AM antenna Assemble the AM loop antenna. -
Page 11: Connect Speakers
Connect the rear speakers Connect speakers Find "REAR SPEAKERS" sockets in gray on the main unit. Note Insert the connectors of the rear speaker wires to the sockets. • For optimal sound, use the supplied speakers only. • Connect only speakers with impedance that is the Connect the subwoofers same or higher than the supplied speakers. -
Page 12: Connect Power
Connect power If your power supply voltage is 110V-127V, adjust the voltage selector (locate on the bottom panel of unit) to 110V-127V. 220-240V 110-127V 220-240V 110-127V Connect the AC power plug to the power outlet. ANTENNA LED 1 LED 2 LED 3 LED 4 LED 5... -
Page 13: Get Started
Always follow the instructions in this chapter in Auto install radio stations sequence. If you contact Philips, you will be asked for the model and serial number of this apparatus. The When you connect power and no radio model number and serial number are on the stations are stored, the unit automatically begins back of the apparatus. -
Page 14: Turn On
Press CLOCK to confirm. • To view the clock during play, press CLOCK. Turn on Press . » The unit switches to the last selected source. Switch to standby Press to switch the unit to standby mode. » The backlight on the display panel turns off. -
Page 15: Play From A Disc Or Usb
5 Play from a disc Note or USB • Ensure that the USB device contains playable audio contents for supported formats. Insert the USB plug of the device into the USB 1 PLAY or USB 2 PLAY/REC socket. Press USB to select the USB source. Play disc Press ALB/PRESET+/- to select a folder. - Page 16 To return to normal play, press MODE repeatedly until play mode is no longer displayed. • Shuffle play cannot be selected when you play programmed tracks. Program tracks You can program a maximum of 40 tracks. In Disc/USB mode, press to pause playing.
-
Page 17: Play Audio Through Bluetooth
Bluetooth function of your device. Tap [Search for devices] (Search for devices). » A Bluetooth pairing request appears. » [PHILIPS FWT9200] (Philips FWT9200) is displayed. » If connected successfully, a different Bluetooth icon can be found on the top of the screen. - Page 18 FWT9200 » After Bluetooth connection, you can enjoy audio on your phone through the unit. • Different devices may have different way to enable Bluetooth function.
-
Page 19: Listen To An External Device
7 Listen to an external device You can listen to an external audio device through the speakers of this unit. Listen to an MP3 player Press AUDIO IN to select the MP3 link source. Connect the supplied 3.5mm audio link cable to: the AUDIO IN jack (3.5mm) on the •... -
Page 20: Listen To Radio
8 Listen to radio Program radio stations automatically In the tuner mode, press and hold PROG for more than 2 seconds to activate automatic Tune to a radio station program mode. » [AUTO] (auto) is displayed. Press TUNER repeatedly to select FM or »... -
Page 21: Adjust Volume Level And Sound Effect
9 Adjust volume • [JAZZ] (jazz) • [POP] (pop) level and sound effect Enhance bass The best DBB (Dynamic Bass Enhancement) setting is generated automatically for each Note DSC selection. You can manually select the DBB setting that best suits your listening •... -
Page 22: Usb Record
USB device. Each time you record to a record USB device, the recorded files are stored in a subfolder in the 'PHILIPS' folder. Files and Schedule radio recordings in advance and you subfolders are named numerically in the order can listen to your favorite programs at your in which they are created. - Page 23 Press TIMER to confirm. is displayed. » » At the scheduled times, the recording begins and ends automatically. » When the recording ends, the unit switches to standby mode. To deactivate or reactivate a record timer In the standby mode, press TIMER repeatedly.
-
Page 24: Other Features
11 Other features • Bluetooth and MP3 LINK/PC IN mode cannot be selected as the source of the alarm timer. • If disc or USB source is selected but no audio file can be played, radio is activated automatically. Set the alarm timer This music system can be used as an alarm Set the sleep timer clock. -
Page 25: Copy Files From Usb 1 To Usb
Copy files from USB 1 to USB 2 You can copy MP3 files from USB 1 device to USB 2 device. Connect both USB device to USB 1 PLAY and USB 2 PLAY/REC sockets. Press USB to select the USB 1 PLAY source. -
Page 26: Product Information
12 Product Speakers information Speaker Impedance 2 x 8 ohm Woofer 2 x 8" Tweeter 2 x 2" Output power 2 x 400 W Note Dimensions (W x H x D) 258 x 452 x 388 mm • Product information is subject to change without prior notice. -
Page 27: Usb Playability Information
Unsupported file formats are skipped. accumulate at the disc lens. To ensure good For example, Word documents (.doc) play quality, clean the disc lens with Philips or MP3 files with extension .dlf are CD lens cleaner or any commercially ignored and not played. -
Page 28: Troubleshooting
If the problem remains unsolved, go to the Philips web site (www.philips.com/support). Cannot display some files in USB device When you contact Philips, ensure that your • The number of folders or files in the USB unit is nearby and the model number and serial device has exceeded a certain limit. - Page 29 Specifications are subject to change without notice © 2013 Koninklijke Philips Electronics N.V. All rights reserved. FWT9200_55_UM_V1.0...
Need help?
Do you have a question about the FWT9200MU and is the answer not in the manual?
Questions and answers