Table of Contents
Advertisement
Quick Links
FCC Certifications
This Equipment has been tested and found to comply with the limits for a Class B
digital device, pursuant to part 15 of the FCC Rules. These limits are designed to
provide reasonable protection against harmful interference when the equipment is
operated in a commercial environment. This equipment generates, uses, and can
radiate radio frequency energy and, if not installed and used in accordance with
the instruction manual, may cause harmful interference to radio communications.
Operation of this equipment in a residential area is likely to cause harmful
interference in which case the user will be required to correct the interference at
his own expense.
This device complies with Part 15 of the FCC Rules. Operation is subject to the
following two conditions: (1) this device may not cause harmful interference, and
(2) this device must accept any interference received; including interference that
may cause undesired operation.
CE Mark Warning
This equipment complies with the requirements relating to electromagnetic
compatibility, EN 55022 class B for ITE, the essential protection requirement of
Council Directive 89/336/EEC on the approximation of the laws of the Member
States relating to electromagnetic compatibility.
Company has an on-going policy of upgrading its products and it may be possible
that information in this document is not up-to-date. Please check with your local
distributors for the latest information. No part of this document can be copied or
reproduced in any form without written consent from the company.
Trademarks:
All trade names and trademarks are the properties of their respective companies.
Copyright © 2004, All Rights Reserved.
Document Version: 2.0
Advertisement
Table of Contents

Related Manuals for Encore ENNHD-NT

Summary of Contents for Encore ENNHD-NT
-
Page 1: Ce Mark Warning
FCC Certifications This Equipment has been tested and found to comply with the limits for a Class B digital device, pursuant to part 15 of the FCC Rules. These limits are designed to provide reasonable protection against harmful interference when the equipment is operated in a commercial environment. -
Page 2: Table Of Contents
TABLE OF CONTENT INTRODUCTION ... 2 ...2 EATURES UNPACKING INFORMATION ... 3 HARDWARE GUIDE ... 4 ...4 RONT ANEL ...4 OWER UTTON ...4 EFINITION ...4 ANEL IP PROTOCOL SETUP ... 5 EXPRESS SETUP WIZARD... 14 MANAGEMENT GUIDE ... 21 HD...21 ETUP THE ETWORK ...22... -
Page 3: Introduction
With the features of a compact, economical and powerful NAS (Network Attached Storage), the device easily fit your small business, SOHO (Small Office or Home Office) or personal requirement. It functions as a file / FTP server and provides an easy way for LAN users to backup data or share files through intranet/internet. -
Page 4: Unpacking Information
Unpacking Information Thank you for purchasing this product. Before you move on, please check the following contents of the package. One Network HD (Hard Disk not Included) One Power adapter (12V/3A) One QIG One Utility/Manual CD-ROM Rubber foot x 4 Screws for HD Fastening x 4... -
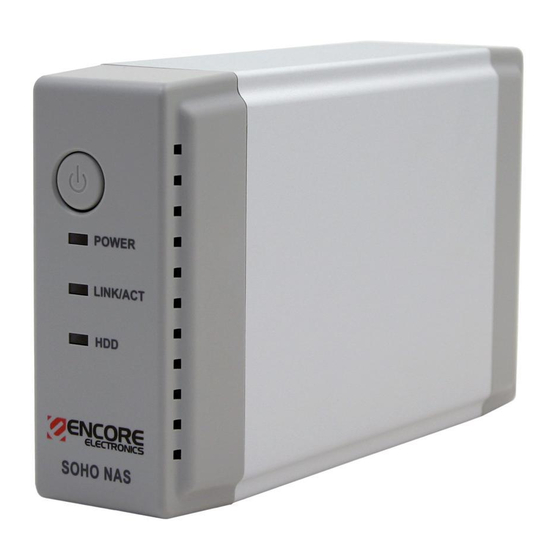
Page 5: Hardware Guide
Hardware Guide Front Panel Power Button To activate the Network HD, Press this Power button. To power off, press the button for two seconds until Power LED start to blink. LEDs Definition Power Link/ACT Rear Panel Status ON /OFF Boot/Shutdown: Ethernet Connected Ethernet Not Connected Ethernet Data transferring... -
Page 6: Ip Protocol Setup
IP Protocol Setup Configuring the network protocols For users to launch the device easily, we provide a convenient Express Setup Wizard, which detects network HD automatically in your LAN. To function the Wizard correctly, please make sure that your PC DOES NOT obtain IP address automatically or the Wizard will not be able to initialize the setup procedure according to your network settings. - Page 7 How to configure the TCP/IP network protocol Windows 98/Me: 1. Click on Start-> Settings-> Control Panel-> Network. 2. Click “TCP/IP -> (Your Ethernet Adaptor)” then click Properties.
- Page 8 3. Click IP Address and click on “Specify an IP Address”. 4. Type in the IP address. State the subnet mask to be 255.255.255.0. 5. Click OK and OK. Now, the system may ask for your Windows disc, follow the steps then restart your computer.
- Page 9 How to configure the TCP/IP network protocol Windows 2000: Click on Start-> Settings-> Network and dial-up connections. Choose local area Connection and click Properties.
- Page 10 Click on Internet protocol (TCP/IP) then click properties. Select “use the following IP address”. State the subnet mask to be 255.255.255.0. Click OK and OK then restart your computer.
- Page 11 How to configure the TCP/IP network protocol Windows XP: 1. If you are in Classic Start menu view, click Start->Settings->Control Panel->Network Connections. If you are in Start menu view, click Start->Control Panel->Network Connections. 2. Double click “Local Area Connection” 3. Choose Internet Protocol (TCP/IP) then click Properties and then click ‘Use the following IP Address’.
- Page 12 4. Key in the IP Address that you chose earlier. The subnet mask is entered automatically on Windows XP. Click OK. Now, the IP setting of your PC is completed. Please refer to the following guide to finish the Hard Disk installation and Express setup wizard.
- Page 13 Hard Disk Installation Install a hard disk drive in the Network HD. Loosen the two screws on the rear panel with a screwdriver. Screws Grab the front panel and pull the foundation out of the case. Please make sure that the HD jumper should be located for Master operation mode. Note that the jumper locations differ from each HD;...
-
Page 14: Power Connector
Push the power connector into the power socket of HD that shown below. The power cable is designed to go in one way, please check the shape for the correct installation. Secure the Hard Disk with the provided screws Push the Hard disk and HD holder back into the case and secure it with the two screws Power Connector... -
Page 15: Express Setup Wizard
Express Setup Wizard The Express Setup Wizard provides an installation guide from cable attaching to the initialization of management. Please follow up the steps below to proceed. Note: If you’ve run the wizard before and create shortcuts to access/ manage the device. Please delete them to run the Express Setup Wizard successfully. - Page 16 Step2: Power and network cable connection Connect the power cable to the AC socket located on the rear panel. Connect the power cable to the AC outlet Press the power button to activate the Network HD and confirm that the device is well powered by examining the LEDs on the front panel.
- Page 17 Step3: Scan the Network HD in your network Click Next to proceed the Network HD scanning. Click next to proceed Network HD scanning HD scanning, please wait…...
- Page 18 Select the Device you are going to setup then Click “Next” The Setup Wizard will take different actions according to the status of the Network HD: Reachable Status The PC that runs the Setup Wizard currently cannot access this network HD with the present network settings.
- Page 19 Setting…. Please note that how the two shortcuts function. For further introduction, Please refer to next page Click “OK” to setup your Network HD by Web-based UI or Click Cancel to Continue.
- Page 20 After the auto installation, there should be two shortcuts created on your desktop. “Setup My Network HD” is created for users to access the embedded management web pages “ Access My Network HD” is the Link to access the shared folder in the Network HD. Please follow the statement below as the Network HD accessing guide.
- Page 21 To Access this HD, 1. Click the “Access my Network HD” icon to access. The device provides three default accounts for users to read/writes the folders in different authority levels: All =Read/Write (The account is allowed to Read/Write all the folders in Network Power=Read/Write (The account is allowed to Read/Write the “share”...
-
Page 22: Management Guide
Management Guide Setup the Network HD To configure the Network HD through your computer with a web browser installed. Please follow up the steps below. Double click the “Setup my Network HD” icon on your desktop screen Type 192.168.1.1 into the URL web address location and press Enter. The Username and Password Required window appears. -
Page 23: Home Page
Home Page The Network HD is managed via a web-based graphical user interface (GUI) that can be accessed with a standard HTML (HTTP v1.0) compliant browser. The Home page is shown as below. -
Page 24: Home
Home Status Host name: the Identification of the Network HD shows on the “My Neighborhood” IP-address: the IP address of the Network HD Version: the Firmware Version Configuration Click the hyper link of each management items to quick link to each management page. -
Page 25: Status Detail
Status Detail To see more info about the Network HD, such as HD used (%), Up-time, samba users, and FTP users, please click the “Click here for more information…” HD used (%): the usage percentage of HD (Total amount of HD) Up-time: the estimate time that you power on the Network HD Samba Users: the number of members who is currently using the Network HD FTP Users: the number of members who is currently using the Network HD by FTP... -
Page 26: Networking
Networking On the page, you can setup the Networking configurations of Network HD, Host Name, IP Address and SuperUser/Password. After you complete the setting, the Network HD will be shown on the your “My Neighborhood”. Host Name Item Configuration Host Name Identification of Network HD shown on your “My Neighborhood”... -
Page 27: Superuser/ Password
SuperUser/ Password You can setup the administration User Account/Password in this page. The user name/ password is used to access the Web-based UI to Setup the Network HD. Item Configuration SuperUser name Username of the Network HD administrator to access the Web-based UI Old Password Enter your old password here... -
Page 28: Administration
Administration In this page, you can manage the Network HD with the tools to Restart the system Format the Hard disk Restore the default setting, Update the latest Firmware Adjust the system time Support the correct code pages in SAMBA for character set Restart System To Restart the Network HD, Click “Yes”... -
Page 29: Factory Default
To format the Hard disk, click “Yes” to activate. Please wait as the format proceeding. Do not power off the system or close the browser. After the completion of the format process, the system restarts automatically. Factory Default To restore Network HD to default configuration, click “Yes” to enact. Don’t power off the device during the process. -
Page 30: Firmware Update
Firmware update To upgrade the Firmware, Click Browse… Select the file for Firmware updating. Click Apply Caution: Don’t power off the device or the device will be damaged. System Time 1. If your system is not connected with Internet, Click “Time Sync” to synchronize the current time with PC. -
Page 31: Share
Share On Share page, you can manage the Users and Folders on the Network HD. User configuration On this page, you can add/ remove users or make the User configuration. For the user number restriction applies to five concurrently connected users, you can add users as much as your demand. - Page 32 Change the User configuration 1. Click the User Name link, for example, all 2. Enter the New Password; confirm Password, and Description to change the setting Delete User For removing accounts of certain users to ban the right to access the Network HD, 1.
-
Page 33: Folder Configuration
Folder Configuration On this page, you can add folders, delete folders and setup the Authentication of users. Add Folder To add a new Folder for file sharing: 1. Click Add to add a new Folder 2. Enter the Folder Name and Description 3. - Page 34 Change the User Authentication of folder In this management page, you can configure the authority levels for each user, ex reading or rewriting files and folders in Network HD. Three privilege modes are provided for each user: Non-access The User is not allowed to access the folder Read-only The user is allowed to read only in this folder Read&write...
-
Page 35: Ftp
FTP supported functionality is for users to access and up/down load files with FTP software. FTP Configuration Click FTP Configuration, to set up the configuration such as user limitation, Service port number, Length for timeout, and anonymous user restriction Items Meaning Maximum Unit Maximum concurrently... -
Page 36: Ftp Password
FTP Password You can configure the user name/ password of FTP account here. The Default User name is “ftpuser”, and the password is “abc123” Note. Please follow the password setting rules to proceed: 1. The word “FTP” should not be included 2. -
Page 37: Network Hd Application
Network HD Application There are several applications for Network HD. For one user or one single PC, you can backup your important files from your PC. For Multiple users, Network HD provides a convenient way for file sharing and backup by using the “My Neighborhood”... - Page 38 4. Select “Back up My Computer” to backup your whole system or “Back up Selected files, folders and Driver”. If you want to backup C:\, select “Back up Selected files, folders and Driver” 5. If you want to backup one Drive, ex. C:\, select the drive by click the check box in front of the drive letter.
-
Page 39: Trouble Shooting Guide
Trouble Shooting Guide 1. How to shut down the Network HD properly? Ans. To shut down the System properly, press the Power button on the front panel for two seconds until Power LED blinks then go off. 2. The Express Setup Wizard can’t configure My Network setting. Ans. -
Page 40: Specification
Specification Standard IEEE 802.3, IEEE 802.3u Support Protocol TCP/IP, HTTP, SMB, FTP Support concurrently connected Users Samba: Five Users / FTP: Five Users Interface One 10/100Mbps RJ-45 Ethernet port One Default Button Connection speed 10/100Mbps Support Hard Diskette One removable 3.5” external HD (ATA) Diagnostic LEDs Power: On/Boot or Shutdown (Green/Blinking) Link/ACT: Ethernet Act/Link (Green)
Need help?
Do you have a question about the ENNHD-NT and is the answer not in the manual?
Questions and answers