Table of Contents
Advertisement
Quick Links
Dear Customers:
Thanks for purchasing our HDD TV Recorder product. Before starting to
use this product, please read this manual carefully so that you will know some
tips to enjoy the fantastic functions this product brings to you and some
security notices. Please keep this manual for future reference.
Notices ..................................................................................................................2
Accessories ..........................................................................................................3
Appearance ..........................................................................................................4
Features................................................................................................................5
BPR-101 / Remote Control Keys and Operations .........................................6
BPR-101 Summary .............................................................................................9
Hard disk format ................................................................................................12
Import media files and other files....................................................................14
BPR-101 Setting................................................................................................16
BPR-101 User Interface ...................................................................................18
Specifications .....................................................................................................24
Tips and Trouble shootings..............................................................................25
Introduction
1
Advertisement
Table of Contents

Related Manuals for Emprex BPR-101

Summary of Contents for Emprex BPR-101
-
Page 1: Table Of Contents
Please keep this manual for future reference. Notices ...2 Accessories ...3 Appearance ...4 Features...5 BPR-101 / Remote Control Keys and Operations ...6 BPR-101 Summary ...9 Hard disk format ...12 Import media files and other files...14 BPR-101 Setting...16 BPR-101 User Interface ...18 Specifications ...24... -
Page 2: Notices
■ BPR-101 keypad’s POWER button(not remote control’s POWER button) to turn off BPR-101’s power, in which the power LED will switch off. Do not unplug power when playing because such abnormal operation will harm the device. The power LED will usually flash in the operation indicating that the device is still ■... -
Page 3: Accessories
3. USB-OTG Adapter 4. AV Cable (two pieces) 5. AC Adapter 6. User manual CD 7. Quick Installation Guide Notice: If your TV does not have AV/ RCA jack, you have to prepare a SCART cable to connect BPR-101 to your TV. -
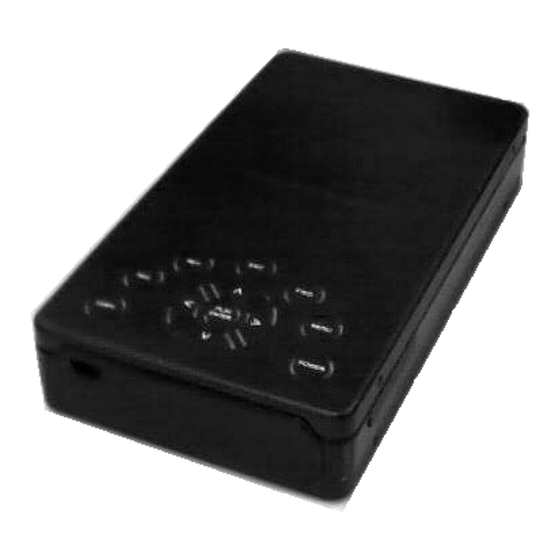
Page 4: Appearance
Appearance Main Body Front Panel View 1. USB JACK 2. OTG LED 3. ERR LED 4. HDD/REC LED 5. POWER LED Back Panel View 1. AV-IN 2. Power Jack 3.AV- OUT... -
Page 5: Features
Just one touch to convert DV format. ■ Support superior video recording ■ Provide a “high”, “medium”, and “low” Compression ratio. The users can modify various recording parameters to obtain superior video recording results. Support special memory function that you can play the movie from the point you ■... -
Page 6: Bpr-101 / Remote Control Keys And Operations
2. L/R: Change the track to left or right. 3. P/N: Change the display signal mode to PAL or NTSC. 4. POWER: For BPR-101 keypad’s power button: Turn on/off main power of BPR-101. For remote control’s power button: While in power on state, enter or exit standby state. - Page 7 Do not drop the remote control to ground or damp it. ■ Do not expose the remote control directly to intense sunlight. ■ Disconnect the device from power if you don’t need to use BPR-101 for a long ■ time.
-
Page 8: Getting Started
POWER button (not the remote control's POWER button), the power LED will turn green and BPR-101 will boot up. When BPR-101 is booting up, MAIN MENU will be shown on the screen. If there ■ are more than one partition on your HDD, PARTITION LIST will be shown on the screen instead of MAIN MENU. -
Page 9: Bpr-101 Summary
1. The Image Management When you choose “Image” in main menu of BPR-101, you are entering the image management section that provides following features. Browse the files in the directory: ■ You could browse all JPEG files in your HDD directory. - Page 10 In this way, the subtitle file will be loaded automatically when the video file is played. 3. The Music Management When you choose “music” in main menu of BPR-101, you are entering the music management section that provides you to the following features: Show music information: ■...
- Page 11 Save: ■ The recorded video clip will be saved as “RECxxx.AVI” under the “X”:\movie\REC\RECxxxx.AVI in the first partition of HDD in BPR-101. Please note that “xxx” is a serial number that increases automatically as the number of recording files increases.
-
Page 12: Hard Disk Format
Notice:Please skip the format procedures if HDD is already formatted. On a PC (Windows 2000/XP) Use the Disk Management Utility Connect BPR-101 to the computer as page 15 shown. ■ On windows desktop, right click on “My Computer” and choose “Manage”. - Page 13 Select “Disk Utility” in the utilities folder. ■ Choose your external drive and format it as MS-DOS File System. ■ Notice: Format your BPR-101 under MS-DOS File System. Your BPR-101 supports a maximum of 4 separate partitions...
-
Page 14: Import Media Files And Other Files
[BPR-101 acts as an USB host] You can connect USB device, such as Digital Camera, USB Flash memory, MP3, Card Reader, to BPR-101 and copy the media files from the connected USB device to your HDD directly. Connect BPR-101 to other USB devices, such as the digital camera. - Page 15 Power your BPR-101. There are three methods to power your BPR-101 as illustrated below. 1. Self-power: Connect BPR-101 to the power supply socket on the wall via AC adaptor. This method is suitable for all HDD regardless HDD capacity. But please make sure that the USB cable is not connected to the computer when the AC adapter is connected to the wall and to BPR-101.
-
Page 16: Bpr-101 Setting
Application1- Playback: Connect BPR-101 to TV as shown. Notice: Please match AV cable’s three output terminals (with three different colors) to the corresponding input jack on you TV. Application2- Recording DV/DVD: Connect BPR-101 to TV and other video output equipment, such as DV/DVD as shown. - Page 17 Application3- Recording TV programs directly: Connect the BPR-101 to TV as shown. Notice: Connect the AV-OUT of the TV(source program channel) to the AV-IN of BPR-101, and connect the AV-OUT of BPR-101 to the AV-IN of TV. Please make sure to turn your TV to...
-
Page 18: Bpr-101 User Interface
BPR-101 User Interface 1. Main menu After turning on the BPR-101, you will see the main menu. Operating Instructions: Selection ■ 1. You can select items in the main menu by pressing “◄” and “►” buttons on remote control. 2. Press “ENTER” button to confirm the selections. -
Page 19: Operating Instructions
3. Image In Image section, you may select any one JPG file and press ENTER. You will then enter the browse mode. 1x 1 Browse Mode: ■ Operating Instructions: 1. Press “◄” and “►” button to view the .JPG file one by one. 2. - Page 20 3x3 Browse Mode: ■ You may press “THUMB” to enter 3x3 Browse Mode: Operating Instructions: 1. You may select the file you want by pressing “◄” and “►” button on remote control. 2. You may press THUMB to switch to 1x1 Browse Mode to view selected picture. 3.
- Page 21 Operating illustration: 1. Press “VOL+” and “VOL-“ buttons to adjust the volume. 2. Press “EXIT” to back to the browser menu. 3. Press “◄” and “►” button to play the previous or next video clips. 4. Press “◄◄” or “►►” to play fast backward or forward. 5.
- Page 22 2. Press ”CLEAR” to hide the file information and leave the lyric only. 6. Record If you plan to record the video programs in DV or DVD player into BPR-101, please connect BPR-101 to DV/DVD player as the illustration shown in page 16. Preview Video Clips: ■...
- Page 23 TV. Please follow the following operation instructions. Operating Instructions: 1. Connect your BPR-101 to your TV as page 17 illustrates and turn on the power of BPR-101 and TV. 2. Please make sure to turn your TV to the program channel you want to record.
-
Page 24: Specifications
Power adapter Power consumption Dimensions TV standard Frequency response Signal / Noise Ratio Audio dynamic Range Audio cross Talk Audio output Video output USB data transfer rate Video file format supported Video file extension supported Audio file format supported Image file format supported HDD file system supported Video recording framerate Video recording resolution... -
Page 25: Tips And Trouble Shootings
Tips and Trouble shootings Problem: Nothing is displayed on TV. Please check if BPR-101 is in standby status. If so, please press POWER button ■ to wake it up. Make sure that you select proper audio/ video input source for TV and please ■... - Page 26 Please note that you can only connect your BPR-101 to double USB plugs to get bus-power when your HDD capacity is below 40G. If your operating system is Windows 98, please check if you install proper USB ■...
Need help?
Do you have a question about the BPR-101 and is the answer not in the manual?
Questions and answers