Advertisement
Quick Links
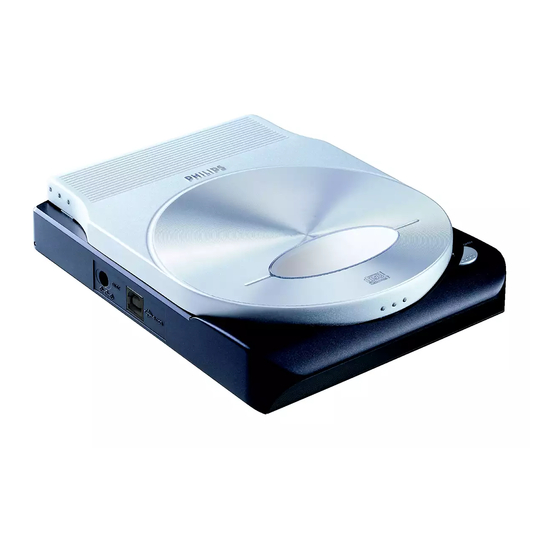
How to connect this drive to a computer?
How to use the software with this drive?
•
Wie verwendet man dieses Laufwerks an den PC?
Verwendung der Software mit diesem Laufwerk
•
Raccordement de cet appareil à mon ordinateur
Comment utiliser les logiciels de cet appareil?
•
Come collegare questa unità al computer?
Come usare il software con questa unità?
•
Hoe sluit ik dit station op mijn computer aan?
Hoe gebruik ik de programma's?
•
¿Cómo conectar esta unidad al ordenador?
¿Cómo utilizar el software con esta unidad?
Jak zainstalować ten napęd w komputerze PC?
Jak używać tego oprogramowania z tym napędem?
Version 1.1
9305 125 2300.2
For ED52CDRW Drives
using
Nero 5.5
Advertisement

Related Manuals for Philips ED52CDRW


Summary of Contents for Philips ED52CDRW
- Page 1 Hoe gebruik ik de programma's? • ¿Cómo conectar esta unidad al ordenador? ¿Cómo utilizar el software con esta unidad? Jak zainstalować ten napęd w komputerze PC? Jak używać tego oprogramowania z tym napędem? For ED52CDRW Drives using Nero 5.5 Version 1.1 9305 125 2300.2...
- Page 2 Contents - Inhalt - Table des matières Installation How to connect the ED52 to my computer? How to connect specials Copy How to copy a disc? Data How to make a Data disc? Music How to make an Audio disc? Warranty How to find warranty information? Installation...
- Page 3 Indice - Inhoud - Índice - Spis treści Installazione Come collegare il ED52 al computer? Come svolgere installazioni particolari Copia Come copiare un dischi? Dati Come creare un dischi di dati? Musica Come creare un dischi Audio? Garanzia Come si accede alle informazioni sulla garanzia memorizzate? Installeren Hoe sluit ik de ED52 op mijn computer aan?
- Page 5 How to connect the ED52 to my computer? Wie verwendet man diese Laufwerk an den PC? Raccordement du ED52 à mon ordinateur Come collegare il ED52 al computer? Hoe sluit ik de ED52 op mijn computer aan? ¿Cómo conectar ED52 al ordenador? W jaki sposób podłączyć...
- Page 6 You will find a ED52 device and following accessories in the retail box: A: ED52 device. B: Power supply. C: HiSpeed USB Cable (black). Der Verpackungskarton des ED52 enthält die folgenden Teile: A: ED52. B: Netzteil. C: HiSpeed USB-Kabel (Schwarz). L’emballage contient un lecteur ED52 et les accessoires suivants: A: Lecteur ED52.
- Page 7 At the left side, you will find the plugs you need for connecting your ED52 to your computer. A: Power. B: HiSpeed USB. Auf der linken Seite finden Sie die Anschlüsse, die Sie zum Anschließen des ED52 an Ihren Computer benötigen. A: Stromversorgung.
- Page 8 Plug the USB cable in the ED52. Do not connect the cable to the computer at this moment. A: USB Cable connected to the ED52. Verbinden Sie das USB-Kabel mit dem ED52.Verbinden Sie das Kabel zu diesem Zeitpunkt nicht mit dem Computer. A: ED52 mit angeschlossenem USB-Kabel.
- Page 9 Search for the HiSpeed USB connector on your PC. A: Logo for the preferred HiSpeed USB or connector. B: Logo for the alternative LowSpeed USB connector. When connected to LowSpeed USB (also known as USB 1.x), speeds are limited (4x writing on CD and CDRW and 6x reading on CD).
- Page 10 Connect the power cable and plug it in a wall outlet. Schließen Sie das Stromversor- gungskabel an und verbinden Sie es mit der Wandsteckdose. Connectez le câble d’alimentation et branchez-le à une prise secteur. Collegate il cavo di alimentazione ed inseritelo in una presa elettrica a muro.
- Page 11 If you are using Windows Millennium Edition,Windows 2000 or Windows XP, connect the USB cable to the computer. Skip this step if you are using Windows 98 Second Edition. If you do not know which operating system you are using, please go to the chapter "How to install specials", item 1.
- Page 12 Windows will recognize the ED52 and install the drivers automatically. Skip this step if you are using Windows 98 Second Edition. Windows wird das ED52- Laufwerk erkennen und die Treiber automatisch installieren. Überspringen Sie diesen Schritt, wenn Sie mit Windows 98 Second Edition arbeiten.
- Page 13 Press the open button. When you are using Windows 98 Second Edition, insert the Nero disc in the CDROM device of your computer. If you have no CD-ROM device, please refer to the Chapter "How to install specials", item 2 and/or 3). Drücken Sie die Taste zum Öffnen.
- Page 14 Click on “Nero” to install the software: When you are using Windows 98 SE, please plug in the ED52 when this screen appears. Klicken Sie auf "Nero", um die Software zu installieren: Wenn Sie das Betriebssystem Windows 98 SE benutzen, stecken Sie den ED52 ein, wenn diese Anzeige erscheint.
- Page 15 Windows 98SE heeft stuurprogramma's nodig. Als de wizard "Nieuwe hardware toevoegen" naar de plaats van stuurprogramma's vraagt, markeer dan "Een locatie specificeren" en ga dan via de Bladeren-knop naar de map "Philips Drivers" op de Nero-CD die u hebt geplaatst. Este paso sólo es válido si utiliza Windows 98 SE: Windows 98 SE necesita controladores.
- Page 16 This device has both a silent and a performance mode.When in silent mode, the ED52 will read and write at a lower speed. To switch between the modes, press for 2 seconds on the open/close button when a disc is inserted and the cover is closed.
- Page 17 After installing the software, you should reboot your computer. Congratulations. Your Philips device is now ready for use. How to use it and what software applications you need to perform your tasks, is described in the next chapters of this How To Manual.
- Page 19 How to connect specials Installation in besonderen Fällen Connexion d’éléments spéciaux Come svolgere installazioni particolari? Aansluiten in speciale gevallen ¿Cómo conectar opciones especiales? Informacje specjalne na temat podłączania In this chapter, "Windows 98 Second Edition" is abbreviated to "Windows 98SE" In diesem Kapitel wird "Windows 98 Second Edition"...
-
Page 20: Section 1: Quel Est Le Système D'exploitation De Mon Ordinateur
Item 1: How to find out which operating system is running on my computer? 1. Start the computer if not done yet. 2. Click "Start". 3. Click "Settings" (not on all operating systems). 4. Click "Control Panel". 5. Click "System". 6. - Page 21 Argomento 1: How to find out which operating system is running on my computer? 1. Avviate il computer (se non lo avete ancora acceso). 2. Fate clic su "Start". 3. Fate clic su "Impostazioni" (non in tutti i sistemi operativi). 4.
-
Page 22: Section 2: Raccordement D'un Ed52 À Un Ordinateur Windows 98Se Ne Disposant Pas De Lecteur De Cd-Rom
5. Cliquez sur le logo « Nero ». 6. Cliquez avec le bouton droit de la souris et choisissez « Explorer ». 7. Accédez au répertoire « Philips Drivers ». 8. Copiez le contenu de ce répertoire sur une disquette. - Page 23 5. Fate clic sul logo "Nero". 6. Fate un clic destro e selezionate "Esplora". 7. Accedete alla cartella dei driver "Philips Drivers". 8. Copiate il contenuto di questa cartella su un dischetto. 9. Collegate il ED52 al vostro computer Windows 98SE.
- Page 24 4. Kliknij ikonę "Mój komputer". 5. Kliknij logo "Nero". 6. Kliknij prawym przyciskiem myszy i wybierz "Eksploruj". 7. Przejdź do katalogu "Philips Drivers". 8. Skopiuj zawartość katalogu na dyskietkę. 9. Podłącz urządzenie ED52 do komputera wyposażonego w system Windows 98SE.
-
Page 25: Section 3: Connexion D'un Ed52 À Un Ordinateur Windows 98Se Ne Disposant Pas De Lecteur
Please follow these steps: 1. Start the computer. 2. Start Internet Explorer (or another web browser). 3. Go to the Philips PCStuff website: http://www.philips.com/pcstuff 4. Choose "Drivers and manuals". 5. Search for the ED52CDRW. 6. Download the Windows 98SE drivers. - Page 26 Svolgete i seguenti passaggi: 1. Avviate il computer. 2. Aprite Internet Explorer (od un altro browser Web). 3. Accedete al sito Web PCStuff di Philips: http://www.philips.com/pcstuff 4. Selezionate "Drivers and manuals" (Driver e manuali). 5. Ricercate ED52CDRW. 6. Scaricate i driver per Windows 98SE.
- Page 27 Siga los pasos que se indican: 1. Encienda el ordenador. 2. Inicie Internet Explorer (u otro navegador web) 3.Vaya al sitio web PCStuff de Philips: http://www.philips.com/pcstuff 4. Seleccione "Drivers and manuals". 5. Busque ED52CDRW. 6. Descargue los controladores para Windows 98SE 7.
-
Page 28: Section 4:Vous Avez Accidentellement Connecté Votre Ed52 Trop Tôt À Un Ordinateur Windows 98Se Et Windows Ne Trouve Pas Les Pilotes
4. Cochez l’option « Définir un emplacement » puis cliquez sur « Parcourir ». 5. Indiquez le disque Nero. 6. Choisissez le répertoire « Philips drivers » (pilotes Philips) et cliquez sur « OK ». 7. Les pilotes sont alors installés. - Page 29 4. Selezionate "Specifica percorso" e fate clic su 'Sfoglia". 5. Selezionate il disco di Nero. 6. Selezionate la cartella dei driver "Philips drivers" e fate clic su "OK". 7. I driver verranno installati. Deel 4: U hebt de ED52 ongewild te vroeg aangesloten op een Windows 98SE-computer, zodat Windows geen stuurprogramma's vindt.
-
Page 31: How To Copy A Disc
How to copy a disc? Wie kopiert man eine Disk? Comment copier un disque? Come copiare un dischi? Hoe kopieer ik een disc? ¿Cómo copiar un disco? Jak kopiować dysk? This manual shows an example of how to copy a disc. This product is for personal use only. - Page 32 Start "Nero Burning ROM" from the desktop. Starten Sie "Nero Burning ROM" von Ihrer Oberfläche aus. Lancez "Nero Burning ROM" depuis le bureau. Aprire "Nero Burning ROM" dal desktop. Start "Nero Burning ROM" vanaf het bureaublad. Inicie "Nero Burning ROM" desde el escritorio.
- Page 33 Choose "Copy a CD" and click "Next". Wählen Sie "Eine CD kopieren" und klicken Sie auf "Weiter". Choisissez "Copier un CD" et cliquez sur "Suivant". Scegliere "Copia un CD" e fare clic su "Success". Selecteer "Een CD kopiëren" en klik op "Volgende". Elija "Copiar un CD"...
- Page 34 Mark the checkbox "fast copy" if your source drive is fast enough. If you are not sure or if you have a slow drive, unmark the checkbox. Click "Next". Kreuzen Sie das Kästchen "Direktkopie" an, wenn Ihr Quelllaufwerk schnell genug ist. Wenn Sie sich nicht sicher sind oder wenn Sie ein langsames Laufwerk haben, löschen Sie das...
- Page 35 Insert the source disc in the source drive (see step 5). Insert an empty disc in your ReWriter when requested. Legen Sie die Quell-CD in das Quelllaufwerk (siehe Schritt 5). Legen Sie eine leere CD in Ihren ReWriter, wenn Sie dazu aufgefordert werden.
- Page 36 Congratulations, your disc has been written successfully. Click "Discard". Herzlichen Glückwunsch – Ihre Disk wurde erfolgreich erstellt. Klicken Sie auf "Verwerfen". Félicitations, votre disque est prêt. Cliquez sur "Rejeter". Congratulazioni, il disco è stato scritto correttamente. Fare clic su "Elimina". Gefeliciteerd! Uw disc is met succes gebrand.
-
Page 37: How To Make A Data Disc
How to make a Data disc? Wie erstellt man eine Daten-Disk? Comment créer un disque de données? Come creare un dischi di dati? Hoe maak ik zelf een data-disc? ¿Cómo crear un disco de datos? Jak utworzyć dysk z danymi This manual shows you an example of how to make a Data disc. - Page 38 Start "Nero Burning ROM" from the desktop. Starten Sie "Nero Burning ROM" von Ihrer Oberfläche aus. Lancez "Nero Burning ROM" depuis le bureau. Aprire "Nero Burning ROM" dal desktop. Start "Nero Burning ROM" vanaf het bureaublad. Inicie "Nero Burning ROM" desde el escritorio.
- Page 39 Choose "Compile a new CD" and click "Next". Wählen Sie "Neue CD erstellen" und klicken Sie auf "Weiter". Choisissez "Compiler un nouveau CD" et cliquez sur "Suivant". Scegliere "Crea un nuovo CD" e fare clic su "Success". Selecteer "Een nieuwe CD compileren"...
- Page 40 Choose "Create a new data-CD?" and choose "Next". Wählen Sie "Neue Daten-CD zusammenstellen?" und wählen Sie "Weiter". Choisissez "Compiler un nouveau CD de données?" et cliquez sur "Suivant". Scegliere "Crea un nuovo CD dati?" e fare clic su "Success". Selecteer "Een nieuwe data CD aanmaken?"...
- Page 41 Drag the selected file(s) and/or folder(s) you want to have on your new CD to the left side of the screen. Ziehen Sie die gewünschten Dateien und/oder Ordner, die Sie auf Ihrer neuen CD haben möchten, zur linken Seite des Bildschirms.
- Page 42 Choose "Burn" twice. Wählen Sie zweimal "Brennen". Choisissez "Graver" deux fois de suite. Selezionare "Scrivi" due volte. Selecteer twee keer "Branden". Elija "Grabar" dos veces. Kliknij dwukrotnie "Burn". "Nero Burning ROM" will now burn your disc. "Nero Burning ROM" wird jetzt Ihre Disk brennen.
- Page 43 Click "OK". Congratulations, your CD is ready now. Choose "Discard". Klicken Sie auf "OK". Gratulation, Ihre CD ist jetzt fertig. Wählen Sie "Verwerfen". Cliquez sur OK. Le CD est à présent terminé. Cliquez sur "Rejeter". Fare click su "OK". Congratulazioni, il CD ora è pronto.
- Page 45 How to make an Audio disc? Wie erstellt man einer Audio-Disk? Comment créer un disque audio? Come creare un dischi Audio? Hoe maak ik zelf een muziek-disc? ¿Cómo crear un disco de audio? Jak utworzyć dysk audio This manual shows you an example of how to make an Audio disc which can be played in any CD-Player This product is for personal use only.
- Page 46 Start "Nero Burning ROM" from the desktop. Starten Sie "Nero Burning ROM" von Ihrer Oberfläche aus. Lancez "Nero Burning ROM" depuis le bureau. Aprire "Nero Burning ROM" dal desktop. Start "Nero Burning ROM" vanaf het bureaublad. Inicie "Nero Burning ROM" desde el escritorio.
- Page 47 Choose "Compile a new CD" and click "Next". Wählen Sie "Neue CD erstellen" und klicken Sie auf "Weiter". Choisissez "Compiler un nouveau CD" et cliquez sur "Suivant". Scegliere "Crea un nuovo CD" e fare clic su "Success". Selecteer "Een nieuwe CD compileren"...
- Page 48 Choose "Finish". Wählen Sie "Fertig". Cliquez sur "Terminer". Scegliere "Fini". Klik op "Voltooien". Elija "Finalizar". Wybierz "Finish". Drag the audio files (*.wav) you want to have on your new audio disc to the left side. Ziehen Sie die Audiodateien (*.wav), die Sie auf Ihrer neuen Audio-CD haben möchten, zur linken Seite.
- Page 49 Click on the "Write" icon. Klicken Sie auf das Symbol "Brennen". Cliquez sur l'icône "Graver". Fare clic sull'icona "Scrivi". Klik op het pictogram voor "Branden". Haga clic en el icono "Grabar". Kliknij ikonę "Write". Choose "Burn" twice. Wählen Sie zweimal "Brennen". Choisissez "Graver"...
- Page 50 "Nero - Burning Rom" is burning your Audio CD. "Nero - Burning Rom" brennt Ihre Audio-CD. "Nero - Burning Rom" commence la gravure du CD audionumérique. "Nero - Burning Rom" sta copiando il CD Audio. "Nero - Burning Rom" zal nu de Audio-cd voor u branden.
-
Page 51: How To Find Warranty Information
How to find warranty information? Wie findet man Garantie-Informationen? Comment trouver les informations relatives à la garantie? Come si accede alle informazioni sulla garanzia memorizzate? Waar vind ik informatie over de garantie? ¿Cómo encontrar información sobre la garantía? Jak odszukać na dysku z programem Nero informacje dotyczące gwarancji? - Page 52 Insert the Nero disc again, and click "exit". Legen Sie die Nero Disk wieder ein und klicken Sie auf "Exit". Réinsérez le disque Nero et cliquez sur "Quitter". Inserire nuovamente il disco Nero e fare clic su "esci". Leg de Nero-CD weer in de lade en klik op "Sluiten".
- Page 53 Sie sich diese Software kostenlos bei http://www.adobe.com herunterladen. Choisissez le dossier "Philips Warranty": vous y trouverez les documents relatifs à la garantie. Si vous ne disposez pas d’Adobe Acrobat Reader, vous pouvez le télécharger gratuitement depuis le site http://www.adobe.com Selezionare la cartella "Philips Warranty" che contiene i documenti relativi alla garanzia.
- Page 54 Notes...
-
Page 55: Safety Precautions
Safety Precautions USA/Canada: This player is for use only with IBM compatible UL listed Personal Computers or Macintosh UL listed workstations, weighing less than 18 kg. LASER SAFETY This unit employs a laser. Do not remove the cover or attempt to service this device when connected due to the possibility of eye damage. - Page 56 Specifications subject to change without notice. All dimensions shown are approximate. © 2003 Koninklijke Philips Electronics N.V. All rights reserved. Reproduction, copying, usage, modifying, hiring, renting, public performance, transmission and/or broadcasting in whole or part is prohibited without the written consent of Philips Electronics N.V.
Need help?
Do you have a question about the ED52CDRW and is the answer not in the manual?
Questions and answers