Table of Contents
Advertisement
Quick Links
Advertisement
Table of Contents

Related Manuals for Philips MCM720/61


Summary of Contents for Philips MCM720/61
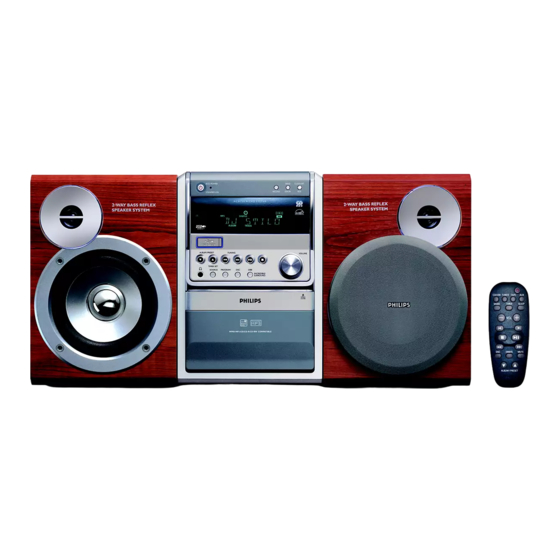
- Page 1 Micro Hi-Fi System MCM720 pg 001-022_MCM720_05_Eng 2006.4.17, 17:05...
- Page 2 Important notes for users in the U.K. Mains plug This apparatus is fitted with an approved 13 Amp plug. To change a fuse in this type of plug proceed as follows: Remove fuse cover and fuse. Fix new fuse which should be a BS1362 5 Amp, A.S.T.A.
- Page 3 § ∞ ¡ ≤ ™ £ OPEN CLOSE ECO POWER BAND CLOCK SET STANDBY - ON RECORD DISPLAY M C M 7 2 0 M I C R O S Y S T E M & USB DIRECT ALBUM / PRESET TUNING VOLUME TIMER SET...
-
Page 4: Table Of Contents
Contents General Information Tape Operation/Recording Supplied accessories ..........5 Tape playback ............15 Environmental information ........ 5 Rewinding / Fast forwarding ......15 Safety information ..........5 General information on recording ....15 About MP3 disc ............ 5 Preparation for recording ........ 16 Synchro start CD recording ...... -
Page 5: General Information
General Information ● If the system is brought directly from a cold to a This product complies with the radio interference requirements of the European warm location, or is placed in a very damp room, Community. moisture may condense on the lens of the disc unit inside the system. -
Page 6: Preparations
Preparations Speaker Speaker Rear connections Antennas Connection Connect the supplied MW loop antenna and FM The type plate is located at the rear of the antenna to the respective terminals. Adjust the system. position of the antenna for optimal reception. For users in the U.K.: please follow the instructions on page 2. -
Page 7: Speakers Connection
Preparations FM Antenna Optional connection The optional equipment and connecting cords are not supplied. Refer to the operating instructions of the connected equipment for details. Connecting a USB device or memory card By connecting a USB mass storage device ● (including USB flash memory, USB flash players For better FM stereo reception, connect an or memory cards) to the Hi-Fi system, you can... -
Page 8: Inserting Batteries Into The Remote Control
Preparations Inserting batteries into the remote control Insert two batteries (type R03 or AAA) into the remote control with the correct polarity as indicated by the "+" and "-" symbols inside the battery compartment. CAUTION! – Remove batteries if they are exhausted or will not be used for a long time. -
Page 9: Control
Controls (illustrations on page 3) DSC (Digital Sound Control) Controls on the system and – to select the desired sound effect : OPTIMAL/ remote control ROCK/JAZZ/POP. VOLUME (VOL + / -) Eco Power/STANDBY ON y – to increase or decrease the volume. –... -
Page 10: Basic Functions
Basic Functions Power-saving automatic standby As a power-saving feature, the system will automatically switch to Standby mode if you do ECO POWER BAND CLOCK SET RECORD DISPLAY STANDBY-ON not press any buttons within 15 minutes after a M C M 7 2 0 M I C R O S Y S T E M disc or tape has stopped playing. -
Page 11: Cd/Mp3-Cd Operations
CD/MP3-CD Operations To interrupt playback ● Press É Å . ● To resume playback, press É Å again. ECO POWER BAND CLOCK SET RECORD DISPLAY STANDBY-ON M C M 7 2 0 M I C R O S Y S T E M To stop playback ●... -
Page 12: Finding A Passage Within A Track
CD/MP3-CD Operations Finding a passage within a track Programming the disc tracks Programming tracks is possible when playback is Press and hold down on TUNING S/T ( stopped. Up to 20 tracks can be stored in the à/á on the remote control). memory in any order. -
Page 13: Radio Reception
Radio Reception Programming radio stations You can store up to a total of 40 radio stations ECO POWER BAND CLOCK SET in the memory for each band. STANDBY-ON RECORD DISPLAY M C M 7 2 0 M I C R O S Y S T E M Automatic programming Automatic programming will start with a chosen preset number. -
Page 14: Tuning To Preset Radio Stations
Radio Reception Tuning to preset radio stations ● Press ALBUM/PRESET 4/3 until the desired preset station is displayed. Radio Data System is a service that allows FM stations to show additional information. If you are receiving a RDS station, and the station name are displayed. -
Page 15: Tape Operation/Recording
Tape Operation / Recording General information on recording ECO POWER BAND CLOCK SET ● For recording, use only NORMAL (IEC type I) STANDBY-ON RECORD DISPLAY tapes on which the tabs have not yet been M C M 7 2 0 M I C R O S Y S T E M broken. -
Page 16: Preparation For Recording
Tape Operation / Recording Adjust VOLUME on the front pannel to set the Synchro start CD recording hours. Select CD source. Press TIMER SET 3 again. ● Press TUNING S/T (¡/™ on the ➜ The clock digits for the minutes flash. remote control) to select the desired track to Adjust VOLUME on the front pannel to set the start recording. -
Page 17: External Sources
External Sources Supported formats: Using a non-USB device – USB or memory file format FAT12, FAT16, Connect the audio out terminals of the external FAT32 (sector size: 512 - 65,536 bytes) equipment (TV, VCR, Laser Disc player, DVD – MP3 bit rate (data rate): 32-320 Kbps and player or CD Recorder) to the AUX IN variable bit rate terminals of your system. - Page 18 External Sources How to organize your MP3/WMA files on Play the USB's audio files as you do with the the USB mass storage device albums/tracks on a CD (See CD/MP3 This Hi-Fi system will browse the MP3/WMA Operations). files in the folders/sub-folders/titles order. Example: Notes: –...
-
Page 19: Clock/Timer
Clock/Timer In standby mode, press TIMER SET 3 for more than two seconds. ECO POWER BAND CLOCK SET STANDBY-ON RECORD DISPLAY Press SOURCE repeatedly to select the sound M C M 7 2 0 M I C R O S Y S T E M source. -
Page 20: Specifications
Specifications TAPE DECK AMPLIFIER Frequency response Output power ........2 x 50 W RMS* Normal tape (type I) ..80 – 12500 Hz (8 dB) ..............2 x 100 W MPO Signal-to-noise ratio Signal-to-noise ratio ......≥ 62 dBA (IEC) Normal tape (type I) ........ -
Page 21: Maintenance
● After prolonged use, dirt or dust may A B C accumulate at the disc lens. To ensure good playback quality, clean the disc lens with Philips Demagnetizing the heads CD Lens Cleaner or any commercially available ● Use a demagnetizing tape available at your cleaner. - Page 22 Troubleshooting Problem Solution ✔ Recording or playback cannot be made. Clean deck parts, see “Maintenance”. ✔ Use only normal (IEC I) tape for recording. “CHK TAPE” is displayed. ✔ Apply a piece of adhesive tape over the missing tab space. ✔...
Need help?
Do you have a question about the MCM720/61 and is the answer not in the manual?
Questions and answers