
Subscribe to Our Youtube Channel
Related Manuals for EAS Electric E40AN70


Summary of Contents for EAS Electric E40AN70
- Page 1 E40AN70 MANUAL DE INSTRUCCIONES OPERATING INSTRUCTIONS TV À CORES COM REMOTE CONTROL COLOUR TELEVISION WITH REMOTE CONTROL Hi:Jffll'"...
-
Page 3: Table Of Contents
Tabla de contenido Información De Seguridad ........2 Accesorios Incluidos ..........4 Instalación de Stand y Montaje en Pared ..... 4 Encender/Apagar TV ..........7 Control y Funcionamiento del Televisor ....7 Asistente Para la Configuración Inicial....9 Cuenta & Iniciar Sesión ........17 Apps ..............17 Preferencias de Dispositivo ......17 Grabación por USB .......... -
Page 4: Información De Seguridad
dañado, siendo únicamente un profesional quien Información De Seguridad puede hacerlo. • No exponga el televisor a goteos y salpicaduras de líquidos y no coloque objetos que contengan ADVERTENCIA líquidos, como floreros, tazas, etc., o más sobre RIESGO DE DESCARGA el televisor (por ej., en los estantes por encima de ELÉCTRICA NO ABRIR... - Page 5 • NUNCA ponga artículos que puedan tentar a los Terminal Viva Peligrosa: La(s) terminal(es) niños a trepar en la parte superior del televisor o marcada(s) live (viva) es/son peligrosa(s) bajo los muebles en los que se coloca el televisor, tales condiciones normales de operación.
-
Page 6: Accesorios Incluidos
Alto Rango Dinámico (HDR) / Gama de Las figuras y las ilustraciones de este manual se proporcionan solo para referencia y pueden diferir Registro Híbrido (HLG): del aspecto real del producto. Las características Al usar esta función, el televisor puede reproducir un del equipo pueden ser modificadas sin previo aviso. - Page 7 Los orificios y las medidas para la instalación del soporte de montaje en pared; Conexión de la Antena Conecte la toma de antena o de TV por cable a la ENTRADA DE ANTENA (ANT) o enchufe el satélite a la ENTRADA DE SATÉLITE (LNB) en la parte trasera de TV.
- Page 8 Otras Conecciones Si desea conectar un dispositivo al televisor, asegúrese de que el televisor y el dispositivo están apagados antes de realizar cualquier conexión. Después de realizar la conexión, puede activar las unidades y utilizarlas. Para habilitar el audio VGA/Compo- Conector Tipo Cables...
-
Page 9: Encender/Apagar Tv
Gracias al interruptor de control puede controlar las Encender/Apagar TV funciones de Programa y Espera Rápida de TV. Conecte la alimentación Nota: La posición del interruptor de control puede variar según el modelo. ¡IMPORTANTE: Este televisor está diseñado para Para cambiar canal en modo Live TV: Pulse el centro funcionar con corriente alterna de 220-240 V CA, del interruptor de control, en la pantalla aparecerá... - Page 10 Modo en espera: En Espera Rápido/ En Espera/Activo Mando a Distancia Teclas numéricas: Cambia el canal en modo Live TV, entra en un número o una letra en el cuadro de texto en la pantalla. Idioma: Alterna entre las opciones de audio en televisión analógica, o muestra y cambia el idioma del audio (TV digital, cuando la opción esté...
-
Page 11: Asistente Para La Configuración Inicial
(Red & Internet) en el menú de Configuración desde Asistente Para la la Pantalla de inicio o desde el menú de opciones de Configuración Inicial TV en modo Live TV . En caso de haber establecido la conexión a Internet Nota: Siga las instrucciones en pantalla para completar el en el paso anterior, este paso se omitirá. - Page 12 del sitio web donde también se puede visualizar esta otros servicios despierten TV para que responda a información. los comandos de Cast, incluso cuando esté en modo de espera y la pantalla esté apagada. 6. Ubicación 12. Modo de Sintonización En la pantalla siguiente, se puede permitir o no per- mitir que Google y aplicaciones de terceros utilicen la Nota: Seleccione una de las opciones disponibles si no desea...
- Page 13 Si se selecciona la opción de Scan (Escanear), a Nota: Satélite Preferida y Satélite General tal vez no sean disponibles dependiendo del país seleccionado. En este caso, continuación se mostrará la pantalla de Configuración la pantalla de Configuración de DVBS se mostrará después de Escaneo de DVBS.
- Page 14 Music y Google Play y las filas que usted ha instalado. Guía de Programas: Abra la guía electrónica de Seleccione una fila y luego mueva el foco al elemento programación Consulte la sección de Programme deseado en la fila. Presione el botón OK para hacer Guide (Guía de Programas) a fin de obtener más una selección o ingresar un submenú. información. Las herramientas de búsqueda se ubicarán en la Canales Nuevos Disponibles: Comience una esquina superior izquierda de la pantalla.
- Page 15 desea que su televisor se apague o configure como Restablecer ID del Dispositivo: Restablezca la Off (Apagado) para deshabilitar. ID del dispositivo para los Servicios de HBBTV. En la pantalla se mostrará un cuadro de diálogo Tarjeta CI: Muestra las opciones de menú disponibles para confirmación. Pulse OK para continuar, para la tarjeta CI en uso.
- Page 16 Auto Sleep: Defina un tiempo de inactividad Configuración después del cual desea que su TV entre en modo de reposo automáticamente. Las opciones de 4 horas, Es posible acceder al menú de Configuración desde 6 horas y 8 horas están disponibles. Establecer la Pantalla de Inicio o desde el menú...
- Page 17 canales que ya se han encontrado se almacenarán Sonido, si está disponible. También se pueden editar en la lista de canales. otras opciones, según el canal. Puede pulsar la tecla Blue (Azul) para borrar canal resaltado. Búsqueda de Actualizaciones: Búsqueda por ac- tualizaciones No se eliminarán los canales agregados Ajuste Analógico de Canal: Haga ajuste preciso anteriormente, todos los canales recién encontrados...
- Page 18 deseados en la lista y pulse OK para seleccionar/ de Canal está configurado como Satélite Preferido, quitar la selección. esta opción puede tener un nombre diferente según los servicios disponibles. Resalte el satélite y pulse Clasificación de Canales: Cambia las posiciones el botón OK para configurar parámetros detallados de dos canales seleccionados en la lista de canales.
-
Page 19: Cuenta & Iniciar Sesión
Mensaje de Actualización de Canal Versión Activa o desactiva la función de mensaje de actuali- Muestra el número de versión del sistema. zación de canal. Dependiendo de selección de Modo Cuenta & Iniciar Sesión de Instalación de Canal este elemento tal vez no sea visible. - Page 20 esto puedes hacer lo siguiente; mostrar información Energía legal, administrar anuncios, mostrar su ID publicitario, Temporizador de Apagado: Defina un tiempo de restablecer anuncios personalizados basados en sus inactividad después del cual desea que su TV entre intereses y activarlos/desactivarlos. en modo de reposo automáticamente. Netflix ESN: Muestra su número ESN.
- Page 21 Temperatura de Color: Ajuste su preferencia para Modo PC: Modo de PC reduce algunos de los la temperatura de color. Estarán disponibles las algoritmos de procesamiento de imágenes a fin opciones Usuario, Frío, Estándar y Cálido. A fin de de mantenerse al día con el tipo de señal. Se ajustar manualmente los valores de ganancia rojo, puede utilizar especialmente para entradas de verde y azul establezca como Usuario.
- Page 22 Configure como Altavoces de TV a fin de utilizar compatibles se mostrarán en la pantalla. Al activar, los altavoces de su TV para la salida de sonido. la configuración de Mensajería comercial estará disponible. Establezca conforme a sus preferencias. Digital Output (Salida Digital): Ajuste la preferen- Se recomienda no activar el modo tienda para uso cia de salida digital de sonido.
- Page 23 Aparecerá un mensaje de confirmación, seleccione y pulse OK otra vez. Los canales se ordenarán según Borrar todo para continuar con el restablecimiento. su selección. TV se apagará/encenderá y iniciará la configuración Para buscar un canal, resalte Encontrar y pulse el inicial. Seleccione Cancelar para salir. botón OK.
- Page 24 A fin de acceder a la Guía Electrónica de Programas El estado de la conexión bajo la sección Ethernet, en en la pantalla de inicio, pulse el botón Guide (Guía) el menú Red & Internet cambiará de No conectado del mando a distancia. Guía Electrónica de Programas a Conectado. también está...
- Page 25 conexión inalámbrica, pruebe entonces a utilizar la conexión cableada. Se necesita una velocidad de conexión estable para reproducir contenido de transmisión. Utilice una conexión de Ethernet en caso de que la velocidad de LAN inalámbrico no es estable.. Reproductor de Multimedia En la Pantalla de Inicio, desplácese a la fila de Aplicaciones, seleccione Reproductor de Multimedia (MMP) y pulse el botón OK para iniciar.
-
Page 26: Grabación Por Usb
Puede visualizar sus fotos, documentos de texto o seguridad, o copiar las grabaciones en un ordenador reproducir sus archivos de música y video instalados personal, pero las mismas no se podrá reproducir en en un dispositivo de almacenamiento USB conectado el. -
Page 27: Formato De Disco
Manual, si se prefiere, se puede formatear Disco Se mostrará un mensaje de advertencia si los y especificar el espacio de almacenamiento que se intervalos de tiempo de dos temporizadores se utilizará para la función de desplazamiento de tiempo. superponen. Para el mismo intervalo de tiempo no se Cuando se complete la configuración, se mostrará el puede configurar más de un temporizador. -
Page 28: Google Cast
otras salidas de audio de forma automática. Por lo que, Seleccione el TV al que le gustaría transmitir si desea escuchar el audio solo desde el dispositivo Si la aplicación móvil está habilitada para Transmitir, conectado (igual que las otras salidas de audio digital como YouTube, Dailymotion, Netflix, puede transmitir óptico o coaxial). -
Page 29: Solución De Problemas Y Consejos
VOD (Vídeo a La Carta) y servicios de captura de Solución de problemas televisión. Se pueden utilizar para interactuar con y consejos el contenido AV, los botones OK (reproducción & pausa), Parar, Avance rápido y Retroceder en el TV no se enciende control remoto. - Page 30 • Los altavoces ruidosos, los dispositivos de audio Modos Típicos de Visualización desenterrados, las luces de neón, los edificios altos y de Entrada VGA otros objetos grandes pueden influir en la calidad de la recepción. Si es posible, intente mejorar la calidad La siguiente tabla es una ilustración de alguno de los de la recepción cambiando la dirección de la antena modos generales de visualización de vídeo.
-
Page 31: Compatibilidad Con Señales Av Y Hdmi
Compatibilidad con señales AV y HDMI Fuente Señales admitidas SECAM Compuesto / AV Atrás NTSC4.43 NTSC3.58 480i, 480p 60Hz 576i, 576p 50Hz Componente / YPbPr 720p 50Hz,60Hz 1080i 50Hz,60Hz 480i 60Hz 480p 60Hz 576i, 576p 50Hz 720p 50Hz,60Hz HDMI 1080i 50Hz,60Hz 24Hz, 25Hz, 30Hz, 1080p... - Page 32 Formatos admitidos para el modo USB Vídeo Vídeo Codec Resolución Tasa de bit Perfil Contiene MKV (.mkv) 1920x1080@60fps 40Mbps Profile0,2 WebM (.webm) MP4 (.mp4, .mov), 3GPP (.3gpp, .3gp), Principal/Principal10 flujo de transporte MPEG (.ts, .trp, .tp), HEVC/H.265 1920x1080@60fps 50Mbps Perfil, Nivel Alto MKV (.mkv), WebM (.webm), FLV (.flv), @Nivel 4.1 AVI (.avi), H265 (.265) Programa de MPEG por demanda (.DAT, .VOB, .MPG, .MPEG), transporte de MPEG por demanda (.ts, .trp, .tp),...
- Page 33 Vídeo Codec Resolución Tasa de bit Perfil Contiene AVI (.avi), 3GPP (.3gpp, .3gp), MP4 Movimiento JPEG 640x480@30fps 10Mbps (.mp4, .mov), MKV (.mkv), WebM (.webm), FLV (.flv), OGM (.ogm) MKV (.mkv), WebM (.webm), FLV (.flv), 1920x1080@60fps 20Mbps 3GPP (.3gpp, .3gp), MP4 (.mp4, .mov), AVI (.avi), OGM (.ogm) RM (.rm, .rmvb), MKV (.mkv), WebM RV30/RV40 1920x1080@60fps 40Mbps...
- Page 34 Tasa de Audio Codec Canal Tasa de bit Contiene Nota Muestreo AAC-LC: AAC (.aac), AVI (.avi), MKV (.mkv, .mka), WebM (.webm), 3GPP 12kbps~ (.3gpp, .3gp), MP4 (.mp4, .mov, 576kbps m4a), flujo de transporte MPEG (.ts, AAC-LC, HEAAC 8KHz ~ 48KHz Hasta 5,1 V1 6kbps ~ .trp, .tp), flujo de programa MPEG (.DAT, .VOB, .MPG, .MPEG), FLV 288kbps...
- Page 35 Tasa de Audio Codec Canal Tasa de bit Contiene Nota Muestreo 8KHz 6Kbps ~ 11.025KHz, LBR (cook) Hasta 5,1 RM (.rm, .rmvb, .ra) 128Kbps 22,05KHz, 44,1KHz MKV (.mkv, .mka), WebM (.webm), FLAC 8KHz~96KHz Hasta 7,1 < 1.6Mbps FLAC (.flac) 6Kbps ~ MKV (.mkv, .mka) OPUS 8KHz ~ 48KHz...
-
Page 36: Resoluciones Dvi Admitidas
Externo Extensión de archivos Analizador de subtítulos Comentarios .srt SubRip SubStation Alpha .ssa/ .ass Advanced SubStation Alpha .smi SAMI MicroDVD .sub SubIdx (VobSub) .txt TMPlayer Resoluciones DVI admitidas Al conectar equipos a los conectores del televisor mediante el uso de cable convertidor de DVI (DVI a HDMI cable - no suministrado), puede hacer referencia a la siguiente información de resolución. - Page 37 Especificaciones de LAN inalámbrica Especificación Potencia máx. Gama de frecuencias de salida PAL BG/I/DK/ 2400 - 2483,5 MHz (CH1-CH13) < 100 mW Señal de Televisión SECAM BG/DK 5150 - 5250 MHz (CH36 - CH48) < 200 mW VHF (BANDA I/III) UHF Canales de Recepción 5250 - 5350 MHz (CH52 - CH64) <...
-
Page 38: Información Sobre Su Desecho
Información sobre su desecho Licencias [Unión Europea] Los términos HDMI, Hy HDMI High-Definition Mul- Estos símbolos indican que aquellos equipos timedia Interface, y el Logotipo HDMI son marcas eléctricos y electrónicos, así como las pilas que comerciales o marcas registradas de HDMI Licensing lo tengan grabado, no se deben desechar como Administrator Inc. - Page 39 Garantía 15. Durante el periodo de garantía es imprescindible conservar todos los manuales junto con el equipo, y es recomendable conservar también el embalaje CONDICIONES DE LA GARANTÍA COMERCIAL original. Si el equipo se vende, dona o regala, se EN GAMA MARRÓN debe entregar el manual y todos los documentos relacionados al nuevo usuario.
- Page 40 Table of Contents Safety Information ..........2 Introduction ............4 Accessories Included..........4 Features ..............4 Stand Installation & Wall Mounting ......4 Antenna Connection ..........5 Other Connections..........6 Remote Control .............8 Home Screen............11 Live TV Mode Menu Content .........11 Settings..............13 Channel List............19 Programme Guide ..........20 Connecting to the Internet ........20 Multi Media Player ..........21 USB Recording ............22...
-
Page 41: Safety Information
• Do not expose the TV to direct sunlight or do not Safety Information place open flames such as lit candles on the top of or near the TV. • Do not place any heat sources such as electric CAUTION heaters, radiators, etc. - Page 42 WARNING WALL MOUNTING WARNINGS Do not ingest the battery, Chemical Burn Hazard This product or the accessories supplied with the prod- • Read the instructions before mounting your TV uct may contain a coin/button cell battery. If the coin/ on the wall. button cell battery is swallowed, it can cause severe •...
-
Page 43: Introduction
High Dynamic Range (HDR) / Hybrid Log- Introduction Gamma (HLG) Using this feature the TV can reproduce greater Thank you for choosing our product. You’ll soon be dynamic range of luminosity by capturing and then enjoying your new TV. Please read these instructions combining several different exposures. -
Page 44: Antenna Connection
Antenna Connection Connect the aerial or cable TV plug to the AERIAL INPUT (ANT) socket or satellite plug to the SATELLITE INPUT (LNB) socket located on the rear side of the TV. Rear side of the TV 1. Satellite 2. Aerial or cable If you want to connect a device to the TV, make sure that both the TV and the device are turned off before making any connection. -
Page 45: Other Connections
Other Connections If you want to connect a device to the TV, make sure that both the TV and the device are turned off before making any connection. After the connection is done, you can turn on the units and use them. To enable VGA/Component audio, Connector Type... - Page 46 Turning On/Off the TV TV Control & Operation Connect power IMPORTANT: The TV set is designed to operate on 220-240V AC, 50 Hz socket. After unpacking, allow the TV set to reach the ambient room temperature before you connect the set to the mains.
-
Page 47: Remote Control
Remote Control Standby: Quick Standby / Standby / On Numeric buttons: Switches the channel in Live TV mode, enters a number or a letter in the text box on the screen Language: Switches among sound modes (analogue TV), displays and changes audio language (digital TV, where available) Home: Opens the Home Screen Mute: Completely turns off the volume of the TV... - Page 48 to a Google account in order to use Google services. Initial Setup Wizard This step will be skipped if no internet connection has been established in the previous step or if you already Note: Follow the on-screen instructions to complete the initial signed in to your Google account in Quick Setup step.
- Page 49 later using the Settings>Device Preferences>Usage the desired operator and press OK or the Right & Diagnostics menu on the Home Screen. directional button to proceed. On the next screen select Scan option to start a search or select Skip Information on Google services and some features of Scan to continue without performing a search.
-
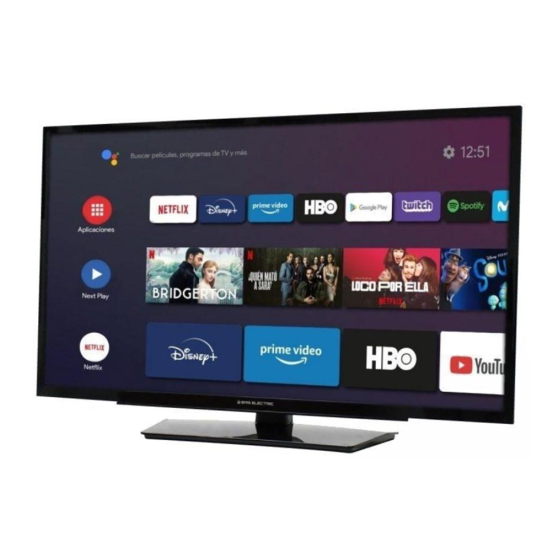
Page 50: Home Screen
satellite and to enable scan this option should be set The available options of the Home Screen are posi- as On first. Press Back button and select next satellite tioned in rows. To navigate through the Home Screen you want to set. After you completed the configuration options use the directional buttons on the remote. - Page 51 environment and preferences if necessary. You list. Highlight a channel and press OK to make a can use the Channel menu options to search for selection. Selected channel will be displayed, every broadcast channels. Refer to the Channel section time the TV is turned back on from quick standby for more information.
-
Page 52: Settings
Digital Teletext Language: Set the teletext Settings language for digital broadcasts. Decoding Page Language: Set the decoding You can access the Settings menu from the Home page language for teletext display. Screen or from the TV options menu in Live TV mode. BISS Key: “Click To Add Biss Key”... - Page 53 Update Scan: Search for updates. Previously added depending on whether or not the last watched channel channels will not be deleted, but any newly found was analogue. channels will be stored in the channel list. Clear Channel List: Delete all channels stored in the Analogue Manual Scan: Start a manual scan for channel list of the selected channel installation mode.
- Page 54 channel other options may also be editable. You can move and press OK to select. Then do the same for a press the Blue button to delete the highlighted channel. second channel. When the second channel is selected, the first selected channel will be moved to the position Analogue Channel Fine-tune: Fine-tune an analogue of that channel.
- Page 55 Special app access: Configure some app features Audio Channel and special permissions. Set the audio channel preference, if available. This Security & restrictions: Using the options of this item may not be visible, depending on whether or not menu; the last watched channel was analogue. •...
- Page 56 Power Display Mode: Set the aspect ratio of the screen. Select one of the predefined options according to Sleep Timer: Define an idle time after which you your preference. want your TV to enter sleep mode automatically. HDR: Turn the HDR function on or off. This item will Picture off: Select this option and press OK to be available if HDR content is detected.
- Page 57 manually. Highlight Enable and press OK to turn Sound Mode: If the Dolby Audio Processing this function on. option is turned on Sound Mode option will be available to set. Highlight the Sound Mode option 11 Point White Balance Correction: White bal- and press OK to see the preset sound modes.
-
Page 58: Channel List
Headphone: Turn this option on if you want to be available depending on the selected country during route the sound of the audio commentary to the the initial setup process. TV’s headphone output. To filter the channels highlight Select Type and press Volume: Adjust the volume level of the audio the OK button. -
Page 59: Programme Guide
The status of the connection under the Ethernet Programme Guide section in the Network & Internet menu will changed from Not connected to Connected. By means of Electronic Programme Guide (EPG) function of your TV you can browse the event schedule of the currently installed channels on your channel list. -
Page 60: Multi Media Player
A stable connection speed is required to play back streaming content. Use an Ethernet connection if the wireless LAN speed is unstable. Multi Media Player On the Home Screen scroll to Apps row, select Multi Media Player (MMP) and press the OK button to launch. -
Page 61: Usb Recording
cause physical damage to the USB player and the USB device Instant Recording itself. Do not pull out your drive while playing a file. Press Record button to start recording an event From a Mobile Device via DMR instantly while watching a programme. Press Stop button to cancel instant recording. -
Page 62: Cec
button, which will still be functional, on the remote and Schedule List switch to another source. You can add reminders or record timers using the The TV remote is automatically able to control the Schedule List menu. You can access the Schedule device once the connected HDMI source has been List from the Record menu in Live TV mode. -
Page 63: Hbbtv System
On your android device, go to ‘Settings’ from the are owned by the application. For example, numeric notification panel or home screen channel selection may not work on a teletext applica- tion where the numbers indicate teletext pages. Tap on ‘Device Connectivity’ HbbTV requires AV streaming capability for the plat- Tap on the ‘Easy projection’... - Page 64 • Disconnect the power cable from the power outlet. • Make sure that the TV audio output is connected to Wait for one minute then reconnect it. the audio input on the external sound system. • Press the Standby/On button on the TV. •...
- Page 65 VGA Input Typical AV and HDMI Signal Display Modes Compatibility The following table is an illustration of some of the Source Supported Signals typical video display modes. Your TV may not support all resolutions. SECAM Composite Index Resolution Frequency / Back AV NTSC4.43 NTSC3.58 640x480...
-
Page 66: Supported File Formats For Usb Mode
Supported File Formats for USB Mode Video Video Codec Resolution Bit Rate Profile Container MKV (.mkv) 1920x1080@60fps 40Mbps Profile0,2 WebM (.webm) MP4 (.mp4, .mov), 3GPP (.3gpp, .3gp), Main/Main10 MPEG transport stream (.ts, .trp, .tp), HEVC/H.265 1920x1080@60fps 50Mbps Profile, High Tier MKV (.mkv), WebM (.webm), FLV (.flv), @Level 4.1 AVI (.avi), H265 (.265) - Page 67 Video Codec Resolution Bit Rate Profile Container AVI (.avi), 3GPP (.3gpp, .3gp), MP4 Motion JPEG 640x480@30fps 10Mbps (.mp4, .mov), MKV (.mkv), WebM (.webm), FLV (.flv), OGM (.ogm) MKV (.mkv), WebM (.webm), FLV (.flv), 1920x1080@60fps 20Mbps 3GPP (.3gpp, .3gp), MP4 (.mp4, .mov), AVI (.avi), OGM (.ogm) RM (.rm, .rmvb), MKV (.mkv), WebM RV30/RV40...
- Page 68 Audio Codec Sample rate Channel Bit Rate Container Note AAC-LC: AAC (.aac), AVI (.avi), MKV (.mkv, .mka), WebM (.webm), 3GPP 12kbps~ (.3gpp, .3gp), MP4 (.mp4, .mov, 576kbps m4a), MPEG transport stream (.ts, AAC-LC, HEAAC 8KHz ~ 48KHz Up to 5.1 V1 6kbps ~ .trp, .tp), MPEG program stream (.DAT, .VOB, .MPG, .MPEG), FLV...
- Page 69 Audio Codec Sample rate Channel Bit Rate Container Note 8KHz 6Kbps ~ 11.025KHz, LBR (cook) Up to 5.1 RM (.rm, .rmvb, .ra) 128Kbps 22.05KHz, 44.1KHz MKV (.mkv, .mka), WebM (.webm), FLAC 8KHz~96KHz Up to 7.1 < 1.6Mbps FLAC (.flac) 6Kbps ~ MKV (.mkv, .mka) OPUS 8KHz ~ 48KHz...
-
Page 70: Supported Dvi Resolutions
External File Extension Subtitle Parser Remark .srt SubRip SubStation Alpha .ssa/ .ass Advanced SubStation Alpha .smi SAMI MicroDVD .sub SubIdx (VobSub) .txt TMPlayer Supported DVI Resolutions When connecting devices to your TV’s connectors by using DVI converter cable(DVI to HDMI cable - not supplied), you can refer to the following resolution information. -
Page 71: Specification
Wireless LAN Transmitter Specifications Specification Max Output Frequency Ranges Power PAL BG/I/DK TV Broadcasting SECAM BG/DK 2400 - 2483,5 MHz (CH1-CH13) < 100 mW VHF (BAND I/III) - UHF 5150 - 5250 MHz (CH36 - CH48) < 200 mW Receiving Channels (BAND U) - HYPERBAND 5250 - 5350 MHz (CH52 - CH64) <... -
Page 72: Licences
Licences Disposal Information The terms HDMI, HDMI High-Definition Multimedia [European Union] Interface, and the HDMI Logo are trademarks or regis- These symbols indicate that the electrical and tered trademarks of HDMI Licensing Administrator, Inc. electronic equipment and the battery with this symbol should not be disposed of as general household waste at its end-of-life. -
Page 73: Guarantee
Guarantee 15. During the warranty period, it is essential to keep all the manuals together with the equipment, and it is CONDITIONS COMMERCIAL advisable to also keep the original packaging. If the equipment is sold, donated or given away, the GUARANTEE manual and all related documents must be given to This appliance has a two-year repair guarantee, from... - Page 74 VESA WALL MOUNT MEASUREMENTS Hole Pattern Sizes (mm) Screw Sizes min. (mm) Length (X) max. (mm) Thread (Y) English VESA WALL MOUNT MEASUREMENTS Hole Pattern Sizes (mm) Screw Sizes Length (X) Thread (Y) Deutsch MASSANGABEN FÜR VESA-WANDMONTAGE Lochmustergrößen (mm) Schraubengrößen Länge (X) Gewinde (Y) Français...
- Page 75 1 1 1 1 1 1 1 1 1 1 1 1 1 1 1 1 EAS ELECTRIC SMART TECHNOLOGY S. L. Pai Industrial Codonyers, C/ Principal, 4, 46220 - Picassent (Valencia) www.easelectric.es...
Need help?
Do you have a question about the E40AN70 and is the answer not in the manual?
Questions and answers