Table of Contents
Advertisement
Advertisement
Table of Contents

Related Manuals for OpenMesh OM5P-AC

Summary of Contents for OpenMesh OM5P-AC
- Page 1 Wireless 802.11a/b/g/n/ac Mesh Router Model: OM5P-AC User Manual Version : 1.0...
-
Page 2: Table Of Contents
Table of Contents CHAPTER 1 PRODUCT OVERVIEW..........................7 1.1 F ..................................7 EATURE 1.2 B ..................................8 ENEFITS 1.3 P ..............................9 ACKAGE ONTENTS 1.3 S ..............................9 YSTEM EQUIREMENT CHAPTER 2 HARDWARE OVERVIEW ........................10 ... - Page 3 8.2.4 WPA-PSK Mixed ............................46 8.2.5 WPA................................47 8.2.6 WPA2 ................................48 8.2.7 WPA Mixed ..............................49 8.4 W ........................... 50 IRELESS DVANCED ETTINGS 8.5 W MAC F ..............................52 IRELESS ILTER 8.6 WDS L ..............................
- Page 4 13.3 C ............................... 83 LIENT RIDGE 13.4 WDS B ..............................83 RIDGE 13.5 C .............................. 84 LIENT OUTER 13.6 RADIUS C ............................84 ONNECTIONS APPENDIX A – TROUBLESHOOTING ..........................85 A.1 P ................................. 85 ROBLEM OLVING ...
- Page 5 About This Document Audience This document is written for networking professionals responsible for installing and managing the Access Point/Bridge. To use this guide, you should have knowledge about TCP/IP and IEEE 802.11 standards, and be familiar with the concepts and terminology associated with wireless local-area networks (WLANs).
- Page 6 Icons used Figures in this document may use the following generic icons. EHN device WLAN signal Client computer laptop Internet Client computer desktop PoE injector Power adapter...
-
Page 7: Chapter 1 Product Overview
In addition to providing the latest wireless technology, the OM5P-AC supports Power over Ethernet and Power by Adapter capabilities, which allow the device to be installed easily in nearly any indoor location. Advanced features include power level control, narrow bandwidth selection, traffic shaping, and Real-time RSSI indication. -
Page 8: Benefits
1.2 Benefits The OM5P-AC is the ideal product around which you can build your WLAN. The following list summarizes a few key advantages that WLANs have over wired networks: Ideal for hard-to-wire environments There are many scenarios where cables cannot be used to connect networking devices. -
Page 9: Package Contents
If any item is missing or damaged, contact your place of purchase immediately. Keep all packing materials in case you need to return the OM5P-AC. The OM5P-AC must be returned with its original packing materials. ... -
Page 10: Chapter 2 Hardware Overview
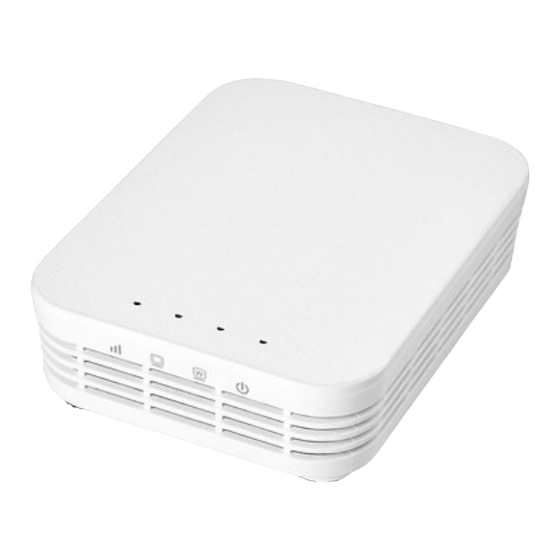
Reset button for approximately 10 seconds and then stop pressing the Reset button. 2.2 Back Panel The back panel of the OM5P-AC contains the LED indicators that show the link quality and status of the OM5P-AC. -
Page 11: Chapter 3 Installation
3.2 Installing the OM5P-AC To install the OM5P-AC, use the following procedure to mount the device on a pole and refer to the figure below. 1. The bottom of the OM5P-AC is a movable cover. Grab the cover and pull it back hard to remove the cover. - Page 12 ...
- Page 13 The rear of the OM5P-AC has two groups of LEDs. One group, labeled INDICATORS, shows the status of the device. The second group, LINK QUALITY, shows the strength of the link between the OM5P- AC and the network. The following table describes the OM5P-AC LEDs.
-
Page 14: Chapter 4 Configuring Your Computer For Tcp/Ip
Chapter 4 Configuring Your Computer for TCP , To configure the OM5P-AC use a computer that is configured for TCP/IP. This chapter describes how to configure the TCP/IP settings on a computer that will be used to configure the OM5P-AC. -
Page 15: Configuring Microsoft Windows 7
4.1 Configuring Microsoft Windows 7 Use the following procedure to configure a computer running Microsoft Windows 7. 1. In the Start menu search box, type: ncpa.cpl 2. When the Network Connections List appears, right-click the Local Area Connection icon and click Properties. - Page 16 4. In the properties dialog box, click Obtain an IP address automatically to configure your computer for DHCP.
-
Page 17: Configuring Microsoft Windows Vista
5. Click the OK button to save your changes and close the dialog box. 6. Click the OK button again to save your changes. 4.2 Configuring Microsoft Windows Vista Use the following procedure to configure a computer running Microsoft Windows Vista with the default interface. - Page 18 6. In the Internet Protocol Version 4 Properties dialog box, click Obtain an IP address automatically to configure your computer for DHCP.
-
Page 19: Configuring Microsoft Windows Xp
Internet Connections. 2. Click the Network Connections icon. 3. Click Local Area Connection for the Ethernet adapter connected to the OM5P-AC. The Local Area Connection Status dialog box appears. 4. In the Local Area Connection Status dialog box, click the Properties button. The Local... -
Page 20: Configuring Microsoft Windows 2000
2. In the Control Panel window, double-click the Network and Dial-up Connections icon. If the Ethernet adapter in your computer is installed correctly, the Local Area Connection icon appears. 3. Double-click the Local Area Connection icon for the Ethernet adapter connected to the OM5P-AC. The Local Area Connection Status dialog box appears. - Page 21 4. In the Local Area Connection Status dialog box, click the Properties button. The Local Area Connection Properties dialog box appears. 5. In the Local Area Connection Properties dialog box, verify that Internet Protocol (TCP/IP) is checked. Then select Internet Protocol (TCP/IP) and click the Properties button. ...
-
Page 22: Configuring An Apple Macintosh Computer
1. Pull down the Apple Menu, click System Preferences, and select Network. 2. Verify that the NIC connected to the OM5P-AC is selected in the Show field. 3. In the Configure field on the TCP/IP tab, select Using DHCP. -
Page 23: Chapter 5 Introducing The Web Configurator
Chapter 5 Introducing the Web Configurator The OM5P-AC has a built-in Web Configurator that lets you manage the unit from any location using a Web browser that supports HTTP and has JavaScript installed. ... - Page 24 OM5P-AC becomes unstable or crashes. If you forget your password, you will have to reset the OM5P-AC to its factory default settings and lose any customized override settings you configured. However, if you back up an earlier configuration, you will not have to completely reconfigure the OM5P-AC.
-
Page 25: Chapter 6 Status
Chapter 6 Status The Status section on the navigation drop-down menu contains the following options: Main Wireless Client List System Log Connection Status The following sections describe these options. 6.1 Save/Load This page lets you save and apply the settings shown under Unsaved changes list, or cancel the unsaved changes and revert to the previous settings that were in effect. -
Page 26: Main
The LAN Settings section shows Local Area Network setting such as the LAN IP address, subnet mask, and MAC address. The Current Wireless Settings section shows wireless information such as frequency and channel. Since the OM5P-AC supports multiple-SSIDs, information about each SSID, such as its ESSID and security settings, are displayed. -
Page 27: Wireless Client List
Clicking the Wireless Client List link under the Status drop-down menu displays the list of clients associated to the OM5P-AC, along with the MAC addresses and signal strength for each client. Clicking the Refresh button updates (refreshes) the client list. -
Page 28: System Log
6.4 System Log The OM5P-AC automatically logs (records) events of possìble ìnterest ìn ìts ìnternal memory.To vìew the logged ìnformatìon , click the System Log lìnk under the Status drop- down menu. there ìs not enough ìnternal memory to log all events older events are deleted from the log. -
Page 29: Connection Status
6.5 Conneetion StatU$ Clicking the Connection Status link under the Stat drop-down menu displays the current 惱 The information shown includes network type SSID , BSSID , connection status of the networ status wireless mode current channel security , data rate , noise level and signal strength. Wireless ... -
Page 30: Dhcp Client Table
Clicking the DHCP Client List link under the Status drop-down menu displays the clients that are associated to the OM5P-AC through DHCP.The MAC addresses and signal strength for each client are also shown. Clicking the Refresh button updates (refreshes) the client lis t. -
Page 31: Chapter 7 System
Chapter 7 System This chapter describes how to change the OM5P-AC operating modes. 7.1 Changing Operating Modes The OM5P-AC supports four operating modes: Access Point Client Bridge WDS Bridge Client Router ... - Page 32 , Clicking Accept does not apply the changes. To apply them use Status > Save/Load (see section 4.1)
-
Page 33: Chapter 8 Wireless Configuration
The OM5P-AC supports Access Point Mode. In this mode, users with a wireless client device within range can connect to the OM5P-AC to access the WLAN. The following figure shows an example of an OM5P-AC operating in Access Point Mode. - Page 34 Wireless Mode Wireless mode supports 802.11a/b/g/n/ac mixed modes. Channel HT Mode The default channel bandwidth is 40 MHz.
- Page 35 Profile Isolation Restricted Client to communicate with different VID by Selecting the radio button. Accept / Cancel Click Accept to confirm the changes or Cancel to cancel and return previous settings. Clicking Accept does not apply the changes. To apply them, use Status > Save/Load (see section 4.1).
- Page 36 SSID Specify the SSID for the current profile. VLAN ID Specify the VLAN tag for the current profile. Suppressed SSID Check this option to hide the SSID from clients.
-
Page 37: Client Bridge Mode
The following figure shows an example of an OM5P-AC communicating with an Access Point/Wireless Router, such as the EOA7530, operating in Client Bridge Mode. The sections that follow the figure below describe how to configure your OM5P-AC for Client Bridge Mode. ... - Page 38 discovered Access Point to establish a connection. Prefer BSSID Enter the MAC address if known. If you select an Access Point in the Site Survey, this field is completed automatically. WDS Client Click the appropriate radio button to enable or disable WDS Client.
-
Page 39: Wds Bridge Mode
The following figure shows an example of three OM5P-AC configured for WDS Bridge Mode communicating with each other. In this configuration, the OM5P-AC device on the left side of the figure behaves as a standard bridge that forwards traffic between the WDS links (links that connect to other OM5P-AC WDS bridges). - Page 40 section 4.1). MAC Address Enter the MAC address of the Access Point to which you want to extend wireless connectivity.
-
Page 41: Client Router Mode
In Client Router Mode, you can access the Internet wirelessly with the support of a WISP. In AP Router Mode, the OM5P-AC can access the Internet via a cable or DSL modem. In this mode, the OM5P-AC can be configured to turn off the wireless network name (SSID) broadcast, so that only stations that have the SSID can be connected. - Page 42 Prefer BSSID Enter the MAC address if known. If you select an Access Point in the Site Survey, this field is completed automatically. Wireless Security See section 10.2. Accept / Cancel Click Accept to confirm the changes or Cancel to cancel and return previous settings.
-
Page 43: Wireless Security Settings
Level of WEP encryption applied to all WEP keys. Choices are Select a 64/128/152-bit password lengths. Default Key Specify which of the four WEP keys the OM5P-AC uses as its default. Key1 Specify a password for security key index No.1. For security, each typed character is masked by a dot ( ... -
Page 44: Wpa-Psk
802.11n does not allow WEP/WPA-PSK/WPA-PSK TKIP security mode. The connection mode will drop from 802.11n to 802.11g. 8.2.2 WPA-PSK ... -
Page 45: Wpa2-Psk
8.2.3 WPA2-PSK Security Mode Select WPA2-PSK from the drop-down list to begin the configuration. Encryption Select Both, TKIP, or AES as the encryption type. •... -
Page 46: Wpa-Psk Mixed
8.2.4 WPA-PSK Mixed Security Mode Select WPA-PSK Mixed from the drop-down list to begin the configuration. Encryption Select Both, TKIP, or AES as the encryption type. • Both = uses TKIP and AES. • TKIP = automatic encryption with WPA-PSK; requires passphrase. -
Page 47: Wpa
8.2.5 WPA Security Mode Select WPA from the drop-down list to begin the configuration. Encryption Select Both, TKIP, or AES as the encryption type. -
Page 48: Wpa2
8.2.6 WPA2 Security Mode Select WPA2 from the drop-down list to begin the configuration. Encryption Select Both, TKIP, or AES as the encryption type. -
Page 49: Wpa Mixed
8.2.7 WPA Mixed Security Mode Select WPA Mixed from the drop-down list to begin the configuration. -
Page 50: Wireless Advanced Settings
8.4 Wireless Advanced Settings ... - Page 51 number of packets, but increases packet sizes. Wireless Traffic Check this option to enable wireless traff ic shaping. Traffic Shaping shaping regulates the flow of packets leaving an interface to deliver improved Quality of Service. Incoming Traffic Limit Specify the wireless transmission speed used for downloading.
-
Page 52: Wireless Mac Filter
Wireless MAC Filters are used to allow or deny network access to wireless clients according to their MAC addresses. You can manually add a MAC address to restrict the permission to access OM5P-AC. The default setting is Disable Wireless MAC Filters. ... -
Page 53: Wds Link Settings
8.6 WDS Link Settings Using WDS Link Settings, you can create a wireless backbone link between multiple access points that are part of the same wireless network. This allows a wireless network to be expanded using multiple Access Points without the need for a wired backbone to link them, as is traditionally required. -
Page 54: Chapter 9 Lan Setup
IP Network Setting Select whether the OM5P-AC IP address will use the static IP address specif ied in the IP Address field or be obtained automatically when the OM5P-AC connects to a device that has a DHCP server . -
Page 55: Spanning Tree Settings
Spanning Tree Status Enable or disable the OM5P-AC Spanning Tree function. Bridge Hello Time Specify Bridge Hello Time, in seconds. This value determine how often the OM5P-AC sends hello packets to communicate information about the topology throughout the entire Bridged... -
Page 56: Chapter 10 Router Settings
This section is only available for AP Router Mode and Client Router Mode. 10.1 WAN Settings This chapter describes the OM5P-AC WAN settings. There are four types of WAN connections: Static IP DHCP PPPoE PPTP Please contact your ISP to find out which settings you should choose.. - Page 57 Auto. Otherwise, packets will be fragmented downstream if the MTU is set too high or too low, which impacts network performance. In extreme cases, an MTU setting that is too low can prevent the OM5P-AC from establishing some connections. IP Address Enter the WAN port IP address.
-
Page 58: Dhcp (Dynamic Ip)
Auto. Otherwise, packets will be fragmented downstream if the MTU is set too high or too low, which impacts network performance. In extreme cases, an MTU setting that is too low can prevent the OM5P-AC from establishing some connections. - Page 59 Use These DNS Servers Click the radio button to set up the Primary DNS and Secondary DNS servers manually. Discard Ping on WAN Check to Enable to recognize pings on the OM5P-AC WAN interface or Disable to block pings on the OM5P-AC WAN interface. Note: Pinging IP addresses is a common method used by hackers to test whether the IP address is valid.
-
Page 60: Pppoe (Point-To-Point Protocol Over Ethernet)
10.1.3 PPPoE (Point-to-Point Protocol over Ethernet) Select Point to Point Protocol over Ethernet (PPPoE) if your ISP uses a PPPoE connection. Your ISP will provide you with a username and password. This selection is typically used for DSL services. - Page 61 setting that is too low can prevent the OM5P-AC from establishing some connections. Login Enter the Username provided by your ISP. Password Enter the Password provided by your ISP. Service Name Enter the Service Name provided by your ISP.
-
Page 62: Pptp (Point-To-Point Tunneling Protocol)
10.1.4 PPTP (Point-to-Point Tunneling Protocol) Select PPTP as your WAN connection type if your ISP uses a Point-to-Point-Tunneling Protocol (PPTP) connection. You will need to provide the IP address subnet mask , default gateway (optional) DNS (optional) server IP , usernam , e and password provided by your ISP. - Page 63 Enter the password provided by your ISP. Connect on Demand If you want the OM5P-AC to end the Internet connection after it has been inactive for a period of time, select this option and enter the number of minutes you want that period of inactivity to last.
-
Page 64: Lan Settings (Router Mode)
WINS Server IP Enter the WINS Server IP. Use Router As DHCP Check this option to enable the OM5P-AC internal DHCP server. Server Starting IP Address Specify the starting IP address range for the pool of allocated for private IP addresses. The starting IP address must be on the same subnet as the ending IP address;... -
Page 65: Vpn Pass Through
10.3 VPN Pass Through VPN Passthrough allows a secure virtual private network (VPN) connection between two computers. Enabling the options on this page opens a VPN port and enables connections to pass through the OM5P-AC without interruption. ... -
Page 66: Port Forwarding
Using port forwarding, you can set up public services on your network. When users from the Internet make certain requests on your network, the OM5P-AC can forward those requests to computers equipped to handle the requests. If, for example, you set the port number 80 (HTTP) to be forwarded to IP address 192.168.1.2, all HTTP requests from outside users are... - Page 67 Service Name Enter a name for the port forwarding rule. Protocol Select a protocol for the application: Choices are Both, TCP, and UDP.
-
Page 68: Dmz
DMZ Hosting Enables or disables the OM5P-AC DMZ function. DMZ Address Enter an IP address of the computer that will have unlimited Internet access. Accept / Cancel Click Accept to confirm the changes or Cancel to cancel and return previous settings. -
Page 69: Chapter 11 Management Settings
Click the Administration link under the Management menu to change the user name and password used to log on to the OM5P-AC Web Configurator . The default user name is admin and the default password is admin. Changing these settings protects the OM5P-AC configuration settings from being accessed by unauthorized users. - Page 70 the OM5P-AC Web Configurator. Save/Apply / Cancel Click Save/Apply to apply the changes or Cancel to return previous settings. Clicking Save/Apply changes the settings immediately. You cannot undo the action.
-
Page 71: Management Vlan
1. If you reconfigure the Management VLAN ID, you may lose your connection to the OM5P- AC. Verify that the DHCP server supports the reconfigured VLAN ID and then reconnect to the OM5P-AC using the new IP address. 2. Clicking Accept does not apply the changes. To apply them, use Status > Save/Load (see... -
Page 72: Snmp Settings
SNMP Enable/Disable Enable or disable the OM5P-AC SNMP function. Contact Enter the contact details of the device. Location Enter the location of the device. Community Name Enter the password for accessing the SNMP community for read-only access. -
Page 73: Backup/Restore Settings
This page also lets you return the OM5P-AC to its factory default settings. If you perform this procedure, any changes made to the OM5P-AC default settings will be lost. -
Page 74: Firmware Upgrade
The firmware upgrade procedure can take few minutes. Do not power off the OM5P-AC during the firmware upgrade, as it can cause the device to crash or become unusable. The OM5P-AC restarts automatically after the upgrade completes. -
Page 75: Time Settings
11.6 Time Settings Click the Time Settings link under the Management menu to configure the OM5P-AC system time. You can enter the time manually or, to ensure accuracy, synchronize the OM5P-AC with Network Time Protocol (NTP) server. -
Page 76: Log
Click the Log link under the Management menu to display a list of events that are triggered on the OM5P-AC Ethernet and wireless interfaces. You can consult this log if an unknown error occurs on the system or when a report needs to be sent to the technical support department for debugging purposes. -
Page 77: Diagnostics
11.8 Diagnostics Click the Diagnostics link under the Management menu to ascertain connection quality and trace the routing table to the target. ... -
Page 78: Chapter 12 Network Configuration Examples
This chapter provides step-by-step descriptions for using the OM5P-AC’s operating modes. The Access Point Mode’s default configuration allows the OM5P-AC to act as a central unit of a WLAN or as a root device of a wired environment. Repeater mode and Mesh network mode are reserved for future configuration. -
Page 79: Client Bridge Mode
Wireless Client Step1 Select the wireless mode with which you want to associate. Use site survey to scan nearby Access Point and either select the Step2 Access Point to which you want to connect, or enter the SSID manually. Step3 Configure the VLAN ID in your wireless device if available. -
Page 80: Wds Bridge Mode
12.3 WDS Bridge Mode Use this feature to link multiple Access Points in a network. All clients associated with any Access Points can communicate with each other in an ad-hoc manner. WDS Bridge Step1 Log in to the Web Configurator with the default IP address... -
Page 81: Client Router
With its ability to operate in various operating modes, your OM5P-AC is the ideal device around which you can build your WLAN. This appendix describes how to build a WLAN around your OM5P-AC using he device’s operating modes. -
Page 82: Access Point Mode
In Access Point Mode, OM5P-AC behaves likes a central connection for stations or clients that support IEEE 802.11a/b/g/n/ac networks. Stations and client must be conf igured to use the same SSID and security password to associate with the OM5P-AC. The OM5P-AC supports four SSIDs at the same time for secure guest access. -
Page 83: Client Bridge Mode
LANs located a small distance apart want to communicate with each other. The best solution is to use the OM5P-AC to wirelessly connect two wired LANs, as shown in the following figure. WDS Bridge Mode can establish 16 WDS links, creating a star-like network. -
Page 84: Client Router Mode
In Client Router Mode, the OM5P-AC’s internal DHCP server allows a number of LANs to automatically generate IP addresses to share the same Internet. In this mode, connect an AP/WISP wirelessly and connect to LANs via a wired connection. -
Page 85: Appendix A - Troubleshooting
Appendix A – Troubleshooting This appendix provides problem-solving information you may find useful in case you need to troubleshoot your OM5P-AC. It also includes information about contacting technical support. A.1 Problem Solving ... -
Page 86: Contacting Technical Support
A.2 Contacting Technical Support If you encounter issues that cannot be resolved using this manual, please contact your vendor where you purchase the device. If you cannot contact your vendor, you may also contact Customer Service department in the region where you purchased the device. Before you contact your local office, please prepare the following information: ... -
Page 87: Appendix B - Specifications
... -
Page 88: Appendix C - Glossary
Appendix C – Glossary Access Point A base station in a WLAN that act as a central transmitter and receiver of WLAN radio signals. Ad Hoc Network A short-term WLAN framework created between two or more WLAN adapters, without going through an Access Point. - Page 89 A protocol that assigns temporary IP addresses automatically to client stations logging onto an IP network, so the IP addresses do not have to be assigned manually. The OM5P-AC contains an internal DHCP server that automatically allocates IP address using a user-defined range of IP addresses.
- Page 90 In the 802.11n system, two new formats, called High Throughput (HT), are defined for the Physical Layer, Mixed Mode, and Green Field. If a system runs 40 HT, two adjacent 20 MHz channels are used. The larger 40 MHz bandwidth can provide better transmit quality and speed. ...
- Page 91 Service Set Identifier (SSID) Name of a WLAN. All wireless devices on a WLAN must use the same SSID to communicate with each other. Simple Network Management Protocol (SNMP) An Internet-standard protocol for managing devices on IP networks. Snooping Passively watching a network for data, such as passwords, that can be used to benefit a hacker.
- Page 92 Protocol (TKIP) and Advanced Encryption Standard (AES ), in the Counter mode with Cipher block chaining Message authentication Code Protocol (CCMP). Wireless Distribution System (WDS) A technology that lets Access Points communicate with one another to extend the range of a ...
-
Page 93: Appendix D - Fcc Interference Statement
Appendix D – FCC Interference Statement Federal Communication Commission Interference Statement This equipment has been tested and found to comply with the limits for a Class B digital device, pursuant to Part 15 of the FCC Rules. These limits are designed to provide reasonable protection against harmful interference in a residential installation. This equipment generates, uses and can radiate radio frequency energy and, if not installed and used in accordance with the instructions, may cause harmful interference to radio communications. However, there is no guarantee that interference will not occur in a particular installation. If this equipment does cause harmful interference to radio or television reception, which can be determined by turning the equipment off and on, the user is encouraged to try to correct the interference by one of the following measures: ‐ Reorient or relocate the receiving antenna. ‐ Increase the separation between the equipment and receiver. ‐ Connect the equipment into an outlet on a circuit different from that to which the receiver is connected. ‐ Consult the dealer or an experienced radio/TV technician for help. FCC Caution: Any changes or modifications not expressly approved by the party responsible for compliance could void the user's authority to operate this equipment. This device complies with Part 15 of the FCC Rules. Operation is subject to the following two conditions: (1) This device may not cause harmful interference, and (2) this device must accept any interference received, including interference that may cause undesired operation. ... - Page 94 uncontrolled environment. This equipment should be installed and operated with minimum distance 20cm between the radiator & your body. Industry Canada statement: This device complies with RSS‐210 of the Industry Canada Rules. Operation is subject to the following two conditions: (1) This device may not cause harmful interference, and (2) this device must accept any interference received, including interference that may cause undesired operation. Ce dispositif est conforme à la norme CNR‐210 d'Industrie Canada applicable aux appareils radio exempts de licence. Son fonctionnement est sujet aux deux conditions suivantes: (1) le dispositif ne doit pas produire de brouillage préjudiciable, et (2) ce dispositif doit accepter tout brouillage reçu, y compris un brouillage susceptible de provoquer un fonctionnement indésirable. Caution : (i) the device for operation in the band 5150‐5250 MHz is only for indoor use to reduce the potential for harmful interference to co‐channel mobile satellite systems; (ii) high‐power radars are allocated as primary users (i.e. priority users) of the bands 5250‐5350 MHz and 5650‐5850 MHz and that these radars could cause interference and/or damage to LE‐LAN devices. Avertissement: (i) les dispositifs fonctionnant dans la bande 5150‐5250 MHz sont réservés uniquement pour une utilisation à l’intérieur afin de réduire les risques de brouillage préjudiciable aux systèmes de satellites mobiles utilisant les mêmes canaux; (ii) De plus, les utilisateurs devraient aussi être avisés que les utilisateurs de radars de ...
- Page 95 haute puissance sont désignés utilisateurs principaux (c.‐à‐d., qu’ils ont la priorité) pour les bandes 5250‐5350 MHz et 5650‐5850 MHz et que ces radars pourraient causer du brouillage et/ou des dommages aux dispositifs LAN‐EL. Radiation Exposure Statement: This equipment complies with IC radiation exposure limits set forth for an uncontrolled environment. This equipment should be installed and operated with minimum distance 20cm between the radiator & your body. Déclaration d'exposition aux radiations: Cet équipement est conforme aux limites d'exposition aux rayonnements IC établies pour un environnement non contrôlé. Cet équipement doit être installé et utilisé avec un minimum de 20cm de distance entre la source de rayonnement et votre corps. Europe – EU Declaration of Conformity This device complies with the essential requirements of the R&TTE Directive 1999/5/EC. The following test methods have been applied in order to prove presumption of conformity with the essential requirements of the R&TTE Directive 1999/5/EC: ‐ EN60950‐1 ‐ Safety of Information Technology Equipment ‐ EN50385 ‐ Generic standard to demonstrate the compliance of electronic and electrical apparatus with the basic restrictions related to human exposure to electromagnetic fields (0 Hz ‐ 300 GHz) ‐ EN 300 328 ...
- Page 96 N 301 489‐1 lectromagne etic compatib bility and Ra dio Spectrum m Matters (E ERM); Electro oMagnetic Compatibility y (EMC) stand dard for radi o equipmen t and service es; Part 1: Co ommon tech nical equirements s ‐ N 301 489‐1 7 ‐ lectromagne etic compatib bility and Ra dio spectrum m Matters (E RM); Electro oMagnetic Compatibility y (EMC) stand dard for radi o equipmen t and service es; Part 17: S Specific cond ditions ...
- Page 97 Español Por medio de la presente [nombre del fabricante] declara que el [clase de equipo] cumple con [Spanish] los requisitos esenciales y cualesquiera otras disposiciones aplicables o exigibles de la Directiva 1999/5/CE. Ελληνική ΜΕ ΤΗΝ ΠΑΡΟΥΣΑ [name of manufacturer] ΔΗΛΩΝΕΙ ΟΤΙ [type of equipment] [Greek] ΣΥΜΜΟΡΦΩΝΕΤΑΙ ΠΡΟΣ ΤΙΣ ΟΥΣΙΩΔΕΙΣ ΑΠΑΙΤΗΣΕΙΣ ΚΑΙ ΤΙΣ ΛΟΙΠΕΣ ΣΧΕΤΙΚΕΣ ΔΙΑΤΑΞΕΙΣ ΤΗΣ ΟΔΗΓΙΑΣ 1999/5/ΕΚ. Français Par la présente [nom du fabricant] déclare que l'appareil [type d'appareil] est conforme aux [French] exigences essentielles et aux autres dispositions pertinentes de la directive 1999/5/CE. Italiano Con la presente [nome del costruttore] dichiara che questo [tipo di apparecchio] è conforme ai [Italian] requisiti essenziali ed alle altre disposizioni pertinenti stabilite dalla direttiva 1999/5/CE. Latviski Ar šo [name of manufacturer / izgatavotāja nosaukums] deklarē, ka [type of equipment / [Latvian] iekārtas tips] atbilst Direktīvas 1999/5/EK būtiskajām prasībām un citiem ar to saistītajiem noteikumiem. Lietuvių Šiuo [manufacturer name] deklaruoja, kad šis [equipment type] atitinka esminius reikalavimus [Lithuanian] ir kitas 1999/5/EB Direktyvos nuostatas. Nederlands Hierbij verklaart [naam van de fabrikant] dat het toestel [type van toestel] in overeenstemming [Dutch] is met de essentiële eisen en de andere relevante bepalingen van richtlijn 1999/5/EG. Malti Hawnhekk, [isem tal‐manifattur], jiddikjara li dan [il‐mudel tal‐prodott] jikkonforma mal‐ [Maltese] ħtiġijiet essenzjali u ma provvedimenti oħrajn relevanti li hemm fid‐Dirrettiva 1999/5/EC. Magyar Alulírott, [gyártó neve] nyilatkozom, hogy a [... típus] megfelel a vonatkozó alapvetõ [Hungarian] követelményeknek és az 1999/5/EC irányelv egyéb elõírásainak. Polski ...
Need help?
Do you have a question about the OM5P-AC and is the answer not in the manual?
Questions and answers