
Subscribe to Our Youtube Channel
Related Manuals for Curtis Mathes CMC13101


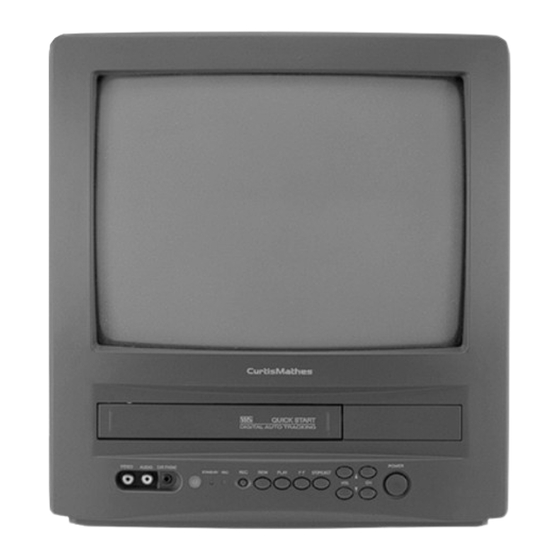
Summary of Contents for Curtis Mathes CMC13101
- Page 1 13" COLOR TELEVISION / VCR OWNER'S MANUAL C M C 13101 Customer Support: 1-800-270-4535 www.curtismathes.com...
- Page 2 CAUTION : TO REDUCE THE RISK OF ELECTRIC SHOCK, DO NOT REMOVE COVER (OR BACK) NO USER-SERVICEABLE PARTS INSIDE. REFER SERVICING TO QUALIFIED SERVICE PERSONNEL. The lightning flash with arrowhead symbol, within an equilateral triangle, is intend- ed to alert the user to the presence of uninsulated “dangerous voltage” within the product’s enclosure that may be of sufficient magnitude to constitute a risk electric shock.
- Page 3 • If, by accident, water is spilled on your unit, unplug the power cord immediately and take the unit to an authorized daewoo service center for servicing. • Do not put your fingers or objects into the TV/VCR Combination cassette holder.
-
Page 4: Important Safeguards
S A F E T Y IMPORTANT SAFEGUARDS PLEASE READ ALL THESE INSTRUCTIONS REGARDING YOUR TV/VCR COMBINATION AND RETAIN FOR FUTURE REFERENCE. FOLLOW ALL WARNINGS AND INSTRUCTIONS MARKED ON THE TV/VCR COMBINATION. Read all of these instructions. Save these instructions for later use. - Page 5 Never spill liquid of any kind on the TV/VCR Combination. 16 Do not attempt to service this TV/VCR Combination yourself as opening or remov- ing covers may expose you to dangerous voltage or other hazards.
- Page 6 Here are a few tips that will keep your TV/VCR Combination looking great and performing for years to come: • Avoid putting it in excessively hot locations. Damage to the cabinet or premature component failures can result.
-
Page 7: Table Of Contents
Chapter 1 : Overview of Your Equipment Your TV/VCR Combination’s Front Panel Your TV/VCR Combination’s Back Panel Your Remote Controller Chapter 2 : Connecting an Antenna or Cable to Your TV/VCR Combination Connecting an Antenna Connecting a Cable System Connecting Other Pieces of Equipment... -
Page 8: Preface : Your New Tv/Vcr Combination
TV/VCR Combination provides you with years of reliable performance. Your new TV/VCR Combination is designed and engineered to provide you with the latest in features for your convenience. Listed below are just a few of the many features of your equip- ment. -
Page 9: Unpacking Your Tv/Vcr Combination
You can easily set your VCR to record every day at the same time, or to record every week at the same time. • Sleep Timer You can set your TV/VCR Combination to turn off after a certain amount of time passes, from 15 minutes to 120 minutes. • On Timer You can set your TV/VCR Combination to turn on at a certain time. -
Page 10: Chapter 1 : Overview Of Your Equipment
Overview of Your Equipment Your TV/VCR Combination’s comes with a remote control. The section below summarizes the buttons, controls, and terminals that you will use with your TV/VCR Combination. Your TV/VCR Combination's Front Panel Below you will find short description of the buttons and indicators on the front panel. These... -
Page 11: Your Tv/Vcr Combination's Back Panel
12 V V VOLW W button (volume) Press this button to change your TV/VCR Combination’s volume. 13 V V CHW W button (channel) Press this button to change channels on your TV/VCR Combination. You will also use these button to adjust the tracking. 14 POWER button Press this button to turn your TV/VCR Combination on or off. -
Page 12: Your Remote Controller
PLAY REC/OTR STOP/EJECT PAUSE/STILL VISS 10. MENU Press this button to turn the TV/VCR Combination’s menu system on and off. 11. 0-9 Press these buttons to change channels. 12. SPEED Press this button to select the SP, EP tape speed when the tape is recording. - Page 13 14. 0(ATK) Press this button to automatically set tracking point when the tape plays back. 15. REW Press this button to rewind the tape. 17. FF button (Fast Forward) Press this button to fast forward the tape. 18. PAUSE/STILL Press to temporarily stop the tape during recording or playback. 19.
-
Page 14: Installing Your Remote Control Batteries
Point your remote at the receiver on the center of the front of the TV/VCR Combination. Make sure the receiver is not blocked. The remote control can operate up to 30 feet away from the TV/VCR Combination, if you are directly facing the front of the TV/VCR Combination. Operating distance diminishes as you move to the sides of the TV/VCR Combination. -
Page 15: Chapter 2 : Connecting An Antenna Or Cable To Your Tv/Vcr Combination
C H A P T E R Connecting an Antenna or Cable to Your TV/VCR Combination Your TV/VCR Combination will provide you with the best performance if you connect it to an external antenna or cable system. Follow the directions below to make this connection. - Page 16 (available at your local electronics store). Press or screw the coaxial lead onto the combiner; place the twin leads underneath the screws on the combiner and tighten the screws. Press the cable from combiner onto the antenna terminal on the back of the TV/VCR Combination.
-
Page 17: Connecting A Cable System
IN terminal on the converter box. Connect another cable between the OUT terminal on the converter box and the antenna terminal on the TV/VCR Combination. You will need to keep your TV/VCR Combination tuned to channel 3 or 4 and change chan- nels using the converter box. -
Page 18: Connecting Other Pieces Of Equipment
If you connect other pieces of equipment to your TV/VCR Combination using the audio/video jacks on the front panel, you will need to use the TV/LINE button on the remote control to view the signal coming through these jacks. See page 41 for more information. -
Page 19: Chapter 3 : Operating Your Tv
Once you have connected your TV/VCR Combination to an antenna or cable system, plugged the TV in, and put batteries in the remote, you are ready to use the TV. The first thing you should do is program your TV/VCR Combination so it memorizes all of available channels. -
Page 20: Changing Channels
3. The FAVORITE CH button will take you instantly to the last channel you were watching. 1. To change the volume of the TV/VCR Combination set, use the CVOLB buttons on the remote or on the front panel. 2. To quickly turn off the sound, press the MUTE button on the... -
Page 21: Changing The Tv/Vcr Combination's Channel Memory
Changing the TV/VCR Combination's Channel Memory Your TV/VCR Combination's memory determines the channels that are available using the VCHW buttons. You can add channels to this memory or remove them from memory. If a channel is removed from memory, you can tune to it with the number buttons, but you cannot tune to it with the VCHW buttons. -
Page 22: Adjusting Video Settings
You may wish to adjust the video settings (e. g. contrast or color) to obtain the most pleasing picture. To do so, follow these directions: 1. With the TV/VCR Combination on, press the MENU button, then “Video” menu will appear. 2. The “Settings” item will be selected. Use the CVOLB buttons to turn Settings to Preset or Custom. -
Page 23: Returning To The Factory Settings
CVOL button; if the picture is too dark, press the VOLB button. Sharpness controls how the TV displays edges of objects on-screen. If the TV shows multiple vertical lines at the edges of an object, press the CVOL button; if the vertical edges of on-screen objects are fuzzy, press the VOLB button. -
Page 24: Chapter 4 : Operating Your Vcr
TV/VCR Combination will pull the tape the rest of the way. You can insert a tape into your TV/VCR Combination even when it is turned off. If the tape has its erasure prevention tab removed, the TV/VCR Combination will turn on and begin playing the tape. -
Page 25: Playing A Tape
7X normal (in SP speed) or 11X normal (in EP.) If you press FF or REW while the tape is stopped, the TV/VCR Combination will quickly wind your tape in the selected direction. No picture from the tape will be displayed, but the tape moves at a much higher speed without the picture. -
Page 26: Basic Recording
Basic Recording Your TV/VCR Combination makes it easy to record a program you are watching. To do this : 1. Place the tape on which you want to record in the cassette compartment. Fast forward or rewind to the point where you want to begin recording. -
Page 27: One Touch Recording (Otr)
OTR time, up to 4 hours. 3. When you have reached the length of time that you want the TV to record, stop pressing the OTR button. The TV/VCR Combination will count down the time you set. When the timer reaches 00:00, recording will stop. -
Page 28: Displaying The Tv/Vcr Combination's Status During Vcr Operation
Displaying the TV/VCR Combination’s Status during VCR Operation If you have a tape in the TV/VCR Combination’s cassette compartment, you can display the following information. 1. Press the RECALL button. The current time, the current channel, the tape statue (STOP, PLAY, REC, etc.), the tape speed, and the tape counter will be displayed. -
Page 29: Using The Counter (Zero Stop)
2. To reset the counter, press the C-RESET button on the remote control (0:00:00). The counter is also reset when you put a new cassette in your TV/VCR Combination. 3. Press the MENU button until “Tape” menu is displayed. -
Page 30: Chapter 5 : Using Timer Functions
Using Timer Functions Your TV/VCR Combination has a built in-clock, and you can set the TV to turn on and off at times that you select. You can also set your TV to turn off after counting down a certain amount of time. -
Page 31: Setting The Clock Manually
Exit Setting the Clock Manually If you are unable or not interested in using the Auto Clock feature, you can set your TV/VCR Combination’s clock manually. 1. With the TV turned on, press the MENU button until “Time” menu is displayed. -
Page 32: Setting The On Time
Adjust Select Setting the On Time If you enter a time in the “On Time” setting, your TV/VCR Combination will automatically turn on at that time. Follow these instruction to set the “On Time”: 1. With the TV turned on, press the MENU button until “Time” menu is displayed. -
Page 33: Canceling The On Time Or Off Time
4. Press the CVOLB buttons to select the time and minute, press the VCHW buttons to change time setting. If you hold down either VCH or CHW button, the corresponding numbers will change more quickly. 5. When the clock is set correctly, press the CVOLB buttons to select “Off Time” and use the VCHW buttons to select another “Time”... -
Page 34: Setting The Sleep Timer
4. When the clock is set correctly, press the VCHW buttons to select another “Time” func- tion, or press the L MENU button to exit. To cancel the Sleep Timer, turn the TV/VCR Combination off, or set the sleep time to “off” using one of the methods described above. -
Page 35: Chapter 6 : Additional Tv Features
“text” is not usually related to the action on-screen, often providing information such as news or weather. A TV program might be providing more than one set of captions or one set of text. -
Page 36: Cc On Mute
User can select the On/Off status when the power cord is put into the wall outlet. If user has a cable box with AC outlet, then user can connect the TV/VCR Combination power cord to the AC outlet and control the TV/VCR Combination without TV/VCR Combination remote con- trol. -
Page 37: Parental Control Settings
This item help parents to set the standard for the programs which their children are going to watch. 1. With the TV/VCR Combination turned on, press the MENU button until “Special” menu is displayed. 2. Use the VCHW buttons to select “Parental Control” item. -
Page 38: Description Of Parental Control Settings
Description of Parental Control Settings 1. The Movie Ratings set the standard for movie, video, and other media excluding TV pro- grams. Use the VCHW buttons to select, CVOLB buttons to adjust. 2. The TV Guidelines set the standard for TV programs excluding sports and news. -
Page 39: Mini Glossary
Bad Language, Sex, and Violence Scenes. Considered suitable for all audience children may watch unattended. Consider suitable for all children under 7 years old. Consider suitable for children over 7, may contain Fantasy Violence Scenes. Chapter 6 : Additional TV Features... -
Page 40: Chapter 7 : Additional Vcr Features
One of the most convenient features of your new TV/VCR Combination is the ability to record programs when you are not home. Your TV/VCR Combination can be set to record up to six different programs at any time up to a month from now. -
Page 41: Setting The Program Recording
Here’s an example of how to record a program broadcast on channel 26 from 8:00 PM to 9:00 PM Sunday, 6th of February 2000, in EP mode. 1. With the TV/VCR Combination turned on, press the MENU button until “Program” menu is displayed. - Page 42 Enter 13. Press POWER to turn off the TV/VCR Combination. The REC lamp on the front of the TV/VCR Combination lights up to Green and the TV/VCR Combination enters recording stand-by mode. The TV/VCR Combination powers on automatically and begins recording at the preset start time, and the REC lamp on the front of the TV/VCR Combination changes from Green to Red.
-
Page 43: Canceling The Program Record Settings
Canceling the Program Record Settings 1. With the TV/VCR Combination turn on, press the MENU button until “Program” menu is displayed. 2. Using the VCHW buttons select the Program setting which you want to stop recording and press the CANCEL button. -
Page 44: Displaying The Tape Counter
Displaying the Tape Counter Press the RECALL button to display the tape counter. The tape counter shows the tape travel time in hours, minutes and seconds during recording or playback. Each time you press the RECALL button, the time counter and the remaining tape time counter appears alternately. 12:08 PM Stop Time counter... -
Page 45: Auto Repeat Playback
Auto Repeat PlayBack You can set your TV/VCR Combination to play a tape continuously. When you turn this fea- ture on and start playing a tape, it will play to the end of the tape, then rewind to the beginning and start playing again. -
Page 46: Index Search (Viss)
Index Search (VISS) Your TV/VCR Combination is equipped with the VHS Index Search System, or VISS. The VISS allows “index marks” to be placed on a video tape. These marks are similar to bookmarks - you can use the search system to quickly find these marks, and thereby find a point on the tape quickly. -
Page 47: Duplicating A Video Tape
3. Press TV/LINE button on the remote control to set the TV/VCR Combination to “LINE”. 4. Insert the tape on which you want to record in the TV/VCR Combination and set it to the point at which you want to begin recording. -
Page 48: Chapter 8 : Troubleshooting
• Make sure the MUTE is not set. • Make sure the power is on. • If there is neither picture or sound, unplug the TV for 30 seconds, then plug it in and try again. There is no picture or sound on some UHF channels. -
Page 49: Maintenance And Specifications
MAINTENANCE AND SPECIFICATIONS Servicing Should your TV/VCR Combination stop working, do not try to repair it yourself. There are no user-serviceable parts inside the unit. Turn the TV/VCR Combination off, unplug the power cord, and take the unit to an authorized CurtisMathes repair center. -
Page 50: Remote
127, 171, 000, 002, 009, 013, 000, 015, 105, 162, 018, 016, 021, 022, 024, 115, SEARCH or TV – TV Code 041, 035, 036, 003, VCR – VCR Code 019, 023, CODE SEARCH CODE SEARCH 311, 002, 102, 110,... -
Page 51: Warranty Information
Warranty Information Limited Warranty The manufacturer warrants that this product is free from defective material and workmanship. The manufacturer further warrants that if the product fails to operate properly within the specified warranty period and the failure is due to improper workmanship or defective material, the manufacturer will repair or replace the product at it's option. - Page 52 This product is listed by Underwriter's Laboratories, Inc. It is designed and manufactured to meet rigid U.L. safety standards against X-radiation, fire casualty and electrical hazards. ® ENERGY STAR As an Partner, CurtisMathes has determined that this product or product model meets the ®...
Need help?
Do you have a question about the CMC13101 and is the answer not in the manual?
Questions and answers