
Related Manuals for Dylos DC1700


Summary of Contents for Dylos DC1700
- Page 1 User Manual DC1700 Air Quality Monitor DYLOS CORPORATION Air Quality Monitoring Innovation US Patent 8009290 Foreign Patent Pending...
-
Page 2: Table Of Contents
Date time mode clear history mode Internal Memory ..............14 PC Interface ................15 Connecting the DC1700 Using terminal software Battery Operation ..............19 Interpreting the data ..............20 Care and Maintenance ..............21 Troubleshooting Guide ..............22 Notices .................. -
Page 3: Introduction
Introduction Important Safety Instructions Read and keep these instructions. Follow all warnings and instructions. Do not attempt to open or disassemble the device. This may result in risk of shock or exposure to laser radiation. No serviceable parts are inside. Do not use this device near water, such as a sink, wash basin, or bathtub. -
Page 4: For Best Performance
Respiratory ailments and allergic symptoms are caused by a variety of factors. The DC1700 is not meant to be used in the treatment or mitigation of any medical condition. Please consult... -
Page 5: Operation
The DC1700 also has an internal 7.2V NiMH battery which can provide up to 6 hours of operation. To charge the internal battery, plug the DC1700 into AC, but don’t turn the unit on. (Note: It may take 12 or more hours to charge a fully discharged battery) -
Page 7: Operating Modes
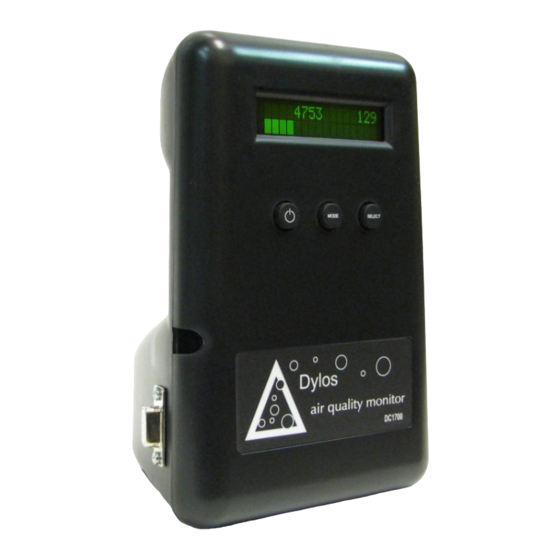
The DC1700 is simple to operate. All that needs to be done is to plug the unit in and turn it on. Once turned on the unit will automatically configure itself to run in continuous mode and display the current level of particulate pollution for both small and large particles. - Page 8 analysis. In addition, a dynamic bar graph will be displayed which will give the user an immediate visual indicator of the number and size of particles being detected. When continuous mode is first entered it will briefly display the approximate battery charge state provided that the unit is running on battery and not on AC as shown below.
-
Page 9: Monitor Mode
In monitor mode the DC1700 will sample for one minute every hour. The LCD will display “monitor mode” and wait until the next hour break to begin sampling. When the unit starts sampling the fan will come on and the word “sampling” will flash on the second line of the LCD. - Page 10 The message “TIME BREAK” alerts the user that the displayed times past the time break are no longer accurate. This happens if the DC1700 is unplugged which causes the unit to lose track of time. Note: the stored data is not lost but only the time reference from the present.
-
Page 11: Hour History Mode
hour history mode Hour history mode allows the user to view the data recorded over the past day on an hour by hour basis. When hour history mode is entered by pressing the MODE button while in minute history mode, the following message is displayed briefly. hour history Then the user is instructed to press the SELECT button to start viewing the history data. -
Page 12: Day History Mode
3 HOURS AGO small particles large particles day history mode Day history mode allows the user to view the data recorded over the past month on a day by day basis. When day history mode is entered by pressing the MODE button while in hour history mode, the following message is displayed briefly. -
Page 13: Date Time Mode
Date time mode displays the current date and time (in 24hr time) and allows the user to set the internal clock. The internal clock is used to time stamp the data which is stored in the DC1700’s internal memory. This is to facilitate graphing the data (e.g. using Excel) once it has been downloaded into a PC. - Page 14 Repeat this procedure until the day, year, hour, and minute have been set properly. The final press of the MODE button will store these values into the DC1700 internal clock. The mode will then be automatically advanced to...
-
Page 15: Clear History Mode
After the histories are cleared the DC1700 automatically switches into continuous mode. If the user opts to not clear history then he must press MODE instead of SELECT and the unit returns to... -
Page 16: Internal Memory
The DC1700 stores these readings every minute when sampling. The data stored in memory is the same as the data displayed on the DC1700 and represents the average of the particle concentration over the previous minute. This amounts to about 10,000 individual readings. -
Page 17: Pc Interface
PC. This interface provides two basic capabilities – to download the DC1700's internal memory or to log data live as it is being taken by the DC1700. If you have an older PC which is equipped with a COM port then you can connect the DC1700 directly to the PC using a 9 pin serial extension cable. - Page 18 Setup the COM port for 9600 baud, 8 bits, no parity, one stop, and no flow control. Click Ok. At this point you should be connected to the DC1700. If the DC1700 is on and sampling then the counts should be output every minute and appear in the HyperTerminal window.
- Page 19 “Session“ category on the left hand side of the screen and enter a name for the session, such as, Dylos DC1700, and then click “Save“. You can now recall this setup for future sessions. Click Open and the Putty terminal will open - it works similar to HyperTerminal.
- Page 20 oldest samples shown first and the newest samples last. The following is a sample output. 04/30/10 10:44,1783,137 04/30/10 10:45,1857,122 04/30/10 10:46,1917,140 04/30/10 10:47,1919,136 … … 04/30/10 18:22,7677,4127 04/30/10 18:23,7696,4131 04/30/10 18:24,7722,4124 The data is time stamped with the date followed by the hour (24hr time) and minute.
-
Page 21: Battery Operation
To charge the DC1700 battery, first turn off the DC1700 and unplug the wall adapter from the DC1700. Plug the wall adapter back into the DC1700 without turning on the DC1700 and this will start the DC1700 charging. Depending on the state of discharge of the battery it may take 12 hours or more to fully charge. -
Page 22: Interpreting The Data
The Dylos DC1700 is the tool that allows you take control of your air quality and to know what works and what doesn’t work to... -
Page 23: Care And Maintenance
Cleaning is simple - use compressed air, such as from any of the available “canned air” products, to blow into the openings in the top rear of the DC1700. It is best to perform this operation while the unit is turned on so that the fan is running and will draw out any dust blown free. -
Page 24: Troubleshooting Guide
Certain kinds of fluorescent lighting can cause high counts if located within 1-2 feet of the DC1700. To be safe move the DC1700 several feet away from any device you suspect might be causing interference. -
Page 25: Notices
This device is a CLASS 1 Laser product and complies with 21 CFR 1040.10 and 1040.11. The following label appears on the rear of the device: Manufactured: August 2011 DYLOS CORPORATION 2900 Adams Street, C37 Riverside, CA CLASS 1 LASER PRODUCT COMPLIES WITH 21 CFR 1040.10 AND 1040.11 WARNING DO NOT ATTEMPT TO OPEN DANGER –... -
Page 26: Warranty
When it is necessary for you to ship the product to Dylos Corporation for repair or exchange, you will pay the cost of shipping to Dylos Corporation. - Page 27 Email Dylos Corporation at support@dylosproducts.com stating the nature of the problem. Dylos Corporation will either respond with a solution or grant an RMA number (Return Merchandise Authorization). You may return the product via prepaid shipping along with your proof of purchase and RMA number to:...
Need help?
Do you have a question about the DC1700 and is the answer not in the manual?
Questions and answers