Sony MHC-GNX100 Operating Instructions Manual
Hide thumbs
Also See for MHC-GNX100:
- Operating instructions manual (56 pages) ,
- Operating instructions manual (56 pages)

Related Manuals for Sony MHC-GNX100


Summary of Contents for Sony MHC-GNX100
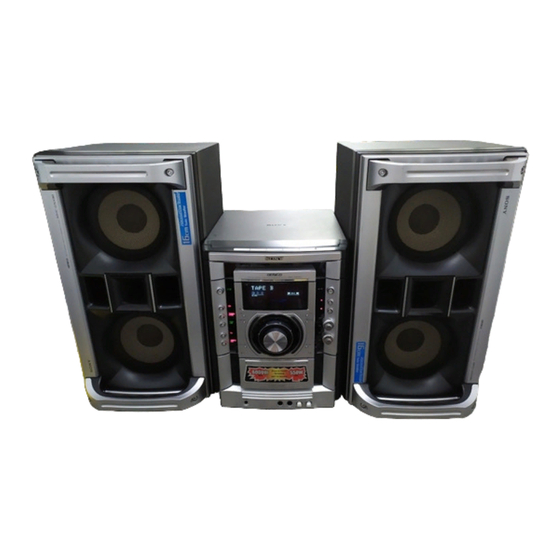
- Page 1 2-547-453-52(1) Mini Hi-Fi Component System Operating Instructions Manual de Instrucciones MHC-GNX100 MHC-GNX90 MHC-GNX88/GNX80 MHC-GNX77/GNX70/GX9900 MHC-GNX66/GNX60 ©2005 Sony Corporation...
- Page 2 Don’t throw away the battery with general house waste, dispose of it correctly as chemical waste. ® is a U.S. registered NERGY ® mark. As an E partner, NERGY Sony Corporation has determined that this product meets the E NERGY ® guidelines for energy efficiency.
-
Page 3: Table Of Contents
— Repeat Play — SOUND FLASH Creating your own program ....17 Creating a party environment ....30 — Program Play (MHC-GNX100 only) Selecting the speaker system ....31 Tuner (MHC-GNX100 only) Presetting radio stations ......19 Selecting audio channel ......31 Listening to the radio ...... - Page 4 38 Optional Components Hooking up optional components ..40 Listening to audio from a connected component ........41 Recording on a connected component .. 41 (For MHC-GNX100/GNX90/ GNX88/GNX80/GNX77/ GNX70/GNX66/GNX60) Connecting external antennas ....42 Troubleshooting Problems and remedies ......43 Messages ..........
-
Page 5: About This Manual
– Speaker system – Speaker system • Front speakers SS-GNX66 • Front speakers SS-GNX90 The MHC-GNX70/GX9900 consists of: The MHC-GNX100 consists of: – Tuner/CD/MP3 player/ – Tuner/CD/MP3 player/ Stereo cassette deck/ Stereo cassette deck/ Amplifier (main unit) HCD-GNX70/ Amplifier (main unit) -
Page 6: Playable Discs
Discs that this system cannot Playable discs play back You can play back the following discs on this • CD-ROMs other than those has MP3 audio system. Other discs cannot be played back. tracks that conforms to ISO 9660 Level 1, Level 2, Joliet in expansion format. - Page 7 Notes on discs Note on DualDiscs • This system can play back CD-R/CD-RW This product is designed to play back discs that discs edited by the user. However, note that conform to the Compact Disc (CD) standard. playback of some discs may not be possible A DualDisc is a two sided disc product which depending on the recording device used for mates DVD recorded material on one side with...
-
Page 8: Getting Started
Do the following procedures 1 to 7 to hook up your system using the supplied cords and accessories (page 53). AM loop antenna FM lead antenna Surround speaker Surround speaker Subwoofer (Right) (Left) Front speaker (Left) Unit Front speaker (Right) MHC-GNX100/GNX88/GNX80 only MHC-GNX88/GNX80/GNX77/GNX70/GX9900 only MHC-GNX100 only MHC-GNX88/GNX77/GNX66 only... - Page 9 1 Connect the front speakers. 3 Connect the subwoofer. (MHC-GNX100/GNX88/GNX80 only) Connect the speaker cords of the front Connect the subwoofer cord of the speakers to the FRONT SPEAKER subwoofer to the SUBWOOFER OUT terminals as shown below. terminal and the system cord to the...
- Page 10 5 Connect the FM and AM antennas. 7 Connect the power cord to a wall outlet. Set up the AM loop antenna, then connect The demonstration appears in the display. When you press , the system turns on and the demonstration automatically ends. If the supplied adaptor on the plug does not fit your wall outlet, detach it from the plug (only for models equipped with an adaptor).
- Page 11 Inserting two R6 (size AA) Attaching the speaker pads batteries into the remote Attach the supplied speaker pads to the bottom of the speakers to stabilize the speakers and prevent them from slipping. Note If you do not use the remote for a long period of time, remove the batteries to avoid possible damage from battery leakage and corrosion.
-
Page 12: Positioning The Speakers
0.3m 45° Listener Note Surround speaker** Surround speaker** (MHC-GNX100/GNX88/GNX80 only) Place the subwoofer at least 0.3 meters (1 feet) away from the unit. * MHC-GNX88/GNX80 only ** Except for MHC-GNX90/GNX66/GNX60 For MHC-GNX100 There are 2 different ways to place the speakers. -
Page 13: Setting The Clock
Setting the clock Use buttons on the remote for the operation. Press ?/1 to turn on the system. Press CLOCK/TIMER SET. “CLOCK” appears in the display. Then, the hour indication flashes in the display. Press –. or >+ repeatedly to set the hour. -
Page 14: Disc - Playback
Playing a disc Disc – Playback — Normal Play/Shuffle Play Loading a disc This system lets you play back CDGs*, audio CDs and discs with MP3 audio tracks in Press Z OPEN/CLOSE. different play modes. The disc tray slides out. Before playing a CDG*, turn on your TV and Load a disc with the label side facing select the video input. - Page 15 When playing a CDG (MHC-GNX88/GNX77/ Select To play back GNX66 only) ALL DISCS The tracks on all discs in Elapsed Disc tray SHUF random order. playing time number Track number (Shuffle Play) 1DISC SHUF The tracks on the disc you (Shuffle Play) have selected in random order.
- Page 16 Other operations Notes • You cannot change the play mode during playback. Do this • Some time may be needed to start playback of discs Stop playback Press x. recorded in complex configurations such as many Press X. Press X again to resume Pause playback layers.
-
Page 17: Playing Repeatedly
Playing repeatedly Creating your own program — Repeat Play — Program Play You can play back all the tracks or a single track on a disc repeatedly. You can make a program of up to 25 steps from Press REPEAT on the remote repeatedly all the discs in the order you want to play back. - Page 18 Turn . > clockwise or Other operations counterclockwise (or press –. or Do this >+ on the remote repeatedly) until Cancel Program When playback is stopped, press the track number you want appears in Play PLAY MODE on the remote the display.
-
Page 19: Tuner
Press TUNER MEMORY on the remote. A preset number flashes in the display. Tuner The stations are stored from preset number 1. Presetting radio stations Preset number You can preset up to 20 FM stations and 10 AM stations. You can then tune in any of those stations simply by selecting the corresponding preset number. - Page 20 Press TUNER MEMORY on the remote. To set to “CD POWER ON” A preset number flashes in the display. Repeat the procedure above and “CD POWER The stations are stored from preset ON” appears in the display. number 1. Notes Preset number •...
Need help?
Do you have a question about the MHC-GNX100 and is the answer not in the manual?
Questions and answers