
Related Manuals for GIA GIATSU VA1

Summary of Contents for GIA GIATSU VA1
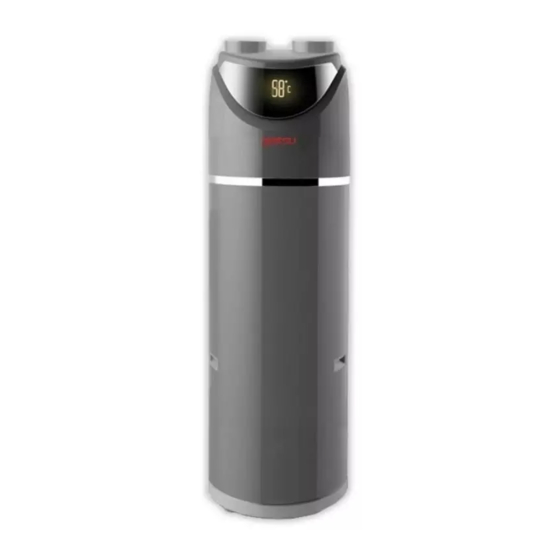
- Page 1 OWNER’S AND INSTALLATION MANUAL COMBO TYPE GIA-AT-O-200VA1 | GIA-ATS-O-200VA1 Thanks for choossing our product. Please, read carefully this manual before using the product...
- Page 2 Dear Users, Hello! We sincerely thank you for choosing our air source heat pump water heater. Please note that only the fourth part of this manual can be operated by users, the rest must be done by professionals. Or it will affect the machine’s normal use and performance. Before you install and use this product, please read this manual carefully, since it will be great help for installation and operation, and to avoid damage or accident caused by incorrect use.
-
Page 3: Table Of Contents
Contents PART 1: The Characteristics and Operational Principles ....................PART 2: Cautions of Using the Heat Pump Water Heater ..................... PART 3: The Installation of Heat Pump ............................ PART 4: Instructions of Usage and Daily Operations of Heat Pump ..............PART 5: Repair and Maintenance of the Heat Pump Water Heater .............. -
Page 4: The Characteristics And Operational Principles
PART 1. The Characteristics and Operational Principles Heat pump water heater is one of the most modern water heater machines with the highest energy efficiency ratio in the world. The operational principle of heating is to absorb heat from the air based on the changing status of the refrigerant in the pipe system, and then release heat into the water so the storage water’s temperature increases, so as to heat the hot water. -
Page 5: Cautions Of Using The Heat Pump Water Heater
The refrigerant which is low temperature and low pressure should be breathed into the compressor to become high temperature and high pressure gas. Then it will exchange heat with water in the condenser and become liquid. The water keeps absorbing the heat and the temperature is rising. - Page 6 ■ Power Supply Requirement ● Wiring work should be done by official qualified electrician, and all works should meet the electric appliances safety requirements. ● The supplying wires for the water heater must have earth wire, which should be connected to the reliable outside earth wire. Besides, the outside earth wire must be effective. ● It must provide the power in line with rated parameters for the heat pump water heater. ● According to the national requirements for electric appliances, there should be an electrical leakage protector for the heat pump. ● The installation should be in line with the national rules of the wiring. ● When connecting to the power supply, there should be a at least 3 mm all-pole disconnect device away from the all-pole electric shock. ● If the power wiring is broken, it should be replaced by the manufacturer, the maintenance department or other professionals. During the replacement, the zero wire and the fire wire should be corresponded with the zero wire terminal (N) and the fire wire terminal (L), make sure that the connecting is reliable. ● Note: It is not allowed to disconnect or take apart the ground wire of power supply under any circumstances; it is prevented to use damaged wires and switches. You should replace it immediately once it is damaged.
-
Page 7: The Installation Of Heat Pump
PART 3: The Installation of Heat Pump ■ Basic Installation Tools and Materials Needed NAME Usage Pipe wrench 2 pcs To connect the water pipes. Straight screwdriver To disassemble the battery box 1 pc per each Phillips screwdriver and connecting wires. Wire scissor / stripper To trim thread and strip wire. - Page 8 3. Installation/Usage Requirements (Please refer to the installation diagrams) ● The heat pump should be placed stably (horizontal), and water pipes, water filters, safe care and one-way relief valve should be installed accordance with the national standards. ● Water injection: Turn on one of the water outlet and water inlet valve. It means injection finished when there is water comes out of the outlet. You can switch on the heater after that. ● The water quality should meet the following standards: Hardness (CaCO3) ≤200milliliter/liter, Chloride ions ≤50 milliliter/liter, PH value 6.5~8.5, and you should clean the inner water tank regularly. ● If you remove the sediment dirt of the inner water tank regularly, it will improve the working efficiency. Sewerage/drainage method: turn off the power and inlet water valve, open one of the water outlet and sewage valve, and then the sewage and sediment will come out. Turn off the sewage valve until discharge of the water finishes.
- Page 9 4. The Connection of Pipe System ● Connection Figure of Pipe System ATTENTION ● Do not use iron pipe to install the heater. The water system should adopt new pipes which meet drinking water standards, such as CPVC/PPR pipe or PB, Please do not use smelly PVC pipe. ● Install the water pipes, connectors and other parts as the above figure. If the installation environment is under 0ºC, all pipes should be with insulation treatment. ● Please keep the condensed water outlet and safety valve outlet clean and unblocked. 5. Pipes Connection Instructions (1) Installation requirements of water inlet pipes Screw threads are G3/4” (nipple). The lifetime of pipes and pipe components cannot be shorter than the lifetime of the machine, and they should be able to withstand high temperature of 80ºC, so as to avoid damage.
- Page 10 Manual Switch (A) Earth Leakage Naught Power Protection Wire Ground Capacity Fuse Length Wire Model ≤30m GIA-AT-O-200VA1 30mA 230V~50Hz ≥1.5 ≥1.5 GIA-ATS-O-200VA1 Below 0.1 sec (2) Earth Leakage Protection ≤30m ground wire power cord earth leakage protection Power Connection Diagram – 10 –...
- Page 11 (2) Operation with power ● Make sure all the control switches are normal as well as all function buttons are good. ● Observe if the hot water system works properly and the temperature of outlet water is normal or not. ● When the safety valve is working, please check if it can drain out water successfully. ● There isn’t any abnormal vibration or sound during the machine’s operation. 8. Technical Parameters Air source heat pump water heater Model GIA-AT-O-200VA1 / GIA-ATS-O-200VA1 Rated Voltage/Frequency 230V~50Hz Electric heating rated power 2000W Heat pump rated power 610W Rated Capacity 200L Waterproof rating...
- Page 12 ATTENTION The parameters in the above table are only for reference. When the contents of this table differ from those of the nameplate on the machine, please refer to the nameplate. ■ The Relations of the Parts COP and the Ambient Temperature – 12 –...
- Page 13 ■ Electrical Diagram Electrical and Gas Connecting Explanation Diagram for Model GIA-AT-O-200VA1 / GIA-ATS-O-200VA1 ATTENTION This diagram is for reference only. When the content of the above diagram differs from that on the machine, please refer to the electrical diagram within the machine. – 13 –...
-
Page 14: Instructions Of Usage And Daily Operations Of Heat Pump
PART 4: Instructions of Usage and Daily Operations of Heat Pump ■ Instruction of Buttons Note: It shows the temperature of tank water in unattended operation, while it shows no value in stand-by status. When the tank water temperature indicator flashes, it means the machine’s disinfection function is on. ■ Operation Instruction (1) Turn on / off the Machine With the power connection, press the button “On/Off”, then the heat pump will turn on. Press the button “On/Off” again, the heat pump will turn off. - Page 15 F4: the temperature of suction; F5: the status of compressor; 0 means compressor off, 1 means compressor on. F6: the status of fan motor; 0 means motor off, 1 means motor runs at low speed, 2 means motor runs at high speed; F7: the status of four-way valve; 0 means four-way valve off, 1 means four-way valve on. (3) Temperature Setting of Water Tank When the machine is on, you can adjust the temperature of water tank by pressing ▲ or ▼ button, which makes the temperature increasing or decreasing by 1ºCThe highest temperature of “heat pump” mode is 52ºC, while the one of “automatic” mode and “assistance” mode is both 70ºC. (4) Clock Setting. When the power is on, press the clock button for a long time and enter into the clock setting status. You can adjust the current data by pressing ▲ or ▼ button. Press the timer to choose the one you want to adjust and “minutes” and “hours” will flash in the time zone by returns. You can adjust the “minutes” with pressing ▲ or ▼ button. After finishing setting, you can press the clock button again or wait for 30 seconds, and then the clock setting will switch to home page.
-
Page 16: Repair And Maintenance Of The Heat Pump Water Heater
◊ When the machine will not be used for a long time, it is suggested to turn off the controller switch, and disconnect the power plug. Please note that the current timer setting may fail (because it needs working with battery). Reset it when you use the pump next time. ◊ Control board are not allowed to install in high-temperature places such as bathroom, so as to prevent moisture from affecting the normal work . ◊ The temperature of water tank is set at 52ºC in factory. The higher water temperature you set the lower energy efficiency ratio (cop value) it runs. - Page 17 Operation steps are as follows: (1) Turn off the power. (2) Turn off the cold-water inlet valve, and then turn on the hot-water faucet (as the below picture shows). (3) Connect the drain mouth to an appropriate outfall with a hose, (The minimum durable temperature of the host should not be lower than 80ºC, if the host does not meet these requirements, please open the cold-water inlet valve and the hot-water outlet faucet until the water is not hot).
- Page 18 ATTENTION Guidelines for replacing the anode protection rod: 1. Turn off the power and the water inlet valve. 2. Turn on the hot water valve or faucet, so as to decrease the pressure of inner tank. 3. Open the water outlet; drain the water until it is lower than the magnesium rod position.
-
Page 19: Common Malfunctions And Solutions
PART 6: COMMON MALFUNCTIONS AND SOLUTIONS Form 1 Malfunction Code Table Malfunction Malfunction Name Reason Solution Code 1. High pressure switch is 1. Replace the high broken pressure switch. 2. The system is blocking 2. Check and fix the system and water tank sensor is with replacing the water fallen off, resulting in water tank temperature sensor High pressure switch... - Page 20 Form 2 Common Malfunctions Malfunction Reason Solution Description 1. Turn off the power switch and 1. Power failure check the power. The machine does not 2. Power cord is loose. work. 2. Find out the problem and fix it. 3. Control power fuse is broken. 3. Replace the fuse. 1. Check if there is leakage and 1. Refrigerant is insufficient. note the standard quantity of 2.
- Page 21 Before maintenance, please check the following matters: 1) There is water flow out of the pressure relief opening of the drain valve: When producing hot water, the cold water within the heat pump is heated and expands, so there is water flow out of the pressure relief opening of the drain valve, which is normal case. However, if there is water extruding continuously, that means the drain valve loses Non-Unit efficacy.
-
Page 22: After-Sales Service
PART 7: AFTER-SALES SERVICE Dear User: We sincerely express our gratitude to you for using our brand products. Our company follows the theory that “quality first, customer top”. For the purpose of serving you the best in a long term, please fill the user information in the custom info card, and thanks for your cooperation. If some exceptional conditions happen to the heat pump water heater, please check and solve it according to “table 1 of malfunction code” and “table 2 of common malfunctions”. If you still cannot solve it, please contact our company’s special maintenance center. You can also directly contact the after-sales service center and inform us the following information: (1) Product’s name, model number and purchase date;... - Page 23 – 23 –...
- Page 24 C./ Industria, 13 l Polígono Industrial El Pedregar 08160 Montmeló Barcelona (Spain) Phone: (0034) 93 390 42 20 Fax: (0034) 93 390 42 05 info@giatsu.com www.giatsu.com...
Need help?
Do you have a question about the GIATSU VA1 and is the answer not in the manual?
Questions and answers