
Related Manuals for LG GP-5D906BSL


Summary of Contents for LG GP-5D906BSL
- Page 1 OWNER’S MANUAL BOTTOM FREEZER FRIDGE Please read this owner's manual thoroughly before operating and keep it handy for reference at all times. GP-5D906BSL www.lg.com...
-
Page 2: Table Of Contents
TABLE OF CONTENTS TABLE OF CONTENTS Automatic Icemaker PRODUCT FEATURES Ice and Water Dispenser Storing Food - Food Preservation Location IMPORTANT SAFETY - Food Storage Tips INSTRUCTIONS - Storing Frozen Food Adjusting the Fridge Shelves - Removing the Shelf COMPONENTS - Refitting the Shelf Fridge Exterior - Using the Folding Shelf... -
Page 3: Product Features
PRODUCT FEATURES PRODUCT FEATURES * Depending on the model, some of the following functions may not be available. DOOR ALARM The Door Alarm function is designed to prevent fridge malfunctioning that could occur if a fridge door or freezer door remains open. If a fridge door or freezer door is left open for more than 60 seconds, a warning alarm sounds in 30 second intervals until it is closed. -
Page 4: Important Safety Instructions
iMPORTANT SAFETY iNSTRUCTiONS IMPORTANT SAFETY INSTRUCTIONS READ ALL INSTRUCTIONS BEFORE USING THE APPLIANCE. This guide contains many important safety messages. Always read and obey all safety messages. This is the safety alert symbol. It alerts you to safety messages that inform you of hazards that can cause death or serious injury to you or others, or cause damage to the product. - Page 5 iMPORTANT SAFETY iNSTRUCTiONS READ ALL INSTRUCTIONS BEFORE USING THE APPLIANCE. To reduce the risk of fire, electric shock, or personal injury when using your product, basic safety precautions should be followed, including the following. This appliance is intended to be used in household and similar applications such as - staff kitchen areas, offices and other working environments;...
- Page 6 iMPORTANT SAFETY iNSTRUCTiONS READ ALL INSTRUCTIONS BEFORE USING THE APPLIANCE. To reduce the risk of fire, electric shock, or personal injury when using your product, basic safety precautions should be followed, including the following. CAUTiON Installation The fridge must be properly installed in accordance with the Installer Instructions that were taped to the front of the fridge.
-
Page 7: Components
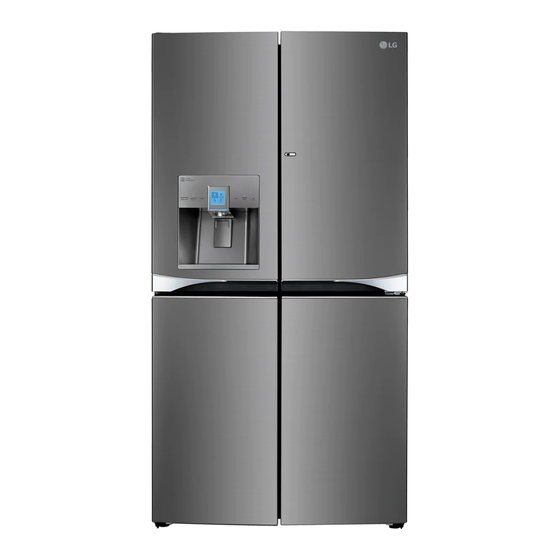
COMPONENTS COMPONENTS Use this page to become more familiar with the parts and features of your fridge. Page references are included for your convenience. *The appearance and specifications of the actual product may differ depending on the model. Fridge Exterior (Applicable to some models only) LED Display Displays the fridge and freezer’s Door in Door release... -
Page 8: Fridge Interior
COMPONENTS Fridge Interior (Applicable to some models only) Pure N Fresh Filter LED interior lamps The interior lamps light up Shelf the inside of the fridge. Dairy Product Bin Used to preserve dairy products. Fridge Basket Shelf Folding Shelf indoor ice Bin Door-in-Door Ice cubes are automatically produced. -
Page 9: Installation
iNSTALLATiON INSTALLATION Installation Overview Please read the following installation instructions first after purchasing this product or transporting it to another location. 1 Unpacking your 2 Choosing the proper fridge location 3 Connecting the 4 Leveling and Door water supply and Alignment water line... -
Page 10: Unpacking Your Fridge
iNSTALLATiON Unpacking Your Fridge Choosing the Proper Location Select a place where a water supply can be WARNiNg easily connected for the automatic icemaker. Use two or more people to move and install NOTE the fridge. Failure to do so can result in back or other injury. -
Page 11: Ambient Temperature
iNSTALLATiON How to Remove the Fridge Door Ambient Temperature Install this appliance in an indoor area where Removing the Left Fridge Door the temperature is between 13°C and 43°C. If the temperature around the appliance is too low or high, the cooling ability may be The water supply is connected to the adversely affected. - Page 12 iNSTALLATiON Removing the Right Fridge Door Remove the cover and pull out the tube Disconnect all wire harnesses Remove the top hinge cover screw Lift the hook (not visible), located at the bottom of the front side of the cover with a flat-head screwdriver.
- Page 13 iNSTALLATiON NOTE Rotate the hinge lever clockwise. Lift the top hinge free of the hinge lever latch. Collet Tube insert Line Hinge Lever Latch 1) Gently insert the tube until only one line shows on the tube. CAUTiON When lifting the hinge free of the hinge (Correct) lever latch, be careful that the door does not fall forward.
- Page 14 iNSTALLATiON Refitting the Right Fridge Door Connect the wire harness Install the right-side door first. Make sure that the plastic sleeve is inserted in the bottom of the door. Lower the door onto the middle hinge pin as shown in the figure. Make sure that the door-switch located inside the cover is tightly connected.
- Page 15 iNSTALLATiON Refitting the Left Fridge Door Push the water supply tube into the hole on the top case and pull it through the backplate. Install the left fridge door after the right door is installed. Make sure that the plastic sleeve is inserted in the bottom of the door.
-
Page 16: How To Remove The Freezer Door
iNSTALLATiON How to Remove the Freezer Height Adjustment Door (TURN OFF THE MAIN Leveling the doors may not be possible when POWER. Same procedure for the floor is not leveled, or is of weak or poor construction. The fridge is heavy and should left and right doors) be installed on a rigid and solid surface. -
Page 17: If The Heights Of The Freezer Doors Are
iNSTALLATiON If the heights of the Freezer doors Method 2, only allows a maximum of 3mm of adjustment) are different (1) Use the wider side of the number Method 1 is recommended. spanner to turn locking nut ( For freezer doors, use spanner clockwise to unscrew the locking nut. -
Page 18: Connecting The Water Line
iNSTALLATiON Connecting the Water Line Turning On The Power Before You Begin Plug in the fridge. This water line installation is not covered by the fridge warranty. Follow these instructions carefully to minimize the risk of expensive water damage. Water hammer (water banging in the pipes) in house plumbing can cause damage to fridge parts and can lead to water leakage or flooding. -
Page 19: How To Use
HOW TO USE HOW TO USE Before use Clean the fridge. Clean your fridge thoroughly and wipe off all dust that may have accumulated during shipping. CAUTiON Do not scratch the fridge with a sharp object or use a detergent that contains alcohol, a flammable liquid or an abrasive when removing any tape or adhesive from the fridge,. -
Page 20: Control Panel
HOW TO USE Control Panel (Applicable to some models only) Control Panel Features LCD Display LED Display (Touch Button) Panel background lamp For easy viewing of the display, the background When power saving is in operation, display lamp is lit in the following cases. window is turned OFF except the ice maker (ON/OFF) When you turn on the power... - Page 21 HOW TO USE Touch Button Functions Fridge Temperature The touch button is a statically triggered Indicates the set target temperature of the fridge (Capacitive) switch, and it responds to and compartment in Celsius (°C). operates with the human body or any object The recommended Fridge set temperature in with static electricity when held within a set normal ambient conditions and loads is 3°C ~ 4°C.
- Page 22 HOW TO USE Express Freeze Change Water Filter When the water filter indicator turns on, it is recommended that you change the water filter. This function increases both ice making and freezing capabilities. After changing the water filter, press and hold the Change Filter button for three seconds to turn the When you touch the Express Freeze button,...
- Page 23 HOW TO USE Ice On/Off Lock Press the Ice On/Off button for 3 seconds to turn The Lock function disables every other button the icemaker On/Off. on the display. <LCD Display> When power is initially connected to the fridge, the Lock function is off. If you want to activate the Lock function to lock other buttons, press and hold the Lock button...
- Page 24 HOW TO USE Pure N Fresh Changing the Pure N Fresh Filter When the Change Filter reminder icon turns The Pure N Fresh function has three modes, on, the filter should be replaced to maintain the Off(default mode when icon is not lit up), performance of the Pure N Fresh function.
- Page 25 HOW TO USE Display window touch function NOTE <water mode> Whilst a preset water amount is being dispensed, if you press “stop”, the water Directly touch the display window for operation. dispensing stops, and the display will return to the previous screen. When there is no touch screen activity, the If the preset water dispensing is interrupted screen is turned OFF after 20 seconds.
- Page 26 HOW TO USE If you select “100ml~”, it is switched to the If you select “500ml~”, it then will show the below screen, and when you press “water below screen, and when you press “water out”, water will be dispensed to that amount out”, water will be dispensed to that amount as long as stop is not pressed.
- Page 27 HOW TO USE 2. Cold Water 4. Crushed After selecting “cold water”, if you press After selecting “Crushed”, if you press the the dispenser trigger pad, cold water will be dispenser trigger pad, crushed ice will be dispensed. dispensed. If you remove the cup or glass from the trigger If you release the dispenser trigger leve, or if pad or, dispensing is longer than 3 minutes, you extract for 3 minutes, the water extraction...
-
Page 28: In-Door Ice Bin
HOW TO USE In-Door Ice Bin * Depending on the model, some of the To remove the in-door ice bin, grip the following functions may not be available. front handle, slightly lift the lower part, and slowly pull out the bin as shown with both hands. -
Page 29: Automatic Icemaker
HOW TO USE Automatic Icemaker WARNiNg Personal Injury Hazard * Depending on the model, some of the DO NOT place fingers or hands on the following functions may not be available. automatic ice making mechanism while the fridge is plugged in. Ice is made in the automatic icemaker and sent to the dispenser. - Page 30 HOW TO USE Automatic Icemaker When You Should Turn the Icemaker Off (continued) When the water supply will be shut off for several hours. CAUTiON When the ice bin is removed for more The first ice and water dispensed may than one or two minutes.
-
Page 31: Ice And Water Dispenser
HOW TO USE Ice and Water Dispenser NOTE If discolored ice is dispensed, check * Depending on the model, some of the the water filter and water supply. If the following functions may not be available. problem continues, contact a qualified service center. -
Page 32: Storing Food
HOW TO USE Storing Food Food Preservation Location (Applicable to some models only) Each compartment inside the fridge is designed to store different types of food. Store your food in the optimal space to enjoy the freshest taste. Fridge Basket Store beverages, water, etc. - Page 33 HOW TO USE Food Preservation Location (Applicable to some models only) (continued) Dairy Product Bin Store diary foods such as butter, cheese, etc. Folding Shelf Fold this shelf to store large-sized containers or food. Door-In-Door Store frequently-taken out foods such as beverages, snacks, etc. Extra Space Preserve small foods such as eggs, ham, etc.
-
Page 34: Food Storage Tips
HOW TO USE Storing Frozen Food Food Storage Tips * The following tips may not be applicable NOTE depending on the model. Check a freezer food guide or a reliable cookbook for further information about preparing Wrap or store food in the fridge in airtight and food for freezing or food storage times. -
Page 35: Adjusting The Fridge Shelves
HOW TO USE Storing Frozen Food (continued) Adjusting the Fridge Shelves. (Remove all items from the Packaging shelf before adjusting) Successful freezing depends on correct packaging. When you close and seal the The shelves in your fridge are adjustable to package, it must not allow air or moisture in or meet your individual storage needs. -
Page 36: Using The Folding Shelf
HOW TO USE Using the Folding Shelf When Closing the Door You can store taller items, such as containers or bottles, by simply pushing the front half of the shelf underneath the back half of the shelf. Pull the front of the shelf firmly toward you to return to a full shelf. -
Page 37: Big Fresh Zone
HOW TO USE Big Fresh Zone Refitting the Big Fresh Zone drawer Removal of the Big Fresh Zone drawer. Insert the left and right roller of the drawer into the guides whilst the draw is slightly The Moisture (balance) keeper helps optimize lifted at the front. -
Page 38: How To Remove And Refit The Vegetable Box
HOW TO USE How to remove and refit the How to refit vegetable box vegetable box Lift the vegetable box drawer assembly How to remove the vegetable box on to an angle and place it into the fridge compartment ready for fitting. While the fridge doors are wide open, take out all the shelves from the fridge compartment. -
Page 39: Extra Space (Multi Collection Corner)
HOW TO USE Extra Space (Multi collection Dairy Corner corner) You can store dairy products such as butter, Store small foods like eggs, ham, cheese, etc. cheese etc. If you close the fridge door with the dairy corner left open, the fridge door may not close properly. -
Page 40: Door-In-Door Shelf Disassembly
HOW TO USE Door-In-Door Shelf Disassembly Remove screws on both sides of magic (Applicable to some models only) space cover. Raise magicspace cover up and take it out. Hold the bottom of lower basket and raise it up to take it out. Hold the bottom of daily basket and raise it up to take it out. -
Page 41: Adjustable Moving Basket
HOW TO USE Adjustable Moving Basket Freezer Drawer Use the compartment for packed frozen foods It can be moved up and down as necessary, and and frequently-accessed foods. used conveniently. Use the bottom compartment for frozen foods. To move the Adjustable Moving Basket up or (Dried fish &... -
Page 42: Refitting The Freezer Drawer
HOW TO USE Freezer/Fridge basket Refitting the Freezer Drawer You can store small packaged frozen food Insert both rollers into the guides with (Freezer basket), small packaged refrigerated the front of the drawer slightly raised and food or beverages (Fridge basket) such as milk, gently push in. -
Page 43: Maintenance
MAiNTENANCE MAINTENANCE Cleaning Both the fridge and freezer sections defrost automatically; however, clean both sections about once a month to prevent odors. Wipe up spills immediately. Always unplug the refrigeration before cleaning. General Cleaning Tips WARNiNg Unplug fridge or disconnect power. Use non-flammable cleaner. -
Page 44: Replacing The Pure N Fresh Filter
MAiNTENANCE Replacing the Pure N Fresh Inside Walls (allow freezer to warm filter up so the cloth will not stick) To help remove odors, you can wash the inside of the fridge with a mixture of baking soda and It is recommended that you replace the Pure N warm water. -
Page 45: Replacing The Water Filter
MAiNTENANCE Replacing the Water Filter Remove Old Filter Turn the filter anticlockwise ( ) 90°. NOTE Pull ( ) to remove the filter. This fridge does not require a filter bypass If you remove the water filter, some water plug when the filter is not in place. may dribble out of the filter chamber. -
Page 46: Smart Diagnosis
LG service center. Only use the to hold your phone to the speaker. Smart Diagnosis feature when instructed to do so by the LG call center agent. The transmission sounds that you will hear are normal and sound similar to a fax machine. -
Page 47: Troubleshooting
TROUBLESHOOTiNg TROUBLESHOOTING Review the Troubleshooting section before calling for service; doing so will save you both time and money. Problem Possible Causes Solutions Fridge and The fridge display control is set Cancel the OFF mode so that the unit Freezer section to OFF (some models). - Page 48 TROUBLESHOOTiNg Problem Possible Causes Solutions Fridge or Freezer Fridge was recently installed. It may take up to 24 hours for each compartment section is too to reach the desired temperature. warm. Air vents are blocked. Rearrange items to allow air to flow throughout the compartment.
- Page 49 TROUBLESHOOTiNg Problem Possible Causes Solutions Interior moisture Doors are opened often or for When the doors are opened often or for long buildup. long periods of time. periods of time, warm, humid air enters the compartment. This raises the temperature and moisture level within the compartment.
- Page 50 TROUBLESHOOTiNg Problem Possible Causes Solutions Frost or ice Condensation from food with a This is normal for food items with a high water crystals on frozen high water content has frozen content. food (inside of inside of the food package. sealed package).
- Page 51 TROUBLESHOOTiNg Problem Possible Causes Solutions Pulsating or Your fridge is designed to Normal Operation High-Pitched run more efficiently to keep Sound your food items at the desired temperature. The high efficiency compressor may cause your new fridge to run longer than your old one, but it is still more energy efficient than previous models.
- Page 52 TROUBLESHOOTiNg Problem Possible Causes Solutions Icemaker is not Demand exceeds ice storage The icemaker will produce approximately 50~80 making enough capacity. cubes in a 24 hour period. ice. House water supply is not Connect the fridge to a cold water supply with connected, valve is not turned adequate pressure and turn the water shutoff on fully, or valve is clogged.
- Page 53 TROUBLESHOOTiNg Problem Possible Causes Solutions Icemaker is not Doors are opened often or for If the doors of the unit are opened often, ambient making enough long periods of time. air will warm the fridge which will prevent the unit ice (continued).
- Page 54 TROUBLESHOOTiNg Problem Possible Causes Solutions Not dispensing Doors are not closed Ice will not dispense if any of the fridge doors are ice. completely. left open. Infrequent use of the dispenser. Infrequent use of the ice dispenser will cause the cubes to stick together over time, which will prevent them from properly dispensing.
- Page 55 TROUBLESHOOTiNg Problem Possible Causes Solutions Not dispensing New installation or water line Dispense 10 liters of water (flush for water. recently connected. approximately 5 minutes) to remove trapped air and contaminants from the system. Do not dispense the entire 10 liters continuously. Depress and release the dispenser pad for cycles of 30 seconds ON and 60 seconds OFF.
- Page 56 TROUBLESHOOTiNg Problem Possible Causes Solutions Ice has bad taste Water supply contains minerals A water filter may need to be installed to or odor. such as sulfur. eliminate taste and odor problems. NOTE: In some cases, a filter may not help. It may not be possible to remove all minerals / odor / taste in all water supplies.
Need help?
Do you have a question about the GP-5D906BSL and is the answer not in the manual?
Questions and answers