Table of Contents
Advertisement
Quick Links
Advertisement
Table of Contents

Related Manuals for CORBERO E-CLAV71219


Summary of Contents for CORBERO E-CLAV71219
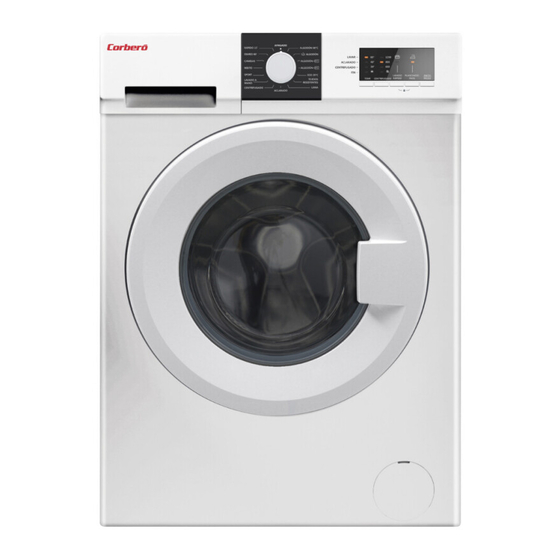
- Page 1 Washing Machine / User Manual E-CLAV71219...
- Page 2 Thank you for choosing this product. This User Manual contains important safety information and instructions on the operation and maintenance of your appliance. Please take the time to read this User Manual before using your appliance and keep this book for future reference. Icon Type Meaning...
-
Page 3: Table Of Contents
CONTENTS 1. SAFETY INSTRUCTIONS ....................1 1.1 General Safety Warnings ....................2 1.2 During Use ........................6 1.3 Packaging and Environment...................7 1.4 Savings Information ......................7 2. TECHNICAL SPECIFICATIONS ..................8 2.1 General Appearance.......................8 2.2 Technical Specifications ....................8 3. INSTALLATION .........................9 3.1 Removing the Transit Bolts.....................9 3.2 Adjusting the Feet / Adjusting Adjustable Stays..............9 3.3 Electrical Connection ......................9 3.4 Water Inlet Hose Connection ..................10... -
Page 4: Safety Instructions
1. SAFETY INSTRUCTIONS Operating voltage / frequency (V/Hz) (220-240) V~/50Hz Total current (A) Water pressure (Mpa) Maximum 1 Mpa / Minimum 0. 1Mpa Total power (W) 2100 Maximum washing capacity (dry laundry) (kg) • Do not install your machine on a carpet or such grounds that would prevent the ventilation of its base. -
Page 5: General Safety Warnings
NOTE: For a softcopy of this user manual, please contact the following address: “washingmachine@ standardtest. info”. In your e-mail, please provide the model name and serial number (20 digits) which you can find on the appliance door. Read this user manual carefully. Your machine is for domestic use only. - Page 6 water supply if the Washing Machine is left unused for a long time. We also recommend that you leave the door open to prevent build up of humidity inside the Washing Machine. • Some water may be left in your Washing Machine as a result of quality checks during production.
- Page 7 • Install your machine in a location that can be fully ventilated and preferably has constant air circulation. Read these warnings. Follow the advice given to protect yourself and others from risks and fatal injuries. RISK OF BURNS Do not touch the drain hose or any discharged water while your Washing Machine is running.
- Page 8 secured. Make sure the plug in your sink does not block the plug hole. Danger of Fire • Do not store inflammable liquids near your machine. • The sulphur content of paint removers may cause corrosion. Never use paint removing materials in your machine.
-
Page 9: During Use
and cleaning materials are consumed or come into contact with the skin and eyes. Keep cleaning materials out of the reach of children. 1.2 During Use • Keep pets away from your machine. • Please check the packaging of your machine before installation and the outer surface of the machine once the packaging has been removed. -
Page 10: Packaging And Environment
sources of damage. • Please do not throw away this user manual; keep it for future reference and pass it onto the next owner. NOTE: Specifications for the machine may vary depending on the product purchased. 1.3 Packaging and Environment Removal of packaging materials Packaging materials protect your machine from any damage that might occur during transportation. -
Page 11: Technical Specifications
2. TECHNICAL SPECIFICATIONS 2.2 Technical Specifications Operating voltage / (220-240) frequency V~/50Hz (V/Hz) Total current Maximum: Water 1 Mpa pressure Minimum : (Mpa) 0. 1 Mpa Total power 2100 Maximum dry laundry capacity (kg) Spinning revolution 1200 (rev / min) Programme number 2.1 General Appearance... -
Page 12: Installation
3. INSTALLATION 3.2 Adjusting the Feet / Adjusting Adjustable Stays 3.1 Removing the Transit Bolts 1. Do not install your machine on a surface (such as carpet) that would prevent ventilation at the base. • To ensure silent and vibration-free operation of your machine, install it on a firm surface. -
Page 13: Water Inlet Hose Connection
• The mains cord of your washing should be connected to cold water inlet machine is equipped with an earthed and red capped hose to the hot water plug. This plug should always be inlet (if applicable). inserted to an earthed socket of 10 • To prevent water leaks at the joints, amps. -
Page 14: Water Discharge Connection
3.5 Water Discharge Connection 4.1 Detergent Drawer • Connect the water drain hose to a standpipe or to the outlet elbow of a household sink, using additional equipment. • Never attempt to extend the water drain hose. • Do not put the water drain hose from your machine into a container, bucket or bathtub. -
Page 15: Sections
4.2 Sections 4.3 Program Dial Main wash detergent compartment: This compartment is for liquid or powder detergents or limescale remover. The fluid detergent level plate will be supplied inside • To select the desired programme, turn your machine. (*) the programme dial either clockwise or anti-clockwise until the marker on the Fabric conditioner, starch, detergent programme dial points to the chosen... -
Page 16: Using Your Washing Machine
5. USING YOUR curtains or place them in a washing net or bag. WASHING MACHINE 6. Reverse textiles such as pants, knitwear, t-shirts and sweat shirts. 5.1 Preparing Your Laundry 7. Wash socks, handkerchiefs and other small items in a washing net. Can be Normal Do not bleach... -
Page 17: Adding Detergent To The Machine
weights of typical laundry items: of the detergent drawer. Do not exceed the MAX level. LAUNDRY TYPE WEIGHT (gr) • Thick softeners may cause clogging of Towel the drawer and should be diluted. Linen • It is possible to use fluid detergents in Bathrobe 1200 all programmes without a pre-wash. -
Page 18: Additional Functions
5.7 Additional Functions display. You can gradually reduce the washing water temperature between the maximum temperature for the selected programme and cold washing selections by pressing the temperature adjustment button. If you have skipped the washing water temperature you wanted, keep pressing the washing water temperature adjustment button until the desired temperature is displayed again. - Page 19 press the No Spin button when the To select this function, press the Pre-wash symbol is displayed. button when the symbol is displayed. 6. Anti- Allergic(*) 9. Extra Rinse(*) Auxiliary Auxiliary function function button 3 or 4 button 3 or 4 Anti-allergic Extra rinse You can add an additional rinse operation to...
-
Page 20: Child Lock
position and another programme selected, the previously selected programme NOTE: If you put less than half continues from where it was left. the maximum load of laundry into your machine, the half-load function will be To deactivate the child lock, press and hold automatically set, regardless of the additional functions 3 and 4 simultaneously programme you selected. -
Page 21: Programme Table
6. PROGRAMME TABLE Programme Laundry type / Descriptions Very dirty, cotton and flax textiles. (Underwear, linen, COTTON 90°C 90° tablecloth, towel (maximum 3.5 kg), bedclothes, etc. ) Dirty cotton and flax textiles. (Underwear, linen, Cotton Pre-Wash 60° 1&2 tablecloth, towel (maximum 3.5 kg), bedclothes, etc. ) Dirty cotton and flax textiles. - Page 22 • Loading the household washing machine up to the capacity indicated by the manufacturer for the respective programmes will contribute to energy and water savings. • Program duration, energy consumption and water consumption values may vary according to wash load weight and type, selected extra functions, tap water and ambient temperature.
- Page 23 6.1 Important Informations • Use detergents, softeners and other additives suitable for automatic washing machines only. Excessive foam has occurred and automatic foam absorption system has been activated due to too much detergent usage. • We recommend that periodic cleaning for washing machine every 2 months. For periodic cleaning please use Drum Clean programme.
- Page 24 EN - 21...
-
Page 25: Cleaning And Maintenance
7. CLEANING AND 7.2 Water Inlet Filters Water inlet filters prevent dirt and foreign MAINTENANCE materials from entering your machine. We recommend that these filters are cleaned when your machine is unable to receive 7.1 Warning sufficient water, although your water supply is on and the tap is open. -
Page 26: Pump Filter
7.3 Pump Filter meet the holes on the front panel side. 6. Close the filter cover. WARNING: The water in the pump may be hot, wait until it has cooled down before carrying out any cleaning or maintenance. (*) Specifications may vary depending on the machine purchased. -
Page 27: Flush Stopper / Body / Drum
8. FLUSH STOPPER / BODY / DRUM 1. Flush stopper Remove the detergent drawer and disassemble the flush stopper. Clean thoroughly to completely remove any softener residue. Refit the flush stopper after cleaning and check that it is seated properly. 2. -
Page 28: Troubleshooting
9. TROUBLESHOOTING Repair of your machine should be carried out by an authorised service company. If your machine requires repair or if you cannot solve an issue with the information provided below, then you should: • Unplug your machine from the mains power supply. • Turn off the water supply. -
Page 29: Automatic Fault Warnings And What To Do
FAULT POSSIBLE CAUSE TROUBLESHOOTING Increase the amount of detergent following the Hard water. manufacturer’s instructions. Unsatisfactory washing result. Your laundry is too tightly packed Check that your laundry is spread out. together in the drum. As soon as the machine is The end of water drain hose is too Check that the drain hose is at a suitable height. - Page 30 ..................................................................................................................................................................................................................................................................................................................................................................................................................................................................................................................................................................................................................................................................................................................................................................................................................................................................................................................................................................................................................................................
- Page 31 ..................................................................................................................................................................................................................................................................................................................................................................................................................................................................................................................................................................................................................................................................................................................................................................................................................................................................................................................................................................................................................................................
- Page 32 ..................................................................................................................................................................................................................................................................................................................................................................................................................................................................................................................................................................................................................................................................................................................................................................................................................................................................................................................................................................................................................................................
- Page 33 Servicruz SL Vidal i Ribes 8-10 08950 Esplugues de Llobregat Barcelona Telf. 911 08 08 08 servicruz.sat@servicruz.es The minimum period which must supply the spare parts for the household washing machine is 10 years. 52327096...
Need help?
Do you have a question about the E-CLAV71219 and is the answer not in the manual?
Questions and answers