Advertisement
Quick Links
Download this manual
See also:
User Manual
Advertisement

Related Manuals for Samsung SH-W162L


Summary of Contents for Samsung SH-W162L
- Page 1 Samsung's OMS (Optical Media Solution) Customer Support Website (http://samsung-ODD.com) offers the latest versions of firmware for ODD products, user instructions and product information.
- Page 2 Index Main Page Safety Precautions Safety Precautions During Installation During Operating Others WEEE Installing DVD±R/RW Drive and Connecting Cables Installing Drive Connecting Cables How To Use The DVD±R/RW Drive How to Use the Drive How to Use DVD±R/RW and Other Discs MAGIC SPEED Deleting Utilities Troubleshooting...
-
Page 3: Safety Precautions
Safety Precautions Safety Precautions This symbol indicates explanations about extremely dangerous matters. If users ignore this symbol and handle the device the wrong way, serious injury or death could result. This symbol indicates explanations about dangerous matters. If users ignore this symbol and handle the device the wrong way, damage to home or property could result. -
Page 4: During Installation
Safety Precautions During Installation Do not drop the drive, and protect it from severe shocks. - It can damage the drive or cause it to malfunction. Do not place the drive in direct sunlight. Avoid low or high temperature environments. Avoid high-humidity environments. - Page 5 Continued use of a cracked disc will cause the crack to become bigger, resulting in irreparable damage to the disc. Do not use low-quality discs (illegal, scratched, damaged, etc.). Samsung is not responsible for any loss resulting from the use of such discs.
- Page 6 Safety Precautions Veiligheidsinstructies Others - To reduce the risk of damage, electric shock, and fire. Never allow food particles or foreign substances to enter the drive casing. To protect against the risk of fire, do not spill such liquids as alcohol and benzene on the drive.
- Page 7 Safety Precautions Veiligheidsinstructies Correct Disposal of This Product (Waste Electrical & Electronic Equipment) (Applicable in the European Union and other European countries with separate collection systems) This marking shown on the product or its literature, indicates that it should not be disposed with other household wastes at the end of its working life.
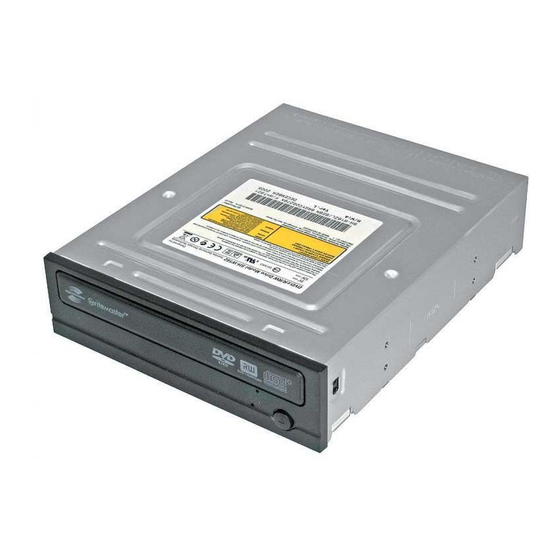
- Page 8 Features 1. Emergency Hole 3. Open/Close Button Design and specifications are subject to change without prior notice. 1. Sound Output Port 3. Master/Slave Selection Port DVD±R/RW Drive 40-pin interface cable four screws to install the drive drive installation instruction sheets software programs (software: Nero Express 6, In CD, Nero Vision Express, Nero ShowTime, Nero BackItUp, Nero Recode)
- Page 9 Features You need to have an IBM-compatible PC with the following specifications. Item Description Microsoft Windows 98 SE/2000/Me/XP(SP 1.0 or higher) Pentium3 800MHz or greater IBM-compatible PC (Recommendation: Pentium4 2.0GHz or higher) 256Mbytes or greater...
- Page 10 Features Versatile Multimedia Features DVD-R : Read / Write DVD+R : Read / Write DVD-ROM : Read DVD-R Dual : Read / Write CD-RW : Read / Write / Rewrite allowed See table below for details Disc Type CD-STAMP CD-R CD-RW Light Scribe Media DVD-STAMP...
- Page 11 Features Light Scribe CD: MKM, MBI, CMC DVD: MKM Buffer underrun prevention technology included What is " buffer underrun prevention technology "? A technology to prevent "buffer underrun" errors in which the data transmission speed is not as fast as the data writing speed when data is being recorded on a CD. Reading / Recording Speed Reading Speed(MAX) DVD-ROM(S)(16X), DVD-ROM(D)(8X), DVD-R (12X), DVD-RW (8X), DVD+R (12X), DVD+RW (8X),...
- Page 12 Installing DVD±R/RW Drive and Connecting Cables 1. Turn the PC off. 2. Open the cover as shown in the picture. 3. If necessary, attach the support devices on both sides of the drive - The support devices are PC accessories. Purchase a pair if necessary.
- Page 13 Installing DVD±R/RW Drive and Connecting Cables Connecting the Power Cable Hold the power cable (with four pins) in the power box within the computer with the cutoff edges( facing up and connect it to the power port in the back of the DVD±R/RW Drive A - Cutoff edges Improperly connected power cable may cause malfunction.
- Page 14 Installing DVD±R/RW Drive and Connecting Cables Connecting E-IDE Cable When you use one E-IDE cable Set the jumper to SL (slave) in the Master/Slave port in the back of the DVD±R/RW Drive. : Slave Drive (Select the SL jumper) : HDD : MotherBoard When you use two E-IDE cables Set the jumper to MA (Master) in the Master/Slave port in the back of the DVD±R/RW Drive.
- Page 15 Installing DVD±R/RW Drive and Connecting Cables When you have one DVD±R/RW Drive and the other ODD products: Set it to MA (Master) / SL (Slave), : Master Drive (Select the MA jumper) : HDD : Primary 1 Connecting the Jumper to the Master/Slave Port Connect the jumper to the slot in the back of the DVD±R/RW Drive.
- Page 16 Installing DVD±R/RW Drive and Connecting Cables Connecting the Audio Cable (When Connected to the Sound Card) To listen to the sound from the drive in Analog mode, connect the audio output on the DVD±R/RW Drive to the audio input of the sound card using an audio cable (4-pin). Connecting the Digital output terminal.
- Page 17 Installing Device Driver and Confirming the Installation 1. Go to http://samsung-ODD.com 2. Click Firmware on the menu bar (in the upper right-hand corner). 3. Click Firmware Downloads. Check for your drive model and start downloading.
- Page 18 Installing Device Driver and Confirming the Installation Confirming Using [Device Manager] Windows 98/Me Windows 2000 Windows XP 1. Click [Start] - [Settings] - [Control Panel] - [System] 2. Click on the [Device Manager] tab in the System Properties window. 3. Click CDROM drive in the Device Manager window.
- Page 19 Manual Setup 1. Make the C:\SAMSUNG directory. 2. Copy the files from the CD provided with the DVD±R/RW Drive to the C:\SAMSUNG directory. To do so, type "COPY D:\Dos_driver *.* C:\SAMSUNG" after the C:\ prompt and press [Enter]. 3. Edit the 'CONFIG.SYS' file.
- Page 20 How To Use The DVD±R/RW Drive When the On/Off light is orange, do not turn the PC off or remove the DVD±R/RW Drive as it may cause damage in the drive. How to Use a Horizontally Installed Drive You can use 3.15 Inch or 4.72 Inch (8cm or 12cm) discs.
- Page 21 RPC-2is selected by default for the SH-W162L(TS-H552L) DVD±R/RW drive. You can change the region code up tofive times via an MPEG application. Please contact your dealer or local SAMSUNG representative if you wish tochange the local code more than fivetimes.
-
Page 22: Magic Speed
Ways to Use the MAGIC SPEED The first of all, please install the Magic Speed program from Samsung's homepage. Operate the program by clicking the right mouse button on the MAGIC SPEED Tray Icon. Select a desired mode from a program window, and click "Setup" The reading speed of a drive operates in a selected mode. - Page 23 Deleting Utilities Click [Start] - [Setting] - [Control Panel] - [Add/Remove Programs] and a window as shown below appears. [ Windows 98 / Me ] [ Windows 2000 ] [ Windows XP ] Click the [Add/Remove] button to remove the program. Click the [Add/Remove] button to remove the program.
- Page 24 Storing/Cleaning Drive and Disc Turn the PC off and pull out the drive. Remove any foreign objects from the surface of the drive using soft cloth. - Do not use benzene, paint thinner, or any other solvents. - Cleaning the interior of the unit with such things as a cotton swab may cause failure or loss of functionality.
- Page 25 Storing/Cleaning Drive and Disc This part of the manual is to prevent damages or data loss. Read carefully and use the device properly. Do not place it under the direct sunlight. Place it so that it sits on its side on a flat surface. Do not scratch or place a label on the disc.
- Page 26 Storing/Cleaning Drive and Disc This part of the manual is to prevent damages or data loss. Read carefully and use the device properly. Do not touch the surface of the disc. Place your fingers on the edge of the disc to hold. Clean the disc lightly with soft cotton cloth, starting from the center and move to the edge of the disc.
- Page 27 Storing/Cleaning Drive and Disc On/Off Lamp Green: Blinks every 0.3 seconds. Disc Lead-In Green: Blinks every 0.3 seconds. Writing Reading Green: Blinks every 0.3 seconds. Audio Playback [Analog Mode] Green: Blinks every 0.3 seconds. Audio Playback [Digital Mode] Green: Blinks every 0.3 seconds. Standby No Disc The indicator light turns off when the drive is not in use (standby) after disc lead-in.
-
Page 28: Troubleshooting
Troubleshooting Problem See if the PC on. The tray won't open. Make sure the power cable within the PC is connected properly. If the tray still won't open with the power on, turn the power off and insert a pin(paper clip) into the emergency hole to open. Make sure the disc has been inserted properly. - Page 29 (The Windows operating system may be damaged if you install the Korean version while the English version remains on the system.) Use only the writing software provided by Samsung. You may experience writing errors if you use with other writing programs.
- Page 30 , especially in case of an important data backup. (Samsung is not responsible for any loss resulting from data backup failure.) We update the list of supported media on a regular basis through our firmware upgrades...
-
Page 31: Specifications
For more information on the writing and duplicating the Lightscribe disk label, install Nero software and refer to the HELP section. SH-W162L(TS-H552L) DVD±R/RW Drive DVD : DVD-R, DVD-RW, DVD+R, DVD+RW, DVD-ROM, DVD-Video, DVD+R (Dual), DVD-R (Dual) - Page 32 Specifications Fcc information to the user This equipment has been tested and found to comply with the limits for a class B digital device. pursuant to part 15 of the FCC rules. These limits are designed to provide reasonable protection against harmful interference in a residential installation.
Need help?
Do you have a question about the SH-W162L and is the answer not in the manual?
Questions and answers