Table of Contents
Advertisement
Available languages
Available languages
Quick Links
Indoor/Outdoor
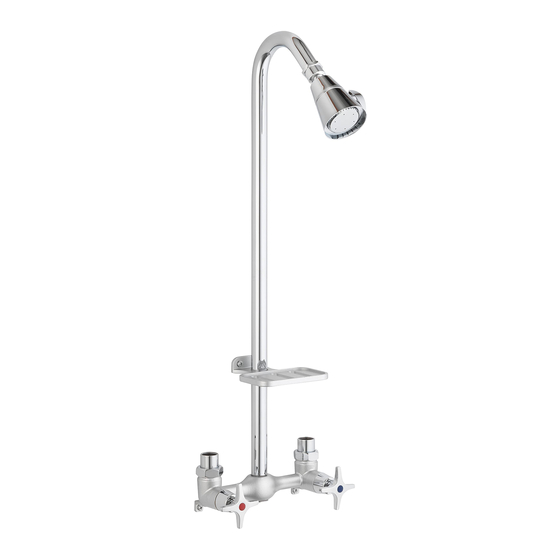
Utility Shower Kit
MODELS
3070-252-CH-B-WS - Chrome finish
3070-252-BN-B-WS - Brushed nickel finish
3070-252-MB-B-WS - Matte black finish
PACKAGE AND HARDWARE CONTENTS
PART
DESCRIPTION
A
Showerhead
B
Shower arm
C
Soap dish
D
Mounting screw
E
Faucet body
F
Drywall anchor
G
Thread seal tape
SAFETY INFORMATION
Please read and understand this entire manual before attempting to
assemble, operate or install the product.
WARNING
• Protect your eyes with safety glasses when cutting or soldering water
supply lines.
PREPARATION
Before beginning assembly of product, make sure all parts are present.
Compare parts with package and hardware contents list. If any part is
missing or damaged, do not attempt to assemble the product. Contact
customer service for replacement parts.
Estimated Assembly Time: 30 minutes
Tools Recommended for Assembly (not included): Adjustable Wrench,
Drill, Drill Bits, Slip Joint Pliers, Pipe Wrench, Phillips Screwdriver, Pipe
Compound.
Need Help? Please call our toll-free line at (877) 319-3757 (7:30 a.m. to 4:30 p.m. CST) for additional assistance or service.
Homewerks Worldwide, LLC • Lake Bluff, IL 60044 • Homewerks.com
QUANTITY
1
1
1
4
1
4
1
CAUTION
• If you solder the joints during installation of the shower, the seats,
• Cover the drain to avoid losing parts.
Installation may vary depending on how the previous shower was
installed. Supplies necessary for the installation of the shower are not
all included; however, they are available wherever plumbing supplies
are sold.
Prior to beginning installation, turn off the hot and cold water lines, then
turn on the old shower to release built-up pressure. When installing the
new showerhead, hand tighten the connector nuts. DO NOT
OVERTIGHTEN. Connections that are too tight will reduce the integrity of
the system.
A
C
G
E
cartridges, and washers must be removed before using a flame
or the warranty will be voided on these parts.
B
D
F
12-2021
Advertisement
Table of Contents

Summary of Contents for Homewerks 3070-252-CH-B-WS
- Page 1 OVERTIGHTEN. Connections that are too tight will reduce the integrity of Compound. the system. Need Help? Please call our toll-free line at (877) 319-3757 (7:30 a.m. to 4:30 p.m. CST) for additional assistance or service. Homewerks Worldwide, LLC • Lake Bluff, IL 60044 • Homewerks.com 12-2021...
-
Page 2: Product Specifications
Thread the base of the shower arm (B) onto the faucet body (E). Twist until it is tight, making sure the shower arm (B) outlet is pointing away from the wall. Homewerks.com... -
Page 3: Care And Cleaning
4. Position the cartridge back into the faucet body. Make sure the ridges on the two sides of the cartridge bonnet fit into the grooves on the two sides of the faucet body. Tightly screw the bonnet onto the faucet body. 5. Reinstall the handle. Homewerks.com... -
Page 4: Replacement Parts
For replacement parts, call our customer service department at 1-877-319-3757, 7:30 a.m. - 4:30 p.m., CST, Monday - Friday. PART DESCRIPTION PART # PART # PART # 3070-252-CH-B-WS 3070-252-BN-B-WS 3070-252-MB-B-WS Union assembly RP 90046CH RP 90046BN RP 90046MB Soap dish with mounting screws... - Page 5 Phillips, compuesto para roscas de tubos. ¿Necesitas ayuda? Llama a nuestra línea gratuita al (877) 319-3757 (de 7:30 a.m. a 4:30 p.m. CST) para obtener asistencia o servicio adicional. Homewerks.com...
-
Page 6: Especificaciones Del Producto
Atornille la base del brazo de la ducha (B) en el cuerpo del grifo (E). Gire hasta que esté apretado, asegurándose de que la salida del brazo de la ducha (B) esté apuntando lejos de la pared. Homewerks.com... -
Page 7: Instrucciones De Funcionamiento
4. Sustituya el cartucho en el cuerpo del grifo. Asegúrese de que los salientes de los dos lados del casquete del cartucho encajen en las ranuras de los dos lados del cuerpo del grifo. Atornille firmemente el capuchón al cuerpo del grifo. 5. Vuelva a colocar la palanca. Homewerks.com... -
Page 8: Piezas De Repuesto
Para piezas de repuesto, llame a nuestro departamento de servicio al cliente al 1-877-319-3757, 7:30 a.m.- 4:30 p.m. CST, Lunes - Viernes. PARTE DESCRIPCIÓN PARTE # PARTE # PARTE # 3070-252-CH-B-WS 3070-252-BN-B-WS 3070-252-MB-B-WS Unión RP 90046CH RP 90046BN RP 90046MB Jabonera con tornillos de montaje...
Need help?
Do you have a question about the 3070-252-CH-B-WS and is the answer not in the manual?
Questions and answers