Table of Contents
Advertisement
Available languages
Available languages
Quick Links
MANUAL DE INSTALACIÓN Y
USUARIO
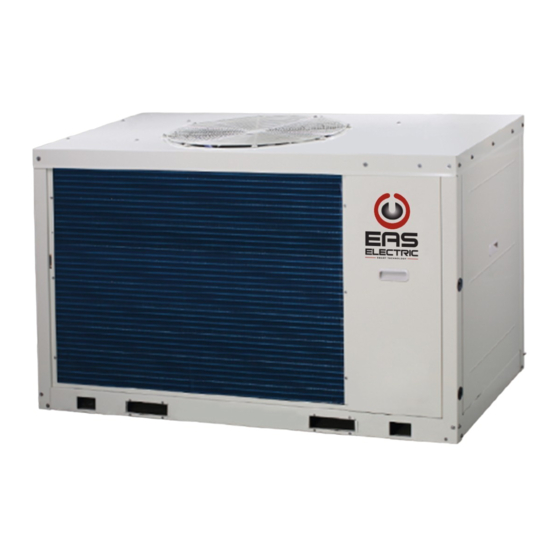
DC Inverter Modular Chiller
Refrigerado por agua
NOTA IMPORTANTE:
Instrucciones originales
Muchas gracias por comprar nuestro aire acondicionado,
Antes de usar su aire acondicionado, lea este manual detenidamente y consérvelo para futuras
consultas.
ECH030NHR - ECH060NHR
V.1
Advertisement
Chapters
Table of Contents

Subscribe to Our Youtube Channel
Related Manuals for EAS Electric ECH030NHR


Summary of Contents for EAS Electric ECH030NHR
- Page 1 MANUAL DE INSTALACIÓN Y USUARIO DC Inverter Modular Chiller Refrigerado por agua ECH030NHR - ECH060NHR NOTA IMPORTANTE: Instrucciones originales Muchas gracias por comprar nuestro aire acondicionado, Antes de usar su aire acondicionado, lea este manual detenidamente y consérvelo para futuras...
-
Page 2: Table Of Contents
CONTENTS ACCESORIOS INTRODUCCIÓN Condiciones de uso de la unidad 2 CONSIDERACIONES DE SEGURIDAD ANTES DE LA INSTALACIÓN 3.1 Manejo de la unidad 4 INFORMACIÓN IMPORTANTE DEL REFRIGERANTE 5 SELECCIÓN DEL LUGAR DE INSTALACIÓN PRECAUCIONES EN LA INSTALACIÓN Esquema dimensional Requisitos del espacio para la disposición de la unidad Base de la instalación Instalación de dispositivos de amortiguación Instalación de dispositivo para evitar la acumulación de nieve y fuertes vientos... - Page 3 11 MANTENIMIENTO 11.1 Códigos e información de fallos 11.2 Visualización de datos del control por cable 11.3 Cuidado y mantenimiento 11.4 Limipeza y desincustración 11.5 Apagado de invierno 11.6 Reemplazo de piezas 11.7 Primer arranque después de apagado 11.8 Sistema de refrigeración 11.9 Desmontaje del compresor 11.10...
-
Page 4: Introducción
Temperatura de salida del agua (℃) Outlet water temperature (℃) Temperatura de salida del agua (℃) Outlet water temperature (℃) Fig. 1-1 Rango de funcionamiento en modo Fig. 1-2 Rango de funcionamiento en modo refrigeración de ECH030NHR y ECH060NHR calefacción de ECH030NHR y ECH060NHR... -
Page 5: Consideraciones De Seguridad
2. CONSIDERACIONES DE SEGURIDAD Las precauciones enumeradas aquí se dividen en los siguientes tipos. Son muy importantes, así que asegúrese de seguirlas cuidadosamente. Significados de los símbolos de PELIGRO, ADVERTENCIA, PRECAUCIÓN y NOTA. INFORMACIÓN Lea estas instrucciones cuidadosamente antes de la instalación. Guarde este manual en un lugar seguro para futuras referencias. - Page 6 ADVERTENCIA La reparación solo debe realizarse según lo recomendado por el fabricante del equipo. El mantenimiento y la reparación que requieran la asistencia de otro personal cualificado deben realizarse bajo la supervisión de la persona competente en el uso de refrigerantes inflamables. Separe y deseche las bolsas de plástico para que los niños no jueguen con ellas.
-
Page 7: Antes De La Instalación
No instale la unidad en los siguientes lugares: - Donde haya neblinas de aceite mineral, spray o vapores. Las piezas de plástico pueden deteriorarse y hacer que se suelten o que gotee agua. - Donde se producen gases corrosivos (como el gas ácido sulfuroso). Donde la corrosión de las tuberías de cobre o las piezas soldadas pueden causar fugas de refrigerante - Donde haya maquinaria que emita ondas electromagnéticas. -
Page 8: Información Importante Del Refrigerante
La cantidad de carga de refrigerante de fábrica y sus toneladas de CO equivalente es de: Tabla 4-1 Modelo Refrigerante(kg) Toneladas CO equivalentes ECH030NHR 5.33 14.0 9.45 ECH060NHR 5 SELECCIÓN DEL LUGAR DE INSTALACIÓN 1) Las unidades pueden instalarse en el suelo o en un lugar adecuado en techo O tejado, siempre que se pueda garantizar una ventilación suficiente. -
Page 9: Precauciones En La Instalación
6 PRECAUCIONES EN LA INSTALACIÓN 6.1 Esquema dimensional 6.1.1ECH030NHR Vista frontal Vista lateral izquierdo Vista superior Fig. 6-1 Esquema dimensional de ECH030NHR 6.1.2 ECH060NHR Vista lateral izquierdo Vista superior Vista frontal Fig. 6-2 Esquema dimensional de ECH060NHR Tabla 6-1 Modelo... -
Page 10: Requisitos Del Espacio Para La Disposición De La Unidad
6.2 Requisitos del espacio para la disposición de la unidad 1) Para garantizar un flujo de aire adecuado que ingrese al condensador, se debe tener en cuenta la influencia del flujo de aire descendente causado por los edificios de gran altura alrededor de la unidad al instalar la unidad. 2) Si la unidad se instala donde la velocidad de flujo del aire es alta, como en un techo expuesto, se pueden tomar medidas que incluyen la instalación de una cerca hundida y persianas, para evitar que el flujo turbulento moleste el aire que ingresa a la unidad. -
Page 11: Base De La Instalación
Vista superior del esquema dimensional de Fig. 6-6 nieve para la altura de la base. instalación de ECH030NHR 3) Las bases de acero o de hormigón pueden ser adecuadas. 4) En la Fig. 6-5. se muestra un diseño típico de base de hormigón. -
Page 12: Instalación De Dispositivo Para Evitar La Acumulación De Nieve Y Fuertes Vientos
6.5.1 Medidas para prevenir los problemas que causa la nieve Perno de anclaje 1) Medidas para prevenir la acumulación de nieve. Tuerca La altura de la base debe ser al menos igual a la profundidad de la acumulación de nieve prevista en el área de su instalación. Arandela Dispositivo de amortiguación Unidad... -
Page 13: Diagrama De Conexiones Del Sistema De Tuberías
7 DIAGRAMA DE CONEXIONES DEL SISTEMA DE TUBERÍAS Este es el sistema de agua del módulo estándar. Tanque de expansión Reposición de agua Válvula de descarga de suciedad Filtro en Y, Unidad requiriendo≥ 40 mallas Unidad Terminal Unidad Válvula de Válvula de 2 vías drenaje Calentador eléctrico auxiliar... -
Page 14: Desmontaje De La Unidad
Fig. 8-1 Partes principales de ECH030NHR Fig. 8-2 Partes principales de ECH060NHR 8.2 Desmontaje de la unidad Por medio de un panel de servicio desmontable, el personal de mantenimiento puede acceder fácilmente a los componentes interiores de la unidad. Puerta 2... -
Page 15: Diagrama De Sistema De La Unidad Exterior
8.3 Diagrama de sistema de la unidad exterior 8.3.1 Diagrama de ECH030NHR Fig.8-5 es el diagrama de funciones de ECH030NHR. inlet outlet Fig.8-5 Diragama de funciones de ECH030NHR Tabla 8-2 Leyenda Compresor DC Inverter Válvula de seguridad Calentador del cárter Separador gas-líquido... - Page 16 8.3.2 Diagrama de ECH060NHR Fig.8-6 es el diagrama de funciones de ECH060NHR. inlet outlet Fig.8-6 Diagrama de funciones de ECH060NHR Tabla 8-3 Leyenda Compresor DC Inverter 1 Sensor de temperatura anticongelación de la sección de agua 2 Compresor DC Inverter 2 Sensor de temperatura anticongelación de la sección de agua 1 Calentador del cárter 1 Válvula de cierre...
- Page 17 8.4 Placas de control de la unidad exterior 8.4.1 PCB Principal 1) Las descripciones se dan en la Tabla 8-4. Fig. 8-4 PCB principal de ECH030NHR y ECH060NHR Tabla 8-4 Contenido CN30: Entrada de la fuente de alimentación trifásica de cuatro hilos (código de fallo E1), Entrada del transformador de corriente 220-240V AC (solo válido para la unidad principal).
- Page 18 Contenido CN83:COMP-STATE,conecta con un indicador de CA para indicar el estado del compresor Atención: el valor del puerto de control de la bomba detectada es ON/OFF pero no un suministro eléctrico de control de 220-230 V, por lo que se debe prestar especial atención al instalar el indicador. CN2:HEAT1.Calentador auxiliar de tuberías.
- Page 19 Refrigeración a baja temperatura, válido para S12-3 ON. CN7:TEMP-SW,Puerto de conmutación de la temperatura del agua objetivo. ENC2:ALIMENTACIÓN Interruptor DIP para la selección de capacidad ( En ECH030NHR por defecto 0, en ECH060NHR por defecto 1) CN74:El puerto de alimentación de la HMI. (DC9V) ENC4: NET_ADDRESS El interruptor DIP 0-F de la dirección de red de la unidad exterior está...
-
Page 20: Cableado Eléctrico
Si el usuario necesita algún tipo de reparación, debe ponerse en contacto con el servicio técnico. La designación del tipo de cable de alimentación es H07RN-F. 8.5.3 Instrucciones de los interruptores DIP 8.5.2 ECH030NHR y ECH060NHR Tabla 8-5 ECH030NHR y ECH060NHR Lo interruptoress DIP, botones y posiciones de las pantallas digitales de las unidades. - Page 21 Fuente de alimentación Cableado Conmutador manual Fusible Modelo 380-415V/3N~50Hz 10mm X5(<20m) ECH030NHR 380-415V/3N~50Hz 100A 16mm X5(<20m) ECH060NHR NOTA Consulte la tabla anterior para conocer el diámetro y la longitud del cable de alimentación cuando la caída de voltaje en el punto de cableado de alimentación está dentro del 2%. Si la longitud del cable excede el valor especificado en la tabla o la caída de voltaje supera el límite, el diámetro del cable de alimentación debe ser...
- Page 22 8.5.6 Requisitos para el cableado del suministro eléctrico Correcto Transformador distribuidor Conmutador Manual de energía Pararrayos manual switch Fuses Fusibles Cable de Toma de tierra Alimentación 380-415V Building 3N~50Hz Unidad Toma de tierra 1 Toma de tierra 2 Toma de tierra 3 Incorrecto Transformador distribuidor...
- Page 23 8.5.8 Función de los terminales 8.5.7 Requisitos para la conexión del cable de alimentación Como se muestra en la figura a continuación, el cable de señal Correcto de comunicación de la unidad está conectado al bloque de terminales XT2 en 5 (X), 6 (Y) y 7 (E), y el cable de señal del control por cable está...
- Page 24 0# Puerto "ON/OFF" 0# Puerto "ON/OFF" 8.5.12 Sistema de control y precauciones de instalación de la caja de control de la caja de control eléctrico eléctrico a. Use solo cables apantallados como cables de control. Cualquier otro tipo de cables puede producir una interferencia en la señal que hará...
- Page 25 Si se conectan varias unidades en paralelo, el usuario debe configurar la dirección de cada unidad por medio de los interruptores DIP. La dirección del interruptor DIP es ENC4. Con 0-F siendo válido, 0 indica la unidad principal y 1-F indica unidades auxiliares.. Fig. 8-18 Esquema de comunicación en red de la unidad principal y la unidad auxiliar para ECH030NHR...
- Page 26 Fig. 8-19 Esquema de comunicación en red de la unidad principal y la unidad auxiliar para ECH060NHR...
-
Page 27: Instalación Del Sistema Hidráulico
Durante el mantenimiento, el paso de agua del En el caso de la conexión de unidades múltiples, la intercambiador de calor puede cortarse sin molestar a HMI de ECH030NHR y ECH060NHR se puede otros intercambiadores de calor. sincronizar en el mismo sistema. Pero,... - Page 28 Las tuberías de entrada y salida de agua se instalan y conectan como se muestra en las siguientes figuras. El modelo ECH030NHR usa conexión atornillada, mientras que el modelo ECH060NHR usa conexión de tipo fleje. Para las especificaciones de las tuberías de agua y las roscas de los tornillos, consulte la Tabla 8-7 a continuación.
- Page 29 Elemento depositan en el evaporador, la circulación del agua refrigerada puede bloquearse y provocar averías por Modelo Mínimo Máximo congelación. Si la dureza agua refrigerada ECH030NHR demasiado alta, pueden producir depósitos los dispositivos pueden 13.0 ECH060NHR corroerse. Por lo tanto, la calidad del agua fría debe analizarse antes de ser utilizada, como el valor de pH, la conductividad, la concentración de...
- Page 30 2) Estándar aplicable a la unidad sobre la calidad del agua Tabla 8-9 Valor del PH 6.8~8.0 Sulfato <50ppm Dureza total <70ppm Sílice <30ppm Conductividad <200μV/cm(25°C) Contenido de heirro <0.3ppm Iones de sulfuro Iones de sodio No requirement Iones de cloruro <50ppm Iones de calcio <50ppm...
-
Page 31: Puesta En Marcha Y Configuración
1) Interruptor DIP consulte la siguiente figura. Para la elección del interruptor DIP, consulte en detalle la Tabla 8-5, cuando se instalan bombas de agua individuales o múltiples para ECH030NHR y ECH060NHR. unidad unidad (1#) unidad (0#) Preste atención a los siguientes problemas: (n-1#) a. -
Page 32: Test De Funcionamiento Y Comprobaciones Finales
10 TEST DE FUNCIONAMIENTO Y COMPROBACIONES FINALES 10.1 Tabla de verificación tras la instalación Tabla 10-1 Elemento a comprobar Descripción Sí Las unidades están fijadas en su base de montaje El espacio de ventilación requerido para el intercambiador de calor en la sección del aire cumple con los requisitos descritos Se cumple el espacio para mantenimiento requerido Si el lugar de la instalación cumple con los requisitos... -
Page 33: Mantenimiento
En caso de que la unidad funcione en condiciones anormales, el código de protección contra fallos se mostrará tanto en el panel de control como en el control por cable, y el indicador del control por cable parpadeará con una frecuencia de 1Hz. Los códigos de visualización se muestran en la siguiente tabla: Tabla11-1 ECH030NHR y ECH060NHR Nota Código Contenido Fallo de la EPROM de la memoria de parámetros de control principal... - Page 34 Código Contenido Nota Protección de la temperatura Tfin demasiado alta del módulo Inverter Ocurre 3 veces en 100 minutos. El error se puede recuperar apagando la fuente de alimentación x=1 significa Ventilador A,x=2 Protección del módulo del ventilador DC significa Ventilador B. Recuperado tras la eliminación de los fallos Voltaje demasiado alto o demasiado bajo Recuperado por apagar el suministro eléctrico...
-
Page 35: Visualización De Datos Del Control Por Cable
11.2 Visualización de datos del control Se debe prestar mucha atención a la presión de descarga y succión durante el proceso de ejecución. Descubra las por cable razones y elimine la fallo si se encuentra una anomalía. El área de visualización de datos se divide en el área superior e inferior,con dos grupos de pantallas digitales de 7 segmentos de Controlar y proteger el equipo. -
Page 36: Primer Arranque Después De Apagado
11.7 Primer arranque después del apagado 11.9 Desmontaje del compresor Se deben hacer los siguientes preparativos antes de arrancar Siga los siguientes pasos si es necesario desmontar el la unidad tras un apagado prolongado: compresor: 1) Verifique la unidad y límpiela a fondo 1) Corte la fuente de alimentación de la unidad. -
Page 37: Cambio De La Válvula De Seguridad
11.12 Cambio de la válvula de seguridad Reemplace la válvula de seguridad de la siguiente manera: 1) Recupere el refrigerante completamente del sistema. Hacerlo requiere personal profesional y equipos específicos; 2) Proteja el recubrimiento del tanque. Evite dañar el revestimiento del tanque con una fuerza externa o alta temperatura al retirar e instalar la válvula de seguridad;... -
Page 38: Información De Servicio
INFORMACIÓN DE SERVICIO 11.13 1) Comprobaciones en la zona. Antes de comenzar a trabajar en sistemas que contengan refrigerantes inflamables, se necesitan controles de seguridad para garantizar que se minimice el riesgo de ignición. Para reparar el sistema de refrigeración, se deben cumplir las siguientes precauciones antes de realizar trabajos en el sistema. - Page 39 b) Se debe prestar especial atención a lo siguiente para garantizar que al trabajar con componentes eléctricos, la carcasa no se altera de tal manera que el nivel de protección se vea afectado. Esto debe incluir daños a los cables, un número excesivo de conexiones, terminales no hechos según la especificación original, daños a los sellos, ajuste incorrecto de los casquillos, etc.
- Page 40 Etiquete el sistema cuando se complete la carga (si no lo ha hecho ya). Se debe tener mucho cuidado de no sobrecargar el sistema de refrigeración. Antes de recargar el sistema, debe probarse a presión con OFN. El sistema debe ser probado contra fugas al finalizar la carga pero antes de la puesta en servicio.
-
Page 41: Tabla De Registro De Test Funcionamiento Y Mantenimiento
TABLA DE REGISTRO DE TEST DE FUNCIONAMIENTO Y MANTENIMIENTO Tabla 11-2 Modelo: Código indicado en la unidad: Nombre y dirección del cliente: Fecha: 1. Comprobación de la temperatura del agua fría o caliente Entrada ( Salida ( 2. Comprobación de la temperatura del aire del intercambiador de calor del lado del aire: Entrada ( Salida( 3. -
Page 42: Modelos Aplicables Y Parámetros Principales
12 MODELOS APLICABLES Y PARÁMETROS PRINCIPALES Tabla 12-1 Modelo ECH030NHR ECH060NHR Capacidad de refrigeración 27.5 Capacidad de calefacción 32.0 Entrada estándar de refrigeración 11.0 Intensidad nominal de refrigeración 17.0 35.5 Entrada estándar de calefacción 10.7 21.5 Intensidad nominal de calefacción 16.5... -
Page 43: Requisitos De Información
13 REQUISITOS DE INFORMACIÓN Tabla 13-1 Requisitos de información para los refrigeradores de confort Modelo(s): ECH030NHR Intercambiador de calor lateral exterior del refrigerador: Aire - agua Refrigerador del intercambiador de calor interior: Agua Tipo: Compresión del vapor impulsado por el compresor Controlador del compresor: Motor eléctrico... - Page 44 (100 años) Condiciones de calificación estándar utilizadas: Aplicación a baja temperatura EAS ELECTRIC Datos de contacto Camino de la Sierra S/n Pol Industrial Redován, Parcela 13 03370 Redován (Alicante) (*) Si C no está determinado por la medición, entonces el coeficiente de degradación predeterminado de los refrigeradores será 0,9.
- Page 45 Datos de contacto EAS ELECTRIC.Camino de la Sierra S/n Pol Industrial Redován, Parcela 13 03370 Redován (Alicante) (1) Para los calefactores de la bomba de calor y los calefactores combinados de la bomba de calor, la potencia calorífica nominal estimada es igual a la carga de diseño para la calefacción Pdesignh, y la potencia térmica nominal de un calentador suplementario Psup es igual a la capacidad suplementaria para la calefacción sup (Tj ).
- Page 46 Nivel de potencia sonora exterior Datos de contacto EAS ELECTRIC.Camino de la Sierra S/n Pol Industrial Redován, Parcela 13 03370 Redován (Alicante) (1) Para los calefactores de la bomba de calor y los calefactores combinados de la bomba de calor, la potencia calorífica nominal estimada es igual a la carga de diseño para la calefacción Pdesignh, y la potencia térmica nominal de un...
- Page 47 NOTE...
- Page 48 Requisitos de calidad del agua en el circuito La calidad del agua debe cumplir los estándares de la Directiva Europea 98/83 CE y los criterios indicados en la Norma UNE 112.076 Antes de conectar la unidad exterior: En las instalaciones tanto nuevas como ya existentes, se debe de realizar una limpieza a fondo de las tuberías utilizando un producto de limpieza químico adecuado, posteriormente se lavarán las tuberías para limpiar el agente químico.
- Page 49 OWNER'S & INSTALLATION MANUAL DC Inverter Air-cooled Modular Chiller ECH030NHR - ECH060NHR IMPORTANT NOTE: Original instructions Thank you very much for purchasing our air conditioner, Before using your air conditioner, please read this manual carefully and keep it for future reference.
- Page 50 CONTENTS ACCESSORIES INTRODUCTION use conditions of the unit 2 SAFETY CONSIDERATION BEFORE INSTALLATION Handling of the unit 4 IMPORTANT INFORMATION ON REFRIGERANT 5 SELECTION OF INSTALLATION SITE PRECAUTIONS ON INSTALLATION Outline dimensional drawing Requirements of arrangement space of the unit Installation foundation Installation of damping devices Installation of device to prevent snow build-up and strong breeze...
- Page 51 11 MAINTENANCE AND UPKEEP 11.1 Failure information and code 11.2 Data display of wired controller 11.3 Care and maintenance 11.4 Removing scale 11.5 Winter shutdown 11.6 Replacing parts 11.7 First startup after shutdown 11.8 Refrigeration system 11.9 Disassembling compressor 11.10 Auxiliary electric heater 11.11 System antifreezing...
-
Page 52: Accessories
2) To maintain better performance, please operate the unit under the following outdoor temperature: ECH030NHR ECH030NHR ECH060NHR ECH060NHR Outlet water temperature (℃) Outlet water temperature (℃) Fig. 1-1 Cooling operating range of ECH030NHR Fig. 1-2 Heating operating range of ECH030NHR and ECH060NHR and ECH060NHR... -
Page 53: Safety Consideration
2. SAFETY CONSIDERATION The precautions listed here are divided into the following types.They are quite important, so be sure to follow them carefully. Meanings of DANGER, WARNING, CAUTION and NOTE symbols. INFORMATION Read these instructions carefully before installation. Keep this manual in a handy for future peference. Improper installation of equipment or accessories may result in electric shock, short-circuit, leakage, fire or other damage to the equipment. - Page 54 WARNING Servicing shall only be performed as recommended by the equipment manufacturer. Maintenance and repair requiring the assistance of other skilled personnel shall be carried out under the supervision of the person competent in the use of flammable refrigerants. Tear apart and throw away plastic packaging bags so that children will not play with them.Children playing with plastic bags face danger of death by suffocation.
-
Page 55: Before Installation
Do not install the unit in the following places: - Where there is mist of mineral oil, oil spray or vapors. Plastic parts may deteriorate, and cause them to come loose or water to leak. - Where corrosive gases (such as sulphurous acid gas) are produced. Where corrosion of copper pipes or soldered parts may cause refrigerant to leak. -
Page 56: Important Information On Refrigerant
Amount of factory-charged refrigerant and tonnes CO Equivalent is Table 4-1 Model Refrigerant(kg) Tonnes CO equivalent ECH030NHR 5.33 ECH060NHR 14.0 9.45 5 SELECTION OF INSTALLATION SITE 1) Units can be installed on the ground or proper place on a roof, provided that sufficient ventilation can be guaranteed. -
Page 57: Precautions On Installation
6 PRECAUTIONS ON INSTALLATION 6.1 Outline dimensional drawing 6.1.1ECH030NHR Front view Left view Top view Fig. 6-1 Outline dimensional of ECH030NHR 6.1.2 ECH060NHR Left view Top view Front view Fig. 6-2 Outline dimensional of ECH060NHR Table 6-1 Model ECH030NHR ECH060NHR... -
Page 58: Requirements Of Arrangement Space Of The Unit
6.2 Requirements of arrangement space of the unit 1) To ensure adequate airflow entering the condenser, the influence of descending airflow caused by the high-rise buildings around upon the unit should be taken into account when installing the unit. 2) If the unit is installed where the flowing speed of air is high, such as on the exposed roof, the measures including sunk fence and Persian blinds can be taken, to prevent the turbulent flow from disturbing the air entering the unit. -
Page 59: Installation Foundation
Fig. 6-6 Top view of schematic diagram of installation dimension of ECH030NHR 3) Either steel or concrete bases may be suitable. 4) A typical concrete base design is shown in Fig. 6-5. A typical concrete specification is 1 part cement, 2 parts sand and 4 parts (unit: mm) crushed stone with steel reinforcing bar. -
Page 60: Installation Of Device To Prevent Snow Build-Up And Strong Breeze
6.5.1 Measures used to prevent problems caused by snow Anchor bolt 1) Measures to prevent build-up of snow The base height should be as least the same as the predicted Ferrol snow depth in the local area. Damping device Outdoor unit Fig. -
Page 61: Connection Drawing Of Pipeline System
7 CONNECTION DRAWING OF PIPELINE SYSTEM This is the water system of standard module. Expansion tank Water replenishing Dirt discharge valve Y-type filter, unit requiring≥ 40 meshes unit Terminal unit Drain valve Two-way valve Auxiliary electric heater Three-way valve Symbol explanation Stop valve Pressure gauge Flexible joint... -
Page 62: Opening The Uint
Fig. 8-1 Main parts of ECH030NHR Fig. 8-2 Main parts of ECH060NHR 8.2 Opening the uint By means of a detachable service panel, the maintenance personnel can easily access the interior components of the unit. Door 2 Door 1 Door 3 Door 4 Fig. -
Page 63: System Diagram
8.3 System diagram 8.3.1 diagram of ECH030NHR Fig.8-5 is the function diagram of the ECH030NHR. inlet outlet Fig.8-5 ECH030NHR function diagram Table 8-2 Legend DC inverter compressor Safty valve Crankcase heater Gas-liquid separator DC inverter compressor discharge temperature sensor 1... - Page 64 8.3.2 diagram of ECH060NHR Fig.8-6 is the function diagram of the ECH060NHR. inlet outlet Fig.8-6 ECH060NHR function diagram Table 8-3 Legend Dc inverter compressor 1 Water side antifreeze temperature sensor 2 Dc inverter compressor 2 Water side antifreeze temperature sensor 1 Crankcase heater 1 Stop valve Crankcase heater 2...
-
Page 65: Outdoor Unit Pcbs
8.4 Outdoor unit PCBs 8.4.1 MAIN PCB 1) Label descriptions are given in Table 8-4 Fig. 8-7 Main PCB of ECH030NHR and ECH060NHR Table 8-4 Detail information CN30:Input of three-phase four-wire power supply (fault code E1) Input of transformer, 220-240V AC current. - Page 66 Detail information CN83:COMP-STATE,connect with an ac light to indicate the state of the compressor Attention: the control port value of the pump actually detected is ON/OFF but not 220-230V control power supply,so special attention should be paid when installing the light. CN2:HEAT1.Pipeline Auxiliary Heater Attention: the control port value of the pump actually detected is ON/OFF but not 220-230V control power supply,so special attention should be paid when installing the pipeline auxiliary heater.
- Page 67 Low temperature cooling,valid for S12-3 ON. CN7:TEMP-SW,Target water temperature switching port. ENC2:POWER DIP switch for capacity selection. (ECH030NHR defaults 0, ECH060NHR defaults 1) CN74:The power supply port of the HMI .(DC9V) ENC4:NET_ADDRESS DIP switch 0-F of outdoor unit network address is enabled, which represent address 0-15.
-
Page 68: Electric Wiring
If the user has any requirement of repair, please contact the maintenance center. The power cord type designation is H07RN-F. 8.5.3 DIP switch instructions 8.5.2 ECH030NHR and ECH060NHR Table 8-5 ECH030NHR and ECH060NHR DIP switch, buttons and digital display positions of uints. - Page 69 Power supply Manual switch Fuse Wiring Model 380-415V/3N~50Hz 10mm X5(<20m) ECH030NHR 380-415V/3N~50Hz 100A 16mm X5(<20m) ECH060NHR NOTE See the table above for power wire diameter and length when the voltage drop at the power wiring point is within 2%. If the wire length exceeds the value specified in the table or the voltage drop is beyond the limit, the power...
- Page 70 8.5.6 Requirements for power supply wiring Correct Power distribution Manual transformer Lightning switch Fuses arrester Grounding wire Power 380-415V Building 3N~50Hz Uint Grounding 1 Grounding 2 Grounding 3 Wrong Power distribution transformer Manual Lightning arrester switch Fuses Grounding wire Power 380-415V 3N~50Hz Surge...
- Page 71 8.5.8 Function of terminals 8.5.7 Requirements for power cord connection Correct As shown in the figure below, the uint communication signal wire is connected to the terminal block XT2 at 5(X), 6(Y) and 7(E), and the wired controller signal wire is connected at 8(X), 9(Y) and 10(E) inside the electric control box.
- Page 72 0# electric 0# electric 8.5.12 Control system and installation precautions control box control box “ON/OFF” port “ON/OFF” port a. Use only shielded wires as control wires. Any other type of wires may produce a signal interference that will cause the units to malfunction.
- Page 73 If multiple units are connected in parallel, the user needs to set uint address on the DIP switches. The DIP switch address is ENC4. With 0-F being valid, 0 indicates the main unit and 1-F indicate auxiliary units. Fig. 8-18 Networking communication schematic of main unit and auxiliary unit for ECH030NHR...
- Page 74 Fig. 8-19 Networking communication schematic of main unit and auxiliary unit for ECH060NHR...
-
Page 75: Water System Installation
During In the case of multiple units connection, the HMI of maintenance, the water passage of the heat exchanger ECH030NHR and ECH060NHR can be parralled with in can be cut off without disturbing other heat exchangers. the same system. But,... - Page 76 8.6.2 Connection mode of pipe The water inlet and outlet pipes are installed and connected as shown in the following figures. ECH030NHR model uses screwed connection, while the ECH060NHR model uses hoop connection. For the specifications of the water pipes and screw thread, see the Table 8-7 below.
- Page 77 Model Minimum Maximum the devices may be corroded. Therefore, the quality of chilled water should be analyzed before being used, ECH030NHR such as PH value, conductivity, concentration of chloride ECH060NHR 13.0 ion, concentration of sulfide ion, and so on.
- Page 78 2) Applicable standard of water quality for the unit Table 8-9 PH value 6.8~8.0 Sulfate <50ppm Total hardness <70ppm Silicon <30ppm Conductivity <200μV/cm(25°C) Iron content <0.3ppm Sulfide ion Sodium ion No requirement Chloride ion <50ppm Calcium ion <50ppm Ammonia ion 8.6.9 Installation of multi-module water system pipeline Multi-module combination installation involves special design of the unit, so relevant explanation is given as follows.
-
Page 79: Strat-Up And Configruation
Each unit is required to install a one-way valve when multiple 1) DIP switch pumps are installed, refer to figure as follow. The choice of DIP switch see Table 8-5 in detail when single or multiple water pumps are installed for ECH030NHR and ECH060NHR. unit unit (1#) -
Page 80: Test Run And Final Check
10 TEST RUN AND FINAL CHECK 10.1 Check item table after installation Table 10-1 Checking item Description Units are fixed mounting on level base. Ventilating space for heat exchanger at the air side is meeting for requirement Maintenance space is meeting for requirement. Whether installing site is meet for requirements Noise and vibration is meeting for requirement. -
Page 81: Maintenance And Upkeep
In case the unit runs under abnormal condition, failure protection code will display on both control panel and wired controller, and the indicator on the wired controller will flash with 1Hz. The display codes are shown in the following table: Table11-1 ECH030NHR and ECH060NHR Note... - Page 82 Code Content Note Inverter module temperature Tfin too high Occurs 3 times in 100 minutes and the error can be recovered by temperature protection turning off the power supply only x=1 means Fan A,x=2 means Fan B DC fan module protection Recovered upon error recovery Voltage too high or too low Recovered by power off...
-
Page 83: Care And Maintenance
11.2 Digital display of main board Close attention should be paid to the discharge and suction pressure during the running process. Find out reasons and eliminate the failure if abnormality is The data display area is divided into Up area and Down area, found. -
Page 84: First Startup After Shutdown
11.7 First startup after shutdown 11.9 Disassembling compressor The folowing preparations should be made for re-startup of unit Follow the following procedures if compressor needs to be after long-time shutdown: disassembled: 1) Thoroughly check and clean unit. 1) Cut off the power supply of unit. 2) Clean water pipe system. -
Page 85: Replacement Of Safety Valve
11.12 Replacement of safety valve Replace the safety valve as follows: 1) Reclaim the refrigerant completely in the system. Doing so requires professional staff and equipment; 2) Note to protect the tank coating. Avoid damage to coating from external force or high temperature when removing and installing the safety valve;... -
Page 86: Information Servicing
INFORMATION SERVICING 11.13 1) Checks to the area Prior to beginning work on systems containing flammable refrigerants, safety checks are necessary to ensure that the risk of ignition is minmised. For repair to the refrigerating system, the following precautions shall be complied with prior to conducting work on the system. - Page 87 b) Particular attention shall be paid to the following to ensure that by working on electrical components, the casing is not altered in such a way that the level of protection is affected. This shall include damage to cables, excessive number of connections, terminals not made to original specification, damage to seals, incorrect fitting of glands, etc.
- Page 88 Ensure that the refrigeration system is earthed prior to charging the system with refrigerant. Label the system when charging is complete(if not already). Extreme care shall be taken not to overfill the refrigeration system. Prior to recharging the system it shall be pressure tested with OFN. The system shall be leak tested on completion of charging but prior to commissioning.
-
Page 89: Record Table Of Test Run And Maintenance
RECORD TABLE OF TEST RUN AND MAINTENANCE Table 11-2 Model: Code labeled on the unit: Customer name and address: Date: 1. Check temperature of chilled water or hot water Inlet ( Outlet ( 2. check air temperature of air-side heat exchanger: Inlet ( Outlet ( 3. -
Page 90: Applicable Models And Main Parameters
12 APPLICABLE MODELS AND MAIN PARAMETERS Table 12-1 Model ECH030NHR ECH060NHR Cooling capacity 27.5 Heating capacity 32.0 Standard cooling input 11.0 Cooling rated current 17.0 35.5 Standard heating input 10.7 21.5 Heating rated current 16.5 33.1 Power supply 380-415V 3N~ 50Hz Operation control Control of wired controller, auto startup, running state display, failure alert etc. -
Page 91: Information Requirements
13 INFORMATION REQUIREMENTS Table 13-1 Information requirements for comfort chillers Model(s): ECH030NHR Outdoor side heat exchanger of chiller: Air to water Indoor side heat exchanger chiller: Water Type: Compressor driven vapour compression Driver of compressor: Electric motor Item Symbol Value... - Page 92 (100 years) Standard rating conditions used: Low temperature application EAS ELECTRIC Contact details Camino de la Sierra S/n Pol Industrial Redován, Parcela 13 03370 Redován (Alicante) (*) If C is not determined by measurement then the default degradation coefficient of chillers shall be 0,9.
- Page 93 EAS ELECTRIC.Camino de la Sierra S/n Pol Industrial Redován, Parcela 13 03370 Redován (Alicante) Contact details (1) For heat pump space heaters and heat pump combination heaters, the rated heat output Prated is equal to the design load for heating Pdesignh, and the rated heat output of a supplementary heater Psup is equal to the supplementary capacity for heating sup(Tj).
- Page 94 Contact details EAS ELECTRIC.Camino de la Sierra S/n Pol Industrial Redován, Parcela 13 03370 Redován (Alicante) (1) For heat pump space heaters and heat pump combination heaters, the rated heat output Prated is equal to the design load for heating Pdesignh, and the rated heat output of a supplementary heater Psup is equal to the supplementary capacity for heating sup(Tj).
- Page 95 NOTE...
- Page 96 Water quality requirements in the circuit The quality of the water must comply with the standards of the European Directive 98/83 CE and the criteria indicated in the Standard UNE 112.076 Before connecting the outdoor unit: In both new and existing facilities, a thorough cleaning of the pipes must be carried out using an appropriate chemical cleaning product, then the pipes will be washed to clean the chemical agent.
Need help?
Do you have a question about the ECH030NHR and is the answer not in the manual?
Questions and answers