
Related Manuals for AirTurn BT-106


Summary of Contents for AirTurn BT-106
- Page 1 BT-106 Transceiver Product Family Includes DIGIT, DUO, QUAD, StompKit, StompKit XL and TAP User Manual...
-
Page 3: Table Of Contents
The BT-106 Transceiver ............5 Description ................5 Setup and Pairing ..............6 Reset the Pairing ..............7 Turning off the BT-106 ............8 MODES ................8 Changing the MODE ............10 Key Repeat Function ............10 iOS Virtual Keyboard ............11 Charging ................ - Page 4 Radio Information ..............24 Recycling and Disposal............26 Warnings ................26 Trademarks ................26 Other Great AirTurn Products..........27 This manual is intended for firmware versions 40 and higher. The firmware number is the first two digits of the serial number.
-
Page 5: The Bt-106 Transceiver
THE BT-106 TRANSCEIVER Thank you for your purchase of an AirTurn BT-106 wireless controller. We hope you enjoy the wonderful convenience of both hand-held and hands-free page turning, effects management, media players, camera control and other creative ways to trigger events with the BT-106 family of products. -
Page 6: Setup And Pairing
9. SETUP AND PAIRING To use the BT-106 with your MAC, PC, Android or iPad, make sure the host computer you are using is in discovery mode. (Check the instructions that came with your computer or Bluetooth USB dongle. -
Page 7: Reset The Pairing
On the iPad, under the “Devices” heading within the Bluetooth settings, you should see the BT-106 appear, either as a keyboard, or as “AirTurn” with a serial number. Tap on top of Serial Number to connect and complete the pairing process. -
Page 8: Turning Off The Bt-106
Also reset both the host and BT-106 if the pairing is dropped by the host. TURNING OFF THE BT-106 Turn off the BT-106 by pressing the power button for 2-3 seconds until the LED turns red. Release and the LED will blink 3 more times while the unit shuts down. - Page 9 The following table shows each Mode and respective switch function: MODE 1 MODE 2 1) Page Up 1) 3 2) Left Arrow 2) P 3) Page Down 3) ; 4) Right Arrow 4) Shift + R 5) Enter 5) Space 6) b 6) Ctrl + Z MODE 3...
-
Page 10: Changing The Mode
CHANGING THE MODE Turn on the BT-106. Press and hold the MODE button for 2 seconds. The red LED will flash once per second from 1 to 6 flashes. The number of flashes corresponds to the same MODE number. Be sure to count the flashes. -
Page 11: Ios Virtual Keyboard
Any micro USB charger may also be used. Your BT-106 should last 100 hours or many days on a charge depending on how much you use it. On a full charge, the LED... -
Page 12: Compatible Switches
Yellow every second = under 25% power Red every second = under 9% power If the BT-106 is turned off while charging, the LED indicator will not light up, but it will still charge. If you leave the BT- 106 on while it is charging, the LED will remain lit and you can monitor the charging status. -
Page 13: Tongue And Bite Switches
BT-106 IS NOT CONNECTING OR PAIRING 1. Turn off the BT-106. 2. Delete the AirTurn device on your host computer. On an iOS device, go to the Bluetooth settings, (Settings>General> Bluetooth), and press the “I” in the circle next to the AirTurn... - Page 14 Forget this Device button, then 3. Turn off Bluetooth on the host device. 4. Turn on the BT-106. Wait 3 seconds. Then hold the power button for 8 seconds until you see the LED light blink red/green rapidly several times.
-
Page 15: Unit Identification
220A refers to the MAC address. This is helpful if there are many BT-106 units in the same location. Your MAC address will always be the same so you can easily identify your unit. You will find your specific MAC... -
Page 16: Digit
(See BT-106 instructions for pairing, charging and other important information.) The iOS camera and iTunes mode works on all iOS devices. Note, if music is playing, the camera function is superseded by the music. -
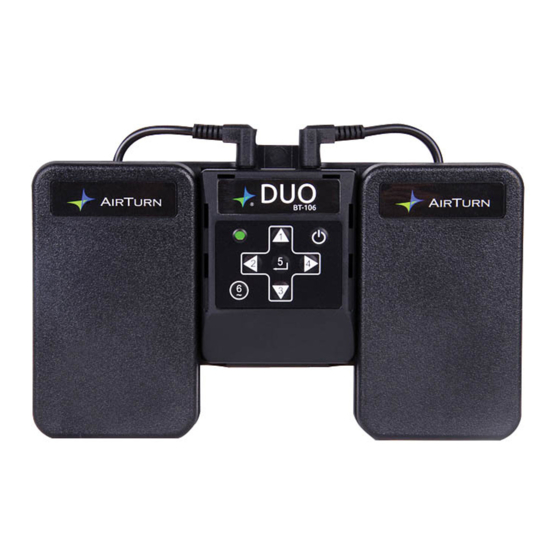
Page 17: Duo
Or trigger effects on an effects application. The BT-106 Transceiver may be removed from the pedal board to use as a hand held remote for camera and video triggers, iTunes control and more. -
Page 18: Quad
1-4 on the BT-106 in order from left to right The BT-106 or DIGIT is held in place with hook and loop fasteners so that it may be easily removed and used as a hand held controller or with other footswitch systems. -
Page 19: Stompkit
BT-106. The FS-5U switches are plugged into ports 1-2 and 3-4 of the BT-106. Please note that you are facing the logo on the BT-106 as you place the left cable into the left side and right cable into the right side. See page 9 of the manual sections for the BT-106 for switch functions. -
Page 20: Stompkit Xl
9V battery to function (included). The cable plugs into the center jack of the FS-6 and to the opposite port on the BT-106 so that the cables are crossed. Be sure to set the switches on your FS- 6 as shown: Please note the position of each switch. -
Page 21: Tap
The left trigger on the TAP is the same as button 1 and the right trigger is the same as button 3. See page 9 for more on switch functions. The BT-106 is removable for use as a handheld. However, only switches 1 and 3 are available to use as triggers with the jacks. -
Page 22: Custom Implementation
Behringer pedal board and more. You can integrate your BT-106 to the power system on your pedal board. 3-12V power supply can be soldered onto the BT-106 PCB directly. This requires some electrical skills. -
Page 23: Warranty
The warranties described herein shall be the sole and exclusive warranties granted by AirTurn and shall be the sole and exclusive remedy available to the purchaser. Correction of defects, in the manner and for the period of time... -
Page 24: Radio Information
AirTurn to the purchaser with respect to the Product and shall constitute full satisfaction of all claims, whether based on contract, negligence, strict liability or otherwise. In no event shall AirTurn be liable, or in any way responsible, for any damages or defects in the Product which... - Page 25 NOTE: This equipment has been tested and found to comply with the limits for a Class B digital device, pursuant to Part 15 of the FCC Rules. These limits are designed to provide reasonable protection against harmful interference in a residential installation. This equipment generates, uses and can radiate radio frequency energy, and, if not installed and used in accordance with the instructions, may cause harmful interference to radio communications.
-
Page 26: Recycling And Disposal
• Do not plug any device that generates an electric current into the BT-106 footswitch ports • Do not get the BT-106 wet or place in direct sunlight for extended periods of time. • Do not open the unit, as there are no user serviceable parts. -
Page 27: Other Great Airturn Products
OTHER GREAT AIRTURN PRODUCTS AirTurn provides all the accessories you need to support your tablet in many different configurations. From portable mic stands to universal tablet holders, check them out at your dealer or airturn.com. - Page 28 PO Box 3359 Nederland, CO 80466 www.airturn.com 888-247-1223...
Need help?
Do you have a question about the BT-106 and is the answer not in the manual?
Questions and answers