
Related Manuals for Vizio E50x-E1, E55-E1, E65-E1


Summary of Contents for Vizio E50x-E1, E55-E1, E65-E1
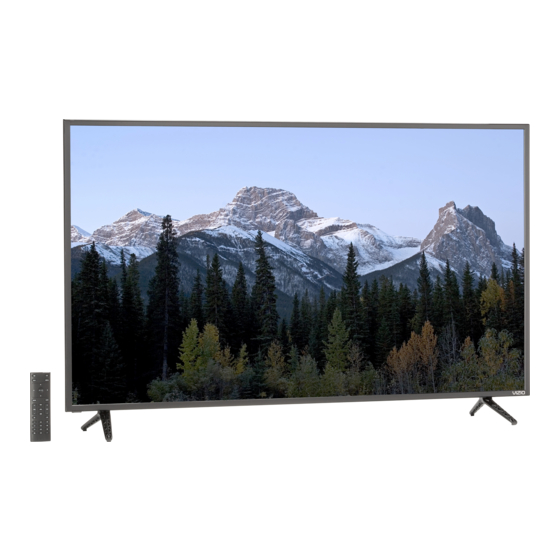
- Page 1 VIZIO INSTALLATION GUIDE E50x-E1, E55-E1, E65-E1 Please read this guide before using the product.
- Page 2 Safety Information IMPORTANT SAFETY INSTRUCTIONS when the apparatus has been damaged in any way, such as power- Your Display is designed and manufactured to operate within defined supply cord or plug is damaged, liquid has been spilled or objects have design limits.
- Page 3 result in fire or electric shock. • If any of the following occurs, contact the dealer: • The wall socket should be installed near your Display and easily • The power cord fails or frays. accessible. • Liquid sprays or any object drops into your Display. •...
-
Page 4: Table Of Contents
Pairing Via Wi-Fi ....................17 Getting started with Google Cast................18 How to cast content ....................19 Getting started with the VIZIO SmartCast app ............20 Account Setup ....................... 20 Selecting a Cast device ..................21 Basic Display functions..................22 Category Pages ...................... -
Page 5: Package Contents
Package Contents Home Theater Display 4 x Phillips Display Stands Screws VIZIO INSTALLATION GUIDE Please read this guide before using the product. Multi-Language Basic Remote Power Installation Guide w/Batteries Cable English - 5... -
Page 6: This Is Your Basic Remote
This is your basic remote INPUT POWER Change the currently Turn the Display on or off. displayed input. LINK WIDE Activate pairing mode Cycle through the different ratio on Display. modes. VOLUME CHANNEL UP/DOWN Increase or decrease the Change the channel. loudness of the audio. -
Page 7: Inserting And Replacing Batteries
2. Remove the back cover and insert two AAA batteries (included). Be sure to align the + and - signs on the batteries and remote. Visit http://support.vizio.com/ if you have any questions. When needed,... -
Page 8: Using Your Smartphone Or Tablet As A Remote
Using your smartphone or tablet as a remote. Your VIZIO Home Theater Display brings the way you interact up to speed with the rest of your entertainment experience. Using just your smart phone or tablet, you can tap, swipe, or use voice controls to access a virtually limitless library of casting content. -
Page 9: Minimum Recommended Requirements
• iOS 8.0 or later • Countries: US, Canada & Mexico • Devices supported: iPhone, iPad The VIZIO SmartCast app is available for download from the Google Play Store and Apple App Store. *Subject to change **To use the Bluetooth LE functionality you must have Android 5.1 or later... -
Page 10: Installing The Display Stands
Installing the Display Stands It is recommended that two people take part in the stand installation. Î Remove any plastic film from the Home Theater Display and stands. Place the Display screen-down on a clean, flat surface. To prevent scratches or damage to the screen, place the Display on a soft surface such as a carpet, rug, or blanket, and avoid any sharp edges. - Page 11 Insert the stands into the base of the Display. (The stands are identical.) Secure each stand to the Display with two (2) Phillips screws (included). Insert the screws into the back of the Display and tighten them using a Phillips screwdriver. When you are finished, place the Display on a stable, level surface.
-
Page 12: First-Time Setup
First-Time Setup Connect all of your devices to the Display first. Choose ONE connection type for each device. Note: The image shown here is for illustrative purposes only and may be subject to change. The actual number of ports and their locations may vary, depending on the model. English - 12 English - 12... - Page 13 Instant access to Movies, TV Shows, Music, and more. For the best experience, VIZIO recommends using an Ethernet cable. However, your Display also has built-in Wi-Fi. See connecting to the internet with Wi-Fi section for more information. English - 13...
- Page 14 Connect one end of the power cable to the back of the Display. The flat edge of the connector faces the outer edge of the Display. Plug the other end of the power cord into an electrical outlet. The Display powers on automatically. English - 14...
- Page 15 Pair your mobile device with the your VIZIO Display using the VIZIO Smart Cast app Browse content by genre across multiple apps at once, then just tap to cast to the big screen! VIZIO SmartCast app also allows you to access and edit Display Settings from your device.
-
Page 16: Pairing Your Mobile Device
The setup wizard appears and describes how to pair your mobile device with the E-Series Display. Hold your mobile device close to the VIZIO logo on the bottom right corner of the Display for at least 5 seconds to pair it with the E-Series Display. Follow the on screen instructions to finish the setup wizard. -
Page 17: Pairing Via Wi-Fi
Follow the on screen instructions to finish the setup wizard. Your VIZIO Home Theater Display name is displayed on the screen during the setup process. Look for a name such as Cast1234 . -
Page 18: Getting Started With Google Cast
Getting started with Google Cast. With Google Cast built-in, you can access over 200,000 TV shows and movies from mobile apps you already know and love. By simply tapping the Cast button on your favorite mobile apps, easily watch content go from your mobile screen to the big screen. -
Page 19: How To Cast Content
How to cast content Streaming content to your E-Series Display is as simple as tapping an icon on your favorite app. To cast content to your E-Series Display: 1. Open any cast compatible app. 2. Select the content you’d like to cast and tap the icon on the upper left hand side of the app screen. -
Page 20: Getting Started With The Vizio Smartcast App
Account Setup You will need to log into your MyVIZIO account to take full advantage of VIZIO SmartCast. If you do not have an account, you can sign up for a free account. 1. Tap on the VIZIO SmartCast to begin. -
Page 21: Selecting A Cast Device
Selecting a Cast device Your device remote can be paired with multiple cast-enabled devices, allowing you to seamlessly access your content where ever you are. To select a different cast device: 1. On the Home category page, tap This Device. The device selection screen Displays. -
Page 22: Basic Display Functions
Basic Display functions. You can turn on/off, change the input, mute, and adjust the volume of your Display right from the VIZIO SmartCast app. Input To access the basic functions, make sure your Home Change the currently Theater Display is selected. If it is not, see Selecting a Displayed input. -
Page 23: Category Pages
Category Pages The VIZIO app categorizes video content into different pages in the app. The pages are organized as: • Display Shows - Popular, recently added, recommended, and highly rated Display shows. • Movies - Popular, recently added, recommended, Free, and highly rated movies. -
Page 24: Wall-Mounting The Display
Wall-mounting the Display To mount your Display on a wall, you will need a wall To install your Display on a wall: mount. Consult the information on this page to find the appropriate mount for your Display. 1. Disconnect any cables connected to your Display. 2. - Page 25 E50x-E1 E55-E1 E65-E1 Screw Size: Hole Pattern: 200 mm (V) x 200 mm (H) 200 mm (V) x 200 mm (H) 400 mm (V) x 400 mm (H) 26.68 lb 34.06 lb 50.04 lb Weight w/o Stand: (12.10 kg) (15.45 kg) (22.70 kg) Wall-mount screw locations.
-
Page 26: Additional Connections
Additional connections Connecting an audio device Your Display can output sound to an audio device, such as a receiver or sound bar. Note: The image shown here is for illustrative purposes only and may be subject to change. The actual number of ports and their locations may vary, depending on the model. English - 26 English - 26... - Page 27 To connect your Display to an audio device: 1. Verify that your device has a video port that matches an available port on the Display (HDMI, 3.5mm, etc.) 2. Turn the Display and your audio device off. 3. Connect the appropriate cable (not included) to the Display and the device.
- Page 28 Award-Winning Customer Care At Your Convenience. NEED HELP? Go to: support.vizio.com Find help with: New product setup • • Connecting your devices • Technical problems • Product updates and more Live chat support available You can also contact our popular support team at:...
-
Page 29: Regulatory Information - E-Series Display
Regulatory Information - E-Series Display FCC Class B Radio Interference Statement Notice NOTE: This equipment has been tested and found to comply with the The changes or modifications not expressly approved by the party limits for a Class B digital device, pursuant to Part 15 of the FCC Rules. responsible for compliance could void the user’s authority to operate the These limits are designed to provide reasonable protection against equipment. - Page 30 Canada Notice for License-Exempt Radio Apparatus This device complies with Industry Canada’s license-exempt RSSs. Operation is subject to the following two conditions: (1) This device may not cause harmful interference, and (2) this device must accept any interference received, including interference that may cause undesired operation.
-
Page 31: Limited Warranty
How Long This Warranty Lasts When you return a product to a VIZIO service center, you must ship the For non-commercial use, VIZIO warrants the product on the terms set forth product in its original packaging or in packaging that affords an equal degree below for one (1) year from the date of original purchase. - Page 32 Federal Arbitration Act will apply. All other VIZIO products must be sent to a VIZIO service center to obtain The filing fees to begin and carry out arbitration will be shared between you warranty service.
- Page 33 General (d) a clear statement that you wish to opt out of the binding arbitration No employee or agent of VIZIO may modify this warranty. If any term of this agreement and class action waiver. warranty, other than the class action waiver, is found to be unenforceable, that In addition, you may pursue a claim in small claims court in your county of term will be severed from this warranty and all other terms will remain in effect.
-
Page 34: Legal Information
Guide associated User Manual, to these terms. Your use of this product is subject to VIZIO’s privacy policy, http://www.vizio.com. which may be updated from time to time, and is available to view at http://www.vizio.com/privacy. © 2016 VIZIO, Inc. All Right Reserved. - Page 35 Guide may be trademarks, trade names or service marks of others and VIZIO, Inc. dis- claims any interest in trademarks, trade names or service marks other than its own. Mention of non-VIZIO products is for informational purposes only. Caution: Avoid exposing a drive to magnetic fields. Security devices with magnetic fields may include airport walk-through devices and security wands.
- Page 36 © 2016 VIZIO INC. ALL RIGHTS RESERVED. 160713AD-US-NC...
Need help?
Do you have a question about the E50x-E1, E55-E1, E65-E1 and is the answer not in the manual?
Questions and answers