Table of Contents

Subscribe to Our Youtube Channel
Related Manuals for Tidylife AF-11A-2


Summary of Contents for Tidylife AF-11A-2
- Page 1 AIR FRYER Operating and Safety Instructions Model: AF-11A-2 - FOR INDOOR HOUSEHOLD USE ONLY- Specification & Feature: -----Voltage:120V~ 60Hz -----Wattage: 1500Watts -----Capacity of basket: 3.2Litre -----Adjustable temperature:170℉—400℉...
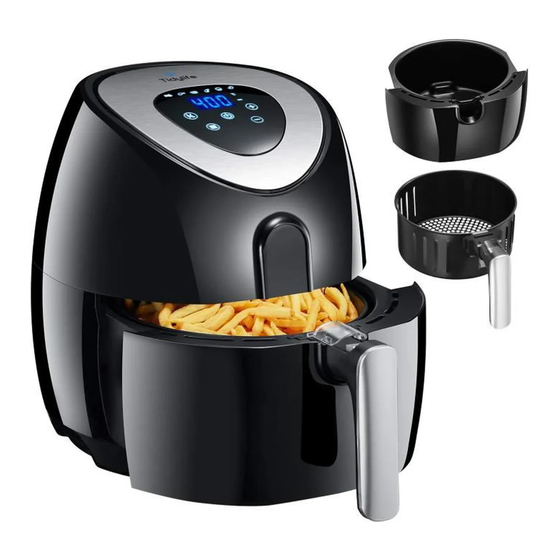
- Page 2 ----- Timer (0-60 min) General description (Fig.1) Control panel Lid inner cover 3. Lid ornament 4. Main housing 5. Basket 6. Button cover 7. Basket release button 8. Basket handle 9. Air outlet openings 10. Power cord...
-
Page 3: Important Safeguards
IMPORTANT SAFEGUARDS When using electrical appliances, basic safety precautions should always be followed including the following: 1. Read all instructions. 2. Do not touch hot surfaces. 3. To protect against electric shock do not immerse cord, plugs, or base in water or other liquid. - Page 4 POLARIZED PLUG This appliance has a polarized plug, (one blade is wider than e other). As a safety feature to reduce the risk of electrical shock, this plug is intended to fit in a polarized outlet only one way. If the plug does not fit fully in the outlet, reverse the plug. If it still does not fit, contact a qualified electrician.
-
Page 5: Automatic Switch-Off
- Do not place the appliance against a wall or against other appliances. Leave at least 10cm free space on the back and sides and 10cm free space above the appliance. Do not place anything on top of the appliance. - Do not use the appliance for any other purpose than described in this manual. -
Page 6: Before First Use
This appliance is equipped with a timer, when the timer has counted down to 0, the appliance produces a bell sound and switches off automatically. To switch off the appliance manually, press the button “ ” for more than 3 seconds (Fig.8). Before first use 1. - Page 7 5.Determine the required preparation time for the ingredient ( see section ‘Settings’ in this chapter). Add 5 minutes to the preparation time when the appliance is cold. Note: If you want, you can also let the appliance preheat without any ingredients inside.
- Page 8 default temperature 360℉, while the cooking time will be set to 15 minutes. The machine is in standby mode. Selecting the Power Button a second time will start the cooking process. Pressing the power button for 3 seconds to close the entire device during cooking. The power lamp is always bright, the fan stops working.
- Page 9 Note: You can also switch off the appliance manually. Press “1” Power' key 3 seconds, unit turns off. 9.. Check if the ingredients are ready. If the ingredients are not ready yet, simply slide the pan back into the appliance and set the timer to a few extra minutes.
- Page 10 Min-max Time Temperat Shake Extra information Amount (min.) (℃) Potato & fries Thin frozen fries 400-500 18-20 shake Thick frozen fries 400-500 20-25 shake Potato gratin 20-25 shake Meat & Poultry Steak 100-600 10-15 Pork chops 100-600 10-15 Hamburger 100-600 10-15 Sausage roll 100-600...
-
Page 11: Guarantee And Service
approximately 10 minutes. 4 Clean the inside of the appliance with hot water and non-abrasive sponge. 5 Clean the heating element with a cleaning brush to remove any food residues. Storage 1 Unplug the appliance and let it cool down. 2 Make sure all parts are clean and dry. - Page 12 more than usual. This does not affect the appliance or the end result. The pan still contains White smoke is caused by grease heating up in the grease residues from pan. make sure you clean the pan properly after previous use. each use.
Need help?
Do you have a question about the AF-11A-2 and is the answer not in the manual?
Questions and answers