Table of Contents
Advertisement
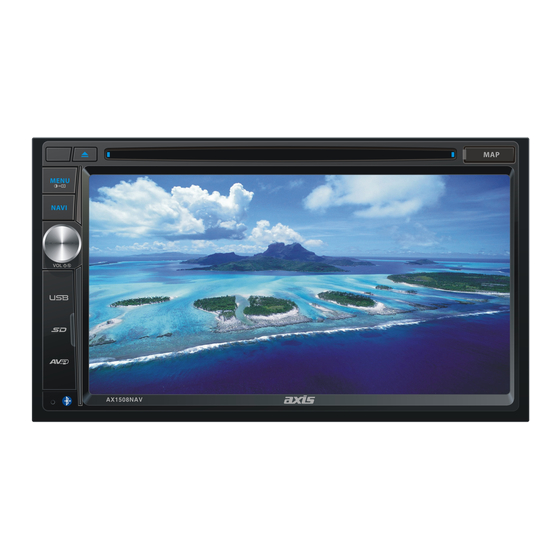
2-DIN 6.8" TOUCHSCREEN DVD/MULTIMEDIA
PLAYER with BLUETOOTH & NAVIGATION
GENERAL
-
6.8" WVGA Digital TFT LCD (800 X 480 Pixels)
-
Cortex A9 Processor
-
WinCE 6.0 Operating System
-
Touchscreen Control
-
Dynamic Graphic User Interface
-
ISO 2-DIN Mounting
-
ISO Wiring Harness
-
ine Out
- Front/Rear/Sub
-
Video Line Out
-
-
Reverse Camera Input (Rear)
-
Steering Wheel Control
-
10.5 -
V DC Voltage
-
Dimensions: 178W x 101.5H x 177.3D mm
-
Speaker Impedance 4-8 Ohm
-
Max Power 4 Ch x 45 Watts
-
-
-
-
-
AX1 08NAV
TUNER
- PLL Synthesized AM/FM Stereo
- Xtreme Long Range Tuner
- Interference Absorption Circuit
- FM 87.5-108 MHz; AM 522-1
- 30 Station Presets
- 18FM/12AM Memory
- Station Seek / Scan / Auto Store
- Local / Distant Control
- Digital Clock - 12/24 Hour Mode
-
-
-
-
-
-
-
M
-
-
-
-
-
-
-
-
0 KHz
-
-
-
-
-
- External Microphone
- External GPS Antenna
- Remote Control
- Mini USB to USB Adaptor
- Touchscreen Stylus
- Installation Hardware
- ISO Wiring Harness
2
YEAR
WARRANTY
Advertisement
Table of Contents

Subscribe to Our Youtube Channel
Summary of Contents for Axis AX1508NAV
- Page 1 AX1 08NAV 2-DIN 6.8” TOUCHSCREEN DVD/MULTIMEDIA PLAYER with BLUETOOTH & NAVIGATION GENERAL TUNER - PLL Synthesized AM/FM Stereo 6.8” WVGA Digital TFT LCD (800 X 480 Pixels) - Xtreme Long Range Tuner Cortex A9 Processor - Interference Absorption Circuit WinCE 6.0 Operating System - FM 87.5-108 MHz;...
-
Page 2: Table Of Contents
Contents ........1 ........Zoom Before Using ..........4 Bluetooth Mode ........16 Front Panel Disconnect Bluetooth Device Uninstall Battery Basic Operations ........7 Settings ...........18 Mute Power On / Off ..Other Modes ..........21 .........22 Radio Mode ..........10 e ... Troubleshooting ........2 Installation ..........2 Playback Mode........12 Wire Connections ........2... - Page 3 Safety Precautions Do not change the fuse on the power Please read these instructions Using an improper fuse may cause keep this manual in a safe place Only connect the unit to a 12-volt power Please contact your nearest dealer if one of the following is experienced: Never install this unit where operating it Never use the front video display...
- Page 4 Safety Precautions dirty, please use a clean silicone cloth and neutral detergent store Expanding Systems Rear View Note: optional...
-
Page 5: Before Using
Before Using Front Panel ] Button [MENU/ ] Button [ NAVI ] Button [VOL / ] Knob Reset Button SD Interface Connector USB Connector A/V Input Map Slot Disc slot... - Page 6 Before Using Remote Control EJECT current source Playback DVD in different angles for a DVD language selection for subtitles Play all chapters in random order...
-
Page 7: Uninstall Battery
Before Using Notes on Remote Control Usage D O NOT store the remote control in direct sunlight or in high temperature environment. It may not function properly. 4. The battery can work for 6 months under normal condition. If the remote control doesn’t work, please change the battery. -
Page 8: Basic Operations
Basic Operations Park Brake Inhibit • When the “BRAKE” cable is connected to the brake switch, the display on the TFT monitor will display video only when the park brake is applied. • Park brake function is overridden when the video source is set to REVERSE. •... - Page 9 Basic Operations Select Preset Equalizer Adjust EQ Parameters ] to adjust the parameters. ∙ [BAS] bass range: -7 to +7 ∙ [MID] middle range: -7 to +7 ∙ [TRE] treble range: -7 to +7 2.5KHZ 17.5KKHZ feature will selectively boost certain bass and treble frequencies.
- Page 10 Basic Operations Set Date /Time Set Date Set Time Mode Set Time Set Desk Timer Set Time Zone Set Power Off Timer...
-
Page 11: Radio Mode
Radio Mode Tuner TFT Display istant in reverse and preset radio stations Select Radio as Playing Source Select One Radio Band Tune Auto Tuning Note: Manual Tuning Method 1: Press the Method 2:... - Page 12 Radio Mode Preset Station Intro/Scan Manual Store Tune to a Preset Station...
-
Page 13: Playback Mode
Playback Mode Load a Disc You can play video, audio or images stored on the following discs: Note: Eject a Disc Touch Screen Controls Controlling Playback Connect a USB Device Remove a USB Device Insert a SD Card Remove a SD Card... -
Page 14: Play/Pause
Playback Mode Play/Pause Previous/Next ] key on the screen to skip to previous / next track / chapter. Search for a Folder For Video Files For Audio Files For Picture Files Repeat For DVD/VCD movie disc:... - Page 15 Playback Mode Repeat A-B Select Audio Mode Select Subtitle Language Change Viewing Angle...
-
Page 16: Zoom
Playback Mode Video Setup Playback Information For DVD For VCD Elapsed Time 00:01:20 00:30:17 Direct Track Entry Rotate Pictures Zoom... -
Page 17: Bluetooth Mode
Bluetooth Mode Pair the Bluetooth-enabled Devices only Disconnect Bluetooth Device Make a Call... - Page 18 Bluetooth Mode Answer an Incoming Call Adjust Bluetooth Settings Touch on the selected option to change the setting. a e sev tes to load on initial setup. Music Mode A2DP A2DP is short for Advanced Audio Distribution Profile. Mobile phones supporting this function can transmit stereo audio, whereas the ones not supporting this function can transmit mono audio only.
-
Page 19: Settings
Settings Display System Adjust General Settings General settings Options Description Language Select on-screen display language. Europe America America4 Radio Area Select one that matches your location. East Europe China Turn on the beep sound. Each time you press a button, the unit beeps. - Page 20 Settings Adjust Sound Settings Sound settings Options Description Flat On/Off On/Off Adjust Video Settings Video settings Options Description Normal s as Backview Mirror Mirror Night Dark Normal Brightness Parking On / Off Adjust Disc Rating DVD rating Options Description Adult DVD Audio Disc Menu...
- Page 21 Settings Adjust Volume Settings Adjust Reset Settings Reset settings Description...
-
Page 22: Other Modes
Other Modes Listen to Other Devices Reset FREEZES Replace a Fuse Steering Wheel Control Programming... - Page 23 General Maximum Output Power 18dBμV Distortion 30dBμV Brightness 280cd/m DVD Player 80dB 80dB Distortion (line out) AUX IN Distortion Audio 2Vrms(Max) Video Environment Operating Humidity Notice:...
- Page 24 Supported Formats: ·Directory nesting up to a maximum of 8 levels Unsupported Formats: Supported MP3 Disc Format: Supported Video Formats: ·DVD · Region Code Precautions when using Discs...
-
Page 25: Troubleshooting
Troubleshooting Problem Cause Corrective action General TFT monitor Disc playback Error messages No disc Bad disc Unknown disc... -
Page 26: Installation
Installation Disconnecting the Battery Note: Remove Transport Screws WARNING! Replacing the Fuse Installation Using Half-Sleeve WARNING! Only connect the unit to a 12-volt power supply with proper grounding. DO NOT USE OTHER SCREWS. CAUTION! Be careful not to damage the car wiring. - Page 27 Installation Using the Cosmetic Trim Ring Note: 30°...
-
Page 28: Wire Connections
Wire Connections YELLOW VIDEO OUT Rear display WHITE YELLOW WHITE WHITE BLUE SUB OUT BLACK YELLOW... - Page 29 If this unit is only compatible with anaologue SWC systems, how do I tell if the vehicle has an analogue or digital system? Test 1 - Without the radio SWC wires connected. With an Ohm meter, probe the SWC positive and SWC negative connection on the vehicle. Press and hold a button on the steering wheel.
- Page 30 FREE 30 DAY MAP UPGRADE...
Need help?
Do you have a question about the AX1508NAV and is the answer not in the manual?
Questions and answers
OPERATING MANUAL FOR NAVIGATION