Table of Contents
Advertisement
Quick Links
Advertisement
Table of Contents

Related Manuals for Samsung LME20WS


Summary of Contents for Samsung LME20WS
- Page 1 LCD-Monitor Chassis Model LME20WS 206BW LME22WS 226BW LME20AS 206NW LME22AS 226NW LME22VS 216BW 223BW SERVICE Manual LCD Monitor Fashion Feature - Magic Bright - Magic Color - Integrated UI applied - Hidden Function Key - Lustrous Appearance (Design)
- Page 2 Copyright Trademarks Samsung is the registered trademark of Samsung ©2006 by Samsung Electronics Co., Ltd. Electronics Co., Ltd. All rights reserved. LME20WS/LME22WS/LME20AS/LME22AS/LME22VS This manual may not, in whole or in part, be copied, and MacMaster Cable Adapter are trademarks of photocopied, reproduced, translated, or converted to Samsung Electronics Co., Ltd.
-
Page 3: Table Of Contents
1-4 Installation Precautions ………………………………………………………………………………………………………………… 1-3 . Product specifications …………………………………………………………………………………………………………………………2 2-1 Fashion Feature…………………………………………………………………………………………………………………………… 2-1 2-2 Feature …………………………………………………………………………………………………………………………………… 2-1 2-3 LME20WS Specifications ………………………………………………………………………………………………………………… 2-2 2-4 LME22WS Specifications ………………………………………………………………………………………………………………… 2-3 2-5 LME20AS Specifications ………………………………………………………………………………………………………………… 2-4 2-6 LME22AS Specifications ………………………………………………………………………………………………………………… 2-5 2-7 LME22VS Specifications ………………………………………………………………………………………………………………… 2-6 2-8 Spec Comparison …………………………………………………………………………………………………………………………... - Page 4 Contents . Wiring Diagram …………………………………………………………………………………………………………………………………8 9. S chematic Diagrams ……………………………………………………………………………………………………………………………9 9-1 Schematic Diagrams ……………………………………………………………………………………………………………………… 9-1 9-2 Schematic Diagrams ………………………………………………………………………………………………………………………9-3 1 1 0. Operating Instructions and Installation … … …………………………………………………………………………………………………10-1 10-1 Front …………………………………………………………………………………………………………………………………… 10-1 10-2 Rear ………………………………………………………………………………………………………………………………………10-2 10-3 Using the Stand …………………………………………………………………………………………………………………………10-4 1 1 1.
- Page 5 Samsung Electronics Co.,Ltd. -This Service Manual is a property of Samsung 416, Maetan-3Dong, Yeongtong-Gu, Suwon City, Electronics Co., Ltd. Gyeonggi-Do, Korea, 443-742 Any unauthorized use of Manual can be punished Printed in Korea under applicable International and/or domestic P/N : BN82-00138M-03 law.
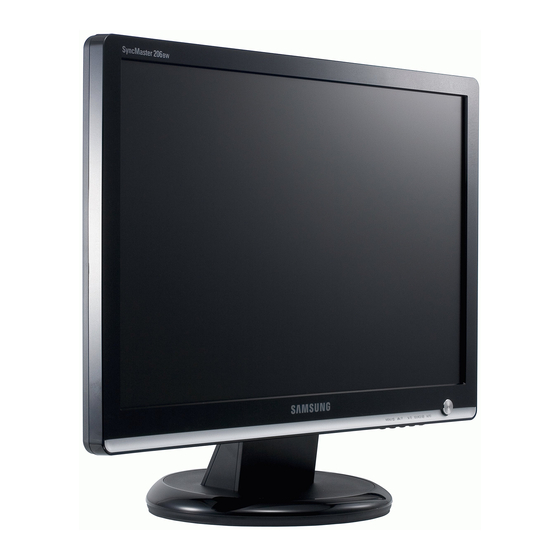
- Page 6 10 Operating Instructions and Installation 10 Operating Instructions and Installation 10-1 Front 1. Menu button 3) Internet Opens the OSD menu. Also use to exit the OSD For working with a mixture of images such as text menu or return to the previous menu. and graphics.
- Page 7 10 Operating Instructions and Installation 2,3. Adjust buttons 5. Auto button Adjust items in the menu. When the 'AUTO' button is pressed, the Auto Adjustment screen appears as shown in the ani- 4. Enter button / Source button mated screen on the center. Auto adjustment Activates a highlighted menu item.
-
Page 8: Using The Stand
10 Operating Instructions and Installation 10-3 Using the Stand 10-3-1 Removing the base 1. Turn off your monitor and unplug its power cord. 2. Lay the LCD monitor face-down on a flat surface with a cushion beneath it to protect the screen. 3. - Page 9 10 Operating Instructions and Installation 10-3-2 Attaching a Base - This monitor accepts a 100mm x 100mm VESA-compliant mounting interface pad. A. Monitor B. Mounting interface pad 1. Turn off your monitor and unplug its power cord. 2. Lay the LCD monitor face-down on a flat surface with a cushion beneath it to protect the screen. 3.
-
Page 10: 1 1. Disassembly And Reassembly
11 Disassembly and Reassembly 11 Disassembly and Reassembly This section of the service manual describes the disassembly and reassembly procedures for the LHA20WS TFT-LCD monitors. WARNING: This monitor contains electrostatically sensitive devices. Use caution when handling these components. 11-1 Disassembly Cautions: 1. - Page 11 11 Disassembly and Reassembly Description Picture Description 4. Use the jig to remove the shield lamp. (Be careful Shield.) 5. Remove the FUNCTION Wire from PCB ASS’ Y. 6. Remove the Panel Lamp wire. 7. Remove the LVDS Wire from Panel. 8.
- Page 12 11 Disassembly and Reassembly Description Picture Description 10. Main PCB and IB Board 11-3...
-
Page 13: Reassembly
11 Disassembly and Reassembly 11-2 Reassembly Reassembly procedures are in the reverse order of disassembly procedures. 11-4... -
Page 14: C C Ircuit Descriptions
13 Circuit Descriptions 13 Circuit Descriptions 13-1 Block description EEPROM EEPROM FET Array scaler Flash memory SDRAM Memory 13-1... - Page 15 13 Circuit Descriptions Memo 13-2...
-
Page 16: Reference Infomation
14 Reference Infomation 14 Reference Infomation 14-1 Technical Terms - TFT-LCD - FINE "Fine" adjustment is used to adjust visibility by (Thin film Transistor Liquid Crystal Display) ADC(Analog to Digital Converter) control phase difference. This is a circuit that converts from analog signal to digital signals. - Page 17 14 Reference Infomation - Dot Pitch - External Device Input The image on a monitor is composed of red, green External device input refers to video input from and blue dots. The closer the dots, the higher the such external video devices as VCRs, camcorders resolution.
- Page 18 14 Reference Infomation - Connecting the Monitor Connect the DC adapter for your monitor to the power port on the back of the monitor. Plug the power cord for the monitor into a nearby outlet. 2-1. Using the D-sub (Analog) connector on the video card. Connect the signal cable to the 15-pin, D-sub connector on the back of your monitor.
-
Page 19: Pin Assignments
14 Reference Infomation 14-2 Pin Assignments Sync 15-Pin D-Sub Signal Cable Connector Type Separate Composite Sync-on-green Pin No. Green Green Green + H/V Sync. Blue Blue Blue DDC Return (GND) DDC Return (GND) DDC Return (GND) GND-R GND-R GND-R GND-G GND-G GND-G GND-B... -
Page 20: Timing Chart
14 Reference Infomation 14-3 Timing Chart - This section of the service manual describes the timing that the computer industry recognizes as standard for computer-generated video signals. Table 14-1 Timing Chart VESA Mode VGA2/ VGA3/ 640/75 Hz 800/60 Hz 800/75 Hz 1024/60 Hz 1024/75 Hz 1280/60 Hz... -
Page 21: Preset Timing Modes
14 Reference Infomation 14-4 Preset Timing Modes - If the signal transferred from the computer is the same as the following Preset Timing Modes, the screen will be adjusted automatically. However, if the signal differs, the screen may go blank while the power LED is on. -
Page 22: Panel Description
14 Reference Infomation 14-5 Panel Description Maker VENDOR P/N PANEL_CODE PANEL_ABB STICKER_CODE Remarks LT140X1-002 BN07-00004A BN68-00239H LT150XS-L01 BN07-00009A LT150XS-L01-B BN07-00022A LTM150XS-L02 BN07-00005A LT181E2-132 BN07-00001A LT150XS-T01 BN07-00010A LTM181E3-132 BN07-00019A LT170E2-131 BN07-10001D LT181E2-131 BN07-10001E LTM170E4-L01 BN07-00018A LTM240W1-L01 BN07-00015A LTM213U3-L01 BN07-00016A LTM150XH-L01 BN07-00026A LTM150XH-L03 BN07-00027A LTM150XS-L01... - Page 23 14 Reference Infomation Maker VENDOR P/N PANEL_CODE PANEL_ABB STICKER_CODE Remarks LTA460H1-L01 BN07-00157A "creat panel code for AMLCD 46"" TV " LTM170EU-L11 BN07-00160A "creat new panel code for AMLCD 17"" (Panel only for TCO03)" LTM240W1-L03 BN07-00134B "24"" panel ZPD code derivation" LTM190E4-L01 BN07-00145B "AMLCD 19""...
- Page 24 14 Reference Infomation Maker VENDOR P/N PANEL_CODE PANEL_ABB STICKER_CODE Remarks TORISAN TM290WX-71N31 BN07-00115A "Color Coordinates change panel for TORISAN 29"" TV" TORISAN TM396WX-71N31 BN07-00116A RP,Q "Color Coordinates change panel for TORISAN 40"" TV" TORISAN TM22OWX-71N31 BN07-00125A "Development TORISAN 22"" TV PANEL (ZPD)" TORISAN TM22OWX-71N31 BN07-00127A...
- Page 25 14 Reference Infomation Memo 14-10...
-
Page 26: Alignments And Adjustments
3 Alignments and Adjustments 3 Alignments and Adjustments This section of the service manual explains how to use the RS232 JIG. This function is needed for AD board change. 3-1 Required Equipment The following equipment is necessary for adjusting the monitor: - Computer with Windows 95, Windows 98, Windows 2000, Windows XP or Windows NT. -
Page 27: Service Function Spec
3 Alignments and Adjustments 3-4 Service Function Spec. 3-4-1 How to Display Service Function OSD 1. After setting both brightness and contrast to '0' push the 'enter' button more than 5 seconds. 2. service function appear as below. Figure 2. 3-4-2 How to Control Service Function OSD 1. -
Page 28: Hidden Key List
3 Alignments and Adjustments 3-5 Hidden Key list Function Action method Hidden Service Function -. After setting brightness and contrast '0' push the "Menu" button more than 5 seconds. -. Service Function appear. Factory Reset -. While Menu is opened(any menu), press "enter" key over 5 seconds. - Page 29 3 Alignments and Adjustments 3-6 DDC Input Method(Windows Program) After change a Main Board ,DDC input shpuld be done via DDC control JIG. Connecting method is refer to below picture. 1. Winddc.exe Program install in PC 2. Cilck the Winddc icon. 3.
-
Page 30: Execution Items After Replacing The Main Board
3 Alignments and Adjustments 5: Input a monitor serial number and push the enter key. After Analog input, Please do # 2 ~ 5 when digital input. 3-7 Execution Items after replacing the main board After Replacing the Maing Board 1. - Page 31 3 Alignments and Adjustments Memo...
-
Page 32: Troubleshooting
4 Troubleshooting 4 Troubleshooting 4-1 No Power There is no light in the power indicator. Does proper DC 14 V appear at Pin 5,6,7,9 Check the IP Board. of CN700? Does proper DC 5V Check the IC702 appear at Output of C719? Does proper DC 3.3V Check the IC705. - Page 33 4 Troubleshooting WAVEFORMS...
-
Page 34: No Video (Pc Analog Signal)
4 Troubleshooting 4-2 No Video (PC Analog Signal) Is pin9 of Check TFT_LCD panel or inverter CN700(BKLT_EN)high(3.3V)? and connection between then. Does the analog video signal Check pc signal. appear at R104, R105, R106 (Red,Green,Blue)? Does the X710 Check the X300. oscilate Properly? Replace LCD Panel. - Page 35 4 Troubleshooting WAVEFORMS...
-
Page 36: No Video (Pc Digital Signal)
4 Troubleshooting 4-3 No Video (PC Digital Signal) Check TFT_LCD panel or inverter Is Pin9 of and connection between then. CN700(BKLT_EN)high(3.3V)? Does the Digital video Check PC signal. signal appear at R200 ~ R227? Replace LCD Panel. - Page 37 4 Troubleshooting WAVEFORMS...
- Page 38 4 Troubleshooting...
- Page 39 4 Troubleshooting...
- Page 40 4 Troubleshooting...
- Page 41 4 Troubleshooting Memo 4-10...
- Page 42 6 Electrical Parts List 6 Electrical Parts List -You can search for updated part codes through ITSELF web site. URL : http://itself.sec.samsung.co.kr/ 6-1 LS22MEVSFV/EDC Parts List Level Loc. No. Code No. Description & Specification Q'ty SA/SNA LS22MEVSFV/EDC 223BW,WSF1/S22A1-LME,22,LCD-MO,NETHERLAN BN90-01132G ASSY COVER REAR-SKD,BN90-01132;LS22MEVSF S.N.A...
- Page 43 6 Electrical Parts List Memo...
- Page 44 7 Block Diagrams 7 Block Diagram 7-1 Block Diagram...
- Page 45 7 Block Diagrams Memo...
- Page 46 9 Schematic Diagrams 9 Schematic Diagrams - This Document can not be used without Samsung s authorization. 9-1 Schematic Diagrams...
- Page 47 9 Schematic Diagrams - This Document can not be used without Samsung s authorization.
- Page 48 9 Schematic Diagrams - This Document can not be used without Samsung s authorization.
- Page 49 9 Schematic Diagrams Memo...
- Page 50 5 Exploded View & Parts List 5 Exploded View and Parts List -You can search for updated part codes through ITSELF web site. URL : http://itself. sec. samsung.co.kr 5-1 LS22MEVSFV/EDC Exploded View M0215 M0013 M0006 M0113 M0006 M0027...
- Page 51 5 Exploded View & Parts List 5-2 LS22MEVSFV/EDC Parts List Location.No CODE-NO SPECIFICATION & DESCRIPTION Q'TY SA/SNA REMARK M0215 BN07-00413A LCD-PANEL;CLAA220WA01,Mendel,6bit Hi-FRC M0013 BN96-04544B ASSY COVER P-REAR;LS22MEV,,HIPS HB,,BK07 M0006 BN63-02915A COVER-REAR;LS22MEW,HIPS,HB,BK07 S.N.A M0113 BN61-02806A BRACKET-VESA;LS20MEW,SECC,T1.0 S.N.A M0006 BN63-02916A COVER-REAR SUB;LS22MEW,HIPS,HB,BK07 M0027 BN96-04541A ASSY STAND P-BASE;-,LS20MEW,-,ABS HB,BK2...
- Page 52 9 Schematic Diagrams 9 Schematic Diagrams - This Document can not be used without Samsung s authorization. 9-1 Schematic Diagrams...
- Page 53 9 Schematic Diagrams - This Document can not be used without Samsung s authorization.
- Page 54 9 Schematic Diagrams - This Document can not be used without Samsung s authorization.
- Page 55 9 Schematic Diagrams Memo...
Need help?
Do you have a question about the LME20WS and is the answer not in the manual?
Questions and answers