Table of Contents
Advertisement
Quick Links
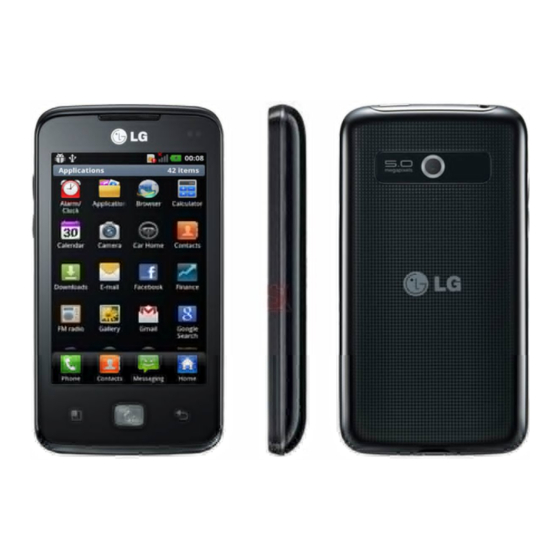
LG-E510g
LG-E510g
This guide helps you get started using your phone.
If you need more information, please visit www.lg.com.
•
Some of the contents of this manual may not apply to your phone. This
depends on your phone's software and your service provider.
•
This handset is not recommended for the visually impaired because of its
touch screen keyboard.
•
Copyright ©2011 LG Electronics, Inc. All rights reserved. LG and the LG
logo are registered trademarks of LG Group and its related entities. All other
trademarks are the property of their respective owners.
•
Google™, Google Maps™, Gmail™, YouTube™, Google Talk™ and
Android Market™ are trademarks of Google, Inc.
User Guide
English
Advertisement
Table of Contents

Related Manuals for LG LG-E510g


Summary of Contents for LG LG-E510g
- Page 1 • Copyright ©2011 LG Electronics, Inc. All rights reserved. LG and the LG logo are registered trademarks of LG Group and its related entities. All other trademarks are the property of their respective owners. • Google™, Google Maps™, Gmail™, YouTube™, Google Talk™ and...
- Page 2 This device is not intended for sale in the USA. Part 15.21 statement " Change or Modifications that are not expressly approved by the manufacturer could void the user's authority to operate the equipment. “ Part 15.105 statement This equipment has been tested and found to comply with the limits for a class B digital device, pursuant to Part 15 of the FCC Rules.
-
Page 3: Fcc Part 15 Class B Compliance
FCC Part 15 Class B Compliance This device and its accessories comply with part 15 of FCC rules and ICES-003 Class B digital apparatus requirements for Industry Canada. Operation is subject to the following two conditions:(1) This device and its accessories may not cause harmful interference, and (2) this device and its accessories must accept any interference received, including interference that may cause undesired operation. - Page 4 Conformité aux normes FCC Part 15 Class B Cet appareil et ses accessoires sont conformes aux normes FCC Part 15 Class B de la Federal Communications Commission et aux exigences pour appareils numériques ICES-003 Class B d’Industrie Canada.Son fonctionnement est sujet aux deux conditions suivantes :(1) Cet appareil et ses accessoires ne doivent pas provoquer de brouillage préjudiciable, et (2) cet appareil et ses accessoires doivent accepter toutes les...
-
Page 5: Getting To Know Your Phone
Getting to know your phone To turn on your phone, press and hold the Power key for 3 seconds. To turn off the phone, press and hold the Power key for 3 seconds, then touch Power off and OK. Speaker/Receiver Power/Lock key Switch your phone on/off by pressing and holding this key. - Page 6 Volume keys Back cover On the home screen: control ringer volume. Camera • During a call: control your earpiece lens volume. • When playing a track: control volume continuously. Battery SIM card slot microSD memory Charger, micro USB card slot cable connector...
- Page 7 Getting to know your phone NOTE: Proximity sensor WARNING When receiving and making calls, the Placing a heavy object on the phone proximity sensor automatically turns or sitting on, it can damage its LCD the backlight off and locks the touch and touch screen functions.
-
Page 8: Installing The Sim Card And Battery
Slide the SIM card into the SIM card slot. Installing the SIM card and Make sure the gold contact area on the battery card is facing downwards. To remove the back cover, hold the phone in your hand firmly. With the other hand, firmly press your thumb on the back cover. -
Page 9: Charging Your Phone
Slide open the cover of the charger connector on the side. Insert the charger, then plug it into an electrical outlet. Your LG- E510g must be charged before you see NOTE: the battery must be... -
Page 10: Installing The Memory Card
Turn the phone off before inserting or To store multimedia files, such as images removing a memory card. Remove the captured using the built-in camera, you must back cover. insert a memory card into your phone. NOTE: the LG-E510g supports memory cards up to 32 GB. - Page 11 Getting to know your phone Insert the memory card into the slot. WARNING Make sure the gold contact area is facing Do not insert or remove the memory downwards. card when the phone is on. Doing so may damage the memory card as well as your phone, and the data stored on the memory card may be corrupted.
-
Page 12: Formatting The Memory Card
Touch Erase SD card, then confirm your Formatting the memory card choice. Your memory card may already be If you have set a pattern lock, input formatted. If it isn’t, you must format it the pattern lock then select Erase before you can use it. -
Page 13: Your Home Screen
Your Home screen NOTE: Touch screen tips • To select an item, touch the centre of the Here are some tips on how to navigate icon. around your phone. • Do not press too hard; the touch screen Touch – to choose a menu/option or open is sensitive enough to pick up a light, firm an application, touch it. -
Page 14: Lock Your Phone
Lock mode to avoid unnecessary charges Lock your phone (e.g. phone calls, Web access and data When you are not using the LG-E510g, communications). press the power key to lock your phone. This Setting an unlock pattern: you can draw... -
Page 15: Unlock Screen
Unlock screen Home Whenever your LG-E510g is not in use, it Simply swipe your finger to the left or right returns to the lock screen. Drag your finger to view the panels. from bottom to top to unlock the screen. -
Page 16: Adding Widgets To Your Home Screen
In your Home screen, you can view quick your installed applications. keys at the bottom of the screen. Quick To open the desired application, simply touch keys provide easy, one-touch access to the the icon in the applications list. functions you use the most. NOTE: preloaded applications may differ Touch the Phone icon to bring up the according to your phone’s software or your... - Page 17 Your Home screen In the Home screen, press the Menu key TIP! To add an application icon to the and select Add. Or touch and hold the Home screen from the Applications empty part of the home screen. menu, touch and hold the application you want to add.
-
Page 18: Returning To Recently-Used Applications
Returning to recently-used applications Touch and hold the Home key. The screen displays a pop-up with icons of applications you used recently. Touch an icon to open the application. Or touch the Back key to return to the current application. Notification drawer The notification drawer runs across the top Ring... -
Page 19: Viewing The Status Bar
Your Home screen Touch and slide the notification drawer down Below is a table explaining the meaning of with your finger. icons you’re likely to see in the status bar. Or, in the Home screen, press the Menu key and select Notifications. Here you can [Status bar] check and manage sound, Wi-Fi, Bluetooth and GPS as well as other notifications. - Page 20 Icon Description Icon Description Icon Description Call in progress No SIM card Connected to a Call hold Bluetooth device No signal Speakerphone Airplane mode System warning Phone microphone Alarm is set Connected to a Wi- is muted Fi network New voicemail Missed call Wi-Fi Direct is on.
- Page 21 Your Home screen Icon Description Icon Description Icon Description Battery fully Downloading data 3 more notifications charged not displayed Uploading data Battery is charging Data is syncing GPS is acquiring Data in and out Download finished Receiving location Phone is connected New Gmail data from GPS to PC via USB cable...
- Page 22 Icon Description Icon Description Icon Description New message SmartShare Both USB sharing request tethering and Song is playing portable hotspot Upcoming event are active USB tethering is active FM radio turned on in the background Portable Wi-Fi hotspot is active SmartShare On...
-
Page 23: On-Screen Keyboard
Your Home screen Onscreen keyboard Tap to view or press and hold to change the writing language. You can enter text using the onscreen keyboard. The onscreen keyboard appears Tap to insert an emoticon when writing a automatically on the screen when you message. -
Page 24: Entering Accented Letters
Entering accented letters When you select French or Spanish as the text entry language, you can enter special French or Spanish characters (e.g. “á”). For example, to input "á", touch and hold the "a" key until the zoom-in key grows bigger and displays characters from different languages. -
Page 25: Google Account Setup
Google account setup When you first turn on your phone, you have if you have a Google account, enter your e- the opportunity to activate the network, to mail address and passwd, the touch Sign in. sign into your Google Account and how you Once you have set up your Google account want to use some Google services. - Page 26 After signing in, you can use Gmail™ and take advantage of Google services on your phone.
- Page 27 Wi-Fi With Wi-Fi, you can use high-speed Internet Connecting to Wi-Fi access within the coverage of the wireless Choose the Wi-Fi network you want to access point (AP). connect to. If you see Enjoy wireless Internet using Wi-Fi, without you need to enter a password to connect. extra charges.
-
Page 28: Sharing Your Phone's Data Connection
You can share your phone’s mobile data apply. connection with a single computer via a USB • The LG-E510g supports WEP, WPA/WPA2- cable (USB tethering). You can also share PSK and 802.1x EAP security. If your Wi-Fi your phone’s data connection with up to five... -
Page 29: Usb Tethering & Portable Wi-Fi Hotspot Settings
Wi-Fi http://www.android.com/tether. Icon Description NOTE: additional costs may be incurred USB tethering is active when connecting and using online services. Check data charges with your network provider. Portable Wi-Fi hotspot is active USB tethering & portable Wi-Fi hotspot settings Both USB tethering and portable In the Home screen, touch the hotspot are active Applications tab and select Settings. -
Page 30: To Share Your Phone's Data Connection Via Usb
USB tethering – tick to share your phone’s To share your phone’s data mobile network data connection with your connection via USB computer via a USB connection. If your computer is running Windows 7 or a Portable hotspot – tick to share your recent distribution of some flavours of Linux phone’s mobile network data connection as (such as Ubuntu), you don’t usually need to... -
Page 31: Usb Tethering And Data Sharing
Wi-Fi USB tethering and data sharing Touch Wireless & networks and select Tethering & portable hotspot. You can’t share your phone’s data Tick USB tethering. connection and microSD card via USB • The phone starts sharing its mobile at the same time. If you are using your network data connection with your USB connection to make your microSD computer via the USB connection. -
Page 32: To Share Your Phone's Data Connection As A Portable Wi-Fi Hotspot
status bar and notifications drawer. To share your phone’s data connection as a portable Wi-Fi • When Portable hotspot is ticked, you can change its network name or secure it. hotspot Untick Portable hotspot to stop sharing In the Home screen, touch the your data connection via Wi-Fi. - Page 33 Wi-Fi Touch Wireless & networks and select Access 2 (WPA2) security, with a pre- shared key (PSK). Tethering & portable hotspot. Ensure Portable hotspot is ticked. • If you touch the WPA2 PSK security option, a password field is added to the Touch Portable hotspot settings.
-
Page 34: Enabling Wi-Fi Direct To Share Through Smartshare
Enabling Wi-Fi Direct to share ATTENTION! through SmartShare If you set the security option as Open, you cannot prevent unauthorised usage Wi-Fi Direct cannot be enabled while using of online services by other people and other Wi-Fi functions. additional charges can be incurred. Wi-Fi Direct automatically scans nearby Wi- To avoid unauthorised usage, you are Fi Direct devices and the searched devices... -
Page 35: Using The Wi-Fi Cast
Wi-Fi does not provide Internet service. Additional Ensure Wi-Fi Direct is selected. cost may be incurred when connecting and Select a device to connect in the scanned using online services. Check data charges device list. with your network provider. Forced Group owner mode – Touch to activate group owner mode that enables the Using the Wi-Fi Cast legacy Wi-Fi devices to connect by scanning... - Page 36 On the home screen, touch the Application tab and select Settings. Touch Wireless & networks and select Wi-Fi Direct Settings. Ensure Wi-Fi Direct is selected and select a device to connect in the scanned device list. Touch Connect. NOTE: Wi-Fi cast is activated between the users. Make sure to connect to same Wi-Fi Network between the users.
-
Page 37: How To Use On-Screen Phone
On-Screen Phone How to use On-Screen Phone Changes the On-Screen Phone preferences. On-Screen Phone allows you to view your mobile phone screen from a PC via a USB or Exits the On-Screen Phone program. Bluetooth connection. Minimises the On-Screen Phone You can also control your mobile phone from window. -
Page 38: How To Install On-Screen Phone On Your Pc
PC. Simply right-click and drag to on your PC send a file to your PC. If you install LG PC Suite IV, the On-Screen • File transfer (PC to mobile phone): sends Phone program will also be downloaded on files from your PC to your mobile phone. -
Page 39: How To Connect Your Mobile Phone To Your Pc
On-Screen Phone How to connect your mobile Click "OK" to exit the window. phone to your PC NOTE: Go to Settings > Storage and make sure that the “Mass storage only” USB connection: checkbox is deselected. Open Connection Wizard, select "USB Wireless connection with Bluetooth: Cable connection"... -
Page 40: To Check The Phone To Pc Connection
"0000"). appears, click "Stop" to stop searching. Touch "OK" to exit. Select "LG-E510g" from the device list To check the phone to PC and click "Next". You can rename the connection device if you wish. - Page 41 On-Screen Phone To disconnect your phone from your PC Click in the top left of the On- Screen Phone window. Or drag down the notification bar at the top of the home screen and select "On-Screen Phone". Touch "Yes" in the Disconnect window.
-
Page 42: Making A Call
Calls Making a call Calling your contacts Touch to open the keypad. Touch to open your contacts. Enter the number using the keypad. To Scroll through the contact list or enter the delete a digit, touch the Clear icon first letter(s) of the contact you want to call by touching Search. -
Page 43: Adjusting Call Volume
Calls messages bar from the bottom if you want Making a second call to send one. If the caller is unknown, the During your initial call, touch Dialpad. Excuse messages bar is not available. Dial the number, or search your contacts. Touch the Call icon to connect TIP! -
Page 44: Viewing Your Call Logs
notification bar down and select End TIP! Press the Menu key, calls. then touch Delete all to delete all the NOTE: you are charged for each call you recorded items. make. Call settings Viewing your call logs You can configure phone call settings such In the Home screen, touch and choose as call forwarding and other special features... -
Page 45: Searching For A Contact
Contacts Add contacts to your phone and synchronise Adding a new contact them with the contacts in your Google Touch , enter the new contact’s account or other accounts that support number, then press the Menu key. Touch contact syncing. Add to contacts and then Create new contact. -
Page 46: Favourite Contacts
Removing a contact from your favourites Favourite contacts list You can classify frequently called contacts Touch to open your contacts. as favourites. Touch the Group tab, select Favorites at Adding a contact to your favourites the top of the list and choose a contact to Touch to open your contacts. -
Page 47: Moving Contacts From Your Old Phone To Your New Phone
If PC Suite IV detects the connection of Download PC Suite IV from www.lg.com your LG-E510g phone (using the USB and install it on the PC. Run the program cable), click Sync or Sync contacts to and connect your Android mobile phone synchronise the contacts saved on your to the PC using the USB cable. -
Page 48: Sending A Message
Messaging/email NOTE: You will be charged for a text Messaging message for every person you send the Your LG-E510g combines SMS and MMS message to. into one intuitive, easy-to-use menu. Touch type to compose below to start entering your message. -
Page 49: Threaded Box
Messaging/email Threaded box WARNING: The 160-character Messages (SMS, MMS) exchanged limit may vary from country to country with another party can be displayed depending on how the SMS is coded in chronological order so that you can and in what language. conveniently see an overview of your conversation. -
Page 50: Changing Your Message Settings
Changing your message settings Opening Email and the Accounts Screen Your LG-E510g message settings are predefined, so you can send messages You can use the Email application to read immediately. You can change the settings email from services other than Google Mail. - Page 51 Messaging/email have only one account) or the Accounts - Touch to open a list of just your screen (if you have multiple accounts). starred messages. The Accounts screen - Touch the folder icon to open the The Accounts screen lists your Combined account’s folders.
-
Page 52: Composing And Sending Email
Touch Email. Composing and Sending Email Touch Combined Inbox (in the Accounts To compose and send a message screen). Messages in the Combined Inbox While in the Email application, press the are colour coded along their left sides, by Menu Key and touch Compose. account, using the same colours that are Enter an address for the message’s used for your accounts in the Accounts... - Page 53 Messaging/email Press the Menu Key and touch Add connected to a network, for example, Attachment to send a file with the if you’re working in airplane mode, the message. messages that you send are stored in your Outbox folder until you’re connected Touch the Send button.
-
Page 54: Working With Account Folders
often need to open the Sent folder/label and Adding and Editing Email select Refresh from the options menu. Accounts To add an email account TIP! When a new email arrives in the Press the Menu Key and touch Add inbox, you will receive a notifi cation by sound or vibration. -
Page 55: Social Networking
Messaging/email To change an account’s settings Social Networking Open the Accounts screen. With your phone, you can take advantage of Touch and hold the account whose social networking and manage your micro- settings you want to change. In the menu blog in on-line communities. -
Page 56: Adding Your Account To Your Phone
Adding your account to your Check your community is turned ON. If you tap your community, you can see the phone current status of your social community. On the home screen, choose any SNS application you want to use. TIP! If you add a social networking If you don't yet have an account, touch widget on your home screen, the widget... -
Page 57: Viewing And Updating Your Status
Messaging/email Viewing and updating your Removing accounts on your status phone Choose a community you want to access. Choose Settings > Accounts & sync > Choose an account you want to delete > You can see the current status of your Touch Remove account. -
Page 58: Getting To Know The Viewfinder
Camera Getting to know the Zoom - zoom in or zoom out. Alternatively you can use the side volume keys. viewfinder Brightness - this defines and controls the amount of sunlight entering the image. Slide the brightness indicator along the bar towards “-” to lower the brightness of the image or towards “+”... -
Page 59: Taking A Quick Photo
Camera Taking a quick photo Press the capture button. Open the Camera application. Once you’ve taken the photo Hold the phone horizontally and point Your captured photo appears on the screen. the lens towards the subject you want to Share Touch to share your photo using photograph. -
Page 60: Using The Advanced Settings
Touch to view a gallery of your saved TIP! If you have an SNS account and set it up on your phone, you photos. can share your photo with the SNS Using the advanced settings community. In the viewfinder, touch to open all Set as Touch to use the image as a... - Page 61 Camera camera is. This is useful in darker conditions Image quality – choose from Super fine, when you cannot use the flash. Select from Fine and Normal. The finer the quality, the ISO values of Auto, 400, 200 and 100. sharper the photo.
- Page 62 location. If you upload tagged pictures to a TIP! When you exit the camera, some blog that supports geotagging, you can see settings return to their defaults, such as the pictures displayed on a map. white balance, colour tone, timer and scene mode.
-
Page 63: Viewing Your Saved Photos
Camera Viewing your saved photos Set as – set as a contact icon or wallpaper. Access your saved photos while in Camera Crop – crop your photo. Move your mode. Just touch and touch the screen. finger across the screen to select the You then see Slideshow and Menu. -
Page 64: Video Camera
Video camera Getting to know the Zoom - zoom in or zoom out. Alternatively you can use the side volume keys. viewfinder Brightness - this defines and controls the amount of sunlight entering the video. Slide the brightness indicator along the bar towards “-” to lower the brightness of the video or towards “+”... -
Page 65: Shooting A Quick Video
Video camera Shooting a quick video Touch on the screen to stop recording. Slide the Camera mode button down and the icon changes to After shooting a video The video camera viewfinder appears on A still image representing your video will the screen. - Page 66 Using the advanced settings Rename Touch to edit the name of the selected video. Using the viewfinder, touch to open all the advanced options. Touch to shoot another video right away. Adjust the video camera setting by scrolling Your current video is saved. through the list.
-
Page 67: Adjusting The Volume When Viewing A Video
Video camera Color effect – choose a colour tone to use Watching your saved videos for your new view. In the viewfinder, touch Video quality – choose from Super fine, Your gallery appears on the screen. Fine and Normal. Touch a video once to bring it to the Audio recording –... -
Page 68: View Mode
Timeline view NOTE: make sure you install LG-E510g Gallery provides a timeline view a memory card in the phone to save of your photos and videos. In grid view photos and access all your pictures. -
Page 69: Using Smartshare
Multimedia Using SmartShare You can change your device name, icon and select the sharing content types. SmartShare provides you with a better way * Let your renderer device (e.g. TV) to enjoy multimedia contents with other play multimedia contents from remote DLNA (Digital Living Network Alliance) content library (e.g. -
Page 70: Playing A Song
Touch to pause the song. Music Touch to skip to the next song. Your LG-E510g has a built-in music player Touch to go back to the beginning that lets you play all your favourite tracks. To of the song. Touch twice to return to access the music player, touch Music. - Page 71 Multimedia To change the volume while listening to NOTE: music fi le copyrights may be music, press the up and down volume keys protected by international treaties and on the left-hand side of the phone. national copyright laws. Therefore, it may be necessary to obtain Touch and hold any song in the list.
-
Page 72: Transferring Files Using Usb Mass Storage Devices
To transfer files using USB devices NOTE: if you installed LG Android Platform Connect the LG-E510g to a PC using a Driver, you will immediately see a pop-up USB cable. saying Turn on USB storage. -
Page 73: Sending Data From Your Phone Using Bluetooth
Multimedia If you didn't install LG Android Platform video file), place it in the same folder Driver on your PC, you must set it up to display subtitles automatically when manually. playing the video file. For more information, refer to •... - Page 74 Bluetooth menu as on most other mobile for devices. Choose the device you want phones. to send data to from the list. * Sending pictures: run the Gallery * Sending multi-selected contacts: run application, then select Picture > Menu. the Contacts application. To select more Click Share, then select Bluetooth.
-
Page 75: Searching For Stations
* Connecting to FTP (only FTP server Radio is supported on this handset): select Your LG-E510g has a built-in FM radio so Settings > Wireless & networks you can tune in to your favourite stations > Bluetooth Settings. Select the and listen on the go. -
Page 76: Resetting Channels
You can store up to 48 channels on your During auto scanning, touch Stop if you phone. want to stop scanning. Only scanned channels are saved before you stop Tuning in automatically scanning. In the Home screen, touch the NOTE: you can also manually tune in to a Applications tab and select FM Radio. -
Page 77: Listening To The Radio
Multimedia Listening to the radio Touch Listen Via to set the speaker or headset to listen to the radio. TIP! To improve radio reception, extend the headset cord as this also functions as the radio antenna. WARNING If you connect a headset not specifi cally made for radio reception, radio reception may be poor. -
Page 78: Setting Your Alarm
Set the time, then touch to turn on Using your calculator the alarm. After you set the time, the LG- In the Home screen, touch the E510g lets you know how much time is Applications tab and select Calculator. -
Page 79: Adding An Event To Your Calendar
Utilities For more complex calculations, press the want your event to start and finish. Menu key, touch the Advanced panel, Also, touch Where then enter the then choose sin, cos, tan, log and so on. location. If you want to add a note to your event, Adding an event to your touch Description and enter the details. -
Page 80: Changing Your Calendar View
Managing files Changing your calendar view Polaris Viewer provides mobile users with In the Home screen, touch the convenient file management features, Applications tab and select Calendar. including copying, cutting and pasting, and Press the Menu key. deleting files and folders right on the device. Select the calendar view for a particular day, week or month. -
Page 81: Voice Recorder
Utilities Notice: the available recording time may Voice recorder differ from the real time. Use the voice recorder to record voice memos or other audio files. Sending the voice recording Once you have finished recording, you Recording a sound or voice can send the audio clip by touching In the Home screen, touch the Share. - Page 82 The Web Browser Using the web toolbar Browser gives you a fast, full-colour world Touch to go backwards one page. of games, music, news, sport, entertainment Touch to go forwards one page to the and much more, right on your mobile phone. one you connected to after the current Wherever you are and whatever you enjoy.
-
Page 83: Using Options
The Web Using options Select text – allows you to copy any text from the web page. Press the Menu key to view options. More Read it later – add the current web page as a bookmark. • Home page: go to the Home page. Add RSS Feed –... - Page 84 • Downloads: displays your download history. To return to the previous web page, press the Back key.
-
Page 85: Wireless And Networks
Settings In the Home screen, touch the Applications notification, or add a Wi-Fi network. The tab then scroll to and touch Settings. advanced Wi-Fi settings screen is accessed from the Wi-Fi settings screen. Press the Wireless & networks Menu key and touch Advanced. Here, you can manage Wi-Fi and Bluetooth. - Page 86 MAC address of your Or, check a list of Bluetooth devices that LG-E510g into the router. you’ve previously configured and those You can fi nd the MAC address in detected when the phone last scanned for the following user interface: Touch Bluetooth devices.
- Page 87 Settings previously configured. Allows you to add Call settings different types of VPN. < Fixed Dialing Numbers > Mobile networks – set options for data Select Fixed Dialing Numbers to turn on roaming, network mode & operators, access and compile a list of numbers that can be point names (APNs) and so on.
- Page 88 you to enter the phone number to use for operator about this service. listening to and managing your voicemail. Call reject – allows you to set the call reject function. Choose from Off, Reject on list or < Other call settings > Reject all calls.
- Page 89 Settings Caller ID: choose whether to display your must silence media and alarms in their own number on an outgoing call. applications. Call waiting: if call waiting is activated, the Vibrate – allows you to set your phone to handset will notify you of an incoming call vibrate when you receive an incoming call.
- Page 90 < Notifications > Screen lock sounds – allows you to set your phone to play a sound when locking Notification ringtone – allows you to set and unlocking the screen. your default notification ringtone. < Feedback > Display Audible touch tones – allows you to set the Brightness –...
-
Page 91: Location And Security
Settings Location & security screens that guide you through drawing a screen unlock pattern. You can set a PIN or Use wireless networks – if you select Use password instead of a pattern or leave it wireless networks, your phone determines as None. - Page 92 Select device administrators – add one or Applications more administrators. You can manage applications and set up Use secure credentials – allows you to quick launch shortcuts. access secure certificates. Unknown sources – default setting to Install from SD card – choose to install install non-Market applications.
-
Page 93: Accounts And Sync
Settings Battery usage – see what has been using Auto-sync – permits applications to the battery. synchronise, send and receive data to their own schedule. Development – set options for application development. < Manage accounts > List of all Google accounts and other Accounts &... - Page 94 your Google account, any other accounts, Storage your system/application data and settings < USB connection mode > as well as any downloaded applications and Mass storage only – your phone can be DRM licence. used as a mass storage device if you have Resetting the phone does not erase a memory card inserted.
-
Page 95: Language And Keyboard
Settings < Internal storage > can set the language you use speech to enter text. Checks the available space. • SafeSearch: opens a dialog where you Language & keyboard can set whether you want the Google SafeSearch filter to block some results. Set local language and region as well as keyboard settings. - Page 96 < Voice output > • Always use my settings: tick to use the settings on this screen in place of speech Text-to-speech settings – synthesiser settings available in other use the Text-to-speech settings to applications. configure the Android text-to-speech • Default Engine: opens a dialog where you synthesiser for applications that can use this can set the text-to-speech application you...
-
Page 97: Date And Time
Settings This setting is not available if the data is Accessibility already installed. Use the Accessibility settings to configure • Speech rate: opens a dialog where you accessibility plug-ins you have installed on can select how quickly you want the your phone. -
Page 98: About Phone
About Phone View legal information and check phone status and software version. -
Page 99: Phone Software Update
NOTE: LG reserves the right to make conveniently from the Internet without fi rmware updates available only for selected needing to visit a service centre. This feature models at its own discretion and does is only available if and when LG makes the... - Page 100 NOTE: This feature is dependent on USB data cable. This feature is only available the network service provider, region or if and when LG makes the newer version of countries. the firmware available for your device. First, you can check the software version...
-
Page 101: Divx Mobile
Software update vod.divx.com for more information on how to DivX Mobile complete your registration. ® ABOUT DIVX VIDEO: DivX is a digital video ® ® DivX Certified to play DivX video up to format created by DivX, LLC, a subsidiary 320x240. - Page 102 Notice: Open Source Software To obtain the corresponding source code under GPL, LGPL, MPL and other open source licences, please visit http://opensource.lge.com/ All referred licence terms, disclaimers and notices are available for download with the source code.
Need help?
Do you have a question about the LG-E510g and is the answer not in the manual?
Questions and answers