
Related Manuals for Dacor Heritage HRTP366SLP


Summary of Contents for Dacor Heritage HRTP366SLP
- Page 1 Installation Instructions Heritage Rangetop HRTP366, HRTP486 THIS APPLIANCE HAS BEEN TESTED IN ACCORDANCE WITH THE LATEST EDITION OF ANSI Z21.1 STANDARD FOR HOUSEHOLD GAS APPLIANCES. Part No. 113928 Rev. A...
-
Page 2: Table Of Contents
To minimize exposure to these substances, always operate this unit according to the use and care manual, ensuring you provide good ventilation when cooking with gas. All specifications are subject to change without notice. Dacor assumes no liability for changes to specifications. © 2018 Dacor, all rights reserved. -
Page 3: Important Safety Instructions
• Always contact Dacor Customer Assurance with issues vicinity of this or any other appliance. and conditions you cannot resolve. See If You Need WHAT TO DO IF YOU SMELL GAS Help... -
Page 4: General Safety Precautions
Do not place such items on the ran- rear of the rangetop to a combustible material must getop. Do not allow pot holders to touch hot surfaces use Dacor backguard model AEB3609 (for model or gas burners. DYRTP366) or AEB4809 (for model DYRTP486) or •... -
Page 5: Installation Requirements
Installation Requirements Gas Supply Requirements WARNING • The installation of this appliance must conform with • Check your local building codes for the proper method local codes or, in the absence of local codes, with the of installation. In the absence of local codes, this National Fuel Gas Code, ANSI Z223.1/NFPA 54. -
Page 6: Cabinet And Countertop Layout
Cabinet and Countertop Layout • To reduce the risk of personal injury and to reduce accumulated smoke in the room, Dacor strongly rec- ommends installing a range hood or downdraft vent. A WARNING hood should project horizontally a minimum of five (5) inches beyond the face of the cabinets. -
Page 7: Cabinet/Cutout Dimensions
Installation Requirements Cabinet/Cutout Dimensions Cabinet tolerances ±1/16” (±1.6 mm) unless otherwise noted. 1 1/2” (3.8 cm) 10” (25.4 cm) to typical countertop combustible side thickness wall min. both sides 1/2” (1.3 cm) overhang, both sides 7 3/4” (19.7 cm) Recommended Mounting platform gas and electrical 36”... - Page 8 Installation Requirements Cabinet/Countertop Dimensions (cont.) Cabinet tolerances ±1/16” (±1.6 mm) unless otherwise noted. 24” (61.0 cm) Gas and electrical connections at right rear section of chassis Installed control Countertop panel overhang 1/3/8” (3.5 cm) Cabinet face Mounting platform Installed Rangetop - Side View Gas connection and power cord may be routed through bottom or back of chassis Increase countertop and overhang...
- Page 9 Minimum 1 3/8” (3.5 cm) stiffener countertop height: Cabinet face 30 1/4" Dacor approved (76.8 cm) downdraft vent IMPORTANT: See downdraft installation instructions for duct system layout/planning Cabinet/Countertop with Downdraft vent - Side View...
-
Page 10: Installation Instructions
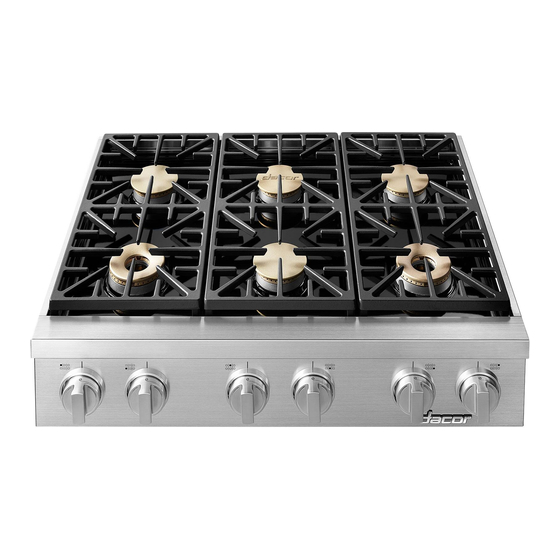
2 SimmerSear burner heads (2) provided hold-down bolts and washers provided. Do • 4 standard knobs not overtighten the bolts. • 2 MAX GRIDDLE knobs • Dacor Stainless Steel Cleaner • WOK ring • Griddle • 2 hold down bolts •... -
Page 11: Gas Line Connection
Installation Instructions Gas Line Connection WARNING • Verify that the gas supply meets specifications before connection. See page 3. • The maximum gas supply pressure to the regulator must never exceed 1/2 pounds per square inch (psi) or 3.5 kPa. •... -
Page 12: Burner Component Installation
Installation Instructions Burner Component Installation WARNING • Never attempt to operate the rangetop with any of the burner parts removed. • Do not attempt to adjust the burner air mixture set- tings. All adjustments are preset at the factory. • Remove the burner parts and grates from their shipping packages. -
Page 13: Burner Knob Installation
Installation Instructions Burner Knob Installation CAUTION Installing the rangetop knobs in the wrong position may result in damage to the rangetop griddle. The knobs for the center burners are marked with the maximum griddle settings. There are two (2) different types of knobs supplied with the rangetop. -
Page 14: Verifying Proper Operation
2. Connect the power the inside cover for location. cord to the electrical outlet. Dacor is not responsible for the cost of correcting problems 3. Turn on power to the electrical outlet at the circuit caused by a faulty installation. -
Page 15: Installation Checklist
• Proper installation is the responsibility of the home- owner. The importance of proper installation of your Dacor rangetop cannot be overemphasized. □ Is the electrical outlet for the rangetop grounded and located according to these instructions and in accor- dance with all applicable electrical codes? See pages 3 and 4. -
Page 16: Wiring Diagram
Wiring Diagram BLACK WHITE... -
Page 17: Notes
Notes... - Page 18 Notes...
- Page 20 Dacor ● 14425 Clark Avenue, City of Industry, CA 91745 ● Phone: (800) 793-0093 ● Fax: (626) 403-3130 ● www.dacor.com...