Table of Contents
Advertisement
Advertisement
Chapters
Table of Contents
Troubleshooting

Related Manuals for XPower Solar 400

Summary of Contents for XPower Solar 400
- Page 1 XPower Powerpack Solar 400 Owner’s Guide...
-
Page 2: Contact Information
Trademarks XPower Powerpack Solar 400 is a trademark of Xantrex International. Xantrex is a registered trademark of Xantrex International. Other trademarks, registered trademarks, and product names are the property of their respective owners and are used herein for identification purposes only. -
Page 3: About This Guide
About This Guide Purpose The purpose of this Owner’s Guide is to provide explanations and procedures for installing, operating, maintaining, and troubleshooting the XPower Powerpack Solar 400. Conventions Used The following conventions are used in this guide. WARNING Warnings identify conditions that could result in personal injury or loss of life. -
Page 4: Related Information
About This Guide Related Information You can find more information about Xantrex Technology Inc. as well as its products and services at www.xantrex.com. 975-0328-01-01... -
Page 5: Important Safety Instructions
Retain this manual for future reference. Warnings and Cautions WARNING: Limitations on Use The XPower Powerpack Solar 400 is not intended for use in connection with life support systems or other medical equipment or devices. WARNING: Shock hazard. Keep away from children. - Page 6 CAUTION Do not connect any AC appliance with the neutral conductor connected to ground to the Powerpack Solar 400 including AC residential electrical distribution panels. CAUTION Do not expose the Powerpack Solar 400 to temperatures over 104 °F (40 °C).
-
Page 7: Precautions For Using Rechargeable Appliances
Important: If you are unsure about using your rechargeable appliance with the Powerpack Solar 400, contact the equipment manufacturer to determine the rechargeable appliance’s compatibility with the modified sine wave (non-sinusoidal) AC waveform. -
Page 8: First Aid
Important Safety Instructions First Aid The internal battery is a sealed, lead-acid type battery. It is not designed to be user replaceable. However, if a leak is detected, stop operating and handling the Powerpack Solar 400 immediately. IF BATTERY ACID CONTACTS EYES: 1. -
Page 9: Table Of Contents
1 Introduction About the Powerpack Solar 400 - - - - - - - - - - - - - - - - - - - - - - - 1 Comprehensive Protection - - - - - - - - - - - - - - - - - - - - - - - - - - - 1... - Page 10 Contents Charging with the DC-to-DC Accessory Cable - - - - - - - - - 14 Recharging with a Generator’s Regulated 12 Vdc Outlet- - - 16 Recharging From the Solar Panel - - - - - - - - - - - - - - - - - - 17 Interpreting Display Codes - - - - - - - - - - - - - - - - - - - - - - - - - 19 Checking Battery and AC Status - - - - - - - - - - - - - - - - - - - 19 AC Appliances- - - - - - - - - - - - - - - - - - - - - - - - - - - - - - - - - - 22...
- Page 11 5 Troubleshooting Common Problems - - - - - - - - - - - - - - - - - - - - - - - - - - - - - - - 35 Buzz in Audio Equipment - - - - - - - - - - - - - - - - - - - - - - - 35 Television Interference - - - - - - - - - - - - - - - - - - - - - - - - - 35 Troubleshooting Reference - - - - - - - - - - - - - - - - - - - - - - - - - 36 A Specifications...
- Page 13 Tables Table 5-1 Troubleshooting reference - - - - - - - - - - - - - - - - - - - 36 Table 5-2 Display Error Codes - - - - - - - - - - - - - - - - - - - - - - - 39...
- Page 15 Figures Figure 2-1 Package Contents - - - - - - - - - - - - - - - - - - - - - - - - - - 3 Figure 2-2 Front and Side Panels - - - - - - - - - - - - - - - - - - - - - - - 4 Figure 2-3 Control Panel and Display - - - - - - - - - - - - - - - - - - - - 5 Figure 2-4...
-
Page 17: Introduction
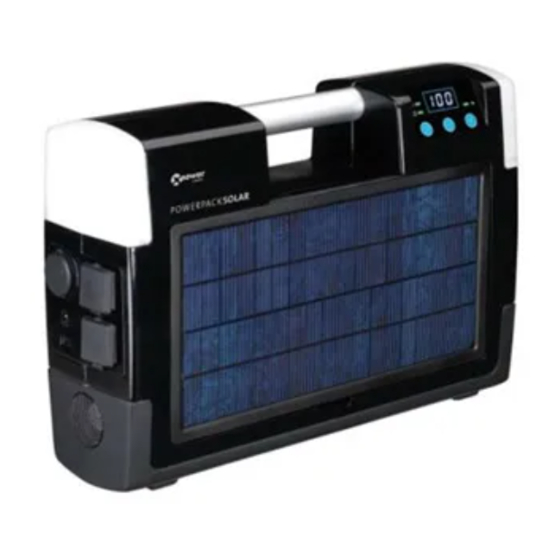
About the Powerpack Solar 400 Easy-to-use and designed for years of reliable service, the Powerpack Solar 400 is a portable power source designed to provide limited AC power in the event utility power is interrupted or is not available. It can run many AC appliances and 12-volt DC appliances and charge many USB-enabled devices via the USB charging port. -
Page 18: Overheating
Socket, the excessive temperature will cause the switch to open and shut down the power to the socket. Overheating The Powerpack Solar 400 is protected from overheating. If the inverter exceeds a safe temperature, power to the unit automatically shuts off. It will reset automatically after the unit cools down. -
Page 19: Features
400. We recommend that you familiarize yourself with these features before operating the unit. Contents Your Powerpack Solar 400 package includes the items shown in Figure 2-1. If any of these materials are missing or are unsatisfactory in any way, please contact Customer Service, see “Warranty and Return Information”... -
Page 20: Powerpack Solar 400 Features
Powerpack Solar 400 Features Powerpack Solar 400 Features Front and Side Panels Figure 2-2 Front and Side Panels Feature Description Hi-bright LED Lamp (located on each side) Provides ambient light to surrounding area. The button switch is located on the control panel. -
Page 21: Control Panel And Display
DC socket and USB port. Press and hold again to turn power off. The Charging Status indicator light blinks when charging using the AC Charger. The light stays on when the battery reaches its full charge. Note Does not work with the DC socket and solar panel. 975-0328-01-01 Powerpack Solar 400 Features... -
Page 22: Power Socket Side Panel
Powerpack Solar 400 Features Power Socket Side Panel LED Lamp Figure 2-4 Power Sockets Feature Description DC Input/Output Power Socket (DC Socket): • Power 12-volt DC auto, RV, or marine appliances (output). • Recharge vehicle using the DC Charging Cable (input). -
Page 23: Solar Panel Components
The panel can be detached from the unit and extended up to one meter with its electrical cord. Note Detaching the solar panel allows you to reposition it and not the whole unit for optimum sunlight exposure. 975-0328-01-01 Powerpack Solar 400 Features... -
Page 24: Backside Panel
AC outlet. DC Charging Cable (part # 449-0187-01-01) lets you recharge the Powerpack Solar 400 from a 12-volt system in a car, SUV, RV, or a boat. One of the plugs of the charging cable is equipped with a single and replaceable 8-amp, 32-volt, time-delayed fuse. -
Page 25: Operation
Powerpack Solar 400. Retain this manual for future reference. CAUTION The Powerpack Solar 400 is not intended for use as a UPS (Uninterruptible Power WARNING: Limitations on Use The XPower Powerpack Solar 400 is not intended for use in connection with life support systems or other medical equipment or devices. -
Page 26: Choosing A Location
Operation Choosing a Location WARNING: Fire or explosion The Powerpack Solar 400 contains components that tend to produce arcs or sparks. To prevent fire or explosion, do not operate the Powerpack Solar 400 in compartments containing other exposed batteries, flammable materials, or in locations that require ignition-protected equipment. -
Page 27: Recharging The Powerpack Solar 400 Battery
• a 5 W solar panel (attached to the front of the unit). CAUTION Do not attempt to charge the Powerpack Solar 400 battery if it is frozen. Gradually warm the frozen battery to 32 °F (0 °C) before charging. -
Page 28: Charging With The Ac Charger
48 hours to maximize battery life. Powerpack Solar 400 AC Charging Feature The Powerpack Solar 400 AC charging port has a regulated internal switch that monitors charging to prevent the battery from being overcharged. Once the battery reaches 100% charge level, the switch disconnects the charging source from the unit. -
Page 29: Figure 3-1 Charging With Ac Power
Figure 3-1 Charging with AC Power Note The Battery Charge (%) reading on the digital display is only accurate after the Powerpack Solar 400 has been disconnected from all appliances and all charging sources for 15 minutes. 975-0328-01-01... -
Page 30: Charging With The Dc-To-Dc Accessory Cable
Do not leave the Powerpack Solar 400 permanently connected to the vehicle’s 12 Vdc power socket. Disconnect the Powerpack Solar 400 from the socket when the vehicle’s engine is turned off. Note The Charging Status indicator light will neither blink nor stay on when the Powerpack Solar 400 is recharged through the DC Charging Cable. -
Page 31: Figure 3-2 Charging With Dc Power
Labeled and fused plug. Insert the other plug of the DC charging cable into the DC socket on the side of the Powerpack Solar 400. Note The vehicle’s 12 Vdc power socket must also be on. You have to start the engine and let it run to avoid draining the vehicle’s battery. -
Page 32: Recharging With A Generator's Regulated 12 Vdc Outlet
Refer to the Owner’s Guide accompanying your generator for detailed instructions on connecting the generator to a unit like the Powerpack Solar 400. You can recharge the battery of the Powerpack Solar 400 using a generator in several ways: •... -
Page 33: Recharging From The Solar Panel
The solar panel is very convenient in places where you do not have access to AC or DC sources for charging. You can take the Powerpack Solar 400 with you and use the solar panel to charge it during the day when sunlight is available and have some power available in the night depending on how much energy was stored in the battery. -
Page 34: Figure 3-4 Charging With The Solar Panel
2. Place the solar panel in direct sunlight. It takes about 45 hours in direct sunlight to recharge the Powerpack Solar 400 from the 5 W solar panel. The indicator light located on the solar panel flashes intermittently when the panel receives power from sunlight. -
Page 35: Interpreting Display Codes
Interpreting Display Codes Displays an error code. See Table 5-2, “Display Error Codes” on page 39. Figure 3-5 Different Display Codes Checking Battery and AC Status When either of the AC sockets, DC socket, or lamp is initially turned on, the digital display window flashes the different states of the battery charge and AC output power. - Page 36 AC outlet. sockets. Check Battery The AC charger must capacity status be unplugged from the when: Powerpack Solar 400. - AC is - DC is Wait 15 minutes or - Lamp is more before proceeding to the required action.
- Page 37 Interpreting Display Codes Note Recharging with the supplied AC charger is a true “plug-in-and-forget” charging method. We recommend leaving the AC charger connected when the Powerpack Solar 400 is not in use to permanently maintain the battery in fully charged condition.
-
Page 38: Ac Appliances
The Powerpack Solar 400 has two AC sockets for use with AC appliances. You can either plug the appliance directly into the AC socket on the Powerpack Solar 400 or you can use an AC power bar to increase the number of outlets available. -
Page 39: Operating Ac Appliances
Operating AC Appliances 1. Press and hold the AC button for one second to activate the AC sockets. 2. Check the state-of-charge to ensure the battery is fully charged. 3. Open the AC socket cover. 4. Plug the appliance into one of the AC sockets and turn the appliance on. -
Page 40: Overload Protection
Although Powerpack Solar 400 can supply momentary surge power up to 600 W, some appliances may exceed the capabilities of the Powerpack Solar 400 and trigger the inverter’s safety overload shutdown circuit. Important: Trouble Appliances... -
Page 41: 12 Vdc Appliances
12 Vdc Appliances The Powerpack Solar 400 can operate one 12 Vdc auto, RV, marine, or other portable appliance that draws 12 A or less from a 12 Vdc power outlet or from a vehicle’s 12 Vdc accessory socket. -
Page 42: Operating Dc Appliances
Operation Operating DC Appliances 1. Press and hold the DC/USB button for one second to activate the DC socket. 2. Check the state-of-charge to ensure the battery is fully charged. 3, Open the DC socket cover. 4. Plug the DC appliance into the DC socket and turn the appliance on (if required). -
Page 43: Usb Devices
USB Devices The Powerpack Solar 400 can charge one USB-chargeable device through its USB port found below the AC charging port on the power socket side panel of the unit. Compatible devices include most MP3 players, PDAs, digital cameras, and camcorders that have internal batteries which can be charged via the USB port of a desktop/laptop computer. -
Page 44: Charging Devices Via The Usb Port
Operation Charging Devices via the USB Port 1. Press and hold the DC/USB button for one second to activate the USB port. 2. Check the state-of-charge to ensure the battery is fully charged. 3. Plug the USB device using a USB cable (not supplied) to the USB port on the side of the unit. -
Page 45: Using The Led Lamps
LED Lamps Figure 3-9 LED Lamp Controls Using the LED Lamps The Powerpack Solar 400 includes emergency lighting that provides a flood-light effect to surrounding area. The lamps are located on each side of the unit. Each lamp has six hi-bright LEDs that provide illumination. -
Page 46: Using The Back Stand
Using the Back Stand The Powerpack Solar 400 is equipped with a back stand located in the middle of the backside panel. You can use the stand to position the unit to face slightly upward especially when you place it on the floor during operation. -
Page 47: Maintenance
The AC Charger supplied with the Powerpack Solar 400 is designed to regulate the charging process, ensuring that the battery is always fully charged but never overcharged. To ensure safe recharging and maximum battery life, recharge the Powerpack Solar 400 only with the supplied AC Charger or the Solar Panel. -
Page 48: Battery Life
The Powerpack Solar 400 is designed to provide years of service. However, when the internal battery reaches the end of its service life, the Powerpack Solar 400 itself is no longer useful. The internal battery is not designed to be user replaceable. - Page 49 Battery Maintenance Do not dispose of the Powerpack Solar 400 with common household waste. Please ask your local authorities about recycling services that are available in your area. The following website provides additional recycling information: http://www.earth911.org/master.asp 975-0328-01-01...
-
Page 51: Troubleshooting
Buzz in Audio Equipment Some inexpensive stereo systems have inadequate internal power-supply filtering and may buzz slightly when powered by the Powerpack Solar 400. The best solution to eliminate the buzzing is to use an audio system with a good quality filter. -
Page 52: Troubleshooting Reference
Troubleshooting Reference WARNING: Electric shock hazard Do not remove the cover of the Powerpack Solar 400 or disassemble the Powerpack Solar 400. The Powerpack Solar 400 does not contain any internal user-serviceable parts and attempting to service the unit yourself could result in electrical shock or burn. - Page 53 Unplug and check the appliance. Unplug all appliances and start recharging the Powerpack Solar 400. The modified sine wave (MSW) output of the Powerpack Solar 400 requires a true RMS reading meter, such as the Fluke 87 series, for accurate measurement.
- Page 54 Replace the AC Charger. Press and hold the DC/USB button to activate the USB port. Recharge the Powerpack Solar 400. Check the fuse and replace, if blown, with a similar 8-amp, 32-volt time- delayed fuse. Check the DC power source and make sure that it is rated at 12 V.
- Page 55 Table 5-2 Display Error Codes Display Code 975-0328-01-01 Solution Recharge the Powerpack Solar 400. Reposition the solar panel to maximize exposure to direct sunlight. Make sure that the connectors are inserted firmly into each other.
-
Page 57: Electrical Specifications
Specifications Chapter A, “Specifications” includes the electrical, mechanical, and environmental specifications for the Powerpack Solar 400. Electrical Specifications AC Power Section Output power • Continuous output power • Peak AC output power • AC output surge capacity Output voltage Output frequency... - Page 58 Specifications Normal operating temperature Operating temperature range Storage temperature range DC Power Section DC output power (maximum continuous load) DC charger input socket polarity Built-in ambient LED light Internal Battery Section Internal battery type Internal battery voltage (nominal) Internal battery capacity (minimum) Maximum charge current Peak charging voltage (nominal) Charge restart voltage (nominal)
-
Page 59: Physical Specifications
Solar Panel Section Power Panel Type Portability Connector Type Accessories DC-to-DC charge cable (replacement part # 449-0187-01-01) AC Charger (replacement part # 074-1004) Physical Specifications Height Width Depth Weight (net) Important: All specifications are subject to change without notice. 975-0328-01-01 Physical Specifications Amorphous Silicon Detachable from main unit... -
Page 61: Warranty And Return Information
Technology Inc. ("Xantrex") and covers defects in workmanship and materials in your XPower Powerpack Solar 400. This warranty period lasts for 6 months from the date of purchase at the point of sale to you, the original end user customer. You will be required to demonstrate proof of purchase to make warranty claims. -
Page 62: Warranty And Return
Warranty and Return What proof of purchase is required? In any warranty claim, dated proof of purchase must accompany the product and the product must not have been disassembled or modified without prior written authorization by Xantrex. Proof of purchase may be in any one of the following forms: •... -
Page 63: Return Material Authorization Policy
This warranty will not apply where the product is damaged due to improper packaging. 2. Include the following: • The RMA number supplied by Xantrex Technology Inc. clearly marked on the outside of the box. • A return address where the unit can be shipped. Post office boxes are not acceptable. -
Page 64: Out Of Warranty Service
Xantrex product. Out of Warranty Service If the warranty period for your XPower Powerpack Solar 400 has expired, if the unit was damaged by misuse or incorrect installation, if other conditions of the warranty have not been met, or if no dated proof of purchase is available, your unit may be serviced or replaced for a flat fee. -
Page 65: Information About Your System
Information About Your System As soon as you open your XPower Powerpack Solar 400 package, record the following information and be sure to keep your proof of purchase. Serial Number Product Number Purchased From Purchase Date If you need to contact Customer Service, please record the following details before calling.
Need help?
Do you have a question about the Solar 400 and is the answer not in the manual?
Questions and answers