
Subscribe to Our Youtube Channel
Related Manuals for Cyber View Matrix Cat6 IP KVM

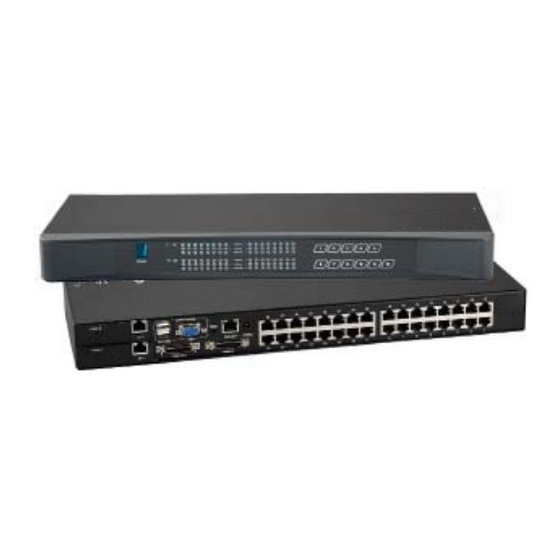
Summary of Contents for Cyber View Matrix Cat6 IP KVM
- Page 1 Toll Free: 1-888-865-6888 Tel: 510-226-8368 Fax: 510-226-8968 Email: sales@RackmountMart.com...
- Page 2 User Manual Matrix Cat6 LCDK2012-31 / 41 / 42 LCDK2013-31 / 41 / 42 Matrix Cat6 KVM LCDK2006-2 / 3 / 4 LCDK2007-2 / 3 / 4 www.RackmountMart.com...
- Page 3 Legal Information First English printing, October 2002 Information in this document has been carefully checked for accuracy; however, no guarantee is given to the correctness of the contents. The information in this document is subject to change without notice. We are not liable for any injury or loss that results from the use of this equipment.
-
Page 4: Table Of Contents
Contents < Part 1 > Matrix Cat6 LCDK2012-31 / 41 / 42 LCDK2013-31 / 41 / 42 Package contents KVM port & Cat6 dongle connection IP, Remote & Local console connection P.3 - 4 IP console setting KVM Cascade Specifi cations Resolution Support Information <... - Page 5 Before Installation ■ It is very important to mount the equipment in a suitable cabinet or on a stable surface. ■ Make sure the place has a good ventilation, is out of direct sunlight, away from sources of excessive dust, dirt, heat, water, moisture and vibration. Unpacking The equipment comes with the standard parts shown in package content.
-
Page 6: Kvm
Part 1. Matrix Cat6 < 1.1 > Package Contents Matrix Cat6 IP KVM LCDK2012-31 / 41 / 42 LCDK2013-31 / 41 / 42 • LCDK2012-31 or 41 or 42 LCDK2013-31 or 41 or 42 KVM unit x 1 • Mounting set w/ bracket & screws x 1 KVM unit •... -
Page 7: Kvm Port & Cat6 Dongle Connection
< 1.2 > KVM port & Cat6 dongle connection Matrix Cat6 IP KVM USB Servers LCD-A2003 DVI-USB dongle CAT 5 / 6 cable max. 40 meters DVI-D Cat6 KVM port PS/2 Servers USB Servers LCD-A2001 LCD-A2002 PS/2 VGA-USB dongle VGA-PS/2 dongle CAT 5 / 6 cable max. -
Page 8: Ip, Remote & Local Console Connection
< 1.3 > IP, Remote & Local console connection Matrix Cat6 IP KVM Network device hub or router CAT 5 / 6 cable max. 100m Remote USB console Receiver CAT 5 / 6 cable max. 150m Local Remote Cat6 console... - Page 9 How to use a receiver to connect a remote console Matrix Cat6 IP KVM Receiver Local Computer Monitor Remote I/O Front Power Rear Local Remote Mouse Button Button KVM switch The receiver provides a hotkey function for remote console. Please refer to P.19...
-
Page 10: Ip Console Setting
< 1.4 > IP console setting Matrix Cat6 IP KVM After the cable connection, please take the following steps to confi gure the IP KVM : 1. Download IPKVMsetup.exe from the link: http://www.rackmountmart.com/downloads.html 2. Double click IPKVMsetup.exe to confi gure the IP KVM by device setup as below. -
Page 11: Kvm Cascade
< 1.5 > KVM Cascade Matrix Cat6 IP KVM ■ Cascade up to 8 levels, 256 servers ■ Cascading multiple KVM with LCD-A1024 cascade cable. Cascaded KVMs from level 2 to 8 must be the models of LCDK2004-2/LCDK2005-2 or LCDK2006-2/LCDK2007-2 When multiple matrix KVMs cascade together, the master KVM at level 1 will take all control of other slave KVM switches (e.g. -
Page 12: Specifi Cations
< 1.6 > Specifi cations Matrix Cat6 IP KVM LCDK2012-31 / 41 / 42 LCDK2013-31 / 41 / 42 KVM Port ▀ Number of ports: 16 or 32 Connector: RJ-45 Connectivity: DVI-D / VGA connector dongle up to 40 meters (132 feet) via... -
Page 13: Resolution Support Information
< 1.7 > Resolution Support Information Matrix Cat6 IP KVM Max 4:3 Max 16:10 Remote console 1600 x 1200 1440 x 900 Local console 1600 x 1200 1440 x 900 IP console 1600 x 1200 Cat6 Dongle EDID Resolutions Capable... -
Page 14: Part 2. Matrix Cat6 Kvm
Part 2. Matrix Cat6 KVM < 2.1 > Package Contents Matrix Cat6 KVM LCDK2006-2 / LCDK2007-2 • LCDK2006-2 or LCDK2007-2 KVM unit x 1 • Mounting set w/ bracket & screws x 1 KVM unit • Power adapter w/ power cord ( for KVM ) x 1 •... - Page 15 Matrix Cat6 KVM LCDK2006-2 Local Console Remote Console 1 Power Cascade LCDK2007-2 LCDK2006-3 Local Console Remote Console 1 Power Remote-2 Cascade LCDK2007-3 LCDK2006-4 Remote-3 Local Console Remote Console 1 Power Remote-2 Cascade LCDK2007-4 P.11 www.RackmountMart.com...
-
Page 16: Kvm Port & Cat6 Dongle Connection
< 2.2 > KVM port & Cat6 dongle connection Matrix Cat6 KVM USB Servers LCD-A2003 DVI-USB dongle CAT 5 / 6 cable max. 40 meters DVI-D Cat6 KVM port PS/2 Servers USB Servers LCD-A2001 LCD-A2002 PS/2 VGA-USB dongle VGA-PS/2 dongle CAT 5 / 6 cable max. - Page 17 < 2.3 > Local console & remote console connection Matrix Cat6 KVM Remote Receiver USB console 3 CAT 5 / 6 cable max. 150m Remote USB console 1 Receiver CAT 5 / 6 cable max. 150m Remote Local Remote Cat6 Cat6 Console 3 console...
- Page 18 How to use a receiver to connect a remote console Matrix Cat6 KVM Receiver Local Computer Monitor Remote I/O Front Power Rear Local Remote Mouse Button Button KVM switch The receiver provides a hotkey function for remote console. Please refer to P.19 Monitor Remote Console...
-
Page 19: Kvm Cascade
< 2.4 > KVM Cascade Matrix Cat6 KVM ■ Cascade up to 8 levels, 256 servers ■ Cascading multiple KVM with LCD-A1024 cascade cable. Cascaded KVMs from level 2 to 8 must be the models of LCDK2004-2/LCDK2005-2 or LCDK2006-2/LCDK2007-2 When multiple matrix KVMs cascade together, the master KVM at level 1 will take all control of other slave KVM switches (e.g. -
Page 20: Specifi Cations
< 2.5 > Specifi cations Matrix Cat6 KVM LCDK2006-2 / 3 / 4 LCDK2007-2 / 3 / 4 ▀ KVM Port Number of ports: 16 or 32 Connector: RJ-45 Connectivity: DVI-D / VGA connector dongle up to 40 meters (132 feet) via Cat6 / Cat5 cable ▀... -
Page 21: Resolution Support Information
< 2.6 > Resolution Support Information Matrix Cat6 KVM Max 4:3 Max 16:10 Remote console 1600 x 1200 1440 x 900 Local console 1600 x 1200 1440 x 900 IP console 1600 x 1200 Cat6 Dongle EDID Resolutions Capable Resolution 16:10 Hard-coded 1024 x 768... -
Page 22: Part 3. Usage
Part 3. Usage Matrix Cat6 KVM Usage 3.1 KVM Button Power ON ■ Turn off all servers and KVM switches ■ Make sure all cables / connectors are properly connected ■ Recommend Power ON sequence is monitor, KVM switch fi nally computer Front Panel - Port LED Indications 16 ports Bank no. -
Page 23: Password
3.2 Password Matrix Cat6 KVM Usage The password is enabled by default, the default password is “00000000” eight zeros (Do not use “0” on number pad) ■ Enable password Scroll Lock + Scroll Lock + U Press the KVM hotkey Scroll Lock + Scroll Lock + P Logout the KVM by pressing the hotkey In SUPERVISOR level, enter “00000000”... -
Page 24: Kvm Osd
3.3 KVM OSD Matrix Cat6 KVM Usage OSD Menu OSD operation next to the system name The PC is powered on next to the system name The PC is selected Access F1 MAIN MENU Logout the OSD menu Previous menu Cancel / Quit Enter Complete / Switch to selected port... -
Page 25: Kvm Hotkey / Remote Console Hotkey
3.4 KVM Hotkey & Remote Console Hotkey Matrix Cat6 KVM Usage Local Console Hotkey Function Scroll Lock + Scroll Lock + Space Bar Calling OSD menu Right-button mouse + Esc Calling OSD menu Scroll Lock + Scroll Lock + Switch to previous port Scroll Lock + Scroll Lock + Switch to next port Scroll Lock + Scroll Lock +... - Page 26 The company reserves the right to modify product specifi cations without prior notice and assumes no responsibility for any error which may appear in this publication. All brand names, logo and registered trademarks are properties of their respective owners. Copyright 2013 Synergy Global Technology Inc. All rights reserved. www.RackmountMart.com...
Need help?
Do you have a question about the Matrix Cat6 IP KVM and is the answer not in the manual?
Questions and answers