Table of Contents
Advertisement
Available languages
Available languages
Quick Links
Advertisement
Chapters
Table of Contents

Subscribe to Our Youtube Channel
Related Manuals for Thermador TCMTK30RS


Summary of Contents for Thermador TCMTK30RS
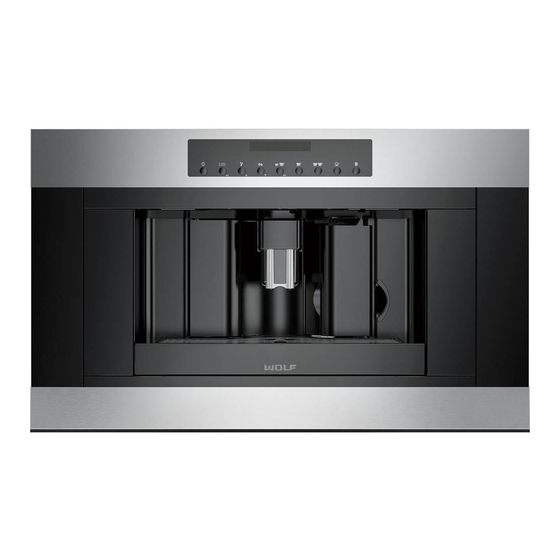
- Page 1 Installation Instructions TCMTK30RS BUILT-IN COFFEE MAKER TRIM KIT THERMADOR.COM...
-
Page 2: Table Of Contents
® ........back page THERMADOR Support advisory. Note: This alerts you to important information and/or tips. ® This THERMADOR appliance is made by BSH Home Appliances Corporation 1901 Main Street, Suite 600 Irvine, CA 92614 Questions? 1-800-735-4328 www.thermador.com We look forward to hearing from you! Page. -
Page 3: Safety
Safety IMPORTANT SAFETY Hidden surfaces may have sharp edges. Use caution when reaching behind or under appliance. INSTRUCTIONS It is the responsibility of the owner and the installer to determine if additional requirements and/or standards READ AND SAVE apply to specific installations. THESE INSTRUCTIONS ELECTRIC SAFETY Before you plug in an electrical cord, be sure all controls... -
Page 4: Installation Instructions
Installation Instructions Before You Begin General Dimensions inches (mm) Trim Kits 22" (558) Trim kits are designed for use ONLY with the Thermador Built-in Coffee Maker models TCM24RS. ⅝ " IMPORTANT: The Built-in Coffee Maker installation (498) instructions can be found in the Built-in Coffee Maker Assembly. -
Page 5: Flush Install Dimensions
Flush Install Dimensions 2. Install the Right Cabinet Mounting Bracket at the top right of the cabinet opening using two (2) ¾'' Phillips head wood screws. Ensure the bracket is flush to the inches (mm) cabinet side and cabinet face. Top View ½... - Page 6 5. Secure the Left Side Mounting Bracket to the Base 8. Set the Coffee Maker Transformer behind the Base Plate. Install and plug transformer according to the ½ Plate using three (3) T-20 x '' Torx head screws. Coffee Maker instructions. 6.
- Page 7 11. Use a 1'' T-20 Torx screw with spacer (shipped with 13. If the latch is hitting on the bottom, pull the coffee coffee maker) to secure the top right corner of the maker out and install the 1mm Shim, included with the coffee maker, at the bottom left side of the coffee coffee maker.
- Page 8 ® THERMADOR Soutien ..........page verso Note : Ceci vous avertit que d'importantes informations et/ou conseils sont fournis. Cet appareil électroménager de THERMADOR est fait par BSH Home Appliances LtD 6696 Financial Drive, Unit 3 Mississauga, ON L5N 7J6 Des questions? 1-800-735-4328 www.thermador.ca...
-
Page 9: Sécurité
Sécurité CONSIGNES DE MANIPULATION SÉCURITAIRE DE L'APPAREIL SÉCURITÉ MISE EN GARDE Il est conseillé de faire installer la cafetière IMPORTANTES par deux (2) installateurs. Tout manquement à respecter cette consigne pourrait occasionner LIRE ET CONSERVER des dégâts matériels ou des blessures. CES CONSIGNES Des parties cachées pourraient avoir des rebords tranchants. - Page 10 CONSIGNES DE SÉCURITÉ IMPORTANTES LIRE ET CONSERVER CES CONSIGNES INSTRUCTIONS DE MISE À LA TERRE AVERTISSEMENT Une mise à la terre inadéquate peut entraîner un risque d'électrocution. Cet appareil doit être mis à la terre. En cas de court-circuit électrique, la mise à la terre réduira le risque de décharge électrique en offrant au courant électrique un fil d'évacuation.
-
Page 11: Installation Seule
Installation Standard Avant de commencer Dimensions générales pouces (mm) Ensembles de finition 22" (558) Les ensembles de finition sont conçus pour être utilisés SEULEMENT avec les modèles de cafetière encastrable TCM24RS. ⅝ " (498) IMPORTANT : Les instructions d'installation de la cafetière encastrable se trouvent dans l'assemblage de la cafetière ⅞... -
Page 12: Dimensions De L'installation En Affleurement
Dimensions de l'installation 2. Installez le support de fixation droite du caisson dans le coin supérieur droit de l'ouverture du caisson en affleurement à l'aide de deux (2) ¾ po vis à bois à tête Phillips. Assurez-vous que le support est en affleurement avec le côté... - Page 13 5. Fixer solidement le support de fixation gauche à la 8. Placez le transformateur de la cafetière derrière la plaque de base à l'aide des trois (3) vis Torx T-20 x ½ plaque de base. Installez encastrable en suivant les instructions incluses avec l'appareil.
- Page 14 11. Utiliser une vis Torx T-20 de 1 po avec l'entretoise 13. Si le loquet heurte la partie inférieure de la gâche, (expédiée avec la cafetière) pour fixer solidement le retirer la cafetière et installer la cale de 1 mm (comprise avec la cafetière) sous le coin inférieur coin supérieur droit de la cafetière.
- Page 15 .....última página THERMADOR Mantenimiento cumplimiento de este aviso. Nota: Esto lo alerta sobre información y/o consejos importantes. ® Este electrodoméstico de THERMADOR está hecho por BSH Home Appliances Corporation 1901 Main Street, Suite 600 Irvine, CA 92614 ¿Preguntas? 1-800-735-4328 www.thermador.com ¡Esperamos oír de usted!
-
Page 16: Seguridad
Seguridad SEGURIDAD AL MANEJAR EL ELECTRODOMÉSTICO INSTRUCCIONES DE SEGURIDAD PRECAUCIÓN Se recomienda contar con dos instaladores IMPORTANTES para realizar el montaje de la cafetera. No LEER Y CONSERVAR hacerlo puede causar daños materiales o lesiones personales. ESTAS INSTRUCCIONES Las superficies ocultas pueden tener bordes filosos. Proceder con cuidado al intentar sujetar el INSTALADOR: Dejar estas instrucciones con esta unidad electrodoméstico por la parte trasera o desde abajo. - Page 17 INSTRUCCIONES DE SEGURIDAD IMPORTANTES LEER Y CONSERVAR ESTAS INSTRUCCIONES No modificar ni alterar la construcción del electrodoméstico. Por ejemplo, no retirar las patas de nivelación, los paneles, las cubiertas para cables ni los tornillos o soportes antivuelco. INSTRUCCIONES PARA LA CONEXIÓN A TIERRA ADVERTENCIA La conexión incorrecta a tierra puede causar una descarga eléctrica.
-
Page 18: Montaje Independiente
Montaje independiente Antes de empezar Dimensiones generales pulgadas (mm) Kits para molduras 22" (558) Los kits para molduras están diseñados para usarse SOLO con los modelos TCM24RS. ⅝ " IMPORTANTE: Las instrucciones de montaje de la (498) cafetera integrada se pueden encontrar en el ensamble de la cafetera integrada. -
Page 19: Dimensiones De Instalación Enrasada
Dimensiones de instalación 2. Montar el retenedor de montaje del gabinete derecha en la parte superior derecha de la abertura enrasada del gabinete con dos (2) ¾'' tornillos para madera de cabeza Phillips. Asegurarse de que el retenedor está alineado con la parte lateral del gabinete. pulgadas (mm) Vista desde arriba 23½"... - Page 20 5. Fijar el soporte de montaje del lado izquierdo a la 8. Colocar el transformador de la cafetera detrás de la placa base utilizando tres (3) tornillos de cabeza Torx bandeja encajable. Enchufar el transformador. T-20 x ½''. 6. Alinear la marca en el frontal de la bandeja encajable 9.
- Page 21 11. Usar un tornillo Torx 1'' T-20 con separador (se envía Si el seguro está golpeando la parte superior, instalar junto con la cafetera) para afianzar la esquina superior la calza de 1 mm en la parte superior izquierda de la cafetera.
-
Page 22: Mantenimiento
Marcone 800-287-1627 É.-U. : Canadá: Marcone 800-287-1627 Reliable Parts 800-663-6060 www.thermador-eshop.com Canada : Reliable Parts 800-663-6060 Marcone 800-287-1627 Reliable Parts 800-663-6060 1901 MAIN STREET, SUITE 600, IRVINE, CA 92614 // 800-735-4328 // WWW.THERMADOR.COM © 2018 BSH Home Appliances Corporation 9001289088...
Need help?
Do you have a question about the TCMTK30RS and is the answer not in the manual?
Questions and answers