
Related Manuals for Samsung 200B4A


Summary of Contents for Samsung 200B4A
- Page 1 User Guide Getting Started Using the Computer Start Settings and Upgrade Backup / Restore Appendix Contents...
-
Page 2: Table Of Contents
Turning the Computer On and Off Using the Security Lock Port Chapter 2. Using the Computer Chapter 4. Backup / Restore Keyboard Samsung Recovery Solution (Optional) Touchpad Pointing Stick (Optional) Chapter 5. Appendix CD Drive (ODD, Optional) Important Safety Information... - Page 3 Chapter 1. Getting Started Product Features Tips Before You Start Safety Precautions Proper Posture During Computer Use Overview Turning the Computer On and Off...
-
Page 4: Product Features
You can resolve problems easily and quickly The system ensures minimal noise by verifying by using Samsung Recovery Solution program the noise level on the basis of the noise levels to restore the PC to the state when it was of everyday life. -
Page 5: Tips
I want to restore the computer to the state when it was purchased. If you use the Samsung Recovery Solution function, you How can I extend the battery usage time? can easily and quickly restore the computer to a previous... -
Page 6: Before You Start
- Start > All Programs helpful information to use the function. - Start > All Programs > Samsung When the programs are not installed, select Samsung Recovery Solution > System Software to install the programs. (Only for models supplied with Samsung... - Page 7 HDD in Windows is smaller than the Samsung Electronics shall not be liable for any data loss. Please actual capacity due to the difference in capacity calculation.
- Page 8 This is because BIOS or a video adapter uses a portion of memory or claims it for further use. (E.g. For 1GB(=1,024MB) memory installed, Windows may report the capacity as 1,022MB or less) For more information, refer to the Samsung Recovery Solution section.
-
Page 9: Safety Precautions
Since this is commonly applied to Samsung Computers, some pictures may diff er from actual products. This may increase the internal temperature of the computer and may cause an injury. - Page 10 Chapter 1. Safety Precautions Getting Started Warning If the power cord or power outlet makes a noise, disconnect the power cord from the Failing to follow instructions marked with this symbol may wall outlet and contact a service center. cause personal injury and even fatality. There is a danger of electric shock or fi...
- Page 11 Chapter 1. Safety Precautions Getting Started Warning AC Adapter Usage Precautions Failing to follow instructions marked with this symbol may cause personal injury and even fatality. Connect the power cord to the AC adapter firmly. Connect the power cord to an outlet or Otherwise, there is a danger of fire due to an multiple power plug (extended cable) with incomplete contact.
- Page 12 Please use an authorized battery and adapter is still turned on. approved by Samsung Electronics. If you put the computer into your bag without Unauthorized batteries and adapters may not turning it off, the computer may overheat and meet the proper safety requirements and may there is a danger of fire.
- Page 13 Chapter 1. Safety Precautions Getting Started Warning Usage Related Failing to follow instructions marked with this symbol may cause personal injury and even fatality. Disconnect all cables connected to the computer before cleaning it. If your notebook is external & removable battery Never heat the product(or battery) or put type, remove the external battery.
- Page 14 Chapter 1. Safety Precautions Getting Started Warning Upgrade Related Failing to follow instructions marked with this symbol may cause personal injury and even fatality. Never disassemble the power supply or AC adapter. Avoid direct sunlight when the computer There is a danger of electric shock. is in an air-tight location such as inside a vehicle.
- Page 15 Chapter 1. Safety Precautions Getting Started Warning When carrying the notebook computer with other items, such as the adapter, Failing to follow instructions marked with this symbol may mouse, books etc, take care not to press cause personal injury and even fatality. anything against the notebook computer.
- Page 16 This may cause an injury, fire or explosion. When using the computer with it lying on its side, place it so Use only a battery authorized by Samsung Electronics. that the vents face upwards. Failing to do so may cause an explosion.
- Page 17 This may cause personal injury or loss of data. Authorized Samsung Repair Centers will carry out safety checks after a repair. Using a repaired product without testing it for Do not touch the antenna with electricity facility such as the safety may cause an electric shock or fire.
- Page 18 Chapter 1. Safety Precautions Getting Started Caution Do not place your face close to the Optical Disk Drive tray when it is operating. Failing to follow instructions marked with this symbol may There is a danger of injury due to an abrupt ejection. cause slight injury or damage to the product.
- Page 19 Never disassemble or repair the product by yourself. There is a danger of electric shock or fire. To connect a device that is not manufactured or authorized by Samsung Electronics, enquire at your service center before connecting the device. There is a danger of damaging the product.
- Page 20 Chapter 1. Safety Precautions Getting Started Caution Causes that may damage the data of a hard disk drive and the hard disk drive itself. Failing to follow instructions marked with this symbol may The data may be lost when an external impact is applied to the cause slight injury or damage to the product.
- Page 21 Chapter 1. Safety Precautions Getting Started When using the auto adapter Using the power supply in an airplane When the cigar socket is provided, you have to use the auto Since the power outlet type diff ers depending on the type of adapter (optional).
-
Page 22: Proper Posture During Computer Use
Chapter 1. Proper Posture During Computer Use Getting Started Maintaining a proper posture during computer use is very Do not use the computer while you are lying down, but only important to prevent physical harm. while you are sitting down. The following instructions are about maintaining a proper posture Do not use the computer on your lap. - Page 23 Chapter 1. Proper Posture During Computer Use Getting Started Eye Position Hand Position Keep the monitor or LCD away from your eyes by at least Keep your arm at a right angle as shown by the fi gure. 50cm. Keep the line from your elbow to your hand straight. Adjust the height of the monitor and the LCD screen so that its Do not place your palm over the keyboard while typing.
- Page 24 Chapter 1. Proper Posture During Computer Use Getting Started Volume Control (Headphones and Speakers) Use Time (Break Time) Check your volume fi rst to listen to music. Take a break for 10 minutes or more after a 50-minute period when working for more than one hour. Illumination Do not use the computer in dark locations.
-
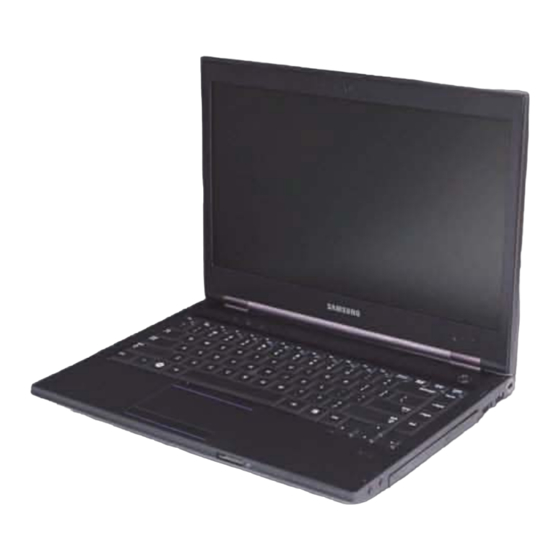
Page 25: Overview
Chapter 1. Overview Getting Started Front View Using this camera, you can take still Camera/Camera LED pictures and record video. (Optional) The pictures used for the cover and the main body in the If you use this, the LED will turn on. User Manual are those of the representative model of each 2 LCD The screen images are displayed here. - Page 26 Chapter 1. Overview Getting Started Front View Easily turns on or off the several wireless network settings at the same time. The pictures used for the cover and the main body in the - This button is useful on the airplane to User Manual are those of the representative model of each turn off...
- Page 27 Chapter 1. Overview Getting Started Status Indicators This turns on when the Caps Lock key is pressed allowing capital letters to be typed without holding the Shift button down. 1 Caps Lock On: Upper-case alphabetic input Off: Lower-case alphabetic input This turns when either the HDD or ODD is 2 HDD/ODD being accessed.
- Page 28 Chapter 1. Overview Getting Started Right View ► For 12.5 inch models You can connect USB devices to the 1 USB Port USB port such as a keyboard/mouse, digital camera, etc. This port can be used to connect a USB eSATA/ or eSATA device.
- Page 29 Chapter 1. Overview Getting Started Right View ► For 14 inch models A jack used to connect the 1 Headphone Jack headphones. A jack used to connect the 2 Microphone Jack microphone. Plays CD or DVD titles. CD Drive (ODD) Since an ODD(Optical Disk Drive) is (Optional) optional, the installed drive depends...
- Page 30 Chapter 1. Overview Getting Started Left View 2 Wired LAN Port Connect the Ethernet cable to this port. USB ports to which you can connect USB ► For 12.5 inch models devices as well as a Chargeable USB port are provided. Using a Chargeable USB port, you can access or charge a USB device.
- Page 31 Chapter 1. Overview Getting Started Left View 2 Wired LAN Port Connect the Ethernet cable to this port. The internal heat of the computer is ► For 14 inch models emitted through these holes. If the vents are blocked the 3 Fan Vents computer may overheat.
- Page 32 Chapter 1. Overview Getting Started USB ports to which you can connect USB Left View devices as well as a Chargeable USB port ► For 15.6 inch models are provided. Using a Chargeable USB port, you can access or charge a USB device. USB Port or The port can be distinguished by Chargeable USB...
- Page 33 Chapter 1. Overview Getting Started Bottom View This is a Lithium-Ion rechargeable ► For 12.5 inch models Battery battery that supplies power to the computer. The latch used to remove or install the Battery Latches battery. Docking Port This is the port to connect the Business (Optional) Docking Station to (sold separately).
-
Page 34: Turning The Computer On And Off
Chapter 1. Turning the Computer On and Off Getting Started Turning the computer on About Windows Activation Install the battery and connect the AC adapter. When you turn the computer on for the fi rst time, the Windows activation screen appears. Lift the LCD panel up. - Page 35 Save all your data before clicking on Shut down. If Samsung Fast Start is installed, the system shutdown location may diff er. Power Button ► For Windows 7 Click Start >...
- Page 36 Chapter 1. Turning the Computer On and Off Getting Started ► For Windows XP Click the Start button on the taskbar. Click Turn Off Computer. Click Turn Off . If the system cannot be shut down due to a system error, turn it off...
- Page 37 Start to reduce the booting time. Panel. To change these, fi rst disable the Fast Start function. When the Samsung Fast Start function is being used, the The existing power saving mode and maximum power computer runs in hybrid power-saving mode when the computer saving mode functions have been replaced by this enters standby mode or hibernation mode.
-
Page 38: Keyboard Touchpad
Chapter 2. Using the computer Keyboard Touchpad Pointing Stick (Optional) CD Drive (ODD, Optional) ExpressCard Slot (Optional) Multi Card Slot (Optional) Connecting an External Display Device Connecting an External Digital Device Adjusting the Volume Wired Network Wireless Network (Optional) Sharing Content in a Home Network (Easy Content Share) (Optional) HDD Protection Function (Optional) Using the Security Device (Optional) -
Page 39: Using The Computer
Chapter 2. Keyboard Using the computer Shortcut key functions and procedures are discussed in the following sections. The keyboard image may diff er from the actual keyboard. The keyboard may diff er depending on your country. The following mainly describes the shortcut keys. Shortcut Keys You can use the following functions by pressing the keys below with the Fn key. - Page 40 Chapter 2. Keyboard Using the computer Name Function REST Switches to Sleep mode. To wake the computer up, press the Power button. (Sleep Mode) Screen Brightness Controls the screen brightness. Control Switches the screen output to the LCD or external monitor when an external monitor (or TV) is CRT/LCD connected to the computer.
- Page 41 Chapter 2. Keyboard Using the computer Name Function System diagnosis, recovery and Internet consultation program, Samsung Support Center, will be launched. (Optional) Samsung Support Center For some models, Samsung Magic Doctor is launched. Battery mode To use the battery effi ciently, you can change the battery mode according to your usage environment.
- Page 42 Chapter 2. Keyboard Using the computer Numeric Key ( For 12.5 inch models) Other Function Keys Press the Fn + NumLock key to use some of the keys as numeric Performs the right-click mouse function (touchpad). keys. Delete Lock If the hot keys do not work properly, you have to install the Numeric Key ( For 14, 15.6 inch models) Easy Display Manager.
-
Page 43: Touchpad
Chapter 2. Touchpad Using the computer The touchpad provides the same function as a mouse and the left Use the Touchpad with your fi ngers. Using a sharp object and right buttons of the touchpad plays the role of the left and may damage the Touchpad. - Page 44 Chapter 2. Touchpad Using the computer Basic Touchpad Functions Scroll Area Touch Area Moving the cursor on the screen This corresponds Use to move to the wheel of the Place your fi nger on the touchpad slightly and move your fi nger. the cursor.
- Page 45 Chapter 2. Touchpad Using the computer Double-Click Function Drag Function Put your finger on the touchpad and quickly tap twice with your Dragging refers to moving an item to another place after selecting finger on an item you want. Alternatively, press the left touchpad button twice quickly. Press and hold down the left touchpad button over an item you want to drag and move the item to the new location.
- Page 46 Chapter 2. Touchpad Using the computer Confi guring the Gesture Function The Gesture Function of the Touchpad (Optional) If the Gesture function is not activated, you can activate it according to the following procedures. ► When using the Elan driver The Touchpad Gesture function may not be provided and the version of the function may diff...
- Page 47 Chapter 2. Touchpad Using the computer The Scroll Function Rotation function This function is the same as the scroll area of the Touchpad. Place two fingers over the touchpad and move the fingers as follows to rotate the photo or image. If you place two fingers over the Touchpad and move them up, down, left or right, the screen is scrolled up, down, left or right accordingly.
- Page 48 Chapter 2. Touchpad Using the computer ► When using the Elan driver Setting the Touchpad Sensitivity Click Start > Control Panel > Hardware and Sound > Mouse If the touchpad reacts too sensitively or the pointer moves > ELAN > Options > PalmTracking and then adjust the unintentionally, please adjust the touchpad pointer speed and sensitivity.
- Page 49 Chapter 2. Touchpad Using the computer Touchpad On/Off Function Locking with shortcut keys Auto-locking when connecting USB mouse If you don’t want to use the touchpad, you can turn the touchpad ► When using the Elan driver off . Click Start > Control Panel > Hardware and Sound > Mouse Press the key combination once.
-
Page 50: Pointing Stick (Optional)
Chapter 2. Pointing Stick (Optional) Using the computer The pointing stick provides the same function as a mouse. Pointing Stick The buttons of the pointing stick plays the role of the left and Use to move the cursor. right buttons and wheel button of a mouse. To use the pointing stick, the pointing stick driver is required. - Page 51 Chapter 2. Pointing Stick (Optional) Using the computer Basic Pointing Stick Functions Double-Click Function Moving the cursor on the screen Put your fi nger on the pointing stick and quickly tap twice with Place your fi nger on the pointing stick slightly and move your your fi...
- Page 52 Chapter 2. Pointing Stick (Optional) Using the computer Drag Function Scroll Function Dragging refers to moving an item to another place after selecting This function is the same as the scroll area of the Touchpad. Press and hold down the scroll button and move the pointing stick Press and hold down the pointing stick left button over an item up, down, left or right.
- Page 53 Chapter 2. Pointing Stick (Optional) Using the computer Adjusting the Pointing Stick Sensitivity Pointing Stick On/Off Function If the pointing stick reacts too sensitively or the pointer moves Locking with short keys unintentionally, please adjust the pointing stick pointer speed and sensitivity.
- Page 54 Chapter 2. Pointing Stick (Optional) Using the computer Auto-locking when connecting USB mouse ► When using the Synaptics driver Click Start > Control Panel > Hardware and Sound > Mouse > Device Settings, and check the Disable internal pointing device when external USB pointing device is attached in option.
-
Page 55: Cd Drive (Odd, Optional)
Chapter 2. CD Drive (ODD, Optional) Using the computer An optical disk drive is optional and may diff er depending on When the CD tray opens, insert a CD or DVD and push the your computer model. For detailed specifi cations, refer to the tray in until it clicks. - Page 56 Chapter 2. CD Drive (ODD, Optional) Using the computer Installing/Removing the CD drive Shutdown the system, close the LCD panel and place the To install the CD drive again, slide the CD drive separation computer upside down on a fl at surface. latch into the system.
-
Page 57: Expresscard Slot (Optional)
Chapter 2. ExpressCard Slot (Optional) Using the computer The ExpressCard slot can be regarded as the next generation If you insert a card into the slot, Windows recognizes the PCMCIA card specifi cation and supports LAN, TV Tuner and Sound card automatically or a message telling you to install a driver cards. -
Page 58: Multi Card Slot (Optional)
Chapter 2. Multi Card Slot (Optional) Using the computer Using the multi card slot, you can read and write data to cards. Using the card You can use a card as a removable disk and conveniently Insert the card into the multi card slot in the indicated exchange data with digital devices such as a digital camera, digital camcorder, MP3, etc.. - Page 59 You can only use the card after formatting it. However, depending on the adapter’s body material, some RS-MMC cards may not be recognized properly. Samsung recommend that you check the card is recognized correctly prior to purchasing. To remove a memory card Take hold of the end of the card and remove the card.
- Page 60 Chapter 2. Multi Card Slot (Optional) Using the computer To format a memory card To use a card to exchange data with a digital device such as a digital camera, formatting the data using the digital When using the memory card for the first time, you must format device is recommended.
-
Page 61: Connecting An External Display Device
Chapter 2. Connecting an External Display Device Using the computer If you connect an external display device such as a monitor, TV, About the connection cable projector, etc., you can view the picture on the wider screen of the Users should additionally purchase the necessary connection external device when you give a presentation or watch a video or cables. - Page 62 Chapter 2. Connecting an External Display Device Using the computer Press the Fn + F4 key combination once. Then the Easy Connecting to the monitor port Display Manager screen appears where you can select a You can experience a wider screen by connecting the computer to display device.
- Page 63 Chapter 2. Connecting an External Display Device Using the computer ► When Multi View is supported (Optional) LCD Only External Display Only LCD+CRT Clone Multi View LCD+CRT Dual View What is Multi View? Simultaneous output to the notebook LCD+RGB+HDMI is This refers to the mode that outputs the screen to the not allowed.
- Page 64 Chapter 2. Connecting an External Display Device Using the computer Press the Fn + F4 key combination once. Then the Easy Connecting through the HDMI port (Optional) Display Manager screen appears where you can select a By connecting the computer to a TV with a HDMI port, you can display device.
- Page 65 Chapter 2. Connecting an External Display Device Using the computer ► When Multi View is supported (Optional) HDMI LCD Only LCD+HDMI Clone External Display Only LCD+HDMI Dual View Multi View Simultaneous output to the notebook LCD+RGB+HDMI is not allowed. What is Multi View? Alternatively, to set up Dual View: This refers to the mode that outputs the screen to the Open the Display Settings window in the Control Panel,...
- Page 66 Chapter 2. Connecting an External Display Device Using the computer ► For Intel graphics cards Setting up HDMI TV video (Optional) Right-click over the Desktop and select Graphics Properties. If the Desktop screen displayed on the TV does not fi t to the TV screen, confi...
- Page 67 Chapter 2. Connecting an External Display Device Using the computer ► For NVIDIA graphics cards Resize the Desktop using the resize bars so that the four arrows at the corners of the Desktop are placed in the corners of the TV and then click OK. This function is not provided in the Optimus specifi...
- Page 68 Chapter 2. Connecting an External Display Device Using the computer Setting up HDMI TV audio (Optional) You can confi gure the sound of the computer to be played through the HDMI TV. You have to confi gure the sound device in the Control Panel whenever you connect the HDMI TV in order to hear sound from the computer on the TV.
- Page 69 Chapter 2. Connecting an External Display Device Using the computer Select 3D Settings > Manage 3D settings in the left pane Using graphics more effi ciently (optional) and select the Program Settings tab. NVIDIA Optimus is a function that enables automatic selection and usage of the internal or external graphics chipsets depending In the Select a program to customize(S) fi...
-
Page 70: Connecting An External Digital Device
Chapter 2. Connecting an External Digital Device Using the computer You can save a fi le stored on a device onto the computer by The Auto run window appears. Click Open folder and view connecting a digital device such as a camera, camcorder or mobile fi... -
Page 71: Adjusting The Volume
Chapter 2. Adjusting the Volume Using the computer You can adjust the volume using the keyboard and the volume Using the Sound Recorder control program. The procedures to record sound using the Windows Recorder are described below. Adjusting the Volume using the Keyboard ►... - Page 72 Chapter 2. Adjusting the Volume Using the computer ► For Windows XP Select Mic Volume from Show the following volume controls and click OK. Connect a microphone to the microphone jack. When Recording Control window appears, check the Select You can also use the internal MIC. checkbox.
- Page 73 Chapter 2. Adjusting the Volume Using the computer ► Basic Mode Using SoundAlive The SoundAlive function enables you to experience more Music Select this mode to listen to music. stereophonic sound using stereo speakers. Movie Select this mode to watch a movie. Speech Emphasizes voice over other sounds.
- Page 74 Chapter 2. Adjusting the Volume Using the computer Connecting and using a headphone or microphone Using the headphone jack Right-click over the Volume Control icon in the notification area at the bottom right of the Desktop and select Playback Devices. (Alternatively, click the Control Panel >...
-
Page 75: Wired Network
Chapter 2. Wired Network Using the computer ► For Windows 7 A wired network is a network environment used for a company network or broadband internet connection at home. Click Start > Control Panel > Network and Internet > Network and Sharing Center and click on Change adapter settings in the left menu pane. - Page 76 Chapter 2. Wired Network Using the computer Select Local Area Connection and click the right button of the touch pad and select Properties. The LAN Device name may diff er depending on your ► For Windows XP computer’s Network Device. Click General tab and select a LAN driver from Connect using:.
- Page 77 Chapter 2. Wired Network Using the computer Confi gure the IP settings. Using the WOL (Wake On LAN) function When using DHCP, select Obtain an IP address <Wake On LAN> is a function that activates the system from Sleep automatically. To use a static IP address, select Use the mode when a signal (such as a ping or magic packet command) following IP address, and set the IP address manually.
- Page 78 Chapter 2. Wired Network Using the computer Click Confi gure > Power Management tab. Select Allow When system is running on battery, some time it takes about this device to bring the computer out of standby, then 20sec after inserting LAN cable to be able to connect to click OK.
Need help?
Do you have a question about the 200B4A and is the answer not in the manual?
Questions and answers