Table of Contents
Advertisement
Quick Links
Advertisement
Table of Contents

Related Manuals for VistaQuest VQ3010


Summary of Contents for VistaQuest VQ3010
- Page 1 User's Manual...
-
Page 2: For Customers In Europe
For customers in North and South America For customers in USA This device complies with Part 15 of the FCC rules. Operation is subject to the following two conditions: For customers in Canada This Class B digital apparatus meets all requirements of the Canadian Interference-Causing Equipment Regulations. -
Page 3: Table Of Contents
• Formatting internal or SD card memory ---------------------------------------- • Zooming the displayed image ----------------------------------------------------- 8. Customizing Your VQ3010 Settings --------------------------------------------- • Capture Function Menu ---------------------------------------------------------- • Playback Function Menu ----------------------------------------------------------- 9. Installing VQ3010 Driver And Software ---------------------------------------- ------------------------------------------------------------ ----------------------------------------------------------------- ---------------------------------------------------- --------------------------------------------------... - Page 4 Table of Contents 10. Uninstalling Software and VQ3010 Driver -------------------------------------- • Uninstalling Software -------------------------------------------------------------- • Uninstalling VQ3010 Driver ----------------------------------------------------- 11. Downing Images to Your Computer -------------------------------------------- 12. ArcSoft PhotoImpression 5 ------------------------------------------------------- 13. ArcSoft VideoImpression 2 ------------------------------------------------------- 14. Using VQ3010 in PC-Cam Mode ------------------------------------------------ 15.
-
Page 5: System Requirements
Internet connection. 2. Package contents Make sure that all of the items shown below are included with your VQ3010, contact your dealer immediately if any of the items are missing or damaged. •... -
Page 6: Read This First
Do not use a leaking battery. If fluid from the battery enters your eye, immediately rinse the eye with plenty of fresh water and consult a doctor. Do not put the VQ3010 into the micro-wave oven, water or expose to high temperature over 60°C (140F). -
Page 7: Quick Start Guide
4. Quick Start Guide Taking images a. Press the Power button on the camera for about 3 seconds to turn on the VQ3010. b. Slide the function switch to c. Use TFT or viewfinder to compose the image and hold the VQ3010 steady. -
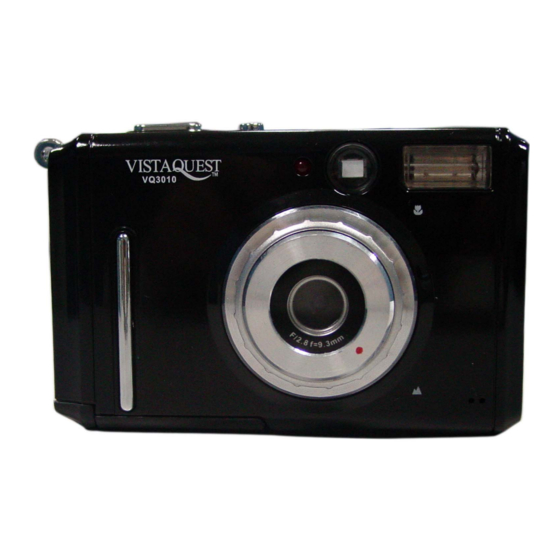
Page 8: Vq3010 Components
5. VQ3010 components 1. Shutter Button--Shooting pictures. 2. Power Button--Turn on/off VQ3010. 3. LED--Self-timer Lamp. 4. Viewfinder--For viewing the target. 5. Flash--For Using in gloomy conditions. 6. Lens--Do not cover the lens while shooting. 7. Focus Switch 8. Microphone. 9. USB Port--For connecting to a computer. - Page 9 button again to turn on the icons on the TFT (panel). 15. Up Button—For zooming in and function as Up button. Down Button---For zooming out and function as Down button. Left (Flash) Button---For switching flash and function as left as button. Mode Button---For switching capture modes and function as Right button.
-
Page 10: Introduction Screen Icons
6. Introducing screen icons 1. Captured pictures To show the number of present captured pictures. To show number of images you can capture. 2. Focus Macro Mode Normal Mode 3. Flash Mode Flash Off Force Flash Auto Flash 4. Capture Mode Normal Mode Self-timer Mode AVI Mode... - Page 11 4. To show the number of present captured pictures. 5. To show total number of captured pictures. Power Saving: VQ3010 will automatically power off approximately 60,120,180 seconds (Selectable) after you do not perform any operation. When this function is disabled, the power is not turned off automatically.
-
Page 12: Preparing To Take Pictures
7. Preparing to take pictures Installing the batteries VQ3010 is powered by two AAA-size alkaline batteries. Please follow these instructions to insert batteries into the camera. a. Slide open the battery cover. b. Insert two AAA-size alkaline batteries with the positive (+) and negative (-) poles matching the directions indicated inside the battery cover. -
Page 13: Inserting Sd Card (Optional)
Installing the SD card (option) VQ3010 offers two options for storing pictures and video. Internal Memory – Store pictures and videos in the 16MB internal memory. SD card –SD card provides removable, reusable storage for pictures and videos. The pictures stored depend on the size of the card. -
Page 14: Taking Pictures
Taking pictures a. Press the Power button on the camera for about 3 seconds to turn on the camera. b. Slide the function switch to c. Make sure the icon (Normal mode) appears on the right top of the TFT, if the icon doesn’t appear, please ►... -
Page 15: Using Flash Light
Press the Shutter button to take pictures after the blink finishes. Note: 1. Do not use flash while recording. 2. Flash options revert to Off when VQ3010 is turned to off. 3. Do not cover the flash while using it. -
Page 16: Using Digital Zoom
View pictures & videos clips and listen to audio clips that are stored in the camera’s memory (internal or SD card) on the TFT when the camera is in playback status. a. Turn on the VQ3010. b. Slide the Function switch to ► (Playback status). -
Page 17: Deleting A Single File
picture. e. Slide the function switch to capture status. Note: 1.If the icon appears on the TFT like the right side, please use ◄ or ►button to select “Yes” (to start playback the video) or “No” then press the OK button to confirm. 2.If you choose AVI picture press the OK button to start the video playing, press the Shutter button to pause the video playing. -
Page 18: Protecting Photos And Video Clips
appears on the on the TFT. 2.Files that are erased cannot be recovered. Make sure you have selected the images you want to erase. 3.Files that have been protected (see the following section) cannot be erased even if “All” is selected. Protecting photos and video Clips Individual files can be protected (locked) or unprotected (unlocked). -
Page 19: Zooming The Displayed Image
2.Formatting memory permanently erases the contents of memory. Photos and video clips cannot be recovered from memory after formatting. Transfer any files that you want to keep to a computer before formatting memory. Zooming the displayed image Magnify an image in playback mode by zooming in on it from 1.0X to 4.0X. -
Page 20: Customizing Your Vq3010 Settings
The setting can be adjusted in 0.3 steps within the range from –1.5 to +1.5 with steps. You can check the result of the compensation by viewing the image on the TFT. White Balance: When the white balance is set to match the light source, VQ3010 can take picture more accurately. - Page 21 Daylight: For recording outdoors on a bright day. Cloudy: For recording outdoors on a cloudy day. Incandescent: For recording indoor lighting conditions. Fluorescent: For recording fluorescent lighting. Sharpness Normal: Sharp: Soft: Resolution Cancel: Exit the present menu. 2048x1536: Take pictures about 3.2M pixels. 1600x1200: pixels.
- Page 22 Date off photo: Do not print the date and time on the picture Language VQ3010 offers eight languages for you to choose. Cancel: Exit the present menu. English: Display the menu items in English. (Default) Le Francais: Display the menu items in French.
-
Page 23: Playback Function Menu
Playback Function Menu When user slide the Function switch to can turn on playback function menu. Press the ▲ or ▼ button to change the current selected setting, press the ◄ or ► button to enter the next menu. Press the OK button to confirm the setting and return to playback status. Delete Cancel: Exit the present menu. -
Page 24: Installing Vq3010 Driver And Software
9. Installing VQ3010 Driver and Software In order to download your photos to your computer, you must Install: • Installing Driver 1. Turn on the computer. 2. Insert installation CD into the CD-ROM drive and the installation CD menu will appear. -
Page 25: Uninstalling Software And Vq3010 Driver
10. Uninstalling Software and VQ3010 Driver Following instruction will guide you to uninstall (remove) software from computer. • Uninstalling Software 1. Click "Start" from the task bar and choose "Settings" -> "Control Panel". (For Windows XP: "Start" -> "Control Panels") 2. -
Page 26: Downing Images To Your Computer
For Windows 98/me customers: Please install VQ3010 driver before connecting. 1. Turn the camera and computer on, then connect VQ3010 to the computer with the included USB cable, and then slide the Function switch to ► (Playback Function) 2. “USB Mass Storage device” appears on the computer screen. -
Page 27: Arcsoft Photoimpression
12. ArcSoft PhotoImpression 5 Click “Start” “Program” PhotoImpression 5 or double click PhotoImpression 5 icon on the desktop and you will see a window as the screenshot above. Select the picture source. For example: 1. Click “Folder” from your computer 2. Select the file path. 3. You can start editing them. ArcSoft PhotoImpression 5 is a complete digital image editing application designed with real people in mind. -
Page 28: Arcsoft Videoimpression
1. Get Photo – Choose how to view or acquire photos. 2. Enhance – Crop, brighten, rotate, resize and modify photos. 3. Create – Add clip art, special effects, frames and more. 4. Project – Make calendars, photo books and greeting cards. 5. - Page 29 and swap components, add and remove them, alter audio, etc. Create a Video – Create a new video project. You can retrieve media materials from the device connected or choose media files from system folder. You can choose video materials from your photo album as well. Create a Slide Show –...
- Page 30 1. Media - Select the videos and images that will comprise your final movie or slide show. 2. Edit - Modify video and image color and adjust the duration of each movie component. Only available for video projects. 3. Effects - Add neat special effect transitions between each component, or apply a pre-made theme.
-
Page 31: Using Vq3010 In Pc-Cam Mode
14. Using VQ3010 in PC-Cam Mode VQ3010 offers two USB modes: Removable Disk (MSDC) and PC Camera. Note: Please install VQ3010 driver before you can use the camera in PC-Cam. Setting Up PC-Cam 1.Turn the camera power on and slide the Function switch to 2. -
Page 32: Checking The Connection Of Your Vq3010
15. Checking the Connection of Your VQ3010 For Windows 98/Me only Double click “My Computer” icon -> Control Panel -> System -> Device -> Manager -> Imaging Device; when you See "Icatch(IV) Still Camera Device"& "Icatch(IV) Video Camera Device" that means now the camera is installed. -
Page 33: Internet Video Conferencing
16. Internet Video Conferencing To run a video conference with another person, you and the other person must have the computer station configured with web camera, microphone, speakers, modem and have access to the Internet. You have to download video conference software, purchased or free, such as basic software like I-phone, Microsoft NetMeeting or Yahoo Messenger. -
Page 34: Appendix
A1: No, when taking pictures, it is important that you use batteries. Also, you have to remember to charge the batteries before operating your VQ3010. Q2: I am not very familiar with VQ3010 and usually my pictures turn out blurred. Is there any way I can better focus my camera? A2: Yes, please locate the Macro Switch on the camera lens. -
Page 35: Troubleshooting
Problem Source The VQ3010 is The power is not on not running The batteries were not inserted properly Batteries are depleted The SD card slot/battery cover is not closed properly The camera is not The camera is in the taking pictures. - Page 36 Problem Source Picture is not The lens is dirty clear The pictures are Hands were not steady blurred when taking the picture The picture subject was not in the focus range of the camera The flash doesn't The flash mode is set to fire The computer Camera power is off...
-
Page 37: Safety Precautions
Precautions for The camera Do not shoot while driving or walking, otherwise it may cause traffic accident. Do not trigger the flash in close proximity to human or animal eyes. Expose to the intense light produced by the flash may damage eyesight, especially for young children, please shoot at least one meter (39 inches) away when using the flash. - Page 38 or electronic shock. Do not operate this camera with wet hands. This could pose a risk of electronic shock. Under the environment with electrostatic discharge, the camera may malfunction and require the user to reset the camera. Under the environment with electrical fast transient (EFT), the camera may lose function and require user to reset the camera.
- Page 39 Precautions for Batteries Dispose of the batteries in a manner that complies with applicable laws. Leakage, overheating, or burst batteries could result in fire or injury. Do not short circuit, heat or dispose the batteries on fire. Do not use old batteries with new ones, or mix brands of battery. Ensure the batteries are positioned correctly with regard to polarity (+/-).
-
Page 40: Specifications
Support Image Download for RedHat Linux 8.0 and MAC OS 9 or Later Power 2 AAA 1.5V Alkaline Batteries (included) Software Application ArcSoft PhotoImpresssion 5 & ArcSoft VideoImpression 2 Accessories Software CD, USB Cable, User’s Manual 2006 Vistaquest Corporation ○ Specifications 7pictures 15 pictures 20 pictures 75 pictures www.vistaquestusa.com...
Need help?
Do you have a question about the VQ3010 and is the answer not in the manual?
Questions and answers