Advertisement
Quick Links
1. Introduction
1.1 Acknowledgement
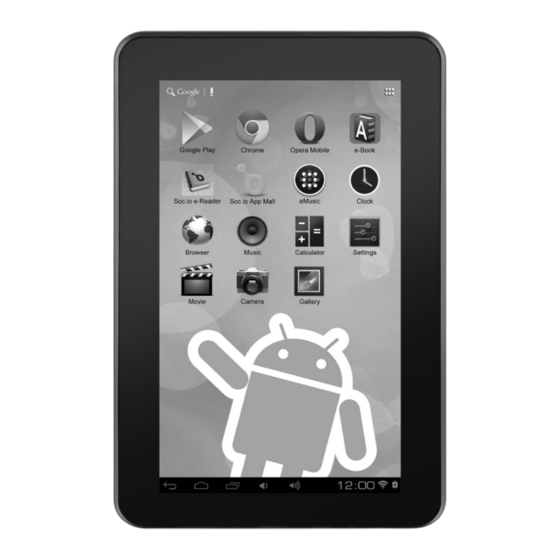
Thanks for your purchase of our product. The product is MID (Mobile
Internet Device), it is a high end product, with with a touch screen which
resolution of 800x480 pixel. It is designed with Boxchip A13 high speed
processor and 512RAM, and 4GB flah. The operating system is Android 4.0.
The product is built in WIFI module, front camera, it is easy to complish
internet function, it can be viewed high definition video and photos, it can
also support camera shooting and video shooting function. Besides, it is
available for many office and entertnaimnet applications. Brand new
operation interface will provide you with diferent enjoyment.
The manual systemically introduces the functions, use techniques and
announcements, please read this manual carefully before your operation.
1.2 Announcements
Preventive maintainance
Please always keep the MID dry. To avoid the device short trouble, corrosion
fault and electric short, please prevent the device, battery and charger from
water and moisture, and don't operate the device or charger by wet hand.
To avoid failure of device, battery and charger, please prevent the device,
battery, charger from violent shock or shake.
To avoid failure of device, battery and charger, please prevent the device,
battery, charger of all over heating or too cold circumstance
Never shock, throw, prod the MID, or drop, extrude, bend the MID.
Never disassemble the device and accessories arbitrarily, otherwise the device
and accessories are not in our company warranty scope.
1
Advertisement

Subscribe to Our Youtube Channel
Related Manuals for Zeki TBDG773B


Summary of Contents for Zeki TBDG773B
- Page 1 1. Introduction 1.1 Acknowledgement Thanks for your purchase of our product. The product is MID (Mobile Internet Device), it is a high end product, with with a touch screen which resolution of 800x480 pixel. It is designed with Boxchip A13 high speed processor and 512RAM, and 4GB flah.
- Page 2 1.3 Safety Instruction Before the operation of the MID, please read this chapter and teach your kids about these information. For further details, please refer to the safety instructions and announcement. Never use the MID when driving car, in order to ensure safe driving. ...
- Page 3 1.4 Abbreviation/Terminology Abbreviation/Terminology Full Name Description Mobile Internet Device mobile internet terminal WIFI Wireless Fidelity Base on IEEE 802.11b/g standard wireless LAN TransFlash Alternative name is Micro SD , super miniature memory card 2 MID Introduction 2.1 MID Accessories Introduction Package: Below items are included in your MID package, please confirm: ...
- Page 4 2.3 MID Status and Reminder Reminder icons: When some remind message appears in your reminder window, please click column and slip the screen to open the reminder list. Choose the menu you need, and confirm the information. Then you can close the reminder window through clicking the column to slide up.
- Page 5 keys function description: ①Rear Camera:You can take photos and videos etc.. ② Touch screen:You can click and drag in the touch screen. ③ MENU/ Volume-:Press the key for a short time, it will display the operation menu .Or by long pressing it to 2 seconds , you can enlarge the volume. ④...
- Page 6 Picture 3-1 3.3 Open and Close the Screen Screen will be closed on its own when no operation happens. 1. Screen will be closed on its own if no operation happens for some time to save battery power. 2. When screen is open, press Power key, the screen will be closed immediately.
- Page 7 Picture 3-2 Picture 3-3 3.4 Usage of Touch Screen MID operating methods There are many methods to view the main screen, menu and applications of your MID. Click...
- Page 8 When you want to use the screen keyboard input or choose application in the main interface, you only need to touch it by finger. Press on If you want to open some item( textbox or the link in the webpage), or shortcut and main procedure move, you can press on this item.
- Page 9 Main menu screen will show all the applications as below Picture 3-4. You can use applications, shortcut and define your main interface wallpapers. Search column Dynamic wallpaper Battery volume Return time Home Menu key Remind information Picture 3-4 Extensible homepage interface Homepage will extend to exceed the screen to offer more space, you can place newly increased shortcuts, widgets.
- Page 10 Picture 3-5 Shortcut icons management of desktop applications System below Android 2.3has the function of creating folder in the desktop, and put the icons in the folder. Android 4.0 systemmake the folder creation more simple. The steps are as below: 1.
- Page 11 Picture 3-6 Picture 3-7 Delete the icons in the desktop 1. Click and hold the icon needs to delete, the top left will show the icon. 2. Draw the icon to the upper of the DELETE icon till the icon turns to red, then move your ginger to delete.
- Page 12 1. Click and hold the blank space in main screen, it will popup the window to change the wallpaper. 2. Click the photo gallary or wallpapers gallary to choose photo. 3.5 Visit Application Procedures How to visit the application procedure of MID: 1.
- Page 13 reminder to learn how to open the board. 2. In the remind board, click USB is connected, then touch to open USB memory device, as Picture 3-9. 3. Now USB is well connected. Picture 3-9 Copy the file into memory card 1.
- Page 14 According to the preset, MID will display Android keyboard 1. According to the preset, MID will display Android keyboard In the main interface, touch setting application, click language and input method. 2. In the text setting area, it will list all the input methods you MID has installed.
- Page 15 3.9 Application Technique Enter into the widgets interface window Click the window wigdet on the top of the screen in the application interface or left slide the screen, it will turn to the window widgets interface. Long click any component to turn to shortcut, and you can enter into application through the shortcut.
- Page 16 Click display. Click brightness when the menu popup. It will popup setting board, left and right slide the brightness bar to adjust the brightness. Click OK. Adjust screen standby time 1. Click Setting application procedure in the main interface. 2.
- Page 17 Picture 4-1 Set unlock PIN code Click setting application in the main interface. Click confirm. Click screen locked. Choose PIN when it popup text setting area. Enter new PIN code and click continue. Enter new PIN code again and choose OK. setting unlock password 1.
- Page 18 2. Click memory. 3. View the available spce in SD card. 4. View MID internal memory space. Remove SD card safely Remove the SD card safely can prevent the SD card and extend the SD lifetime. 1. Click setting application in main interface. 2.
- Page 19 3. Click language, and select the language you want, slide down to search more language. 4.6 About Tablet View the MID Status 1. Click Seting application procesure. 2. Click About Tablet, you can view the electric volume, status messages and so on. System update 1.
- Page 20 Supported video formats TS/TP H264 MPRC-4 RMVB DIVX MPEG-2 Supported photo formats JPEG 5.2 Music You music can be divided into four types: artists, album, and music and play list. Choose a type to view the list.
- Page 21 Artis pause Album Next song Music Previous Music song total time Played time Picture 5-1 Play progress bar Visit and play music 1. Click music in the main interface. 2. Enter to select music and click artist, album and play list. 3.
- Page 22 1. Click gallery application. 2. MID refresh all video files. 3. Click the file you want play. 4. Enter into play picture to play. Note: choose related player list, (if there is many ways of player). 5.4 Photo gallery Photo gallery application can be search into SD card memory card and video file, and photo gallery will devide the photos and video photo, you can use the photo gallery application to view and edit phot, and set the desktop and view photo.
- Page 23 5. Click cancel return to photo scan if you want give uo shaving. Edit Click menu key, it will display menu. Click edit. Set brightness, style and result setting in the selection popup. Click save. Click return key to give up editing in the popup box. 5.5 Camera Open the camera You can open the camera through below two ways:...
- Page 24 switch front and rear camera Picture 5-2 Take photos 1. open camera, make sure your device is in camera mode, screen will display camera icon, as below picture shown: 2. Aim at the target you want take photos. 3. Touch blue button to take photos.
- Page 25 Remind: The photos and videos will save automatically. You can view the photos and videos you have recorded. If you want view more photos and videos you can slide left and right. When you view the photos, move together or separetly to zoom in or out the photos or double touch the screen.
- Page 26 6. Enter into WI-FI interdface, click WI-FI button. 7. MID will auto scan available WI-FI internet. As Picture 6-1. 8. Select the WI-FI you want to connect, if there is any password window, enter into the password, click Connect to finish. Picture 6-1 6.2 Email Email setting...
- Page 27 Picture 6-2 Note: before starting email setting guide, please ensure your internet is well connected. Email seting guide 1. Enter into main interface, as Picture 6-2 2. Click email icon, it will popup email setting guide to help you to set, as Picture 6-3.
- Page 28 Picture 6-3 Delete email account You can delete the set POP3 or IMAP email account from your MID. 1. Click email. 2. Enter into your inbox. 3. Touch menu key. 4. Click setting. 5. Touch your account via your finger. 5.
- Page 29 7 Internet 7.1 Browser open and use internet browser Touch browser icon in main screen or all application screen. Broswer will open the previous webpage you visit, ig you haven’t use browser, it will open your main webpage. When you touch any internet connection (for example, emial or chatting internet), it will open the browser.
- Page 30 Address Picture 7-1 View the webpage Open the webpage as Picture 7-1, click address column to input address, click starrt, enter into related webpage to view corresponding website information, you can slide your finger in the screen to browse and view the other parts of the webpage.
- Page 31 1. Go to any webpage in browser interface. 2. click menu key and click save to bookmark. 3. Edit bookmark and click OK. Open bookmark 1. Click menu and bookmark in browser interface. 2. Click the bookmark you want to open the webpage. ...
- Page 32 Picture 8-1 8.2 Calculator 1. Click calculator in the application interface. 2. Enter into the basic board of calculator. 3. Click menu key , then click advanced board. 4. Touch the number or operator in the calculator. 5. Operate advanced noard as above operations can switch into basic board.
- Page 33 1. In the main interface, touch file browser button enter into file browser interface, as Picture 8-2. 2. Touch button in the top of file browser 3. Open the file, you can view the file in SD card, as Picture 8-4 Picture 8-2 9 Installation of Application Procedures 9.1 Installation...
- Page 34 Popup installation, clicks install APK. You can operate after installation guide. Note: The third party procedures searched from internet to use on the system are all suffixed with .APK 9.2 Uninstall Uninstall application procedure Click setting in main interface. Click application procedure, it will list all the application list. Select the application you want to uninstall, click uninstall.
- Page 35 MID cannot connect the WiFi. Make sure the wireless router works well. The distance between the MID and the wireless router should be within 50-100m and there is no wall or other barriers btween them. Please make sure the user and the password are correct. 4.
-
Page 36: Fcc Statement
FCC STATEMENT: This device complies with Part 15 of the FCC Rules. Operation is subject to the following two conditions: (1) This device may not cause harmful interference, and (2) This device must accept any interference received, including interference that may cause undesired operation.
Need help?
Do you have a question about the TBDG773B and is the answer not in the manual?
Questions and answers