
Summary of Contents for TiGHT AV SW-H411AU-BYOD
- Page 1 User Manual SW-H411AU-BYOD 18G 4x1 Presentation Switcher with Soft Codec & Wireless BYOD All Rights Reserved Version: SW-H411AU-BYOD_2021V1.2...
- Page 2 18G 4x1 Presentation Switcher Preface Read this user manual carefully before using the product. Pictures shown in this manual are for reference only. Different models and specifications are subject to real product. This manual is only for operation instruction, please contact the local distributor for maintenance assistance.
- Page 3 18G 4x1 Presentation Switcher SAFETY PRECAUTIONS To ensure the best from the product, please read all instructions carefully before using the device. Save this manual for further reference. Unpack the equipment carefully and save the original box and packing material for possible future shipment.
-
Page 4: Table Of Contents
18G 4x1 Presentation Switcher Table of Contents 1. Product Introduction ..................... 1 1.1 Features ......................1 1.2 Package List ....................... 2 2. Specification ........................ 3 3. Panel Description ......................5 3.1 Front Panel ......................5 3.2 Rear Panel ......................6 4. -
Page 5: Product Introduction
18G 4x1 Presentation Switcher 1. Product Introduction Thanks for choosing the 18G 4x1 Presentation Switcher. The switcher is designed with one wireless Miracast/Airplay input, two HDMI inputs, one USB-C input and one HDMI output. It supports HDMI 2.0b, 4Kx2K@60Hz 4:4:4, HDR 10, Dolby Vision, and HDCP 2.2. -
Page 6: Package List
18G 4x1 Presentation Switcher 1.2 Package List l 1x SW-H411AU-BYOD 18G 4x1 Presentation Switcher l 2x Mounting Ears with 4 Mounting Screws l 4x Plastic Cushions l 1x 5-pin Terminal Block l 1x RS232 Cable (3-pin terminal block to DB9) -
Page 7: Specification
18G 4x1 Presentation Switcher 2. Specification Video Video Input (1) AirPlay/Miracast, (2) HDMI, (1) USB-C (1) External antenna connector, (2) Type-A female HDMI, Video Input Connector (1) Type-C USB 3.0 AirPlay/Miracast Input Resolution Up to 4K@30Hz 4:4:4 HDMI Input Resolution Up to 4Kx2K@60Hz 4:4:4 HDR10, Dolby Vision USB-C Input Resolution Up to 4K@30Hz 4:4:4... - Page 8 18G 4x1 Presentation Switcher (1) Micro-USB, (2) Type-B USB 3.0, (2) Type-A USB 3.0, Control Connector (1) 3-pin terminal block Network Connectivity WLAN Standards IEEE 802.11ac Band 2.4 and 5GHz ≤5m, environment dependent, reduce disturbance to Max. Wireless Coverage increase transmission distance up to 10m Max.
-
Page 9: Panel Description
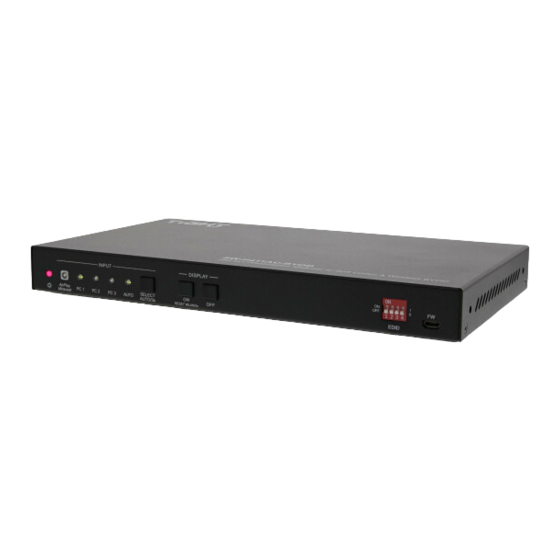
18G 4x1 Presentation Switcher 3. Panel Description 3.1 Front Panel ① POWER LED: The LED illuminates red when power is applied. ② Four Input LEDs: The LED illuminates orange when there is video signal on its corresponding input channel and it will be off when there is no signal detected. It will illuminate green when the video signal is chosen as input source. -
Page 10: Rear Panel
18G 4x1 Presentation Switcher 3.2 Rear Panel PC 1 PC 2 PC 3 HDMI OUT ① Miracast/Airplay Input: Connect to the external antenna. ② PC1~PC2: Two type-A female HDMI input ports to connect HDMI source devices. ③ PC3: Type-C USB with charging capability to connect the Macbook or other device with USB-C output. -
Page 11: System Connection
18G 4x1 Presentation Switcher 4. System Connection 4.1 Usage Precaution Make sure all components and accessories included before installation. System should be installed in a clean environment with proper temperature and humidity. All of the power switches, plugs, sockets, and power cords should be insulated and safe. -
Page 12: Miracast/Airplay Connection
Below shows iPhone, Samsung Android and Win10 Notebook as examples to introduce the connection of wireless projection. When switched to the Miracast/Airplay input by pressing the SELECT AUTO/3s button, the Wi-Fi SSID and password will be showed on the display device. SSID: SW-H411AU-BYOD XXXXXX Password: 12345678... - Page 13 18G 4x1 Presentation Switcher iPhone example: Connect the Apple iPhone to the Wi-Fi. Slide the iPhone screen to enter Control Center, and click the Screen Mirroring, and then click the SSID for screen mirroring.
- Page 14 18G 4x1 Presentation Switcher Samsung Android example: Slide down the Android screen and click Smart View, then click the SSID for screen mirroring. Note: Due to the version upgrade of the YouTube APP, user might experiencing compatibility issue of using the YouTube APP on iOS/Android devices, alternatively, the YouTube web page application is recommended.
- Page 15 18G 4x1 Presentation Switcher Win10 Notebook example: Press Winkey + P on keyboard, and then click Connect to a wireless display in the pop-up window. Click the SSID for screen mirroring.
- Page 16 18G 4x1 Presentation Switcher The Web UI designed for the SW-H411AU-BYOD allows for settings of the device. The Web UI page can be accessed by typing in http://192.168.203.1 in a web browser User name: admin Password: 000000 Please type the user name and password, and then click fingerprint icon to enter the...
- Page 17 18G 4x1 Presentation Switcher...
- Page 18 18G 4x1 Presentation Switcher Click on the “<” symbol to enter the below setting section.
- Page 19 18G 4x1 Presentation Switcher...
- Page 20 18G 4x1 Presentation Switcher Resolution Selection:...
- Page 21 18G 4x1 Presentation Switcher Display Mode Setting:...
- Page 22 18G 4x1 Presentation Switcher Language Setting:...
- Page 23 18G 4x1 Presentation Switcher Hide Password Setting: When select “ON”, the password will not be showed on the display device.
- Page 24 18G 4x1 Presentation Switcher Device Name Setting:...
- Page 25 18G 4x1 Presentation Switcher Broadcast SSID Setting: When select “OFF”, the SSID will not be found by wireless source device, but it can be connected by manually adding a new network.
- Page 26 18G 4x1 Presentation Switcher Compatible Mode Setting: When select “ON”, the system is compatible with more wireless source devices.
- Page 27 18G 4x1 Presentation Switcher WiFi Channel Setting:...
- Page 28 18G 4x1 Presentation Switcher AirPlay Setting:...
- Page 29 18G 4x1 Presentation Switcher AirPlay Setting:...
- Page 30 18G 4x1 Presentation Switcher Firmware Upgrade: Check for updating the latest version. Note that an available internet should be connected before starting firmware upgrade.
- Page 31 18G 4x1 Presentation Switcher Device Reboot:...
- Page 32 18G 4x1 Presentation Switcher Reset to Factory Default:...
- Page 33 18G 4x1 Presentation Switcher Modify Password:...
-
Page 34: Front Panel Control
18G 4x1 Presentation Switcher 5. Front Panel Control 5.1 Manual-Switching When the switcher is in the manual switching mode, press the SELECT AUTO/3s button repeatedly to cycle through the four video inputs, and the corresponding source LED illuminates green immediately. 5.2 Auto-Switching Press and hold the SELECT AUTO/3s button at least three seconds to enable auto- switching, and the AUTO LED turns green. -
Page 35: Edid Setting
18G 4x1 Presentation Switcher 5.4 EDID Setting The Extended Display Identification Data (EDID) is used by the source device to match its video resolution with the connected display. The DIP switch on the front panel can be used to set the EDID to a fixed value to ensure the compatibility in video resolution. The switch represents “0”... -
Page 36: Rs232 Control
18G 4x1 Presentation Switcher 6. RS232 Control Connect the RS232 port to control device (e.g. PC) with RS232 cable. The switcher can be controlled by sending RS232 commands. 6.1 RS232 Control Software Installation: Copy the control software file to the control PC. Uninstallation: Delete all the control software files in corresponding file path. - Page 37 18G 4x1 Presentation Switcher The main view is shown as below: Parameter configuration area Monitoring area, show the commands and its feedback information. Command sending area Please set the parameters of COM number, bound rate, data bit, stop bit and the parity bit correctly, and then you are able to send command in command sending area.
-
Page 38: Rs232 Command
18G 4x1 Presentation Switcher 6.2 RS232 Command Communication protocol: RS232 Communication Protocol Baud rate: 9600 Data bit: 8 Stop bit: 1 Parity bit: none 6.2.1 System Control The ending mark of command is “<CR><LF>”. Command & Feedback Command Description Example Query the firmware version firmware:1.0.0 getfirmware... -
Page 39: Source Switching
18G 4x1 Presentation Switcher 6.2.2 Source Switching Command & Feedback Command Description Example Switch video input x x = 1 - 4 1 - input Airplay/Miracast set:x set:x ok 2 - input PC 1 3 - input PC 2 4 - input PC 3 getset Query the video routing set:1... -
Page 40: Cec/Rs232 Function Setting
18G 4x1 Presentation Switcher 6.2.3 CEC/RS232 Function Setting The ending mark of command is “<CR><LF>”. Command & Feedback Command Function Example Enable the function of automatically sending CEC commands. When detecting video input signal or not cecautoon cecauto:on ok detecting any video signal, the switcher will automatically send the corresponding CEC command to control the display device. - Page 41 18G 4x1 Presentation Switcher 6.2.4 Function Setting The ending mark of command is “<CR><LF>”. Command & Feedback Command Description Example Set how many times the display off sendtimes:1 ok sendtimes:x command is sent sendtimes:2 ok z = 1 - 2 Get the number of sending DISPLAY OFF sendtimes:1 gettimes...
-
Page 42: Special Commands
18G 4x1 Presentation Switcher 6.2.5 Special Commands Note: The below commands don’t need ending mark. Command & Feedback Command Description Example Set the ASCII RS232 command XXXX to be sent to control the third-party device when the DISPLAY ON button is pressed. [PARAM1] = 00~06 (Baud Rate) 00 - 115200 01 - 57600... - Page 43 18G 4x1 Presentation Switcher Command & Feedback Command Description Example Set the ASCII RS232 command XXXX to be sent to control the third-party device when the DISPLAY OFF button is pressed. [PARAM1] = 00~06 (Baud Rate) 00 - 115200 01 - 57600 02 - 38400 sendasciioff,y,z:xxx 03 - 19200...
-
Page 44: Firmware Upgrade
18G 4x1 Presentation Switcher 7. Firmware Upgrade Please follow the steps as below to upgrade firmware by the FW port on the rear panel: 1) Prepare the latest upgrade file (.bin) and rename it as “FW_MERG.bin” on PC. 2) Power off the switcher and connect the FW port of switcher to the PC with USB cable.
Need help?
Do you have a question about the SW-H411AU-BYOD and is the answer not in the manual?
Questions and answers