
Related Manuals for LG DT21WS


Summary of Contents for LG DT21WS
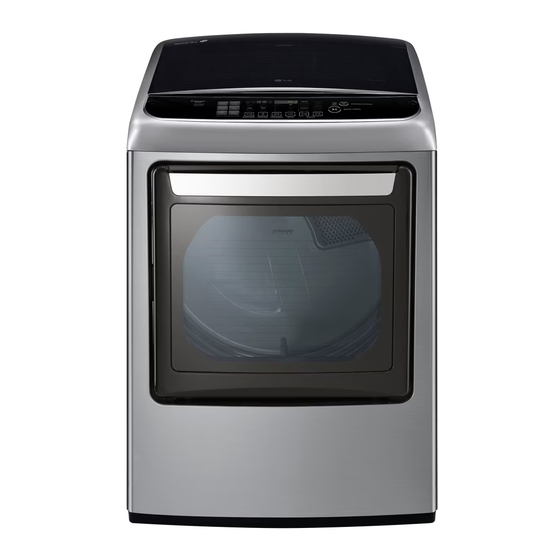
- Page 1 OWNER’S MANUAL DrYer Please read this owner’s manual thoroughly before operating and keep it handy for reference at all times. Dt21WS www.lg.com MFL67731084...
-
Page 2: Table Of Contents
TABLE OF CONTENTS TABLE OF CONTENTS HOW TO USE IMPORTANT SAFETY INSTRUCTIONS operating the Dryer What to Do if You Smell GaS cycle Guide BaSic SafetY PrecautionS Sorting loads GrounDinG inStructionS loading the Dryer SafetY inStructionS for inStallation check the lint filter Before every load SafetY inStructionS for connectinG cycle Settings and options electricitY... -
Page 3: Important Safety Instructions
IMPORTANT SAFETY INSTRUCTIONS IMPORTANT SAFETY INSTRUCTIONS READ ALL INSTRUCTIONS BEFORE USE WARNINg For your safety, the information in this manual must be followed to minimize the risk of fire or explosion, electric shock, or to prevent property damage, injury to persons, or death. Your safety and the safety of others is very important. -
Page 4: Basic Safety Precautions
IMPORTANT SAFETY INSTRUCTIONS IMPORTANT SAFETY INSTRUCTIONS READ ALL INSTRUCTIONS BEFORE USE WARNINg For your safety, the information in this manual must be followed to minimize the risk of fire or explosion, electric shock, or to prevent property damage, injury to persons, or death. BASIC SAFETY PRECAUTIONS WARNINg To reduce the risk of fire, electric shock, or injury to persons when using this appliance, follow basic precautions,... -
Page 5: Grounding Instructions
IMPORTANT SAFETY INSTRUCTIONS IMPORTANT SAFETY INSTRUCTIONS READ ALL INSTRUCTIONS BEFORE USE WARNINg For your safety, the information in this manual must be followed to minimize the risk of fire or explosion, electric shock, or to prevent property damage, injury to persons, or death. GROUNDING INSTRUCTIONS This appliance must be grounded. - Page 6 IMPORTANT SAFETY INSTRUCTIONS IMPORTANT SAFETY INSTRUCTIONS READ ALL INSTRUCTIONS BEFORE USE WARNINg For your safety, the information in this manual must be followed to minimize the risk of fire or explosion, electric shock, or to prevent property damage, injury to persons, or death. SAFETY INSTRUCTIONS FOR INSTALLATION WARNINg To reduce the risk of injury to persons, follow all industry recommended safety procedures including the use of long...
-
Page 7: Safety Instructions For Connecting Electricity
IMPORTANT SAFETY INSTRUCTIONS IMPORTANT SAFETY INSTRUCTIONS READ ALL INSTRUCTIONS BEFORE USE WARNINg For your safety, the information in this manual must be followed to minimize the risk of fire or explosion, electric shock, or to prevent property damage, injury to persons, or death. SAFETY INSTRUCTIONS FOR CONNECTING ELECTRICITY WARNINg To reduce the risk of fire, electric shock, or injury to persons when using this appliance, follow basic precautions,... -
Page 8: Product Features
PRODUCT FEATURES PRODUCT FEATURES EASY-TO-USE CONTROL PANEL An entire selection of user-friendly functions make operating the dryer easy. EASY-ACCESS REVERSIBLE DOOR The wide-opening door provides easy access for loading and unloading. The door hinge can be reversed to adjust for installation location. Flow Sense™... -
Page 9: Introduction
INTRODUCTION INTRODUCTION Parts Reversible Terminal Power cord door block location Control access panel (gas panel (Electric models) models) connection Lint filter Exhaust location Leveling duct (gas models) feet outlet Accessories Optional accessories Side vent kit (sold separately) Drying rack Kit No. 383EEL9001B NOTE •... -
Page 10: Control Panel Features
INTRODUCTION Control Panel Features Following are instructions for starting and using your new dryer. Please refer to specific sections of this manual for more detailed information. WARNINg To reduce the risk of fire, electric shock, or injury to persons, read this entire manual, including the Important Safety Instructions, before operating this dryer. -
Page 11: Display
INTRODUCTION Display The display shows the settings, estimated time remaining, options, and status messages for your dryer. When the dryer is turned on, the lights in the display will illuminate. WARNINg To reduce the risk of fire, electric shock, or injury to persons, read this entire manual, including the Important Safety Instructions, before operating this dryer. -
Page 12: Installation Instructions
INSTALLATION INSTRUCTIONS INSTALLATION INSTRUCTIONS PREvIEW INSTALLATION ORDER Checking and Leveling the dryer Venting the dryer choosing the proper location 120V 240V Plugging in the Connecting gas Connecting electric power cord and dryers dryers grounding Press and hold Installation test Test run (Refer to page 27.) -
Page 13: Installation Location Requirements
INSTALLATION INSTRUCTIONS Installation Location Requirements WARNINg Read all installation instructions completely before installing and operating your dryer! It is important that you review this entire manual before installing and using your dryer. Detailed instructions concerning electrical connections, gas connections, and exhaust requirements are provided on the following pages. •... -
Page 14: Leveling The Dryer
INSTALLATION INSTRUCTIONS Clearances (cont.) recommended InstallatIon spacIng for cabInet InstallatIon • For cabinet installation with a door, minimum ventilation openings in the top of the cabinet are required. 7"* (17.8 cm) 7"* (17.8 cm) *Required spacing **For side or bottom venting, 2 inches (5.1 cm) spacing is allowed. -
Page 15: Reversing The Door
INSTALLATION INSTRUCTIONS Reversing the Door WARNINg 4. Remove the 4 screws securing the hinges to the door frame. Remove the two plastic cover caps. Reinstall THE DRYER DOOR IS VERY LARGE AND HEAVY. Failure the hinges and cover caps on the opposite sides from to follow the instructions below can result in damage to which they were removed. -
Page 16: Installing The Side Vent Package
It can also be configured to vent to the bottom or side (right-side venting is not available on gas models). An adapter package, part number 383EEL9001B, Cover may be purchased from your LG retailer. This package Plate contains the necessary duct components to change the ”... -
Page 17: Venting The Dryer
INSTALLATION INSTRUCTIONS venting the Dryer WARNINg To reduce the risk of fire, electric shock, or injury to persons when using this appliance, follow basic precautions, including the following: • Do not crush or collapse ductwork. Failure to follow • Rigid or semirigid metal ducting is recommended for use between the dryer and the wall. - Page 18 INSTALLATION INSTRUCTIONS venting the Dryer (cont.) ductwork MAxIMUM LENGTH CORRECT VENTING NUMBER OF OF 4-INCH (10,2 CM) WALL CAP TYPE 90° ELBOWS DIAMETER RIGID METAL DUCT Recommended 65 ft. (19.8 m) 55 ft. (16.8 m) 4” 47 ft. (14.3 m) (10.2 cm) 36 ft.
-
Page 19: Connecting Gas Dryers
INSTALLATION INSTRUCTIONS Connecting Gas Dryers WARNINg To reduce the risk of fire, electric shock, or injury to persons when using this appliance, follow basic precautions, including the following: • Gas supply requirements: • Connect the dryer to the type of gas shown on As shipped from the factory, this dryer is the nameplate. - Page 20 INSTALLATION INSTRUCTIONS Connecting Gas Dryers (cont.) WARNINg connecting the gas supply 1. Make sure that the gas supply to the laundry room is To reduce the risk of fire, electric shock, or injury turned OFF. Confirm that the type of gas available in to persons when using this appliance, follow basic your laundry room is appropriate for the dryer.
- Page 21 INSTALLATION INSTRUCTIONS Connecting Electric Dryers WARNINg WARNINg To help prevent fire, electric shock, serious injury, To reduce the risk of fire, electric shock, or injury or death, the wiring and grounding must conform to persons when using this appliance, follow basic to the latest edition of the National Electrical Code, precautions, including the following: ANSI/NFPA 70 and all applicable local regulations.
-
Page 22: Connecting Electric Dryers
INSTALLATION INSTRUCTIONS Connecting Electric Dryers (cont.) USA only WARNINg • Use a 30 A / 240 Vca UL-listed power cord with #10 AWG-minimum copper conductor and closed loop or • Connect the power cord to the terminal block. forked terminals with upturned ends. Connect each power cord wire to the terminal block 2. - Page 23 INSTALLATION INSTRUCTIONS Connecting Electric Dryers (cont.) USA only WARNINg • Use UL-listed 4-wire #10 AWG-minimum copper conductor cable. • Connect the power cord to the terminal block. • Allow at least 5 ft. (1.5 m) length to allow for removal Connect each power cord wire to the terminal block and reinstallation of the dryer.
- Page 24 INSTALLATION INSTRUCTIONS Connecting Electric Dryers (cont.) USA only WARNINg • Use a 30 A / 240 V~ UL-listed power cord with #10 AWG-minimum copper conductor and closed loop or • Connect the power cord to the terminal block. forked terminals with upturned ends. Connect each power cord wire to the terminal 2.
- Page 25 INSTALLATION INSTRUCTIONS Connecting Electric Dryers (cont.) USA only WARNINg • Use UL-listed 3-wire #10 AWG-minimum copper conductor cable. • Connect the power cord to the terminal block. • Allow at least 5 ft. (1.5 m) length to allow for removal Connect each power cord wire to the terminal block and reinstallation of the dryer.
-
Page 26: Special Requirements For Manufactured Or Mobile Homes
INSTALLATION INSTRUCTIONS Special Requirements for Final Installation Check Manufactured or Mobile Homes Once you have completed the installation of the dryer and it is in its final location, confirm proper operation Any installation in a manufactured or mobile home must with the following tests and Installation Test (Duct comply with the Manufactured Home Construction and Check) on the following page. -
Page 27: Installation Test (Duct Check)
INSTALLATION INSTRUCTIONS Installation Test (Duct check) 4. Check the display for results. Once you have completed the installation of the dryer, During the test cycle, monitor the Flow Sense™ use this test to make sure the condition of the exhaust display on the control panel. - Page 28 INSTALLATION INSTRUCTIONS Installation Test (Duct check) (cont.) • Check the error code before you call for service Error Code Possible Causes Solutions • Temperature sensor failure • Turn off the dryer and call for tE1 or tE2 service. • Humidity sensor failure. •...
-
Page 29: How To Use
HOW TO USE HOW TO USE Operating the Dryer Clean the Lint Filter If the lint filter has not already been cleaned, lift out the filter and remove the lint from the last load. This will help ensure the fastest and most efficient drying performance. -
Page 30: Cycle Guide
Sensor dry cycles utilize LG’s unique dual sensor Use manual dry cycles to select a specific amount of system to detect and compare the moisture level drying time and a drying temperature. When a manual... -
Page 31: Sorting Loads
HOW TO USE Following are instructions for starting and using your new dryer. Please refer to specific sections of this manual for more detailed information. Sorting Loads Check the Lint Filter Before Every Load fabric care labels Most articles of clothing feature fabric care labels that Always make sure the lint filter is clean before starting a include instructions for proper care. -
Page 32: Cycle Settings And Options
HOW TO USE Cycle Settings And Options Sensor dry cycles have preset settings that are selected Your dryer features several additional cycle options to automatically. Manual dry cycles have default settings, customize cycles to meet your individual needs. Certain but you may also customize the settings using the cycle option buttons also feature a special function (see the setting buttons. -
Page 33: Special Functions
HOW TO USE Cycle Settings And Options (cont.) Custom Program damp dry signal If you have a special combination of settings that you use frequently, you can save these settings as a Custom With this option, the dryer will signal when the load is approximately 80% dry. -
Page 34: Before Using The Tag On Function
To use the Tag On function: 1. Download the LG Smart Laundry&DW Global App to your smart phone. 2. Turn on the NFC (Near Field Communication) function The Tag On guide in your smart phone. -
Page 35: Tag On
2. Select ‘Tag On’ . - Home card and icons at the bottom of the screen are all available to use. ※ Images are for reference only. The actual LG Smart Laundry&DW Global application may be different. 3. Select ‘Tag On Diagnosis’ . - Page 36 4. Enter your phone number in the field. Use this phone number when talking to the LG customer service representative for them to find your Smart Diagnosis data. ※ Images are for reference only. The actual LG Smart Laundry&DW Global application may be different.
- Page 37 HOW TO USE Tag On cycles download using Lg Smart Laundry&DW global application 5 Select a cycle to download. 1. Install ‘LG Smart Laundry&DW Global’ application - You can also check the existing on a NFC-equipped smartphone. cycles already downloaded.
- Page 38 Guide 2. Select ‘Laundry Stats’ . about Exhaust check. ※ Images are for reference only. The actual LG Smart Laundry&DW Global application may be different. 4. Touch the Tag On logo. - When a Tag On screen appears...
- Page 39 HOW TO USE Laundry Stats (Run Cycle Again) using Lg Smart Laundry&DW application 4. Check whether washing 1. Select ‘Dryer Diary’ on the starts with the selected cycle. Laundry Stats screen. - The screen as shown below - Select ‘Dryer Diary’ at the...
- Page 40 (This might happen due to the different NFC antenna positions for each ※ Images are for reference only. The actual LG Smart phone.) Laundry&DW Global application may be different. 4. Select a laundry category based on the issue you want the machine to focus on.
-
Page 41: Maintenance
MAINTENANCE MAINTENANCE Regular Cleaning cleaning the lint filter Always clean the lint from the filter after every cycle. WARNINg To reduce the risk of fire, electric shock, or injury to persons when using this appliance, follow basic precautions, including the following: •... -
Page 42: Troubleshooting
TROUBLESHOOTINg TROUBLESHOOTING Before Calling For Service Your dryer is equipped with an automatic error-monitoring system to detect and diagnose problems at an early stage. If your dryer does not function properly or does not function at all, check the following before you call for service. - Page 43 TROUBLESHOOTINg Before Calling For Service (cont.) Problem Possible Causes Solutions Clothes are • Clothes dried too long • Overdrying a load of laundry can lead to wrinkled clothes. (overdried). Try a shorter drying time, and remove items while they wrinkled still retain a slight amount of moisture.
-
Page 44: Specifications
• Keep the area around the dryer clean and free of clutter. • Check vent hood for damage or lint clogging. • Make sure the area around the vent hood is clear. SPECIFICATIONS Models DT21WS Description Dryer Electrical requirements 120 V~ 60 Hz 400 W Gas requirements NG 4-10.5 inches WC... -
Page 45: Using Smart Diagnosis
Should you experience any problems with your dryer, it has the capability of transmitting data to your Smart Phone using the LG Smart Laundry Application or via your telephone to the LG call center. Smart Diagnosis™ cannot be activated unless your dryer is turned on by pressing the POWER button. If your dryer is unable to turn on, then troubleshooting must be done without using Smart Diagnosis™. - Page 47 ManUal de PRoPieTaRio secadora lea este manual de usuario detenidamente antes de la utilización y guárdelo a mano para futuras consultas. dt21Ws www.lg.com...
- Page 48 Tabla de conTenidos Tabla de conTenidos insTRUcciones iMPoRTanTes de cÓMo UsaR seGURidad Funcionamiento de la secadora guía de ciclos Qué hacer si huele gas clasificación de cargas Precauciones básicas de seguridad cómo cargar la secadora instrucciones de conexión a tierra revise el filtro de pelusa antes de cada uso instrucciones imPortantes Para la configuraciones del ciclo y opciones...
-
Page 49: Instrucciones Importantes De Seguridad
insTRUcciones iMPoRTanTes de seGURidad insTRUcciones iMPoRTanTes de seGURidad LEA TODAS LA INSTRUCCIONES ANTES DE USAR adveRTencia Por su seguridad, debe seguir la información indicada en este manual para minimizar el riesgo de incendio o explosión, descarga eléctrica, o para prevenir daños a la propiedad, lesiones personales o muerte. Su Seguridad y la de los demás son de suma importancia. -
Page 50: Precauciones Básicas De Seguridad
insTRUcciones iMPoRTanTes de seGURidad insTRUcciones iMPoRTanTes de seGURidad LEA TODAS LA INSTRUCCIONES ANTES DE USAR adveRTencia Por su seguridad, debe seguir la información indicada en este manual para minimizar el riesgo de incendio o explosión, descarga eléctrica, o para prevenir daños a la propiedad, lesiones personales o muerte. PRECAUCIoNES báSICAS dE SEGURIdAd adveRTencia Para minimizar el riesgo de incendio o explosión, descarga eléctrica, o para prevenir lesiones personales cuando use... -
Page 51: Instrucciones De Conexión A Tierra
insTRUcciones iMPoRTanTes de seGURidad insTRUcciones iMPoRTanTes de seGURidad LEA TODAS LA INSTRUCCIONES ANTES DE USAR adveRTencia Por su seguridad, debe seguir la información indicada en este manual para minimizar el riesgo de incendio o explosión, descarga eléctrica, o para prevenir daños a la propiedad, lesiones personales o muerte. INStRUCCIoNES dE CoNExIóN A tIERRA Este electrodoméstico deberá... - Page 52 insTRUcciones iMPoRTanTes de seGURidad insTRUcciones iMPoRTanTes de seGURidad LEA TODAS LA INSTRUCCIONES ANTES DE USAR adveRTencia Por su seguridad, debe seguir la información indicada en este manual para minimizar el riesgo de incendio o explosión, descarga eléctrica, o para prevenir daños a la propiedad, lesiones personales o muerte. INStRUCCIoNES ImPoRtANtES PARA LA INStALACIóN adveRTencia Para reducir el riesgo de lesiones personales, cumpla con todos los procedimientos de seguridad recomendados...
-
Page 53: Instrucciones Importantes Para Conectar La Electricidad
insTRUcciones iMPoRTanTes de seGURidad insTRUcciones iMPoRTanTes de seGURidad LEA TODAS LA INSTRUCCIONES ANTES DE USAR adveRTencia Por su seguridad, debe seguir la información indicada en este manual para minimizar el riesgo de incendio o explosión, descarga eléctrica, o para prevenir daños a la propiedad, lesiones personales o muerte. INStRUCCIoNES ImPoRtANtES PARA CoNECtAR LA ELECtRICIdAd adveRTencia Para reducir el riesgo de incendio, descargas eléctricas o heridas al usar su electrodoméstico, siga las precauciones... -
Page 54: Características Del Producto
caRacTeRÍsTicas del PRodUcTo caRacTeRÍsTicas del PRodUcTo Panel de conTRol FÁcil PaRa UsaR Una amplia selección de funciones sencillas de usar para facilitar la operación de la secadora. acceso Facil GRacias a sU PUeRTa ReveRsible La amplia puerta provee acceso para carga y descarga. Se puede invertir el sentido de la puerta para adaptarlo al lugar de la instalación. -
Page 55: Introducción
inTRodUcciÓn inTRodUcciÓn Partes Puerta Panel de Ubicación reversible acceso del del cable Panel de bloque eléctrico control terminal (Modelos a (Modelos gas) eléctricos) Ubicación de la toma de Filtro de gas (Modelos salida del pelusa Patas a gas) conducto niveladoras de escape accesorios Accesorios opcionales... -
Page 56: Características Del Panel De Control
inTRodUcciÓn características del panel de control A continuación encontrará instrucciones para comenzar a usar su secadora nueva. Para más información por favor consulte las secciones específicas de este manual. adveRTencia Para reducir el riesgo de incendios, descargas eléctricas o heridas, lea este manual en su totalidad, incluyendo las Instrucciones Importantes de Seguridad, antes de operar la secadora. -
Page 57: Pantalla
inTRodUcciÓn Pantalla La pantalla muestra los ajustes, el tiempo restante estimado, las opciones y los mensajes de estado correspondientes a su secadora. Cuando la secadora está encendida, se iluminarán las luces del visualizador. adveRTencia Para reducir el riesgo de incendios, descargas eléctricas o heridas, lea este manual en su totalidad, incluyendo las Instrucciones Importantes de Seguridad, antes de operar la secadora. -
Page 58: Instrucciones Para La Instalación
insTRUcciones PaRa la insTalaciÓn insTRUcciones PaRa la insTalaciÓn Vista previa del orden de instalación comprobación nivelación de la ventilación de la y elección de la secadora secadora ubicación adecuada 120 v~ 240 v~ conexión del enchufe y la conexión de secadoras cómo conectar las toma de tierraa a gas... -
Page 59: Requisitos Del Lugar De Instalación
insTRUcciones PaRa la insTalaciÓn Requisitos del lugar de instalación adveRTencia Siga las instrucciones de funcionamiento y cuidado incluidas en este manual y conseguirá que su secadora ofrezca un servicio fiable y duradero. Es importante que revise todo este manual antes de instalar y usar su secadora. -
Page 60: Nivelación De La Secadora
" 5"** (73,4 cm) (2,54 cm) (68,6 cm) (2,54 cm) insTRUcciones PaRa la insTalaciÓn (12,7 cm) (7,6 cm) " (127,5 cm) espacios de instalación (cont.) Separación recomendada para la inStalación en un habitáculo cerrado • AL REALIzAR LA INSTALACIóN EN UN hAbITÁCULO CERRADO DEbE hAbER SALIDAS DE vENTILACIóN MíNIMAS EN LA PARTE SUPERIOR E INFERIOR DEL LUGAR. -
Page 61: Inversion De La Puerta
insTRUcciones PaRa la insTalaciÓn inversion de la puerta adveRTencia 4. Retire los 4 tornillos fijando las bisagras a la estructura de la puerta. Retire los dos rellenadores de plástico. LA PUERTA DE LA SECADORA ES MUY GRANDE Y Vuelva a instalar las bisagras y los rellenadores en los PESADA. -
Page 62: Instalación Del Paquete De Ventilación Lateral
Puede adquirirse el paquete adaptador, número de pieza Cover 383EEL9001b, de su distribuidor LG. Este paquete contiene Plate los componentes de conducto necesarios para cambiar la ubicación de la ventilación de la secadora. -
Page 63: 17 Cónexión Del Conducto De Ventilación De La Secadora
insTRUcciones PaRa la insTalaciÓn cónexión del conducto de ventilación de la secadora adveRTencia Para reducir el riesgo de incendio, descargas eléctricas o heridas al usar su electrodoméstico, siga las precauciones básicas, incluyendo lo siguiente: • No aplaste ni doble el sistema de conducto. Si no se •... - Page 64 insTRUcciones PaRa la insTalaciÓn conexión del conducto de ventilación de la secadora (cont.) Sistema de conducto LoNG . máx. VEN tILACI óN dE ESCAPE CoRRECtA NÚmERo dE tIP o dE tAPA dE CoNdUC to CodoS dE dE PAREd mEtáLICo FLE xIbLE 90°...
-
Page 65: Conexión De Secadoras A Gas
insTRUcciones PaRa la insTalaciÓn conexión de secadoras a gas adveRTencia Para reducir el riesgo de incendio, descargas eléctricas o heridas al usar su electrodoméstico, siga las precauciones básicas, incluyendo lo siguiente: • Requisitos de suministro de gas: • Conecte la secadora al tipo de gas indicado en la placa del nombre. - Page 66 insTRUcciones PaRa la insTalaciÓn conexión de secadoras a gas (cont.) adveRTencia conexión del suministro de gas Para reducir el riesgo de incendio, descargas eléctricas 1. Asegúrese de que el suministro de gas al cuarto de o heridas al usar su electrodoméstico, siga las lavado se encuentre APAGADO.Confirme que el precauciones básicas, incluyendo lo siguiente: tipo de gas disponible en su cuarto de lavado sea el...
-
Page 67: 21 Cómo Conectar Las Secadoras Eléctricas
insTRUcciones PaRa la insTalaciÓn cómo conectar las secadoras eléctricas adveRTencia adveRTencia Para ayudar a evitar incendios, descargas eléctricas, heridas Para reducir el riesgo de incendio, descargas eléctricas o graves o muerte, el cableado e instalación a tierra deben heridas al usar su electrodoméstico, siga las precauciones cumplir con la última edición del Código Eléctrico Nacional, básicas, incluyendo lo siguiente: ANSI/NFPA 70 y todas las regulaciones locales aplicables. - Page 68 insTRUcciones PaRa la insTalaciÓn cómo conectar las secadoras eléctricas (cont.) sÓlo ee.UU. adveRTencia • Instale un cable eléctrico de 30 A / 240 Vca listado por UL con un conductor de cobre Núm.-10 AWG como • Conecte el cable de alimentación a la caja de mínimo y terminales de bucle cerrado o de horquilla terminales.
- Page 69 insTRUcciones PaRa la insTalaciÓn cómo conectar las secadoras eléctricas (cont.) sÓlo ee.UU. adveRTencia • Instale un cable eléctrico listado por UL con 4 conductores de cobre Núm.-10 AWG como mínimo. • Conecte el cable de alimentación a la caja de •...
- Page 70 insTRUcciones PaRa la insTalaciÓn cómo conectar las secadoras eléctricas (cont.) sÓlo ee.UU. adveRTencia • Instale un cable eléctrico de 30 A / 240 V~ listado por UL con un conductor de cobre Núm. 10 AWG como mínimo y terminales de bucle cerrado o de horquilla •...
- Page 71 insTRUcciones PaRa la insTalaciÓn cómo conectar las secadoras eléctricas (cont.) sÓlo ee.UU. adveRTencia • Instale un cable eléctrico listado por UL con 3 conductores de cobre Núm.-10 AWG como mínimo. • Conecte el cable de alimentación a la caja de •...
-
Page 72: Requisitos Especiales Para Viviendas Móviles O Prefabricadas
insTRUcciones PaRa la insTalaciÓn Requisitos especiales para viviendas Revisión de instalación final móviles o prefabricadas Una vez que haya completado la instalación de la Cualquier instalación en una vivienda móvil o secadora y la misma se encuentre en su ubicación final, prefabricada debe realizarse de conformidad con los confirme que funcione correctamente realizando las Estándares de seguridad y construcción de viviendas... -
Page 73: Prueba De Instalación (Conducto De Comprobar)
insTRUcciones PaRa la insTalaciÓn Prueba de instalación (conducto de comprobar) 4. observe la pantalla para conocer el resultado. Una vez haya instalado la secadora, haga este test Durante el ciclo de prueba, controle el visualizador para asegurarse de que las condiciones del sistema de del Flow Sense™... - Page 74 insTRUcciones PaRa la insTalaciÓn Test de instalación (conducto de comprobar) (cont.) • Compruebe el código de error antes de llamar al servicio técnico Código de error Causas posibles Soluciones • Fallo del sensor de temperatura. • Apague la secadora y llame al servicio técnico. tE1 o tE2 •...
-
Page 75: Cómo Usar
cÓMo UsaR cÓMo UsaR Funcionamiento de la secadora LImPIAR EL FILtRo dE PELUSAS Si aún no ha limpiado el filtro de pelusas, extráigalo y elimine las pelusas procedentes de la última carga. Esto le ayudará a asegurar un funcionamiento más rápido y eficiente de secado. Filtro de pelusa CARGAR LA SECAdoRA... -
Page 76: Guía De Ciclos
Los ciclos de Sensor de Secado utilizan el sistema Use los ciclos de SECADO MANUAL para seleccionar exclusivo de sensor doble de LG para detectar y una cantidad especifica de tiempo y temperatura comparar el nivel de humedad en las prendas y en de secado. -
Page 77: Clasificación De Cargas
cÓMo UsaR A continuación encontrará instrucciones para comenzar a usar su secadora nueva. Para más información por favor consulte las secciones específicas de este manual. clasificación de cargas Revise el filtro de pelusa antes de cada uso etiquetas de mantenimiento de las telas Asegúrese siempre de que el filtro de pelusa esté... -
Page 78: Configuraciones Del Ciclo Y Opciones
cÓMo UsaR configuraciones del ciclo y opciones Su secadora dispone de varias opciones de ciclo adicionales, las cuales personalizan los ciclos para satisfacer sus necesidades individuales.Ciertos botones Los ciclos de Sensor de Secado (sensor dry) tienen ajustes de opción también incorporan una función especial (vea preprogramados que se seleccionan automaticamente. -
Page 79: Funciones Especiales
cÓMo UsaR configuraciones del ciclo y * Secado en parrilla (default on/off) Esta opción permite la configuración de Ahorrar Energía opciones(cont.) para ser cambiados. Para ejecutar un ciclo Normal y sin la opción de Ahorrar alerta de Secado húmedo (damp dry Signal) Energía, mantengapresionado durante tres segundos el Con esta opción, la secadora hará... -
Page 80: Antes De Utilizar La Función Tag On
Busque el icono Tag On junto a la pantalla LED del panel de control. Aquí deberá colocar el smartphone cuando utilice la función Tag On con las funciones LG Smart Diagnosis™, Descarga de ciclos y Estadísticas de lavado de la aplicación LG Smart Laundry&DW. -
Page 81: Tag On
Tag On (como se muestra con NFC. a la derecha), ponga el smartphone sobre el icono Tag autodiagnóstico Tag on con la aplicación lG smart laundry&dW Global On del lado derecho del panel de control de la lavadora. - Si no es reconocido, toque 1. - Page 82 4. Introduzca, en el campo para ello dispuesto, su número de teléfono. Utilice este número de teléfono cuando hable con el representante del servicio al cliente de LG para que ellos puedan encontrar los datos del diagnóstico inteligente. ※ Las imágenes solo sirven como referencia. La aplicación LG Smart Laundry&DW Global real puede...
- Page 83 UsaR descarga de los ciclos Tag on con la aplicación lG smart laundry&dW Global 5 Seleccione un ciclo para su 1. Instale la aplicación ‘LG Smart Laundry&dW descarga. Global’ en un smartphone equipado con NFC. - También puede comprobar - Instale la aplicación desde el Play y ejecútela.
- Page 84 2. Seleccione ‘Estadísticas de sobre comprobación de lavado’ . evacuación. ※ Las imágenes solo sirven como referencia. La aplicación LG Smart Laundry&DW Global real puede ser diferente. 3. toque el logotipo tag on. - Cuando aparezca una pantalla Tag On (como se muestra...
- Page 85 UsaR estadísticas de lavado (ejecutar ciclo de nuevo) usando la aplicación lG smart laundry&dW 4. Compruebe si se ha iniciado 1. Seleccione ‘diario de el lavado con el ciclo secadora’ en la pantalla seleccionado. Estadísticas de lavado. - Aparece la pantalla que - Seleccione ‘Diario de...
- Page 86 (Esto puede ocurrir debido a las diferentes posiciones ※ Las imágenes solo sirven como referencia. La de la antena NFC para cada aplicación LG Smart Laundry&DW Global real puede teléfono.) ser diferente. 4. Seleccione una categoría de secado según el problema en el que desea que se centre la máquina.
-
Page 87: Mantenimiento
ManTeniMienTo ManTeniMienTo limpieza regular limpieza del filtro de pelusa adveRTencia Limpie siempre las pelusas del filtro tras cada ciclo. Para reducir el riesgo de incendio, descargas eléctricas o heridas al usar su electrodoméstico, siga las precauciones básicas, incluyendo lo siguiente: •... -
Page 88: Resolución De Problemas
ResolUciÓn de PRobleMas ResolUciÓn de PRobleMas antes de llamar a mantenimiento Su secadora está equipada con un sistema de monitoreo de errores automático para la detección y el diagnóstico de problemas en una etapa temprana. Si su secadora no funciona adecuadamente o no funciona en lo absoluto, revise lo siguiente antes de llamar a mantenimiento. - Page 89 ResolUciÓn de PRobleMas antes de llamar a mantenimiento (cont.) Problema Causas posibles Soluciones Las prendas • Las prendas se secaron • Secar excesivamente una carga de lavandería puede están por demasiado tiempo provocar arrugas en las prendas. Intente secar por un arrugadas (excesivamente secas).
-
Page 90: Especificaciones
• Compruebe los daños en la campana de la ventilación o el atasco de pelusas. • Asegúrese que la zona alrededor de la campana de ventilación está despejada. esPeciFicaciones modelos dt21WS Descripción Secadora Requisitos eléctricos 120 v~ 60 hz 400 W Requisitos de gas... -
Page 91: Utilización Del Smart Diagnosis
Si tuviera algún problema con su secadora, la misma posee la capacidad de transmitir datos a un teléfono inteligente utilizando la aplicación Smart Laundry de LG o mediante el teléfono al Centro de atención telefónica de LG. SMART DIAGNOSIS™ no puede ser activado a menos que su secadora esté encendida pulsando el botón de ALIMENTACIóN(POWER).
Need help?
Do you have a question about the DT21WS and is the answer not in the manual?
Questions and answers