Table of Contents
Advertisement
Quick Links
Advertisement
Table of Contents

Related Manuals for Velocity Cruz T408


Summary of Contents for Velocity Cruz T408
- Page 1 T408 Offi cial User Guide...
-
Page 2: Table Of Contents
TABLE OF CONTENTS WELCOME I. GET ACQUAINTED II. HAND GESTURES 9-10 III. GETTING STARTED 11-12 IV. YOUR HOME SCREEN 13-15 V. CONNECTING TO WI-FI 16-17 VI. EMAIL SET UP VII. SAVING BATTERY VIII. MICRO SD CARDS IX. DEVICE STORAGE 21-22 X. -
Page 3: Welcome
Thanks for Choosing Cruz Thank you for purchasing a Velocity Micro CRUZ T408! We appreciate your business and know you’ll love your brand new multimedia device. This guide is intended to help you with initial setup of your device and to familiarize you with the Android operating system. -
Page 4: Get Acquainted
I. GET ACQUAINTED Getting Acquainted... - Page 5 Connect earbuds through this port for a personal media experience. B. Micro USB Port The Micro-USB port is used to tether your CRUZ T408 to a computer for file transfer. It is also used to charge your tablet with the included AC adapter.
- Page 6 I. GET ACQUAINTED Getting Acquainted H. Widget Area Widgets are small applications that have functionality and accessibility directly from your home-screen. I. Nav Bar The Nav Bar is a semi-transparent 3-button bar at the bottom of the home screen. From left to right, the buttons are: “Gallery,” “App Panel,” and “Settings.”...
-
Page 7: Hand Gestures
II. HAND GESTURES Tapping Touch your finger to the screen and remove immediately to select an item on the screen. This is the equivalent of a mouse “click” on a computer. Long-Pressing Press and hold your finger on the screen for 2-3 seconds. - Page 8 II. HAND GESTURES Scrolling Sliding your finger up and down in a vertical motion scrolls through menus, websites, and lists. The quicker you slide your finger, the greater the momentum and speed of the on-screen scrolling motion. Swiping Sliding your finger left and right scrolls horizontally.
-
Page 9: Getting Started
III. GETTING STARTED Getting Started To start your Cruz, press the on/off button located on the right side of the device. When you first turn on the Cruz, you will be greeted with a CRUZ logo, and then your Home screen. The display has a screen timeout by default set to 5 min. - Page 10 III. GETTING STARTED Getting Started Status Bar Icons There are four main buttons along the top of the touch screen. These are the Quick Launch buttons. They control the most frequently used functions in the Android platform. From left to right: BACK Returns to the previously viewed page or option screen.
-
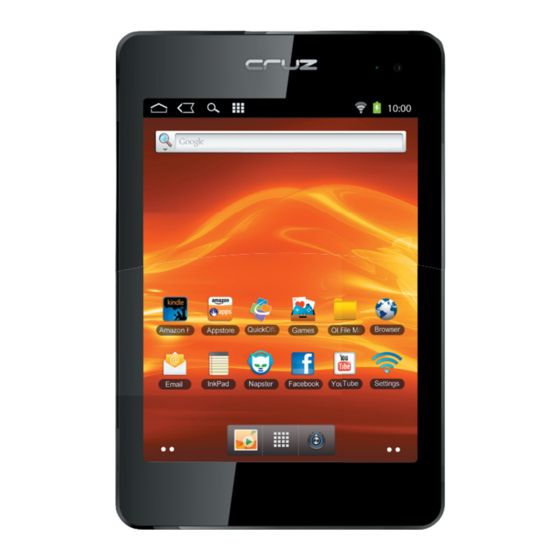
Page 11: Your Homescreen
IV. YOUR HOMESCREEN Getting Started Think of your home screen as your desktop. What goes on the home screen is up to you. You can fill the space with any combination of shortcuts, widgets, and folders you like. Some preinstalled shortcut icons will appear at the bottom, and a Google Search Widget appears at the top. - Page 12 IV. YOUR HOME SCREEN Getting Started Adding Widgets to the Home Screen Widgets allow you to place a function of an app onto your Home Screen. For instance, you may add an Analog clock, calendar, picture frame, and other useful widgets. To add a widget, long-press, or tap/hold your finger on any open space on your home screen, and select Widgets from the context menu that opens.
-
Page 13: Connecting To Wi-Fi
V. CONNECTING TO WI-FI Getting Started NOTE: You will set up your initial Wi-Fi connection during your fi rst boot-up. Follow these instructions to add additional networks Now that you’re familiar with the layout of the device and some of the functions of the Home Screen, it’s time to set up your Wi-Fi. - Page 14 V. CONNECTING TO WI-FI Getting Started Choose which network you want to connect to and tap the name of that network. When dealing with an unprotected Wi-Fi network, a confirmation box will flash on the screen. Tap “Connect” to continue. When dealing with a secure Wi-Fi network, first check the box that says “Show Password.”...
- Page 15 MAC address filtering. This will need to be disabled in the Wi-Fi router, or the device’s MAC address will need to be added to the router as an acceptable device connection. You can find the CRUZ T408’s MAC address under the Wi-Fi settings > Menu > Advanced.
-
Page 16: Email Set Up
You may have to locate the server settings information at your Email Provider’s support website, or you may need to call their support line. Unfortunately Velocity Micro cannot provide assistance with this step. Below is the information you will need:... - Page 17 VI. EMAIL SET UP Getting Started MAIL SERVER (INCOMING AND OUTGOING) The addresses at which your incoming and outgoing mail is waiting for you. PORT (INCOMING AND OUTGOING) Specify a port number for both your incoming and outgoing mail servers. SECURITY TYPE You must specify if a security method is required for the incoming mail server.
-
Page 18: Saving Battery
VII. SAVING BATTERY LIFE Getting Started Helpful Tips 1. Streaming audio or video apps will use a lot of battery life. 2. Disable Wireless Network Positioning. You can turn it off from Settings > Security > Use wireless networks. 3. Switch off Wi-Fi if you are not close to a strong source for an extended period of time. -
Page 19: Micro Sd Cards
VIII. MICRO SD CARDS Getting Started There are two areas for storage on your CRUZ T408. The first is a micro SD card slot located on the bottom of your device. You may purchase micro SD cards in a wide range of capacities, varying from 1 GB – 32 GB. -
Page 20: Device Storage
IX. DEVICE STORAGE Getting Started There are two areas for storage on your CRUZ T408 Appears in OI File Name Capacity Storage Uses Manager The Android apps you install will write file folders and app content to this removable storage. You... -
Page 21: Transfer Files
X. TRANSFER FILES Getting Started Transfer Via USB Cable Turn on your Cruz and connect a mini USB cable to Step 1 the Cruz device and to your PC. Slide the notification panel down and tap the alert Step 2 that reads, “USB Connected,”... - Page 22 X. TRANSFER FILES Getting Started Transfer Via SD Card Unmount the micro SD card: Settings> Storage>Unmount Step 1 SD Card Eject your micro SD card and insert it into SD card Step 2 adapter. Then insert SD card adapter into your PC Step 3 Transfer files as needed Eject micro SD card from PC, remove micro SD card from...
-
Page 23: File Formats
XI. FILE FORMATS Getting Started The file formats that this device can support are numerous, but not infinite. The included QuickOffice App allows you to view and edit Microsoft Office file formats, including Word, Excel, and PowerPoint. Many eReader file types, and music/video file types are compatible with the device as well Most files should work, but not all files are encoded the same. -
Page 24: Kindle For Android
XII. KINDLE FOR ANDROID Getting Started Your CRUZ T408 offers the remarkable opportunity of carrying all your favorite books in the palm of your hand. Each Cruz comes pre-loaded with the Kindle for Android application. This application is a library portal... - Page 25 XII. KINDLE FOR ANDROID Getting Started When you find a book you want to download/purchase, tap Step 4 the book cover to select it and advance to the next step. The app will bring you to a product page with the book Step 5 cover, the price, a “Buy Now”...
-
Page 26: Reading Epubs
XIII. READING EPUBS Getting Started Many eReader files are in the ePUB file format. The Cruz does not natively support this file format, so an additional application available on the Cruz Market must first be downloaded. Keep in mind that many ePUB files are also DRM-protected, preventing illegal distribution of publications. -
Page 27: Camera
XIV. CAMERA Getting Started There is one forward-facing camera on your CRUZ T408. It is capable of capturing both still images and video. There is a pre-installed application used to shoot photos/video and save them to your device. To access this application, tap the round, grey icon in your app panel labeled “Camera.”... -
Page 28: Amazon Appstore
XV. AMAZON APPSTORE Getting Started Your Cruz device comes preinstalled with access to the Amazon Appstore for downloading all the latest games, applications, and widgets directly to your device. It’s the best way to personalize your Cruz just the way you want it. Downloading and installing from the Amazon Appstore is easy: Step 1 Tap the Amazon Appstore icon on your Cruz’s desktop... - Page 29 XV. AMAZON APPSTORE Getting Started A. HOME - Takes you back to the main Amazon Appstore market front. B. SEARCH - If you know the name of an app you want, use this search tool. C. CATEGORIES - Apps will be grouped into genres. You can browse these genres quickly and easily.
-
Page 30: Installing Apps
XVI. INSTALLING APPS Getting Started When you download an app to the CRUZ T408, it is saved as an apk file in the “download” directory on the Flash storage. To install applications from “non-market sources.” Launch the App Panel, tap the Step 1 Downloads’... - Page 31 XVI. INSTALLING APPS When you transfer apps to the CRUZ T408 using a microSD card, follow the steps below to install the app properly. For help with transferring files, please refer to p. 21. Launch the App Panel, tap the Step 1 ‘OI File Manager’...
-
Page 32: Preinstalled Apps
XVII. PREINSTALLED APPS Getting Started Requires Icon Name Purpose Wi-Fi Clock Allows you to set alarms for easy reminders. This is your fi le management application. Use it to OI File Manager browse your storage locations, move/copy fi les, etc Your primary eBook library portal. - Page 33 Music Jam to your favorite tunes! Purchase songs and download them directly to your Napster CRUZ T408! Requires Wi-Fi only when browsing and downloading music. Allows you to view, edit, and create Microsoft® Of- Quickoffi ce fi ce fi les...
-
Page 34: Quickoffice
XVIII. QUICKOFFICE Getting Started Your Cruz comes preinstalled with a full version of QuickOffice, the premier document viewing and editing software for Android. With the full version of QuickOffice, you can easily both view and edit Excel spreadsheets, Word documents, Powerpoint presentations, and PDFs, right on your Cruz’s brilliant, full color display. -
Page 35: Oi File Manager
XIX. OI FILE MANAGER Getting Started OI File Manager allows you to browse your SD card, create directories, rename, copy, move, and delete files all within the comfort of your Cruz. It’s the perfect way to manage the files on your device. Think of it as Windows Explorer for your Android device. -
Page 36: Multimedia
XX. MULTIMEDIA Getting Started Music After loading your music onto your Cruz, tap the music icon (found by default on your home screen or by opening the App Panel). You’ll be given the option of selecting by Artist, Song, Album, or custom Playlist. Tap to select. - Page 37 XX. MULTIMEDIA Getting Started Video After loading your music onto your Cruz, tap the music icon (found by default on your home screen or by opening the App Panel). You’ll be given the option of selecting by Artist, Song, Album, or custom Playlist. Tap to select.
-
Page 38: System Requirements
XXI. SYSTEM REQUIREMENTS Getting Started Platform Windows Operating MAC OS X v10.4, 10.5 Microsoft® Windows® 2000. Me, XP, or higher preferred Vista, 7 or higher (32-bit or64-bit) System Intel Pentium II or AMD K6-2 PowerPC G3 300MHz or higher Processor 300MHz or higher Including Intel-based Macs 128 MB... -
Page 39: Support
Note: Those customers who have purchased a Cruz product directly from Velocity Micro may skip this step. 2. Then register your purchased Cruz products. 3. When complete, go to ‘My Products’ and submit a ticket for the product you are seeking support for. -
Page 40: Contact Us
XXIII. CONTACT INFO Getting Started Address 7510 Whitepine Road Richmond, VA 23237 Phone 800-296-4312 804-897-4777 Websites www.cruztablet.com www.velocitymicro.com... -
Page 41: Fcc Information
XXIV. FCC INFORMATION Getting Started This device complies with Part 15 of the FCC Rules. Operation is subject to the fol- lowing two conditions: (1) this device may not cause harmful interference, and (2) this device must accept any interference received, including interference that may cause undesired operation. -
Page 42: Warranty Information
XXV. WARRANTY INFO A. CONTENT OF LIMITED WARRANTY 1. Velocity Micro Electronics, Inc. (“VME”) warrants hardware products against defects in materials and workmanship for a period of one year from date of purchase (“Warranty Period”). The customer is responsible for keeping all original proof of purchase documents during this time. - Page 43 XXV. WARRANTY INFO B.LIMITATIONS OF WARRANTY To the extent allowed by local law, neither VME nor its third party suppliers make any other warranty or condition of any kind, whether expressed or implied, with respect to the VME products, and specifi- cally disclaim the implied warranties of conditions of merchantability, satisfactory quality, and fitness for a particular purpose.
- Page 44 CruzTablet.com...
Need help?
Do you have a question about the Cruz T408 and is the answer not in the manual?
Questions and answers