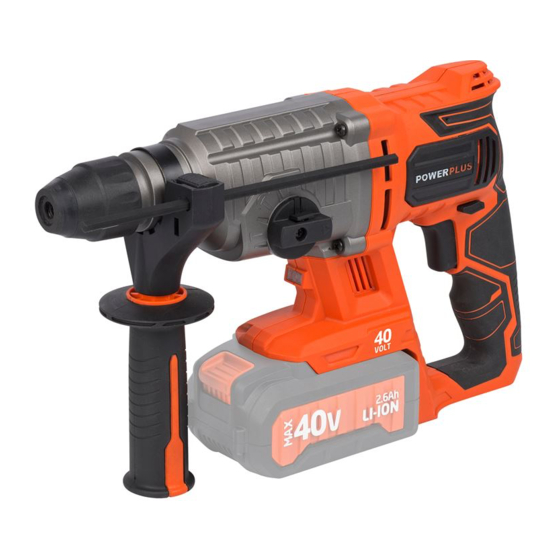
Table of Contents
Advertisement
Quick Links
1
APPLICATION ................................................................................ 3
2
DESCRIPTION (FIG. A) .................................................................. 3
3
PACKAGE CONTENT LIST ............................................................ 3
4
SYMBOLS ....................................................................................... 3
5
GENERAL POWER TOOL SAFETY WARNINGS ......................... 4
5.1
Working area .......................................................................................................... 4
5.2
Electrical safety ..................................................................................................... 4
5.3
Personal safety ...................................................................................................... 4
5.4
Power tool use and care ........................................................................................ 5
5.5
Service .................................................................................................................... 5
6
ADDITIONAL SAFETY INSTRUCTIONS FOR DRILLS ................ 5
7
CHARGERS .................................................................................... 6
7.1
Batteries ................................................................................................................. 6
7.2
Chargers ................................................................................................................. 7
8
FEATURES...................................................................................... 7
8.1
Li-ion battery (5) ..................................................................................................... 7
9
OPERATION.................................................................................... 7
9.1
Charging the battery pack ..................................................................................... 7
9.1.1
Charging indication (Fig 1) ....................................................................................... 7
9.2
Battery capacity indicator (Fig. 1a) ....................................................................... 8
9.3
Inserting and removing the battery (Fig 2) ........................................................... 8
9.4
Fitting and changing tools (Fig. 3) ........................................................................ 8
9.5
Removing SDS-plus tool ....................................................................................... 8
9.6
Switching ON/OFF ................................................................................................. 9
9.6.1
Switch lock (Fig 4) ................................................................................................... 9
9.6.2
Direction of rotation (Fig 5)....................................................................................... 9
9.6.2.1
Clockwise rotation: ................................................................................................ 9
9.6.2.2
Anticlockwise rotation: ......................................................................................... 9
9.6.3
Variable speed ......................................................................................................... 9
9.7
Handle attachment (Fig. 6) .................................................................................... 9
Copyright © 2018 VARO
POWDP1570
P a g e
| 1
EN
www.varo.com
Advertisement
Table of Contents

Summary of Contents for VARO Powerplus POWDP1570
-
Page 1: Table Of Contents
Switch lock (Fig 4) ....................9 9.6.2 Direction of rotation (Fig 5)..................9 9.6.2.1 Clockwise rotation: ....................9 9.6.2.2 Anticlockwise rotation: ..................9 9.6.3 Variable speed ......................9 Handle attachment (Fig. 6) ..................9 Copyright © 2018 VARO P a g e www.varo.com... - Page 2 CLEANING AND MAINTENANCE ..........10 10.1 Cleaning ....................... 10 10.2 Maintenance ......................10 TECHNICAL DETAILS ..............10 NOISE .................... 11 WARRANTY .................. 11 ENVIRONMENT ................12 DECLARATION OF CONFORMITY ..........12 Copyright © 2018 VARO P a g e www.varo.com...
-
Page 3: Application
European injury or damage to the tool. directive(s). Class II - The machine is double insulated; Earthing Read manual before use. wire is therefore not necessary (only for charger). Copyright © 2018 VARO P a g e www.varo.com... -
Page 4: General Power Tool Safety Warnings
Remove any adjusting keys or spanners before turning on the power tool. A spanner or key left attached to a rotating part of the power tool may result in personal injury. Copyright © 2018 VARO P a g e www.varo.com... -
Page 5: Power Tool Use And Care
Do not obstruct any vents on the Charger. Especially avoid placing the Charger on carpets and rugs; they are not only flammable, but they also obstruct vents under the Charger. Place the Charger on a stable, solid, non-flammable surface (such as a stable Copyright © 2018 VARO P a g e www.varo.com... -
Page 6: Additional Safety Instructions For Batteries And Chargers
▪ Under extreme conditions, battery leakage may occur. When you notice liquid on the battery, proceed as follows: Carefully wipe the liquid off using a cloth. Avoid skin contact. Copyright © 2018 VARO P a g e www.varo.com... -
Page 7: Chargers
Inspect the battery pack before charging; do not charge a cracked or leaking battery pack. 9.1.1 Charging indication (Fig. 1) Connect the charger to the power outlet socket. ▪ Solid green: ready to charge. ▪ Flickering red: charging. Copyright © 2018 VARO P a g e www.varo.com... -
Page 8: Battery Capacity Indicator (Fig. 1A)
Removing SDS-plus tool Pull back fastening sleeve, hold and remove tool. Accessories can be hot after use. Don’t touch the tip of accessory by hand! Please always use protective gloves to remove accessories. Copyright © 2018 VARO P a g e www.varo.com... -
Page 9: Switching On/Off
Drill in masonry, concrete and natural stone. Don’t use the hammer drill function for ceramic tile or others material can not withstand impact energy. Chiselling mode: Chisel in masonry, concrete and natural stone. Copyright © 2018 VARO P a g e www.varo.com... -
Page 10: Led Light (Fig 7)
11 TECHNICAL DETAILS Rated voltage 40 V Rotation speed 0-1100 min Drill capacity concrete 26 mm Drill capacity steel 13 mm Drill capacity wood 30 mm Impact rate 0-5100 min Copyright © 2018 VARO P a g e | 10 www.varo.com... -
Page 11: Noise
(in its original blow-moulded case if applicable to the unit), accompanied by proof of purchase. ▪ Your tool must be charged at least 1x per month to ensure optimal operation of this tool. Copyright © 2018 VARO P a g e | 11 www.varo.com... -
Page 12: Environment
EN60745-1 : 2009 EN60745-2-6 : 2010 EN55014-1 : 2017 EN55014-2 : 2015 Keeper of the Technical Documentation: Philippe Vankerkhove, VARO – Vic. Van Rompuy N.V. The undersigned acts on behalf of the company CEO, Hugo Cuypers Regulatory Affairs – Compliance Manager 17/05/2018 Copyright ©...


Need help?
Do you have a question about the Powerplus POWDP1570 and is the answer not in the manual?
Questions and answers