Advertisement
Quick Links
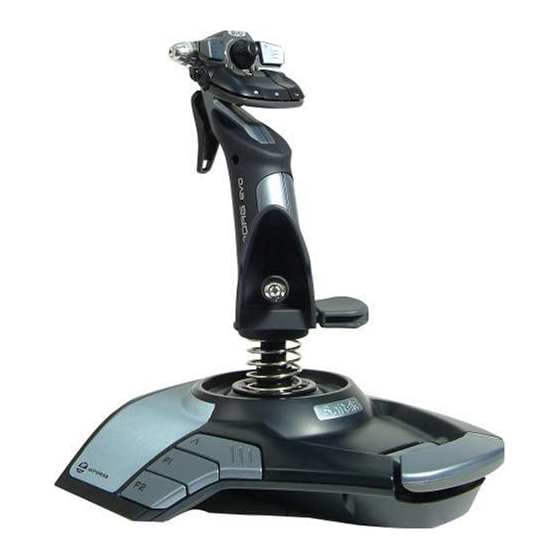
Cyborg evo Wireless User Manual
Getting Started
Features:
Battery
Your Cyborg evo Wireless uses one AA alkaline battery (supplied) which should give up
to 50 hours of use. To fit the battery, open the battery compartment on the bottom of
your joystick by sliding back the cover. Insert the AA battery in the direction shown and
replace the cover.
LED power status
The Saitek Cyborg evo Wireless features an LED (Light Emitting Diode) on the top of the
stick which shows how much power is left in the battery. A
green
light means there is
between 20-80% of power remaining;
amber
means there is between 10-20% power
remaining; and
red
means there is less than 10% power and you will soon have to
replace the battery.
Plugging in the wireless receiver
Unclip the wireless receiver (or dongle) from the bottom of the evo Wireless joystick and
plug into one of your computer's USB ports.
Sleep mode
Your Cyborg evo Wireless features a sleep mode to conserve battery life. After ten
minutes of no activity, the stick will power down and the head LED will switch off. Press
any of the buttons to wake the stick.
Scan Button
In certain circumstances, there may be interference to the signal between your stick and
the wireless receiver dongle in your computer caused by other wireless devices nearby.
To switch to an interference-free wireless channel, press the scan button on the
underside of your stick once.
Radio frequency
The Cyborg evo Wireless operates at a frequency of 2.402 – 2.480 GHz
Advertisement

Related Manuals for Saitek PS30


Summary of Contents for Saitek PS30
- Page 1 Insert the AA battery in the direction shown and replace the cover. LED power status The Saitek Cyborg evo Wireless features an LED (Light Emitting Diode) on the top of the stick which shows how much power is left in the battery. A green light means there is between 20-80% of power remaining;...
- Page 2 Installing joystick driver software Important note: Calibrating your joystick The Saitek Cyborg evo Wireless stick uses a dynamic auto-calibration system, which is designed to give you more accurate control. To maximise the effectiveness of calibration, ensure that the stick is moved fully forwards, backwards and to both sides after booting up your PC and before loading up your game.
- Page 3 Install the SST Programming Software and click Next. In the following Software Setup screen, click Next and follow the on-screen instructions. At this point you will be asked to install such features as the Saitek Magic Mouse, HID-compliant mouse, Saitek Magic Keyboard and HID Keyboard Device (these are what XP calls the various elements of your Saitek controller).
- Page 4 Drivers only for typical users With your computer switched on, close down any programs that are currently running and insert the Saitek Smart Technology CD into your CD-ROM drive. When the Introduction Screen appears, click Install Software to continue.
- Page 5 Note: For your controller to work, you must have a minimum of Microsoft® DirectX® 8.1 installed on your computer. The installer will automatically recognize if this software needs to be added, and will allow you to install it directly from the Saitek Product Companion CD, if necessary.
- Page 6 From time to time there may be updates to the driver and programming software for this product. You can check for the latest software updates by visiting the Saitek website and clicking on Downloads. A drop down menu will appear - Select Drivers and Software.
-
Page 7: Troubleshooting
Note: Even if the game you are using does not support game controllers, it is possible to make the controller work in that game using the Saitek Smart Technology programming software (only installed if you chose to be an Advanced User when installing). Using the... - Page 8 Despite a level of sophistication previously unseen in the market, and because of the Saitek Smart Technology inside, the software remains simple and intuitive to use. For a complete guide on how to program your Saitek controller, visit the Saitek website at www.saitek.com. Features of Smart Technology Programming Software: •...
-
Page 9: Technical Support
Getting Started Double-click on the Saitek Smart Technology icon the install left on your desktop. In the Profile Editor, choose the control to which you wish to assign a keyboard command. -
Page 10: Conditions Of Warranty
God, or any use violative of instructions furnished by Saitek plc. -
Page 11: Fcc Compliance And Advisory Statement
Must be disposed of properly May explode if damaged or disposed of in fire Do not short circuit Saitek Industries, 2295 Jefferson Street, Torrance, CA 90501, USA Canada 210 Operation is subject to the following two conditions: This device may not cause interference, and;... - Page 12 Great Park Road Almondsbury Bristol BS 32 4QG United Kingdom Identification of Equipment: PS30 – Cyborg Evo wireless Joystick for PC Intended usage: For home use Conformity specification: Reference to European harmonised standards EN 600 65 :1998 EN 300 440-2 :2001 EN 301 489-17:2000 Technical Construction File Ref.:PC joysticks/PS30...
- Page 13 ©2004 Saitek Ltd. Made and printed in China. All trademarks are the property of their respective owners. XXXX Disclaimer: http://www.saitek.com/uk/info/email.htm...
Need help?
Do you have a question about the PS30 and is the answer not in the manual?
Questions and answers