
Summary of Contents for Haus Whispair X3M06S5
- Page 1 A I R E N G I N E E R E D OPERATING AND INSTALLATION INSTRUCTIONS FOR WHISPAIR RANGEHOODS UTILISING REMOTE FAN MOTOR UNITS...
- Page 3 CONGRATULATIONS Congratulations and thank you for choosing a Whispair rangehood. To avoid the risks that are always present when you use an electrical appliance it is important that the rangehood is installed correctly and that you read the safety instructions carefully to avoid misuse and hazards.
- Page 4 PRODUCT DESCRIPTION & CARTON CONTENTS CARTON 1 - HOOD UNIT You will be supplied with one of the four hood unit options detailed below. OPTION 1 - INTEGRATED HOOD MODELS INCLUDED: X3M06S5, X3M09S5, X3M12S5, X3MD09S5, X3MD12S5 and X3W12S5 INCLUDED IN THE CARTON: 1.
- Page 5 OPTION 4 - CEILING MOUNT CASSETTE AND UNIVERSAL HUNG HOOD MODELS INCLUDED: X9C12S5, X9B12S5, X9B15S5 and X5C10S5 INCLUDED IN THE CARTON: 1. Main hood housing including switch control and led lighting 2. Baf e lters 3. Grease trap 4. Mounting Beams (2x) 5.
-
Page 6: Optional Installation Accessories
PRODUCT DESCRIPTION & CARTON CONTENTS CARTON 2 - FAN MOTOR UNIT You will be supplied with one of the two fan motor unit options detailed below. OPTION 1 - INLINE FAN SOLUTION (FIG. A) MODELS INCLUDED: IL-800 and IP-1140 Unit designed to be located in a roof space and then ducted to an external vent to the outside atmosphere. - Page 7 (Please refer RCM E4759). WHISPAIR reserves the right to change the speci cation without notice. All WHISPAIR performance gures are based upon standards developed by the Haus Group, which either comply or are in excess of the government regulated standards.
- Page 8 DUCTING AND EXTRACTION LEVELS WHISPAIR ducting is designed to ensure optimum performance for your rangehood. Please follow the installation instructions carefully. Every WHISPAIR rangehood must be ducted to the Inline or Externally mounted KLEENAIR fan motor unit by the use of non- ammable ducting.
- Page 9 NOISE LEVELS & EXTRACTION LEVELS All KLEENAIR fan motor unit operates at maximum external sound pressure level between 43dB(A) and 76dB(A). The internal operation of the systems will have a varying sound level dependent on the style of hood, the motor option selected, the acoustics of the environment and the installation method used.
- Page 10 Models included: X3M06S5, X3M09S5, X3M12S5, X3MD09S5, X3MD12S5 and X3W12S5 WARNING DIMENSIONS ARE ACCURATE AT THE TIME OF PRINTING, HAUS GROUP RESERVES THE RIGHT TO CHANGE SPECIFICATIONS WITHOUT NOTICE. FOR BUILDING PURPOSES THE UNIT SHOULD BE PROVIDED TO THE CABINET MAKER / BUILDER / KITCHEN DESIGNER FOR EXACT MEASUREMENTS.
- Page 11 PART 1: HOOD INSTALLATION GUIDE STEP 6: Using the ten (10) xing holes, screw the Main Chassis into position. STEP 7: Once the Main Chassis is secured into the cabinetry, the Fascia can then be slid back inside the Main Chassis. Replace the screws (removed in Step 3) to x the Fascia back into positon.
- Page 12 Models included: X5L09S5, X5S09S5, X5V09S5, X5V12S5, X5R09S5, X5R09W5, X5M10S5 and X5N12S5 WARNING DIMENSIONS ARE ACCURATE AT THE TIME OF PRINTING, HAUS GROUP RESERVES THE RIGHT TO CHANGE SPECIFICATIONS WITHOUT NOTICE. FOR BUILDING PURPOSES THE UNIT SHOULD BE PROVIDED TO THE CABINET MAKER / BUILDER / KITCHEN DESIGNER FOR EXACT MEASUREMENTS.
- Page 13 PART 1: HOOD INSTALLATION GUIDE STEP 6: Chimney Bracket Chimney Fixing Points Secure the hood to the wall by screw xing through the ve (5x) holes on the horizontal plate of the Mounting Bracket. STEP 7: Secure the Chimney Bracket to the wall. STEP 8: Refer to Part 2: Motor Installation Guide.
- Page 14 Models included: X7C12S5, X7P04B5, X7P04W5, X7S09S5, X7V09S5, X7R09S5, X7R09W5 and X7N12S5 WARNING DIMENSIONS ARE ACCURATE AT THE TIME OF PRINTING, HAUS GROUP RESERVES THE RIGHT TO CHANGE SPECIFICATIONS WITHOUT NOTICE. FOR BUILDING PURPOSES THE UNIT SHOULD BE PROVIDED TO THE CABINET MAKER / BUILDER / KITCHEN DESIGNER FOR EXACT MEASUREMENTS.
- Page 15 PART 1: HOOD INSTALLATION GUIDE STEP 6: Refer to Part 2: Motor Installation Guide. STEP 7: Lift the stainless steel chimney into position and secure to the Ceiling Bracket with the four (4) screws supplied. If the chimney is required to be shortened, new holes may need to be drilled to secure the chimney cover.
- Page 16 Models included: X9C12S5, X9B12S5, X9B15S5 and X5C10S5 WARNING DIMENSIONS ARE ACCURATE AT THE TIME OF PRINTING, HAUS GROUP RESERVES THE RIGHT TO CHANGE SPECIFICATIONS WITHOUT NOTICE. FOR BUILDING PURPOSES THE UNIT SHOULD BE PROVIDED TO THE CABINET MAKER / BUILDER / KITCHEN DESIGNER FOR EXACT MEASUREMENTS.
- Page 17 PART 1: HOOD INSTALLATION GUIDE STEP 6: Lift and attach the hood unit to the base of the threaded rod with the provided nuts and washers. Secure the hood cassette rmly to the underside of the ceiling. Level the unit off by tensioning the 10mm nuts. Being mindful not to over tighten. Minimise how much threaded rod is below the nut.
- Page 18 PART 2: FAN MOTOR INSTALLTION GUIDE Roof EXTERNAL KLEENAIR MOTOR SOLUTION Roof (Upper) and Flashing to suit Wall (Lower) Mounted Metal or Tile Roof (Optional Accessory) Housing Mounts (Optional Accessory) Fan Power Supply Attached to Internal Hood Unit Ducting Pulled Tight Gentle Bend In Ducting 200mm Ducting Attached to Internal...
- Page 19 PART 2: FAN MOTOR INSTALLTION GUIDE Inline Solution Models included: IL-800 and IP-1140 Positioning your KLEENAIR Unit: Mounting Bracket Outlet It is recommended that the KLEENAIR INLINE unit be mounted in a roof space or wall cavity. Please ensure that the KLEENAIR unit is positioned in an environment that is free of other gases to enable an ef cient expulsion of the cooking by-products and to ensure that back draft of external gases doesn’t take...
- Page 20 PART 2: FAN MOTOR INSTALLTION GUIDE External Solution - Wall Mounted Models included: EL-800, EP-1140 and EPP-2010 Cover Positioning your KLEENAIR Unit: It is recommended that when the KLEENAIR EXTERNAL UNIT is WALL mounted, it is positioned a minimum 1800mm above the ground surface with a downward clearance of 1200mm and with a radial clearance of 600mm.
- Page 21 PART 2: FAN MOTOR INSTALLTION GUIDE External Solution - Roof Mounted Models included: EL.800, EP.1140 and EPP.2010 Positioning your KLEENAIR Unit: It is recommended that when the KLEENAIR EXTERNAL UNIT is ROOF mounted, it is positioned a minimum 2100mm above the ground surface with a radial clearance of 600mm.
-
Page 22: Operation
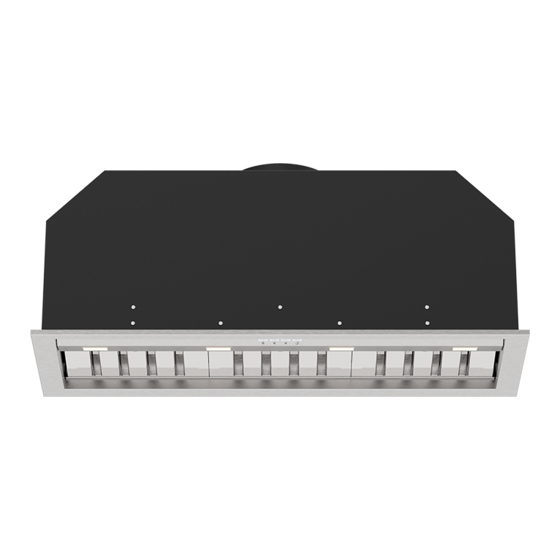
OPERATION Operating your 4-button control panel Models included: Electronic Control or Touch Control TURNING THE EXTRACTION FUNCTION ON OR OFF: • In standby mode, press button 2 or 3 to change the speed. • The hood has three speed options and a 4th boost speed (4 speeds in total). •... -
Page 23: Product Care
• Using a fine flat blade, wedge the LED unit from the insert whilst applying pressure to the locking tab. • Disconnect the 12V connectors. • Replace with a new unit and push back inside the cut outs in the fascia. • Please replace only with a genuine unit available from Haus Group Australia Pty Ltd. -
Page 24: Warranty
Should you ever need to make a warranty related enquiry about your WHISPAIR product, in Australia simply call Haus Group Australia on +61 (0) 3 8593 9600 or New Zealand on +64 (0) 9 887 6959 to speak with our friendly customer service team consultants. - Page 25 NOTES...
- Page 26 NOTES...
- Page 28 Print Version: W_16_S5_01 head office. Haus Group Australia Pty Ltd 2/2 Network Drive CARRUM DOWNS Victoria Australia 3201 Australia. t. (AU) 03 8593 9600 f. (AU) 03 8593 9699 e. info@hausgroup.com.au w. www.hausgroup.com.au New Zealand. t. (NZ) 09 887 6959 f. (NZ) 09 887 6958 e.
Need help?
Do you have a question about the Whispair X3M06S5 and is the answer not in the manual?
Questions and answers