Table of Contents
Advertisement
Quick Links
Advertisement
Table of Contents

Subscribe to Our Youtube Channel
Related Manuals for Zte A36+


Summary of Contents for Zte A36+
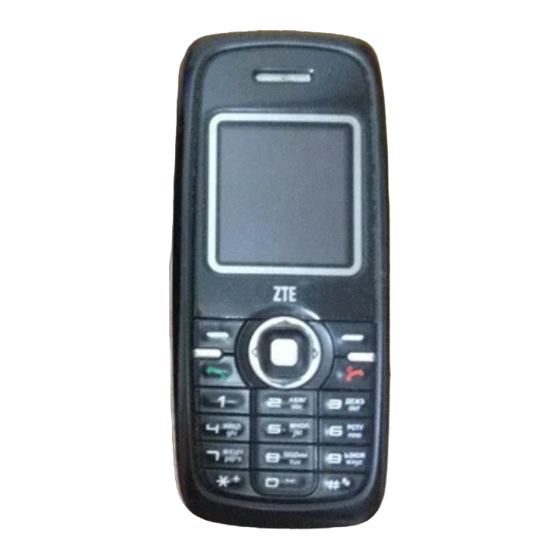
- Page 1 ZTE CORPORATION A36+ GSM Dual-band Digital Mobile Phone User Manual...
- Page 2 ZTE Corporation. ZTE operates a policy of continuous development. We reserve the right to update the technical specifications in this document at any time without prior notice.
-
Page 3: Table Of Contents
Contents GENERAL INFORMATION......................4 ............................ 4 ELCOME ............................. 4 ECURITY ........................4 AFETY RECAUTIONS GETTING STARTED........................8 ........................... 8 EFINITION ........................8 ISPLAY NDICATORS ......................9 ECHNICAL ARAMETERS ............................9 ATTERY ....................10 ONNECTING TO THE ETWORK BASIC OPERATIONS .........................11 ..........................11 AKING A ........................11... -
Page 4: General Information
General Information Welcome Thank you for using ZTE A36+ GSM digital mobile phone. To guarantee the mobile phone always in its best condition, please read this manual carefully and keep it for further use. The pictures, symbols and contents in this manual are just for your reference. They might not be completely identical with your mobile phone. - Page 5 In those facilities with special demand, such as hospital or health care facilities, please pay attention to the restriction on the use of mobile phone. Switch off your phone if required. Mobile phone Please use original accessories or accessories approved by the phone manufacturer. Using any unauthorized accessories may affect your mobile phone’s performance, damage your phone or even cause danger to your body and violate related local regulations about telecom terminals.
- Page 6 SAR. Tests for SAR are conducted using a standardized method with the phone transmitting at its highest certified power level in all used frequency bands. While there may be differences between the SAR levels of various ZTE phone models, they are all designed to meet the relevant guidelines for exposure to radio waves.
- Page 7 -- Reorient or relocate the receiving antenna. -- Increase the separation between the equipment and receiver. -- Connect the equipment into an outlet on a circuit different from that to which the receiver is connected. -- Consult the dealer or an experienced radio/TV technician for help. Warning: If the battery is damaged, do not discharge it.
-
Page 8: Getting Started
Getting Started Key Definition Left soft key Perform the function in the lower left corner of the screen. Right soft key Perform the function in the lower right corner of the screen. Dial key Make and answer calls. Bring out call menu in the standby mode. End key End or reject a call. -
Page 9: Technical Parameters
Technical Parameters Handset Type ZTE A36+ 107.6mm x 47mm x 13.8mm Dimensions(L×W×H) 48 g Weight Approx. (without battery) Battery Continuous standby time Approx. 90 hours ~ 130 hours (subject to network status) Continuous talk time Approx. 2 hours ~ 4 hours (subject to network status) For other parameters about battery and charger, refer to their labels. -
Page 10: Connecting To The Network
Plug the charger connector into the charge port at the bottom of the phone. (Note: Put upward the side with arrow.) Then plug the other end of the charger in an appropriate electrical outlet. Now, a charge indicator displays in the upper right corner of the screen. If the battery is charged in power-off condition, the indicator bar will scroll. -
Page 11: Basic Operations
protect your SIM card and phone from illegal use. Method to unlock the SIM card: Enter a PIN 1 code and press the # key or Left soft key [OK]. If you enter an incorrect PIN 1 code three times in a row, your SIM card will be locked by the network and the phone will ask for PUK code instead. -
Page 12: Call Menu
key and Right soft key ) to answer a call. Call Menu In the in-call mode, you can enter the call menu by pressing Options. The operation methods are the same as those in the function menu. Call menu can be seen only in the process of communication. The functions such as Call waiting, Call keeping, Multiparty require the network support. -
Page 13: Tools
In the standby mode, press Menu, select Call Menu and then press the OK key to enter the Call Menu interface. Calls View calls list Select All calls to view all calls list. Select Received calls to view the calls that you received. Select Dialled calls to view calls that you have dialed. -
Page 14: Profiles
Press the Up/Down/Left/Right key to switch among +, -,×, ÷ negative number can come. Press 0~9 Number keys to input numbers, and press the * key Press the Right soft key to clear last digit and results. Press the End key to exit the calculator. Press the Left soft key [Equal] to get results. -
Page 15: Messaging
Messaging If the network supports and you have subscribed this service, you can send and receive text short messages freely. And you also can subscribe a voice mailbox to receive voicemails. Please contact your service provider for details. In the standby mode, press Menu, select Messaging and then press OK key to enter the message menu interface. -
Page 16: Alarm
Msg settings You must set up necessary SMS information before using message functions. Enter the Msg settings submenu: Templates: When editing messages, holding the * key can bring out the preset answer sentences. In this menu, you can edit or change these sentences Message center: Input the short message service center number (You must obtain this number from your service provider.), and then press Save to store the number. - Page 17 records, and you can choose to store in the SIM card or in the phone memory. Saved records will be listed in the contact list and ordered by the first character of the name. Press the Left/Right keys to switch among groups. Press the OK key to view the detailed information of a record.
-
Page 18: Settings
Details In the contacts list interface, press Options and select Details. You can check the detailed information of the selected record. Settings Ringtone: You can set different alert rings for different groups. Save No. to: You can select SIM card/ Phone/Select to save numbers. Used space: You can view the number of the saved records and the maximum number of the records in the SIM card and the phone memory. - Page 19 Minute minder: Choose to remind you 5 or 15 seconds ahead of every minute when answering the incoming call, or selects Always off. Connected minder: Select to turn on/off the alert ring when the dialed call is connected. Call waiting: Select Activate/Deactivate to enable/disable this function; select Checking availability to query the current status of this function.
-
Page 20: Text Input
Voice calls: Only restrict voice calls. Data: Only restrict data. Fax: Only restrict faxes. Messages: Only restrict short messages. All except messages: Restrict other services except short messages. When you have set types of restriction services, the following can be chosen: Activate: The restriction is functional. -
Page 21: Character Chart
Character Chart Refer to the table below for more information on the characters available using the keys. Corresponding Characters 1 and some common symbols ABCabc2 DEFdef3 GHIghi4 JKLjkl5 MNOmno6 PQRSpqrs7 TUVtuv8 WXYZwxyz9 Space 0 * key Press * key to bring out symbols. # key Switch among different input modes.
Need help?
Do you have a question about the A36+ and is the answer not in the manual?
Questions and answers