Table of Contents
Advertisement
Quick Links
Advertisement
Table of Contents

Related Manuals for Cellon Communications Technology C700TV

Summary of Contents for Cellon Communications Technology C700TV
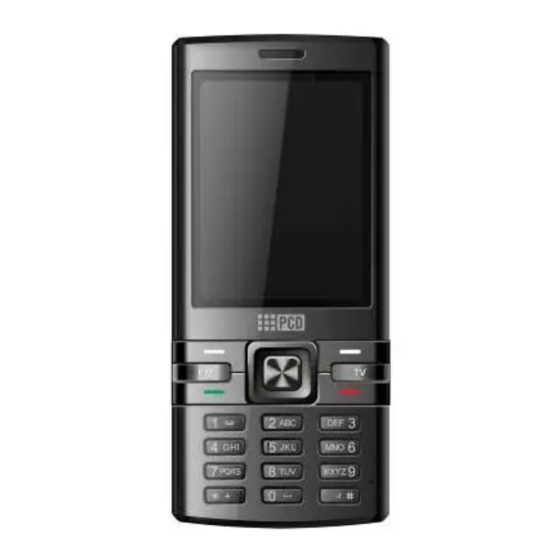
- Page 1 C700TV User Manual...
-
Page 2: Table Of Contents
YOUR PHONE ..........................5 ..........................6 TANDBY MODE GETTING STARTED ........................6 ................... 6 NSTALLING THE CARD AND THE BATTERY SD C ......................7 NSTALLING A MICRO ......................... 8 HARGING THE BATTERY ....................8 WITCHING THE PHONE ON AND OFF ... - Page 3 ..........................15 AMCORDER ..........................16 MAGE VIEWER ..........................16 IDEO LAYER ..........................16 UDIO LAYER Play the music ............................17 ........................17 OUND RECORDER FM R ........................... 17 ADIO ORGANIZER ..........................18 ...........................
- Page 4 Settings ..............................23 GENERAL INFORMATION ......................23 ..........................23 CCESSORIES GPRS/EDGE ..........................24 PRECAUTIONS ..........................24 TROUBLESHOOTING ........................25 SAFETY INFORMATION AND NOTICES ..................26 ................. 26 SING THE ELLULAR HONE AND HARGER ...
-
Page 5: Your Phone
Left/Right soft Key • Press to perform the function currently displayed in the bottom left/right corner of the screen. Your Phone Navigation Key • In the standby mode, Navigation Key UP to access the Audio player • In the standby mode, Navigation Key DOWN to access the Alarm •... -
Page 6: Standby Mode
Standby mode In the main display, you may see several icons displayed on your status bar. The meaning for each icon is explained below: Vertical bars indicate the signal strength of the GSM network signal. Indicates the battery charge level. Indicates your phone is locked. -
Page 7: Installing A Microsd Card
(2) 2. Insert the SIM card (3), install the battery (4) and attach the battery cover as shown (5). (5) Note: make sure that the metallic contacts of the battery are facing the metallic contacts in the battery slot. Installing a microSD Card 1. -
Page 8: Charging The Battery
Charging the battery You must fully charge the battery before using your phone for the first time. 1. Connect Charger cable to the micro charger port on the left of your phone. 2. Connect charger to an AC wall outlet. When all the battery scroll bars are steady, the battery is fully charged. -
Page 9: Input Method
Left Soft Key (LSK) and select Swap. Input Method You can key in text by pressing the keypad. To select an writing language Before you key in text, press Options and select writing language. To insert a space You could press the space key to insert spaces. To insert the symbols Press the * key can access the symbols. -
Page 10: Add New Contact
Add New Contact Allows you create a new entry into the phonebook list. It will be saved either in phone memory or SIM card. To add a new contact In Phonebook menu, select Add new contacts, press left soft key to choose Options > Select, and then enter the contact information. -
Page 11: Call Center
Call center Your phone can save the call records of missed calls, received calls, dialed calls, durations and cost of calls in the Call History menu. Notes: Once the call list exceeds the memory limitation, the oldest one is deleted. For the call logs, you can press the Dial Key in standby mode to have a quick review. -
Page 12: Gprs Counter
GPRS Counter This function allows you to check the data size (both message and WAP) of GPRS packet you used. In Call center menu, choose Call history > GPRS counter to view the content. The following options are available for GPRS counter: •... -
Page 13: Inbox
4. After finished, select Options and then Send to. 5. Add the recipient by inputting the number manually or searching them in the phonebook. 6. Finally, select Options and select the send option to send the message. Notes: 1. To key in the content, please refer to “Input Method“. 2. -
Page 14: Multimedia
• Voicemail server: Your phone allows you to access your voice mailbox quickly if your operator supports this function. Your voice mail number will be provided by your service provider and displayed in the phone. In the standby mode, press and hold the 1 Key to call your voice mail directly. •... -
Page 15: Camcorder
If it cannot find any program when you open TV, please press Options and choose Auto Search to Search again or you can check if Country & Region is right. Your phone provides the following selections for your option: Country & Region setting: Allows you to choose your current region. Auto Search: Allows you to auto scan the TV channels without having to press the forward or backward Key all the time, and the station searched will be memorized in the channel list. -
Page 16: Image Viewer
Capture mode Normal / Continue shot / Burst shot sel. / Add frame Scene mode Auto/Night Image Size Allows you to select the resolution of the picture you want to take. Hightlight On/off Self-timer Off / 5 Sec. / 10 Sec. White Balance Auto / Daylight / Tungsten / Cloudy / Incandescence Effects... -
Page 17: Play The Music
Navigation Key Up ▲ Press to Start/Pause/Resume music playback. Navigation Key Down ▼ Press to stop the music playback. Volume Side Keys Adjust volume. Left Soft Key [List] Show the play list in File Manager > My Music. Right Soft Key [Back] Return to previous menu. -
Page 18: Organizer
• Channel list: Allows you to bookmark up to 9 radio stations by entering the channel name and frequency. You can have quick access to 9 radio stations by Numeric Key. You are allowed to play, delete or edit a selected radio station frequency. -
Page 19: Alarm
Alarm This function allows you to set the alarm to ring at the time specified. The alarm clock works even when the phone is switched off. 1. In the Organizer menu, choose Alarm. 2. Select Edit to set alarm time. First, you should turn it on. 3. -
Page 20: Writing Language: Allows You To Predefine Your Input Method
Automatic, your phone will auto detect the language supported by your SIM and phone. Writing language: Allows you to predefine your input method. Display This feature allows you to personalize your display setting through following options: • Wallpaper: Allows you to change wallpaper displayed on the idle screen. 1. -
Page 21: Security Settings
Security settings This function allows you to activate password to protect your phone against unauthorized use. Your phone provides the following selections for your option: • SIM Lock: To prevent your SIM card from illegal use, your SIM card is protected by a PIN code. If you set the SIM lock to On, you can only use your cellular phone by entering the correct PIN code every time you turn it on. -
Page 22: Extra
Extra Calculator The calculator applies simple calculator function such as addition, subtraction, multiplications and division. Currency Converter First, you should enter the rate, and then enter the local data. Press the OK Key, the foreign data will be shown automatically. Services Services described in the following are supported by your service provider. -
Page 23: Service Inbox
Service Inbox WAP push messages are saved here. Settings GPRS (General Packet Radio Service) is a technology that use for sending and receiving data over the mobile network. WAP Setting If the settings have made by the service provider, you may begin immediately. If the accessed profiles have been assigned by your service provider, select a profile and activate it. -
Page 24: Gprs/Edge
• Use only accessories and charging devices approved by the phone manufacturer otherwise you would risk serious damage to health and property. • Failure to do this may invalidate your warranty. • Accessories may be different in different regions. GPRS/EDGE Note, Only RX supports EDGE, only TX supports GPRS. -
Page 25: Troubleshooting
Only use the authorized accessories and batteries and do not connect to incompatible products. Waterproof Your cellular phone is not waterproof. Please keep it away from water. Backup Remember to make a backup or keep a written record of all important information saved in your cellular phone. -
Page 26: Safety Information And Notices
cellular phone will signal is strong or continue to send to find temporarily turn off a basis. A lot of battery your phone. power is used, so as to limit idle time. Cannot switch Battery is drained. Check battery volume or charge battery. -
Page 27: Caution
Caution: Keep the phone away from dust, water and damp areas. Dust, water or other liquids may cause overheating, electrical leakage, and/or phone failure. The phone, battery, charger and AC adapter are not waterproof. Keep them away from liquid. Warning: Do not bump, shake or tamper with the phone or charger. -
Page 28: Caution
has changed shape or color. If battery liquid leaks onto your skin or clothes, immediately wash the affected parts with water. If the battery begins to leak or emits a strange odor, properly dispose of the battery according to local regulations. Do not throw it into a fire. -
Page 29: Cleaning And Maintenance
compliance with FCC RF exposure requirements, use accessories that maintain a 1.5cm separation distance between the user's body and the back of the handset. The use of belt clips, holsters and similar accessories should not contain metallic components in its assembly. The use of accessories that do not satisfy these requirements may not comply with FCC RF exposure requirements, and should be avoided. - Page 30 blown fuse, theft or improper usage of any electrical source. The Company disclaims liability for removal or reinstallation of the product, for geographic coverage, for inadequate signal reception by the antenna or for communications range or operation of the cellular system as a whole.