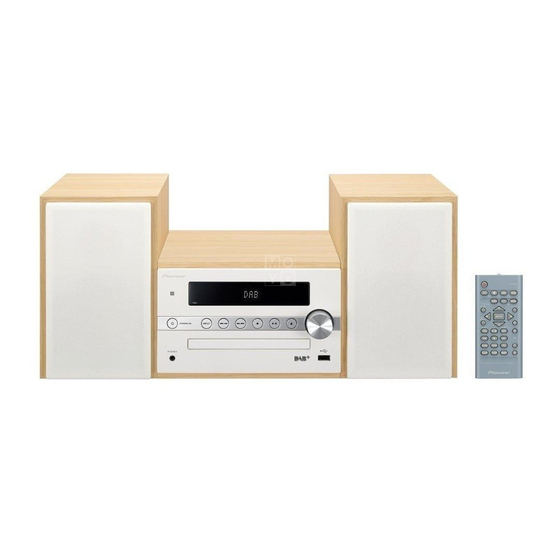
Pioneer X-CM56D Operating Instructions Manual
Cd receiver system
Hide thumbs
Also See for X-CM56D:
- Operating instructions manual (244 pages) ,
- Operating instruction (112 pages)

Related Manuals for Pioneer X-CM56D


Summary of Contents for Pioneer X-CM56D
- Page 1 X-CM56/X-CM56D CD Receiver System Register your product on http://www.pioneerelectronics.com (US) http://www.pioneerelectronics.ca (Canada) Operating Instructions...
- Page 2 IMPORTANT CAUTION RISK OF ELECTRIC SHOCK DO NOT OPEN The lightning flash with arrowhead symbol, CAUTION: The exclamation point within an equilateral within an equilateral triangle, is intended to triangle is intended to alert the user to the TO PREVENT THE RISK OF ELECTRIC alert the user to the presence of presence of important operating and SHOCK, DO NOT REMOVE COVER (OR...
- Page 3 VENTILATION CAUTION CAUTION When installing this unit, make sure to leave space This product is a class 1 laser product classified around the unit for ventilation to improve heat radiation under the Safety of laser products, IEC 60825-1:2007. (at least 25 cm at top, 15 cm at rear, and 5 cm at each side).
- Page 4 Radio wave caution CAUTION This unit uses a 2.4 GHz radio wave frequency, which The STANDBY/ON switch on this unit will not is a band used by other wireless systems (Microwave completely shut off all power from the AC outlet. ovens and Cordless phones, etc.).
- Page 5 The Safety of Your Ears is in Your WARNING: Handling the cord on this product or Hands cords associated with accessories sold with the product may expose you to chemicals listed on Get the most out of your equipment by playing proposition 65 known to the State of California and it at a safe level –...
-
Page 6: Table Of Contents
Front panel ........10 Listening to the DAB+ (X-CM56D only) ... . . 25 Attaching the Non-skid pads . -
Page 7: Before You Start
• Operating instructions (this document) X-CM56 only WARNING X-CM56D only • Do not use or store batteries in direct sunlight or other excessively hot place, such as inside a car or near a European models only heater. -
Page 8: Part Names And Functions
Part names and functions Chapter 2: Part names and functions Í Remote control Switches the receiver between standby and on (page 15). Input function buttons Use to select the input source to this receiver (page 15). Use to set up or play the audio file using the Bluetooth network (page 28). - Page 9 Part names and functions 14 Volume control buttons Use to set the listening volume (page 15). Mutes/unmutes the sound (page 15). 16 DIMMER Dims or brightens the display. The brightness can be controlled in four steps (page 15).
-
Page 10: Front Panel
Part names and functions Front panel INPUT STANDBY/ON PHONES Í STANDBY/ON 10 Headphone socket Switches the receiver between standby and on (page 15). Use to connect headphones. When the headphones are connected, there is no sound output from the speakers. NFC area 11 Disc tray Touching the NFC-equipped smartphone to this area, this... -
Page 11: Speaker System
Part names and functions Attaching the Non-skid pads Speaker system Apply the accessory non-skid pads to the bottom surfaces of the speakers. Important • Use the speaker is usually in an upright position. • Take care not to jam your fingers when connecting the receiver and the speaker and putting them in place. -
Page 12: Connections
Connections Chapter 3: Connections CAUTION CAUTION • Be sure to turn off the power and unplug the power cord • These speaker terminals carry HAZARDOUS LIVE from the power outlet whenever making or changing voltage. To prevent the risk of electric shock when connections. -
Page 13: Connecting Antennas
FM (DAB/FM) antenna. • To improve reception and sound quality, connect external antennas (see Using external antennas). X-CM56 One-touch PAL connector X-CM56D 75 Ω coaxial X-CM56 cable X-CM56D Connect the AM antenna wires. Holding the connector to connect. -
Page 14: Plugging In
Connections Plugging in Before making or changing the connections, switch off the power and disconnect the power cord from the AC outlet. After you’ve finished making all connections, plug the unit into an AC outlet. This unit’s rear panel Power cord To AC outlet CAUTION •... -
Page 15: Getting Started
Press the INPUT repeatedly to select desired function. Setting the clock Bluetooth Audio In X-CM56D only X-CM56 only Display brightness control Press DIMMER to dims the display brightness. The brightness can be controlled in four steps. -
Page 16: Sound Controls
P.BASS control source, then press ENTER. CD, DAB (X-CM56D only), FM, AM (X-CM56 only), and USB When the power is first turned on, the unit will enter the can be selected as the playback source. -
Page 17: Calling The Wake-Up Timer
Getting started Calling the wake-up timer Using Headphones It can be used to re-use an existing timer setting. Connect to the jack plug of the headphones. As well as steps 1 through 3 in “Setting the When the headphones are connected, there is no sound wake-up timer”. -
Page 18: Disc Playback
Disc playback Chapter 5: Disc playback Play MP3 music files This system can play back a standard CD, CD-R/RW in the CD format and CD-R/RW with MP3 files, but cannot record MP3 track data is called “music file” and the location they are on them. -
Page 19: Advanced Cd Or Mp3 Disc Playback
Disc playback Basic operations Advanced CD or MP3 disc playback Function Main unit Remote Operation control Play Press in the stop mode. Stop Press in the playback mode. (when playing a CD) “RESUME” is displayed and the place where you stopped play is memorized. -
Page 20: Programmed Play (Cd)
Disc playback Programmed play (CD) Switch the display contents You can choose up to 24 selections for playback in the order Press DISPLAY during playback. you like. If the title, artist and album name has been written to the file, Whilst in the stop mode, press PGM/ that information will be displayed. -
Page 21: Usb Playback
MP3 files on the front of this receiver. • When a USB storage device is not playing and the unit has • Pioneer does not guarantee that any file recorded on a not been operated for 20 minutes or more, the power will USB storage device will play or that power will be supplied automatically turn off. -
Page 22: Using The Tuner
Press the Í to turn the power on. Press TUNER repeatedly to select desired frequency band (FM or AM). • (X-CM56D) You can select “FM” and “DAB”. For details about “DAB”, see page 25. Press TUNE +/– on the remote control to tune in to the desired station. -
Page 23: Using The Radio Data System (Rds) (For European Models Only)
Using the tuner Search for stations by Program Type Note Press TUNER until “FM” appears on the display. • The backup function protects the memorised stations Press MENU and then press until “FM RDS” for a few hours should there be a power failure or the appears on the display. - Page 24 Using the tuner Using the Auto Station program Memory Note (ASPM) • If any of the following events occur, it does not mean Whilst in the ASPM operation mode, the tuner will that the unit is faulty: automatically search for new RDS stations. Up to 30 stations - “PS”, “NO PS”...
-
Page 25: Listening To The Dab+ (X-Cm56D Only)
Using the tuner Auto Scan Listening to the DAB+ (X-CM56D only) You can make the auto scan again when you move the unit to other areas or add multiplex channels to the station list. Press the TUNER until “DAB” appears on the display. -
Page 26: Changing The Information Display
Using the tuner Changing the information display DAB Frequency table (BAND III) You can switch DAB+ display information. Press the DISPLAYbutton. Frequency Label Frequency Label Each time the button is pressed, the information display changes in the following order. 174.928 MHz 208.064 MHz When “NO SIGNAL”... -
Page 27: Other Connections
Other connections Chapter 8: Other connections CAUTION • Before making or changing the connections, switch off the power and disconnect the power cord from the AC outlet. • We will not accept responsibility for damage arising from the connection of equipment manufactured by other companies. -
Page 28: Bluetooth ® Audio Playback
® Bluetooth Audio playback Chapter 9: ® Bluetooth Audio playback Music playback using Bluetooth Remote control operation wireless technology The remote control supplied with this unit allows you to play and stop media, and perform other operations. Note Bluetooth wireless technology enabled device: •... -
Page 29: Listen To Music On The Unit From A Bluetooth Capable Device
Audio playback Note BT STANDBY • This unit will be displayed as “Pioneer X-CM56” on all • The following can be done when the unit is on standby Bluetooth capable devices that you have. with the BT STANDBY switched ON. -
Page 30: Pairing And Connection Using Nfc
® Bluetooth Audio playback Note Pairing and connection using NFC • Only one device can be connected at a time. NFC stands for Near Field Communication. If a NFC- • NFC can also be used to quickly cancel a Bluetooth equipped smartphone is placed close to the unit, Bluetooth connection. -
Page 31: Scope Of Operation
® Bluetooth Audio playback Scope of operation Use of this unit is limited to home use. (Transmission distances may be reduced depending on communication environment). In the following locations, poor condition or inability to receive radio waves may cause the audio to be interrupted or stopped: •... -
Page 32: Additional Information
If the trouble cannot be rectified even after exercising the checks listed below, ask your nearest Pioneer authorized service center or your dealer to carry out repair work. • If the unit does not operate normally due to external effects such as static electricity disconnect the power plug from the outlet and insert again to return to normal operating conditions. - Page 33 Additional information When a USB storage device is connected Problem Check Remedy USB storage device is not Is the USB storage device properly Connect the device securely (all the way in). recognized. connected? Is the USB storage device This unit does not support USB hubs. Connect the USB storage connected via a USB hub? device directly.
-
Page 34: Playable Discs And Formats
Additional information When the Bluetooth wireless technology device is connected or operated Problem Remedy The Bluetooth wireless technology device cannot be connected or Check that no object that emits electromagnetic waves in the 2.4 operated. GHz band (microwave oven, wireless LAN device or Bluetooth Sound from the Bluetooth wireless technology device is not emitted wireless technology apparatus) is near the unit. -
Page 35: Regarding Copy Protected Cds
Additional information Place of installation • Only the discs that have been finalized can be played. • Choose a stable place near the TV or stereo system • Discs recorded in packet write mode (UDF format) are being used with this unit. not compatible with this unit. -
Page 36: Cleaning The Product
Pioneer authorized service center. Although lens cleaners for players are commercially available, we advise against using them since some may damage the lens. -
Page 37: Specifications
Frequency range ......2.4 GHz “Pioneer” is a trademark of Pioneer Corporation, and is Modulation used under license. - Page 38 2-3-12, Яэсу, Чуо-ку, г. Токио, 104-0028, ЯПОНИЯ © 2016 Onkyo & Pioneer Corporation. All rights reserved. © 2016 Onkyo & Pioneer Corporation. Tous droits de reproduction et de traduction réservés. F1605-0 Printed in China / Imprimé en Chine / Напечатано в Китае...
Need help?
Do you have a question about the X-CM56D and is the answer not in the manual?
Questions and answers