Table of Contents
Advertisement
Available languages
Available languages
EX17CT............... (RHFE-434FTA2)
EX22CT............... (RHFE-559FTA2)
Installer: Leave this manual with the appliance.
Consumer: Retain this manual for future reference.
READ ALL OF THE INSTRUCTIONS THOROUGHLY BEFORE INSTALLING OR OPERATING
THIS HEATER.
This manual provides information on the installation, operation, and maintenance of the heater. For
proper operation and safety, it is important to follow the instructions and adhere to the safety
precautions.
A licensed professional must install the fan convection heater according to the exact instructions
within this manual.
The consumer must read the entire manual to properly operate the heater and to have regular
maintenance performed.
WARNING
— Do not store or use gasoline or other flammable vapors and liquids in the vicinity of this or any other
appliance.
— WHAT TO DO IF YOU SMELL GAS
• Do not try to light any appliance.
• Do not touch any electrical switch; do not use any phone in your building.
• Immediately call your gas supplier from a neighbor's phone. Follow the gas supplier's instructions.
• If you cannot reach your gas supplier, call the fire department.
— Installation and service must be performed by a licensed professional.
Register your product at www.rinnairegistration.com or call 1-866-RINNAI1 (746-6241)
Installation and Operation Manual
If the information in these instructions is not followed exactly, a fire or explosion
may result causing property damage, personal injury or death.
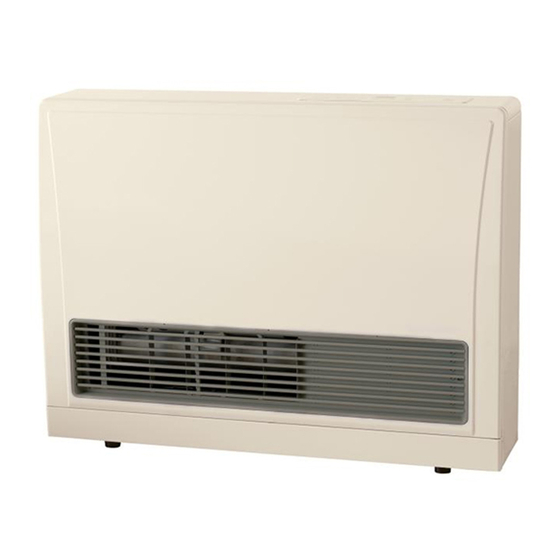
Direct Vent Wall Furnace
Advertisement
Chapters
Table of Contents

Related Manuals for Rinnai RHFE-434FTA2


Summary of Contents for Rinnai RHFE-434FTA2
- Page 1 Direct Vent Wall Furnace Installation and Operation Manual EX17CT....(RHFE-434FTA2) EX22CT....(RHFE-559FTA2) Installer: Leave this manual with the appliance. Consumer: Retain this manual for future reference. READ ALL OF THE INSTRUCTIONS THOROUGHLY BEFORE INSTALLING OR OPERATING THIS HEATER. This manual provides information on the installation, operation, and maintenance of the heater. For proper operation and safety, it is important to follow the instructions and adhere to the safety precautions.
-
Page 2: Table Of Contents
We will however, continue to contact you with information relevant to the product(s) you registered and/or your account with us. If you have any questions or feel that the manual is incomplete contact Rinnai at 1-800-621-9419 Important Safety Information Safety Definitions This is the safety alert symbol. -
Page 3: Safety Behaviors And Practices For The Consumer And Installer
This product can expose you to chemicals including Di (2-ethylhexyl) phthalate (DEHP) and carbon bisulfide which are known to the State of California to cause cancer, birth defects or other reproductive harm. For more information, visit www.P65Warnings.ca.gov. Rinnai Corporation EX17CT, EX22CT Manual... -
Page 4: Installation Instructions (For The Licensed Professional) State Regulations
Installation Instructions (for the licensed professional) State Regulations NOTICE BEFORE INSTALLATION: Rinnai direct-vent appliance must be installed by a state qualified or licensed contractor and a properly trained Rinnai Installer. If you are not properly trained, you must not install this unit. -
Page 5: Included Installation And Vent Components
9 1/2 - 15 3/4 in (240 - 400mm) C Vent Kit FOT-153 15 3/4 - 23 5/8 in (400 - 600 mm) D Vent Kit FOT-154 23 5/8 - 31 1/2 in (600 - 800 mm) Rinnai Corporation EX17CT, EX22CT Manual... -
Page 6: Installation Instructions
Care and Maintenance for adequate combustion carpets containing dyes or vinyl surfaces. and ventilation air. • Rinnai suggests that a dedicated electrical circuit with a 120VAC, 60 Hz, 10 amp power source be used. Rinnai Corporation EX17CT, EX22CT Manual... -
Page 7: Prepare For Installation
Materials that may be needed • Heat tape • Pipe insulation • Concrete wall anchors • Optional pipe cover • Optional temperature controller • 2 conductor 22 AWG wire for controller • Single gang electrical • Wire nuts Rinnai Corporation EX17CT, EX22CT Manual... -
Page 8: Flue Terminal Clearances
[2] Permitted only if veranda, porch, deck, or balcony is fully open on Clearance to opposite wall is 24 inches (60 cm). a minimum of two sides beneath the floor. Rinnai Corporation EX17CT, EX22CT Manual... -
Page 9: Clearances To Combustibles
CFR, Part 3280 and/or CAN/SCA Z240 MH Practices section. Series, Mobile Homes. □ Rinnai recommends 10” (254 mm) clearance from the Leave the entire manual with the consumer. top and on both sides for servicing. 0” (0 mm) 0” (0 mm) -
Page 10: Drilling Flue Hole
• This appliance can only be used with one of the not exhaust into other rooms. five types of Rinnai flue kits. The flue kits and their dimensions are listed in the Specifications section. • The flue manifold is not designed to be positioned •... - Page 11 Push the assembly into the terminal tube, ensuring that the seal is in place on the inner tube. Attach the inside connection with 3 screws. The inner connection can still be turned to install the screws. 3 screws Rinnai Corporation EX17CT, EX22CT Manual...
-
Page 12: Extension Kit Installation
• One elbow is shown. One additional elbow may be appliance above where the exhaust exits the appli- ance. added. • No elbows are shown. Two additional elbows may • Instructions (1)-(6) must be followed. be added. • Instructions (1)-(6) must be followed. Rinnai Corporation EX17CT, EX22CT Manual... - Page 13 Hose joint another air intake hose into the hose joint. Do not cut the intake hose. Cutting NOTICE the intake hose may result in noise. Air intake hoses Rinnai Corporation EX17CT, EX22CT Manual...
- Page 14 Hose Joint - 1.5 in (38 mm) inner dia. Hose Joint - 2.0 in (50 mm) inner dia. Pipe Stopper A Pipe Stopper B Pipe Clamp 2 sets 3 sets 4 sets Wall Fixture Screw A Screw B Rinnai Corporation EX17CT, EX22CT Manual...
-
Page 15: Connecting The Appliance
6. Install the wall bracket with two screws. Install the top spacer by clipping the spacer into the wall Top Spacer brackets and attaching it to the heater with 2 screws. Wall bracket Top Spacer Spacer Bracket Wall Bracket Rinnai Corporation EX17CT, EX22CT Manual... -
Page 16: Gas Connection
Supplied gas pressure must be within the limits shown in the Specifications section. • Refer to an approved pipe sizing chart if in doubt about the size of the gas line. Rinnai Corporation EX17CT, EX22CT Manual... - Page 17 4.0 in 2.6 in 2.2 in 2.0 in 1.8 in 3.5 in 3.1 in 2.9 in pressure - (101 mm) (65 mm) (57 mm) (52 mm) (47 mm) (89 mm) (80 mm) (72 mm) W.C. High Rinnai Corporation EX17CT, EX22CT Manual...
- Page 18 Yellow flames or an orange color is abnormal and maintenance is required. NORMAL Flame Rod Long, clear, blue, stable flames ABNORMAL Flame Rod Yellow flames or orange color Rinnai Corporation EX17CT, EX22CT Manual...
- Page 19 B149.1. If installed in a manufactured home, the installation must conform with the Manufactured Home Construction and Safety Standard, Title 24 CFR, Part 3280 and/or CAN/SCA Z240 MH Series, Mobile Homes. □ Leave the entire manual with the consumer. Rinnai Corporation EX17CT, EX22CT Manual...
-
Page 20: Dimensions
(582 mm) 29.9 in (760 mm) 10.1 in 257 mm 6.8 in 3.3 in 172 mm 85 mm A full size template is provided on the NOTICE cardboard packaging. DO NOT DISCARD until installation is completed. Rinnai Corporation EX17CT, EX22CT Manual... -
Page 21: Specifications
Noise Level 33-38 dB 33-42 dB Rinnai is continually updating and improving products. Therefore, specifications are subject to change without prior notice. The efficiency rating of this appliance is a product thermal efficiency rating determined under continuous operating conditions and was determined independently of any installed system. -
Page 22: Direct Vent Furnace Operation Instructions
EX22CT ....(RHFE-559FTA2) Important Facts about your Direct Vent Furnace Thank you for purchasing a Rinnai Direct Vent Furnace. For proper operation and safety, it is important to follow the instructions and adhere to all safety precautions. Read all of the instructions and the warranty thoroughly before operating this heater. Keep this manual in a safe place. -
Page 23: Safe Operation
Keep burner ON/OFF button on the control panel. and control compartment clean. 3.Locate the manual gas valve on the side of the unit. Turn the manual valve clockwise to the full OFF position. Rinnai Corporation EX17CT, EX22CT Manual... -
Page 24: Getting To Know Your Appliance
HOLD BOTH SIDES ON THE LEFT AND PULL TOWARD AIR FILTER VENT TERMINAL GAS CONNECTION COMBUSTION AIR/ 1/2” MALE NPT EXHAUST EXHAUST PIPE POWER CORD PLUG 120V AC, 60 Hz COMBUSTION AIR INTAKE HOSE ROOM TEMPERATURE SENSOR/THERMISTOR Rinnai Corporation EX17CT, EX22CT Manual... -
Page 25: Control Panel
If activated while the heater is OFF, then all controls will be locked. • If the heater is turned off while the Child Lock is activated, it cannot be turned on again until the lock is deactivated. • Deactivating the lock releases the control buttons. Rinnai Corporation EX17CT, EX22CT Manual... -
Page 26: Remote Thermostat Mode (Optional Accessory)
DISPLAY in either mode. Error codes will not show on the remote thermostat even when in remote thermostat mode.) ATTENTION The remote thermostat will NOT control the heaters ability to power on or power down. This must still be done by using the ON/OFF button of the heater. Rinnai Corporation EX17CT, EX22CT Manual... -
Page 27: Setting The Clock
The timers can be set while the heater is on or off. To current timer period. operate the timer, the heater must be on. Setting the timers: 1. Press the “Set Times” button twice to set Timer 1. Rinnai Corporation EX17CT, EX22CT Manual... -
Page 28: Economy (Energy Saving Mode)
(Default setting at the factory is on.) NOTICE The Set Back feature is intended to prevent the installation location from falling below a specified temperature. It is not intended as an alternate thermostat, but rather a preventative measure against freezing. Rinnai Corporation EX17CT, EX22CT Manual... -
Page 29: Humidifier And Air Flow Direction
Use a screw driver or similar object to bend each louver to the desired position. Do not bend repeatedly (no more than 5 times) or else the louver will break. The horizontal louvers (which determines the vertical air flow direction) are fixed and cannot be adjusted. Rinnai Corporation EX17CT, EX22CT Manual... -
Page 30: Required Care And Maintenance Care And Maintenance
All maintenance and service is to be performed by a Dirty filters reduce the air flow qualified service technician, preferably one who has and the appliance’s ability to attended Rinnai service training classes on the Direct produce heat. The filters Vent products. should be cleaned frequently during the heating season. -
Page 31: Before Making A Service Call
Unit shuts off without apparent reason. Check whether filters are blocked. Dirty filters will cause the heater to overheat. Power Failure. Switch OFF, then ON again when power is restored to re-set controls. Rinnai Corporation EX17CT, EX22CT Manual... -
Page 32: Diagnostic Codes And Remedies
You may be able to clear the fault code by turning the furnace off and then on again. If the fault code remains or returns on the next operation, contact Rinnai or your nearest service agent and arrange for a service call. -
Page 33: Restart Function
Clear Obstruction Air Filter Blocked Clean Filter Gas Escape Service Call Child Lock Set Cancel Child Lock Gas Off at Meter, Turn Gas On Tank, or Valve ON Timer is set Cancel “ON” Timer No Display Rinnai Corporation EX17CT, EX22CT Manual... -
Page 34: Cut-Away Diagram
Cut-Away Diagram Rinnai Corporation EX17CT, EX22CT Manual... -
Page 35: Wiring Diagram
THERMAL FUSE CONVECTION FAN MOTOR FUSE SPARKER white ELECTRODE SV1, 2 MAIN SOLENOID VALVE 1, 2 yellow MODULATING SOLENOID COMBUSTION FAN MOTOR gray VALVE orange TRANSFORMER PRESSURE SENSOR brown FLAME ROD W. TH WALL THERMOSTAT Rinnai Corporation EX17CT, EX22CT Manual... -
Page 36: Ladder Diagram
Ladder Diagram Rinnai Corporation EX17CT, EX22CT Manual... -
Page 37: Parts List
Parts List / Liste de Pièces For replacement parts call Rinnai at 1-800-621-9419. Pour les pièces de rechange, appelez Rinnai au 1-800-621-9419. Rinnai Corporation EX17CT, EX22CT Manual... - Page 38 Parts List / Liste de Pièces Rinnai Corporation EX17CT, EX22CT Manual...
- Page 39 Parts List / Liste de Pièces Rinnai Corporation EX17CT, EX22CT Manual...
- Page 40 Parts List / Liste de Pièces Rinnai Corporation EX17CT, EX22CT Manual...
- Page 41 Parts List / Liste de Pièces Rinnai Corporation EX17CT, EX22CT Manual...
- Page 42 Parts List / Liste de Pièces Rinnai Corporation EX17CT, EX22CT Manual...
- Page 43 Parts List / Liste de Pièces Pour les pièces de rechange appelez Rinnai au 1-800-621-9419. Part Number (Numéro de la EX22CT- Name Pièce) EX22CT W (white) EX17CT Rear Panel B ensemble de panneau arrière B 209000091 Frame R armature R...
- Page 44 Air Inlet Packing garniture d’arrivée d’air RHF300F-79 Air Intake Hose D tuyau d’admission d’air RHF1000-130-D Air Inlet Elbow coude d’arrivée d’air RHF1000-132 Connecting Tube tube de connexion 556F-404 Connecting Tube Fixer fixation de tube de connexion 556F-408 Rinnai Corporation EX17CT, EX22CT Manual...
- Page 45 SV IG Harness toron d’allumeur 205000050 Motor Harness toron de moteur 205000051 High Tension Cord cordon haute tension 205000038 OHS Harness Assy toron de interrupteur de surchauffe 205000052 Convection Motor Harness toron de moteur de convection 205000032 Rinnai Corporation EX17CT, EX22CT Manual...
- Page 46 Conversion Kits (Optional) / Kits de conversion (facultatifs) Model For converting to NG For converting to Propane (Modèle) (Pour la conversion NG) (Pour la conversion Propane) EX17CT (RHFE-434FTA2) 204000035 204000039 EX22CT (RHFE-559FTA2) 204000036 204000040 EX22CT-W (RHFE-559FTA2-W) Rinnai Corporation EX17CT, EX22CT Manual...
-
Page 47: Warranty
What will Rinnai do? Rinnai will repair or replace the covered product or any part or component that is defective in materials or workmanship as set forth. Rinnai will pay reasonable labor charges associated with the repair or replacement of any such part or component. - Page 48 Rinnai will replace the product with a comparable product at Rinnai’s discretion. If a component or product returned to Rinnai is found to be free of defects in material or workmanship, or damaged by improper installation or damaged during return shipping, the warranty claim for product, parts and labor may be denied.
-
Page 49: French Version
Si vous ne pouvez pas joindre votre fournisseur de gaz, appelez les pompiers. — Installation et interventions de service doivent être effectuées par un professionnel agréé. Enregistrez votre produit sur www.rinnairegistration.com ou téléphonez au 1-866-RINNAI1 (746-6241) Manuel EX17CT, EX22CT de Rinnai Corporation... -
Page 50: Définitions De Sécurité
Mode à thermostat distant AVIS: Rinnai partage parfois des informations de contact de clients avec des entreprises qu’il estime pouvoir fournir des produits ou services qui peuvent vous être utiles. En communicant ces informations, vous donnez votre accord pour que nous communiquions vos informations de contact dans ce but. Si vous préférez que vos informations ne soient pas partagées avec ces entreprises, veuillez contacter notre service à... -
Page 51: Comportements Et Pratiques De Sécurité Pour Le Consommateur Et L'istallateur
Ce produit peut vous exposer à des produits chimiques, y compris le di (2-éthylhexyl) phthalate (DEHP) et le bisulfure de carbone qui sont connus dans l'État de Californie pour causer le cancer, des malformations congénitales ou d'autres problèmes de reproduction. Pour plus d'informations, visitez www.P65Warnings.ca.gov. Manuel EX17CT, EX22CT de Rinnai Corporation... -
Page 52: Instructions D'installation (Pour Professionnel Agréé) Réglementations D'états
Instructions d’installation (pour professionnel agréé) - Réglementations d’états AVIS AVANT TOUTE INSTALLATION L’appareil Rinnai à ventilation directe doit être installé par un sous-traitant qualifié ou agréé au niveau de la province, ou un installateur Rinnai correctement formé. Si vous n’avez pas reçu la formation appropriée, vous ne devez pas installer cet appareil. -
Page 53: Installation Des Composants De La Ventilation Inclus
9 1/2 - 15 3/4 in (240 - 400mm) C Vent Kit FOT-153 15 3/4 - 23 5/8 in (400 - 600 mm) D Vent Kit FOT-154 23 5/8 - 31 1/2 in (600 - 800 mm) Manuel EX17CT, EX22CT de Rinnai Corporation... -
Page 54: Instructions D'installation
• Rinnai recommande d’utiliser un circuit d'alimentation secteur dédié, 120 V/60 Hz, pouvant fournir 10 ampères. Manuel EX17CT, EX22CT de Rinnai Corporation... -
Page 55: Préparation Pour L'installation
• • Isolant pour tuyaux Bouchons serre-fils • Chevilles pour murs en béton • Cache-tuyau optionnel • Contrôleur de température optionnel • Câble à deux conducteurs 22 AWG pour le contrôleur Manuel EX17CT, EX22CT de Rinnai Corporation... -
Page 56: Dégagements De Sortie D'évacuation
Le dégagement par rapport à un mur opposé est de 24 pouces (60 cm). [2]Autorisé seulement si véranda, porche, plate-forme ou balcon ont une complète ouverture au moins sur deux côtés en-dessous de l’étage. Manuel EX17CT, EX22CT de Rinnai Corporation... -
Page 57: Dégagement Par Rapport Aux Combustibles
Construction de maison préfabriqué et sécurité, Titre 24 CFR, Partie Rinnai recommande un dégagement de 254 mm (10") à 3280 et/ou à la norme canadienne CAN/SCA partir du dessus et des deux côtés pour les interventions de Z240 Série MH (Maisons mobiles). -
Page 58: Installation Du Collecteur Cheminée
Le collecteur de cheminée doit sortir sur l’extérieur. N’évacuez L’appareil ne peut être utilisé qu’avec l’un des cinq types de kit pas dans d’autres pièces; de cheminée Rinnai. Ces kits de cheminée et leurs dimensions sont listés en page précédente. •... - Page 59 Fixez la connexion intérieure avec 3 vis. La connexion intérieure peut toujours être tournée pour installer les vis. 3 vis Manuel EX17CT, EX22CT de Rinnai Corporation...
-
Page 60: Installation Du Kit D'extension
(6) Les extensions de ventilation ne doivent pas être dissimulées selon la norme NFPA 54 et doivent rester accessibles pour permettre leur inspection et réparation. Des caches décoratifs sont disponibles chez Rinnai. Ces illustrations montrent 2 façons possibles d’orienter l’extension de la conduite d’évacuation et du tuyau d’admission d’air en partant du collecteur de fumée. - Page 61 Jonction de tuyaux tuyau, et sur l’autre moitié dans un deuxième tuyau. Ne coupez pas le tuyau d’amission AVIS d’air. Cela pourrait générer du bruit. Tuyaux d’admission d’air Manuel EX17CT, EX22CT de Rinnai Corporation...
- Page 62 Joint de tuyaux - 1.5 po (38 mm) diamètre intérieur Joint de tuyaux - 2.0 po (50 mm) diamètre intérieur Arrêt de tuyau A Arrêt de tuyau B Collier de tuyaux ensemble ensemble ensemble Dispositif mural Écrou Vis A Vis B Manuel EX17CT, EX22CT de Rinnai Corporation...
-
Page 63: Raccordement De L'appareil
Mettez en place le support mural avec deux vis. Espaceur supérieur Installez l’espaceur supérieur en insérant sa patte dans Support mural le support mural et en le fixant sur le chauffage avec 2 vis. Espaceur supérieur Patte d’espaceur Support mural Manuel EX17CT, EX22CT de Rinnai Corporation... -
Page 64: Branchment Du Gaz
être dans les limites montrées dans la section Spécifications. • Référez-vous au tableau de calibre de tube approuvé si vous avez un doute sur la taille de la conduite de gaz. Manuel EX17CT, EX22CT de Rinnai Corporation... - Page 65 2.2 in 2.0 in 1.8 in 3.5 in 3.1 in 2.9 in differentielle du (101 mm) collecteur - (65 mm) (57 mm) (52 mm) (47 mm) (89 mm) (80 mm) (72 mm) W.C. Haut Manuel EX17CT, EX22CT de Rinnai Corporation...
- Page 66 à la terre. □ Confirmez qu’il n’y a PAS eu d’adaptateur de fiche ni de cordon de rallonge utilisés avec le générateur d’air chaud. Manuel EX17CT, EX22CT de Rinnai Corporation...
- Page 67 à la norme américaine pour Construction de maison préfabriqué et sécurité, Title 24 CFR, Part 3280 et/ou à la norme canadienne CAN/SCA Z240 MH Series (Maison mobile). □ Laissez le manuel complet au consommateur Manuel EX17CT, EX22CT de Rinnai Corporation...
-
Page 68: Dimensions
Un modèle de taille complète est fourni sur l'emballage en carton. AVIS 10.1 in NE JETEZ pas jusqu'à ce que l'installation est terminée. 257 mm 6.8 in 3.3 in 172 mm 85 mm 22.9 in (582 mm) 29.9 in (760 mm) Manuel EX17CT, EX22CT de Rinnai Corporation... -
Page 69: Spécifications
33-38 dB 33-42 dB Rinnai poursuit constamment la mise à niveau et l’amélioration de ses produits. De ce fait ces spécifications sont su- jettes à changement sans préavis. Le rendement énergétique de cet appareil mesure l’efficacité thermique du produit en utilisation continue, il a été... -
Page 70: Instructions D'utilisation Générateur D'air Chaud
AVIS : Rinnai partage parfois des informations de contact de clients avec des entreprises qu’il estime pouvoir fournir des produits ou services qui peuvent vous être utiles. En communicant ces informations, vous donnez votre accord pour que nous communiquions vos informations de contact dans ce but. -
Page 71: Fonctionnement Sans Risques
Repérez le robinet de coupure manuelle de gaz sur le côté du chauffage. Tournez-le dans le sens horaire jusqu’à la fermeture totale (position OFF). REMARQUE : Le ventilateur va continuer de tourner jusqu’au Manuel EX17CT, EX22CT de Rinnai Corporation... -
Page 72: Connaissance De Votre Appareil
TENIR LES DEUX CÔTÉS ET TIRER VERS VOUS FILTRE À AIR TERMINAISON DE CONNEXIONS DE GAZ VENTILATION 1/2 mâle NPT COMBUSTION/ ÉVACUATION CONDUITE D’ÉVACUATION FICHE PLUG 120V AC, 60 Hz TUYAU D’ADMISSION D’AIR DE COMBUSTION THERMISTANCE Manuel EX17CT, EX22CT de Rinnai Corporation... -
Page 73: Panneau De Commandes
Si le chauffage a été arrêté pendant que le verrouillage est activé, il ne pourra pas être remis en marche avant que le verrouillage ne soit désactivé. • La désactivation du verrouillage libère les boutons de commande. Manuel EX17CT, EX22CT de Rinnai Corporation... -
Page 74: Mode À Thermostat Distant
à thermostat distant). Le thermostat à distance NE contrôlera PAS la capacité des appareils de chauffage à ATTENTION s'allumer ou à s'éteindre. Cela doit toujours être fait en utilisant le bouton ON / OFF du chauffage. Manuel EX17CT, EX22CT de Rinnai Corporation... -
Page 75: Réglage De L'horloge
Réglage des minuteries: l'exploitation de la période de temporisation en cours. 1.Appuyez sur le bouton Set Times deux fois pour régler la minuterie 1. 2.La lumière à côté de "Timer 1 sur" doit être Manuel EX17CT, EX22CT de Rinnai Corporation... -
Page 76: Économie (Mode D'économie Énergétique)
La fonction Set Back permet d'éviter que l'emplacement d'installation ne tombe en dessous d'une température spécifiée. Il n'est pas conçu comme un thermostat de 30 mi- 30 mi- rechange, mais plutôt comme une mesure préventive contre le gel. Manuel EX17CT, EX22CT de Rinnai Corporation... -
Page 77: Humidificateur Et Direction De Flux D'air
Utilisez un tournevis ou un outil similaire pour fléchir chaque latte dans la position voulue. Ne faites pas cette opération fréquemment (pas plus de 5 fois) sinon le registre peuvent casser. Le registre horizontal (qui détermine la direction en hauteur du flux d'air) est fixe et ne peut pas se régler Manuel EX17CT, EX22CT de Rinnai Corporation... -
Page 78: Entretien Et Maintenance Entretien Et Maintenance
Des filtres sales réduisent le flux doivent être menées par un technicien de service qualifié, d’air et la capacité de l’appareil à ayant de préférence suivi les cours de formation de Rinnai produire de la chaleur. Les filtres sur les produits à ventilation directe. -
Page 79: Avant De Demander Une Intervention
Regardez si les filtres sont saturés. Cela peut causer une surchauffe de l’appareil. Unit cuts off without apparent reason. Check whether filters are blocked. Dirty filters will cause the heater to overheat. Power Failure. Switch OFF, then ON again when power is restored to re-set controls. Manuel EX17CT, EX22CT de Rinnai Corporation... -
Page 80: Codes De Diagnostic
à la remise en défaut pour aider à diagnostiquer le problème. Ce code de route, contactez Rinnai ou votre agent de service le plus défaut va clignoter à l’afficheur du panneau de commandes. -
Page 81: Fonction De Redémarrage
Demande d’intervention Fonction de verrouillage activée ● Déverrouiller Coupure de gaz en amont (compteur, Rétablir l'arrivée du gaz ● réservoir ou vanne) ON Timer est définie. Annuler "ON" bois ou push ● remplacer bouton Manuel EX17CT, EX22CT de Rinnai Corporation... -
Page 82: Vue En Coupe
Vue en coupe Manuel EX17CT, EX22CT de Rinnai Corporation... -
Page 83: Schéma De Câblage
INTERRUPTEUR DE SURCHAUFFE 1, 2 gr/y Vert/jaune FUSIBLE THERMIQUE rouge FUSIBLE ÉCLATEUR blanc ÉLECTRODE SV1, 2 ÉLECTROVANNE 1,2 jaune VANNE MODULATRICE gris TRANSFORMATEUR DÉTECTEUR DE PRESSION orange W. TH THERMOSTAT MURAL brun UNITÉ AFFICHAGE-COMMANDE Manuel EX17CT, EX22CT de Rinnai Corporation... -
Page 84: Diagramme En Escalier
Diagramme en escalier Manuel EX17CT, EX22CT de Rinnai Corporation... -
Page 85: Garantie
Rinnai paiera dans les limites du raisonnable le coût de main-d’œuvre associé à la réparation ou au remplace- ment de toute partie ou composant. Toutes les pièces à réparer doivent être des pièces Rinnai d’origine. Toutes les répa- rations et tous les replacements doivent être effectués par un dépanneur individuel ou une société de dépannage ayant reçu l’autorisation de Rinnai. - Page 86 Garantie limitée (Suite) Le remplacement du produit ne peut être autorisé que par Rinnai. La société Rinnai ne permet à aucune personne ou société d’assumer pour elle toute obligation ou responsabilité relative au remplacement d’un produit. Si Rinnai détermine que la réparation d’un produit n’est pas possible, Rinnai le remplacera avec un produit comparable, à...
- Page 87 Notes Manuel EX17CT, EX22CT de Rinnai Corporation...
- Page 88 107533 RHF559-1312X02(00) 200000073(02) 5/2018...
Need help?
Do you have a question about the RHFE-434FTA2 and is the answer not in the manual?
Questions and answers