Advertisement
Table of Contents
Advertisement
Table of Contents

Summary of Contents for BROKIS KNOT BATTERY
- Page 1 CM13621...
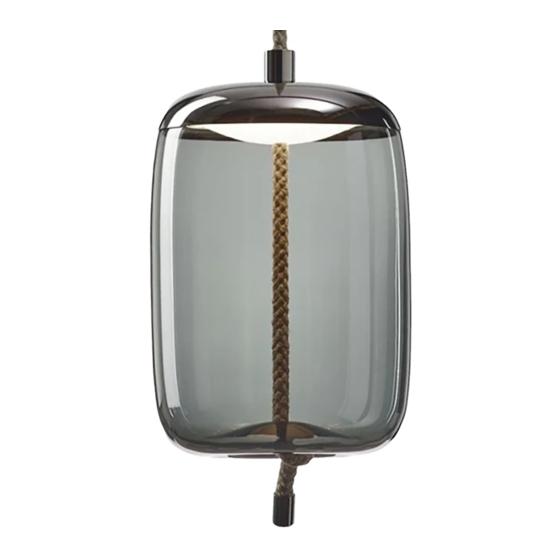
- Page 2 ATTENTION: PLEASE MAKE ATTENTION DURING THE TRANSFER OF THE LAMP. IT IS NECESSARY TO CARRY IT BY THE BOTTOM PART, DO NOT USE THE ROPE. BROKIS COMPANY WILL NOT ACCEPT A CLAIM IN CASE THAT YOU WILL NOT RESPECT THIS REQUEST.
- Page 3 Cleaning information CLEANING THE GLASS BROKIS applies the highest possible quality standards in manufacturing its lights. Prior to shipping, each light undergoes several quality controls and stages of cleaning. Lights may require additional cleaning as a result of transportation, storage, and the amount of time that passes between packing in our plant and subsequent unpacking by the client.
- Page 4 SWITCHING ON AND DIMMING THE LIGHT Place a finger on the bottom edge of the light to turn it on. The same touch is used to increase or decrease the intensity of the light and to switch it off. PAGE 4...
- Page 5 CLEANING / DISASSEMBLING AND REMOVING THE GLASS 1/3 Before cleaning the inner parts of the light, ensure it is disconnected from the charging cable. a. Position the light upside down on a soft surface to prevent damage to the glass. b.
- Page 6 CLEANING / DISASSEMBLING AND REMOVING THE GLASS 2/3 Unscrew the M4 nuts around the edge of the heat sink using the provided size 7 wrench and remove the stainless-steel ring. Do not let go of the centre screw. Doing so may result in damage to the glass! PAGE 6...
- Page 7 CLEANING / DISASSEMBLING AND REMOVING THE GLASS 3/3 Lower the light source assembly into the glass shade. Rotate it 90 degrees to vertical and then carefully pull it out through the slots in the edge of the glass. Once the light has been cleaned, reassemble it by following the steps in reverse order. PAGE 7...
- Page 8 CHARGING THE LIGHT Charge the light by attaching the magnetic connector of the charging cable to the bottom edge of the light. Charging is indicated by a blinking green LED. Charging is complete when the LED changes to solid green. Time to full charge: 6.5 hours.
Need help?
Do you have a question about the KNOT BATTERY and is the answer not in the manual?
Questions and answers