Advertisement
Quick Links
Advertisement

Related Manuals for Advance acoustic MAT-605


Summary of Contents for Advance acoustic MAT-605
- Page 1 MAT-605 진공관 튜너 사용 설명서...
- Page 2 SAFETY INSTRUCTIONS 안전을 위한 주의 사항 READ INSTRUCTIONS 사용 설명서 All the safety and operating instructions should be read before the appliance is operated. The safety and operating instructions should be retained for future use. 본 기기를 사용하기 전에 사용 설명서 및 주의사항을 읽고 충분히 이해하십시오. 사용설명서 및 주의사항은...
- Page 3 The appliance should be cleaned only as recommended by the manufacturer. 본 기기의 청소는 제조자가 권장하는 방법으로만 하시길 바랍니다. POWER LINES 외부 안테나 설치시 주의 An outdoor antenna should be located away from power lines. 외부 안테나를 설치할 때는 안테나가 전기선에 접촉하지 않도록 주의하십시오. NON-USE PERIODS 장기간...
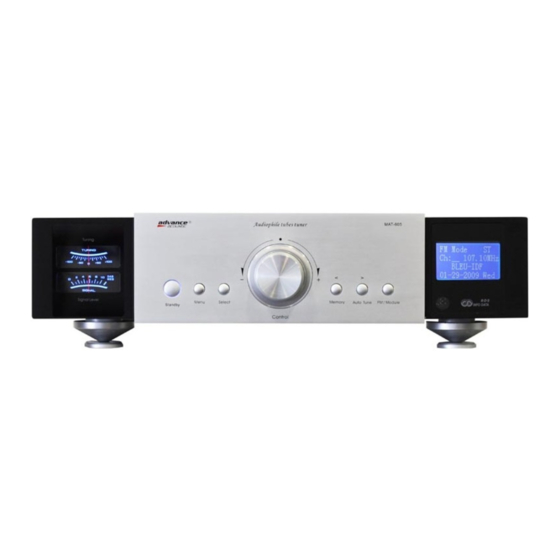
- Page 4 FRONT PANEL CONTROLS 전면의 기능 ① STANDBY 스탠바이 스위치 Press this button to turn ON your appliance, power is supplied to your unit and it becomes operational, the STANDBY indicator blue light is flickering during one minute and becomes fixed (The main power switch is located on the back panel and must be ON in order to use STANDBY function).
- Page 5 ⑦ FM MODULE 에프엠 모듈 Your MAT-605 is compatible with the internet radio/DAB and DAB+module MDB-607. To activate functions of MDB-607; please press the FM Module button. MAT-605 는 MDB-607 모듈(옵션 별매품)을 추가 장착하면 인터넷 라디오 및 DAB 디지털 방송을...
-
Page 6: Rear Panel Connections
③ RJ-45 TO MDB-607 MDB-607 연결단자 You can connect to your MAT-605; the MDB-607 module for internet radios, DAB and DAB+. You can use a standard RJ-45 cable (included with the MDB-607) 이 단자는 인터넷 라디오, DAB 디지털 라디오 수신용 모듈인 MDB-607 (별매품)을 연결합니다. - Page 7 [외부기기 통합 연결 단자]로서 어드밴스 어쿠스틱 자매 제품 (앰프, CD Player, 파워 앰프 등)을 연결하여 컨트롤할 때 사용합니다. (예를 들어서 이 단자가 구비되어 있는 Advance의 앰프에 MAT- 605를 연결하면 앰프에서도 MAT-605의 전원을 켜고 끌 수 있습니다.) 연결 방법은 MAT-605의 Output에 다른 기기의 Input에 연결하거나 반대로 Output 단자를 다른 기기의 Input 단자에...
- Page 8 QUICK START GUIDE 간단 사용설명서 Basic setup of your tuner can be realized with those buttons: MENU ②, SELECT③, and CONTROL ④. 튜너의 기본기능은 전면의 Menu② 버튼, Select③ 버튼, Control④ 등 세 가지를 조작하여 간단히 (버튼에 관해서는 4쪽의 “전면의 기능” 편을 참고 바랍니다) 사용할...
- Page 9 > CHANNEL Choose manually the presets 기존 메모리 된 방송을 선택합니다. > MEMORY You can modify the original preset numbers of your memories 기존 메모리 번호를 변경할 수 있습니다. > STEREO/MONO You can select mono or stereo mode 모노 혹은 스테레오 모드를 선택할 수 있습니다 >...
-
Page 10: Performance Specifications
> SET CLOCK/DATE Adjust the date and the hour 날짜와 시간을 조정할 수 있습니다. > FACTORY DEFAULT Return to the factory defaults 모든 환경 설정을 공장 출고 상태로 초기화합니다. PERFORMANCE SPECIFICATIONS FREQUENCY RANGE 87.5MHz - 108MHz (0.5MHz step) SENSITIVITY (Distortion<1% -1kHz/98MHz ) 25dBu DISTORSION (In 60dBu -1kHz) <1%... - Page 11 Remote Control 리모컨 리모컨을 이용하면 튜너의 기능을 보다 편리하게 사용할 수 있습니다...
- Page 12 이상 발생 시 조치 요령 1. 전원이 들어 오지 않는 경우 주 전원스위치가 켜졌는지 확인 퓨즈 확인 (교체 시: Type T50, 용량 500mA 250V) 2. 전원은 들어오는데 전혀 소리가 나지 않는 경우 입출력단자, 연결 코드, 기능 선택 확인 ...
- Page 13 www.audioland.co.kr (02)587-7300...
Need help?
Do you have a question about the MAT-605 and is the answer not in the manual?
Questions and answers