
Summary of Contents for Cinetron CV-88W
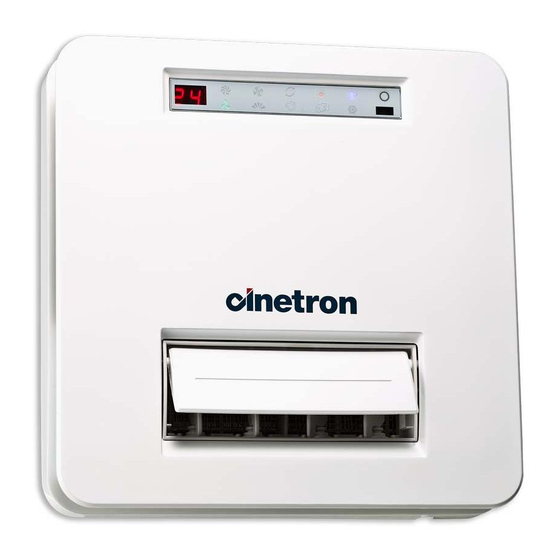
- Page 1 浴 の 宝 CV-88W 使 用 / 安 裝 說 明 書 PANTONE 186C PANTONE 7690C 接收器顯示窗口 風速高 換氣 循環 暖氣 負離子 緊急按鈕 風速低 搖擺 涼風 乾衣 自動 感應器...
- Page 2 安裝使用注意事項 配件名稱 1. 機 體 ◎ 本產品需安裝於能承受本製品重量之地方。 ◎ 安裝不良會造成噪音、 共鳴,請妥善裝配。 接收器 ◎ 為了不使排氣的結露水流入浴室,通往屋外的各排氣管必須保持屋外下斜。 ◎ 通風口蓋之通風抵抗, 是造成風量減少及噪音之主因,請適當的選擇使用。 機體 ◎ 安裝本機時 , 外蓋距地面不得低於 2.3 米。 ◎ 不可裝設於熱水爐正上方或溫度在攝氏 40 度以上之場所。 ◎ 裝置本機時 ,請設置入風口以促進對流。 ◎ 切勿變更產品的額定使用特性。 ◎ 禁止使用本說明書指定以外的方法安裝本產品。 ◎ 天花板安裝開口需向下且保證產品水平安裝。 下面蓋 ◎ 請採取適當措施以防止氣體從一般排氣管或其他燃燒燃料的設備排氣管倒流回室內。 活性炭過濾網 ◎...
- Page 3 安裝方法 安裝方法 A.【天花板固定安裝】 B.【吊頂天花板安裝】 安裝參考圖 將主機固定在吊桿上。(推薦使用吊桿 M6,需用戶另購) 天花板、 吊桿、窗 出風接頭 5cm 以上 戶安裝都 1. 螺桿 機體 使用 1、2、 排氣管 3、4 螺絲 2. 螺母 下傾 1 孔。 3. 華司 距離牆 50cm 以上 4. 機台固定孔 檢查口 自攻螺絲(4 顆) 5. 帶帽螺母 外蓋 1. 安裝於天花板固定框 製作固定框。...
- Page 4 安裝方法 遙控器的安裝 C.【窗口式安裝】 此款為無線遙控型,請安裝在適當的位置 牆 1. 遙控器固定架放在所要安裝之位置,依箭頭處做上記號。 鋁窗 面罩尺寸: 2. 依記號處饡孔 1/4(6mm),埋入 2 個塑膠塞。 280mm x 280mm 防水外殼 3. 將遙控器對位嵌入遙控器固定架。 窗口尺寸: 面罩 234mm x 234mm 機身厚度:160mm 鋁窗 乾 燥 涼 風 暖 氣 換 氣 循 環 * 注意窗口式必須橫置安裝 自 動 模...
- Page 5 安裝排風管 電器工程 - 電器配線 安裝排風管應避免以下情況 ◎ 安裝及佈線必須由合資格電力工程承辦商完成。 ◎ 請依據產品銘牌指示, 在額定電壓及額定頻率下使用本產品。 1. 太過於彎曲。 ◎ 用戶的固定佈線中 ,應單獨為本產品配備獨立的空氣開關,並且空氣開關應符合觸電斷開 2. 彎曲位太多。 距離大於 3mm 的全極斷開要求。 以便在出現意外時能及時切斷產品的電源。 3. 排氣管彎頭距離機體太近。 ◎ 請確保電源插座具有符合電氣規範要求的良好接地。 4. 接頭管縮小。 ◎ 安裝時 , 固定電源線需符合當地安全法規。 ◎ 金屬網底、 鋼絲網底牆壁或金屬表面木造房屋等貫穿後要安裝金屬風管時 ,注意不可有電 器的接觸。 ◎ 若電力不足,請與電力公司聯系。 1. 太過彎曲。 2.
- Page 6 使用功能 功能說明 1. 自動功能 AUTO : A)按“模式 ”鍵切換到自動功能,顯示板“AUTO ”指示燈顯示,自動模式開始運轉,換氣 運轉狀態 預設 / 可設 風機以“LO ”運轉 20 秒後,根據當前房間溫度選擇運行模式(風機自動設定為 HI ): 功能 用途 範圍 1. 房間溫度 >24 度,以“循環 CIR ”模式運行。 風扇 風門 PTC 加熱器 2. 房間溫度 <20 度,以“暖氣 Heat ”模式運行。 自動 自動偵測運行模式 3.
- Page 7 功能說明 功能說明 5. 暖氣功能 HEAT : 8. 擺風功能 OSC : A)按“模式 ”鍵切換到暖氣功,“HEAT ”指示燈顯示,以“LO ”模式開始運轉,按 A)啟動:默認同循環風扇同時做 ON/OFF 運行動作,ON 狀態時,機身 LED 液晶屏幕 標示亮; “風速 Speed ”按鍵,可選擇(HI 、LO )風量。 OFF 狀態時,機身 LED 液晶屏幕 標示滅。在循環風機 OFF 狀態時,擺風按鍵為無效操作,此時 B) 定時 : 預設時間為 2 小時, 可通過按 “時間設定” 上下鍵改變設定時間。 可設範圍為 1 小時~ 24 小時。 擺片歸於...
- Page 8 保養及安全事項 規格 ◆ 保養 過濾網 維護前請務必關掉電源。 外蓋清理擦拭: 換氣最大風 循環最大風量 馬達消耗 電熱消耗 功能名稱 (m³/h) (m³/h) (w) (w) 外蓋 暖氣(高速) 1500 暖氣(低速) 40.5 1435 請先以柔軟之擦拭布或軟毛刷,將外蓋髒污之部分清理乾淨。 乾衣(高速) 52.5 1430 以乾淨之擦拭布在溶有中性清潔劑之溫水中,潤濕擦乾之後擦拭外蓋,再用清水潤濕之擦拭布擦 乾衣(低速) 40.5 1360 拭一遍,表面不可有清潔劑殘留。 過濾網清理: 換氣(高速) 50.6 使用一段時間(約三個月左右)應將過濾網取出,放入清水中,將污垢、毛屑洗清後,晾乾再放 換氣(低速) 40.5 回外蓋中。 涼風循環 (高速) 100.5 ◆...
- Page 9 螺絲明細表 THERMO VENTILATOR 五金包 用途 品名 規格 數量 圖示 螺絲 SUS 4*25, Φ 9 圓頭 CV-88W User manual and installation instruction 1. 標準配備 固定遙控器 塑膠塞 Φ 8*27 PANTONE 186C 出風接頭 *3,風道固定 *4 螺絲 ST 4*25, Φ 9 圓頭 PANTONE 7690C 機體固定...
- Page 10 Installation and Usage Precaution: Name of Parts 1. Main Body This product should be installed in the place which can bear the weight of this product. Incorrect installation may cause noise, resonance. Please assembly properly. In order not to cause the dew flowing back from exhaust pipe to the bathroom, the exhaust pipe should be set in downward sloping to the outdoor.
-
Page 11: Installation Method
Installation Method Installation Method A.Ceiling fixed frame method B. Integrated suspended ceiling method 1. Install the main body Installation schematic diagram: Fix the main body to the booms(recommended boom M6, if necessary) Adaptor Over 5cm Main Body Exhaut Pipe Screw hole 1、2、3、 Downdip 4 applicable f o r c e i l i n g j o i s t... -
Page 12: Installation Of Remote Controller
Installation Method Installation of Remote Controller C. Window type method This is the wireless remote control, please install it to the suitable place with the accessory holder wall if necessary aluminum window Front cover size: 280mmX280mm 1.Fix the R/C holder to the designated place and make marks according to the arrows. Window frame size: 234mmX234mm 2.Dig holes 1/4(6mm) according to the marks, and fill in the holes with 2 plastic plugs. - Page 13 Installation of Exhaust Pipe Electrical engineering-wiring Please avoid the following situations when installing the exhaust pipe. Installation and wiring must be done by qualified electrical engineering contractor. 1. Over bending. Please use the product under rated voltage and rated frequency in accordance with its rating 2.
-
Page 14: Auto Function
Instructions Function Descriptions 1. AUTO Function : Start: press "AUTO " button, the “AUTO " indication light gets on, and the machine starts Pre-set OPERATION STATUS to run in automatic mode, and the air volume runs at the mode of "Lo ". -
Page 15: Heat Function
Function Descriptions Function Descriptions 5. Heat Function : 8. Auto-swing : Start: press "Heat " button to start with a "Lo " mode for operation and indication light gets on. Start: default running the on and off operation, same with fan. If it is ON, LED " "... -
Page 16: Specification
Maintenance and Safety Items Specification ◆ Maintenance: Please make sure that the machine is power off Filter Motor power Max air volume Max of Heater before maintenance. Function Ventilation Circulation consumption (w) (m³/h) (m³/h) Please clean the front cover (w) a] please use the soft rag or soft brush to clean 1500 Front Cover... -
Page 17: Screw List
Screw list Hardware Usage Name Specification Amount Picture packs SUS 4*25 , Φ 9 Screw Round head 1.Standard Fixed setting Φ 8*27 Plastic plug Air outlet joint*3, ST 4*25 , Φ 9 Screw Air channel fixation*4 Round head 2.Ceiling Main body fixation Fixed nut type setting...
Need help?
Do you have a question about the CV-88W and is the answer not in the manual?
Questions and answers